In this tutorial I’ll show you how to create a clean and simple looking portfolio showcasing any kind of visual work.
I’ll touch on basic Photoshop tools and techniques to get the final result in an organized and professional manner.
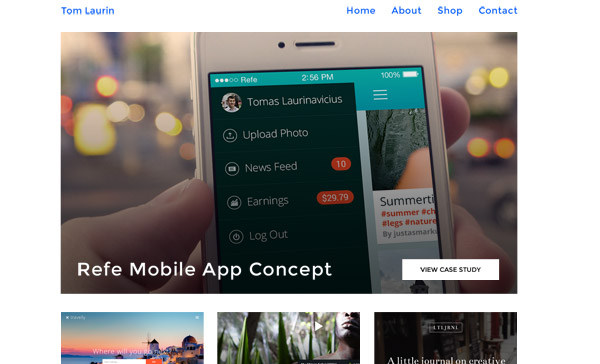
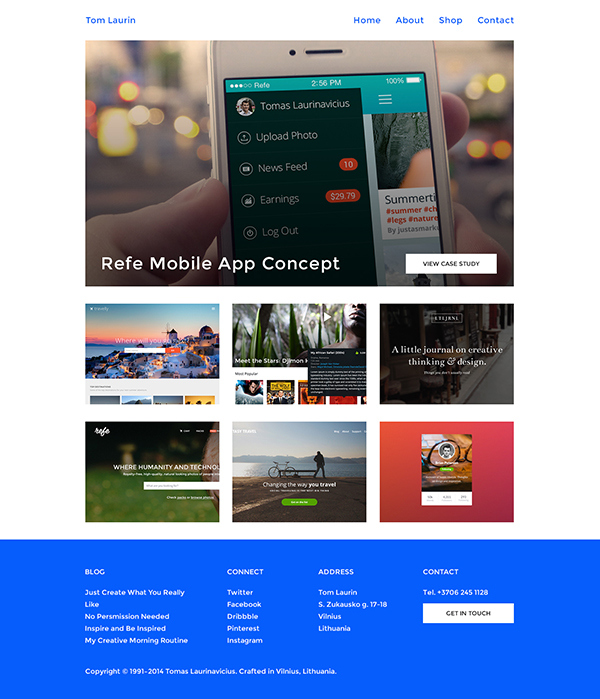
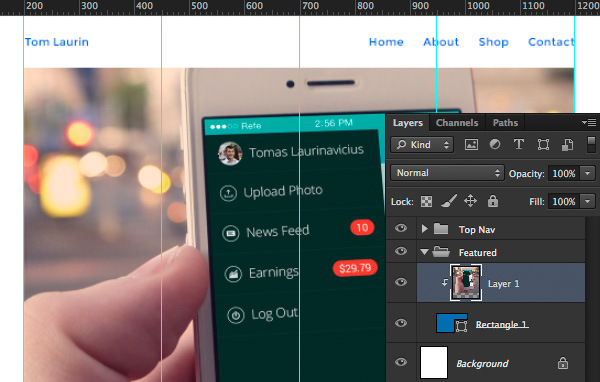
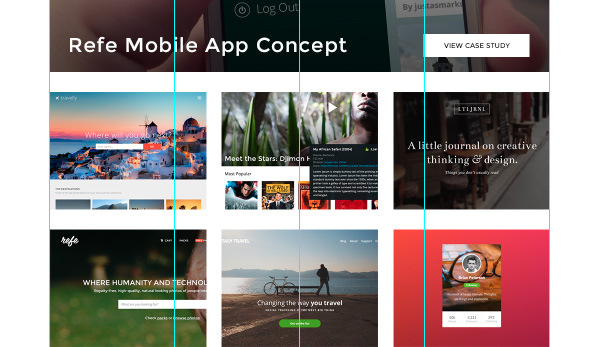
Final Image
Tutorial Details
- Program : Photoshop CS3 +
- Estimated Completion Time : 30 minutes
- Difficulty : Beginner
Resources
Step 1
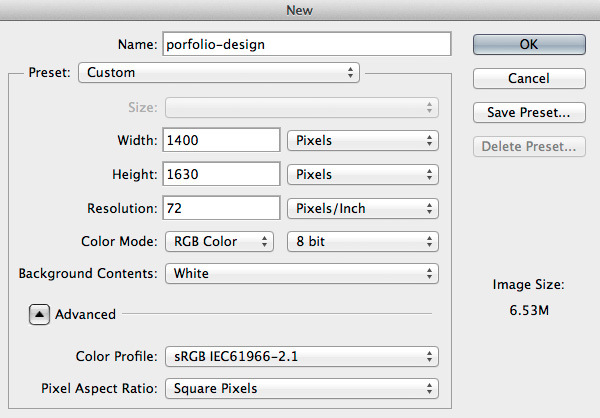
Lets get started by creating a new document in Photoshop. Hit CMD/CTRL+N and set the width to 1400px and the height to 1630px.
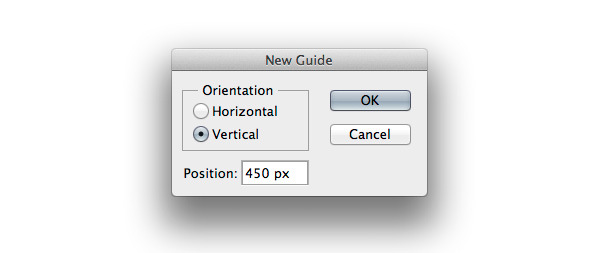
Now let’s set some guidelines so we have our design perfectly aligned. Go to View > New Guide… and set following vertical guidelines: 200px, 450px, 700px, 950px and 1200px.
Step 2
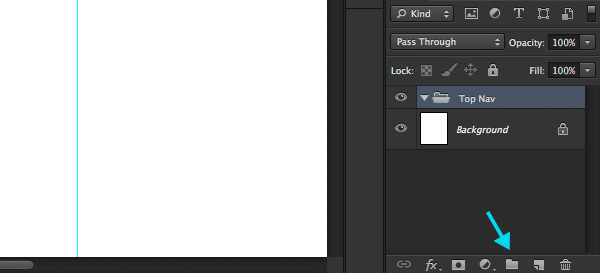
Now that we have our guidelines set we can start designing. Create a new group called Top Nav, go to Layer > New > Group… or simply hit the quick group icon at the bottom of layers panel.
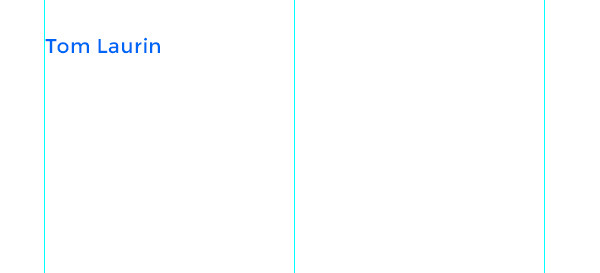
Pick the Horizontal Type Tool (T), choose Montserrat font, set its size to 20px, color to blue #075dfb and write down the name of your portfolio. Place it right after the first vertical guideline leaving some space at the top, in my case it’s 40px.
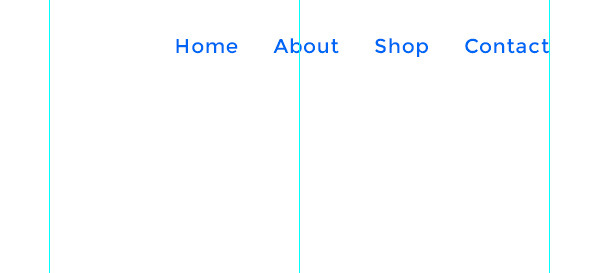
After that duplicate that layer by hitting CMD/CTRL+J and move it to the right of the document. Using the same tool change text to be links of your portfolio. My example is shown below.
Step 3
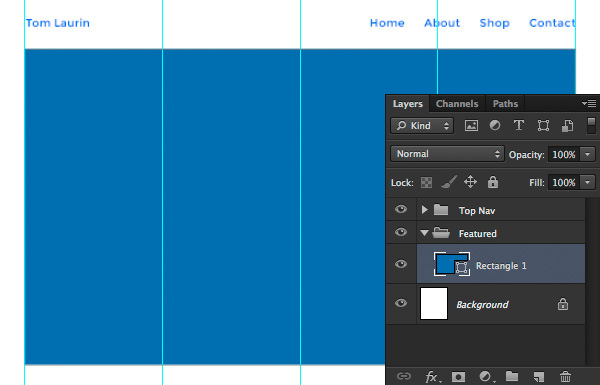
Minimize Top Nav group by clicking on the little arrow icon next to its name and create a new group called Featured.
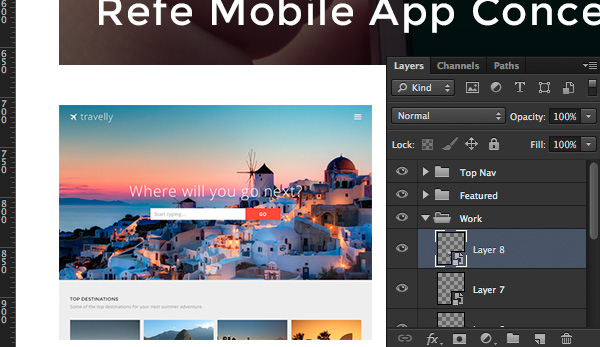
Go to Layer > New > Group… or simply hit the quick group icon at the bottom of layers panel. After that pick the Rectangle Tool (U) and draw a 1000x574px sized rectangle between the first and last guidelines. Using the Move Tool (V) move the shape 40px down the navigation so it has enough space and looks balanced.
Now we need to put the actual work above our rectangle shape. I’ve used one of my previous shots on Dribbble: Refe Menu Opened. Choose an image you want to use in your portfolio and drag it into Photoshop. Make sure it is big enough so it will cover the rectangle without scaling.
After you have dragged your image into Photoshop place its layer above the rectangle layer and holding down ALT key mouse over the thumbnail of the image until you see a little arrow-down icon and click on it to create a Clipping Mask so everything that is inside the clipping mask will be within the rectangle area.
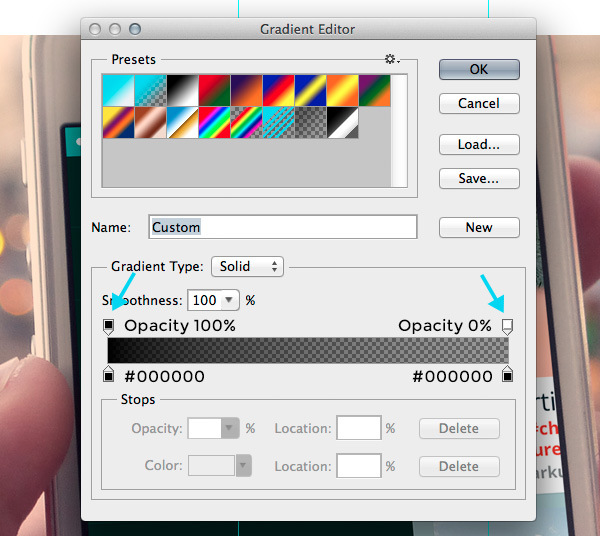
Great! Now we need to put a shadow over the image so the text on top of it will be easily readable.
Create a new layer called Shadow using SHIFT+CMD/CTRL+N shortcut and create a Clipping Mask as we did for the image earlier. After that pick the Gradient Tool (G) and make it go from black to transparent. Gradient options are shown below.
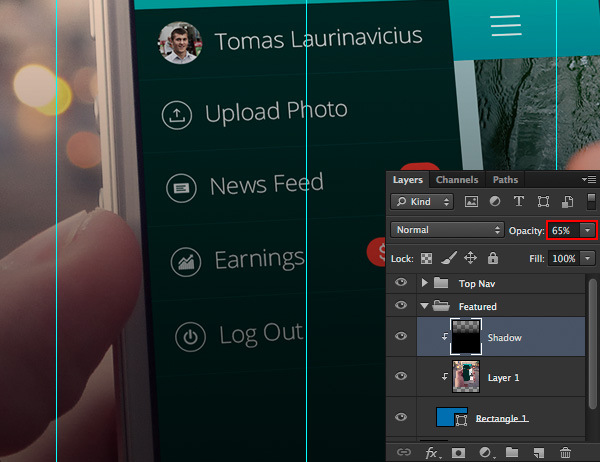
After you have the gradient ready, hold down the SHIFT key and drag from the bottom of the image to the top of it and reduce the layer’s Opacity to 65%.
We need a title for our work we’re featuring. Pick the Horizontal Type Tool (T) once again use Montserrat font and set the font size to 40px, color #FFFFFF and write whatever you think will describe your work using 3-5 words. Make sure to give some space for the text so it looks balanced. For consistency I’ve left 40px space on the left and on the bottom.

We need a call-to-action button so the visitor can dig deeper into our work. Pick the Rectangle Tool (T) and draw a 212x46px sized rectangle. Place it on the right of the image consistently giving 40px space around (30px at the bottom as we need to align horizontally with the title).
Finally, pick the Horizontal Type Tool (T) again, set the color to black #000000, font size to 14px and write your button message. Place inside the white rectangle and center it both vertically and horizontally.

Step 4
Let’s add some more of your work so visitors can get a sense of your style. Minimize the Featured group by clicking the small arrow icon next to the group name and create a new group called Work.
For the work examples I’ve used some of my previous Dribbble shots. Drag and drop your shots into Photoshop, convert them into smart objects by clicking the right mouse button on the image and selecting Convert to Smart Object option. After that hit CMD/CTRL+T to resize the images to be 313x235px and place them in three columns by two. Leave 40px spaces at the top and bottom and 30px between the images on the sides.
Step 5
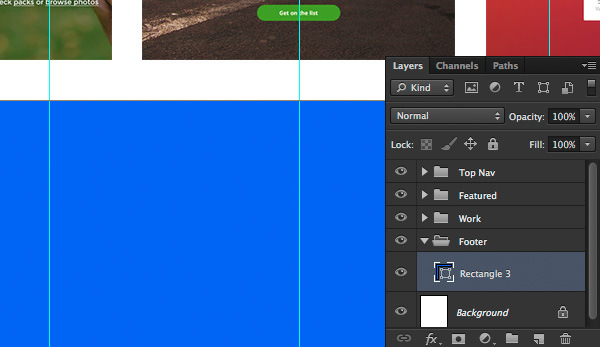
That’s it for the work section. It was quick huh? Minimize the Work group and create a new one called Footer. Grab the Rectangle Tool (U) set the color to the previously used blue #075dfb and draw a huge rectangle covering the bottom part of the document. This will be the footer area background. After that move it 40px below the work images using the Move Tool (V).
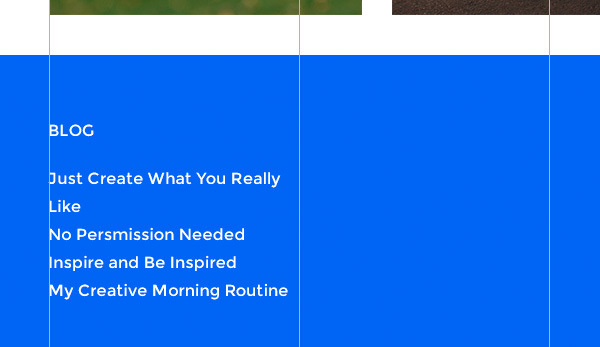
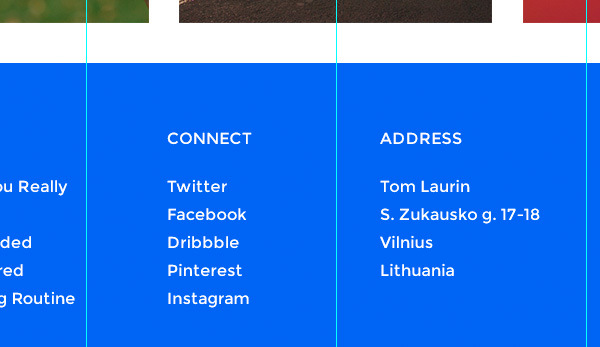
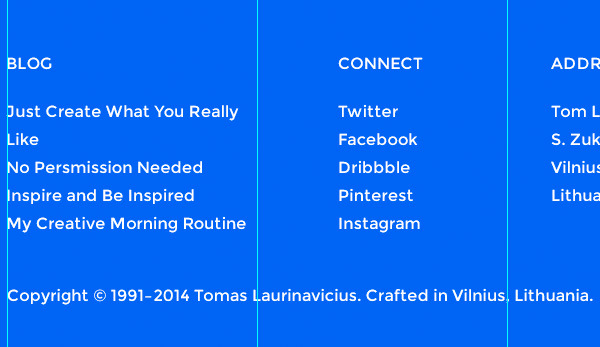
Now we need to put some content in our footer. Pick the Horizontal Type Tool (T), set the color to white #FFFFFF, size to 16px and write down BLOG in capitals and some potential blog post headlines. Place it 70px from the top giving a lot of space and creating a footer section more powerful and independent.
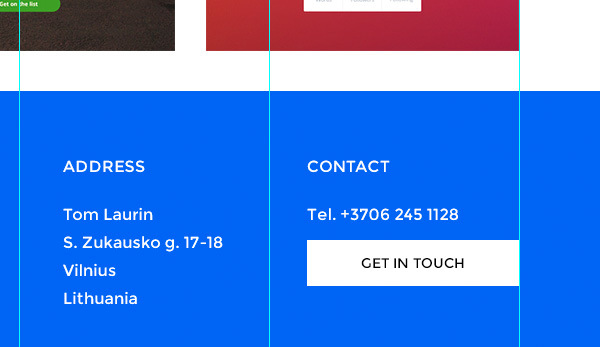
After that add some more information that visitors may need. I’ve included social network links and address. Make sure you give enough space on the sides so everything looks balanced.
We need to put a call-to-action button once again so the visitor has something to act on. Open up the Featured group and find the button layers, holding CMD/CTRL click on the rectangle and text layers and hit CMD/CTRL+J to duplicate them, then move them into your Footer group and place above the background. Use the previously created text for contact info and place the new button, change the text and you’re done.
Finally, we need to add our copyright to protect our work. Simply use the previously created text, duplicate it and change the copyright to whatever you want. Place it 60px below the last text line and you’re done.
And We’re Done!
I hope that you enjoyed the tutorial.