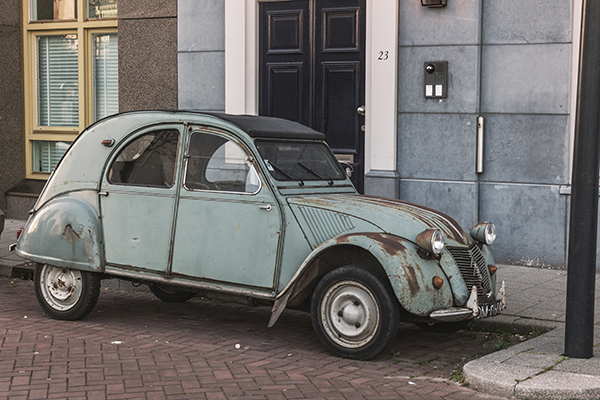
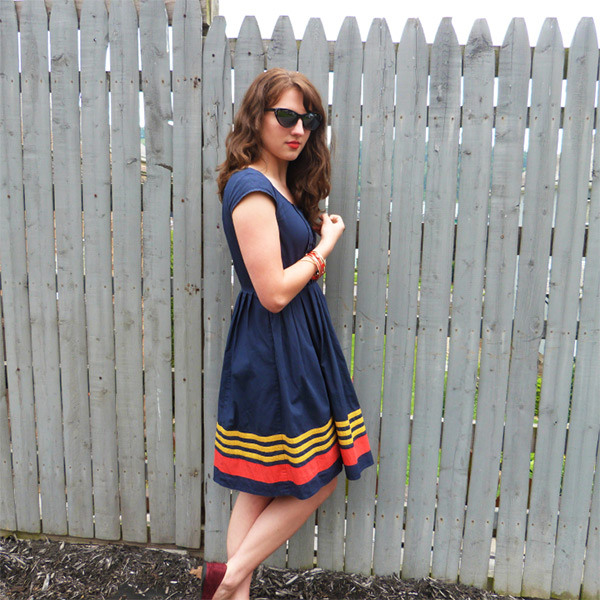
In this tutorial I’ll show you how to create a retro desaturation photo effect in Photoshop CS6.
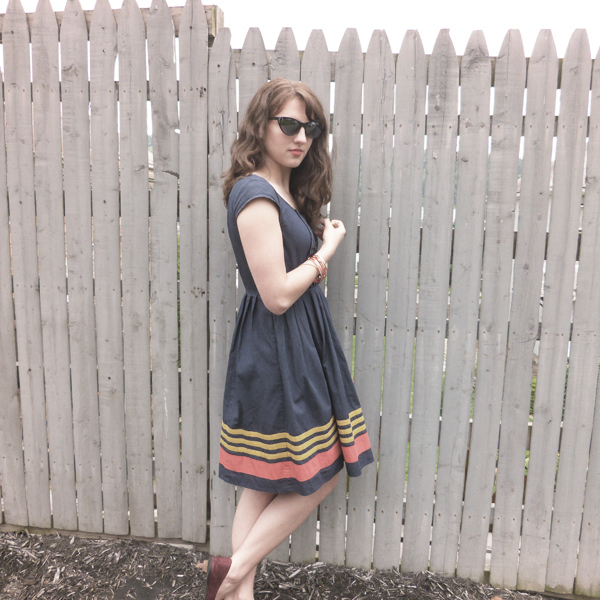
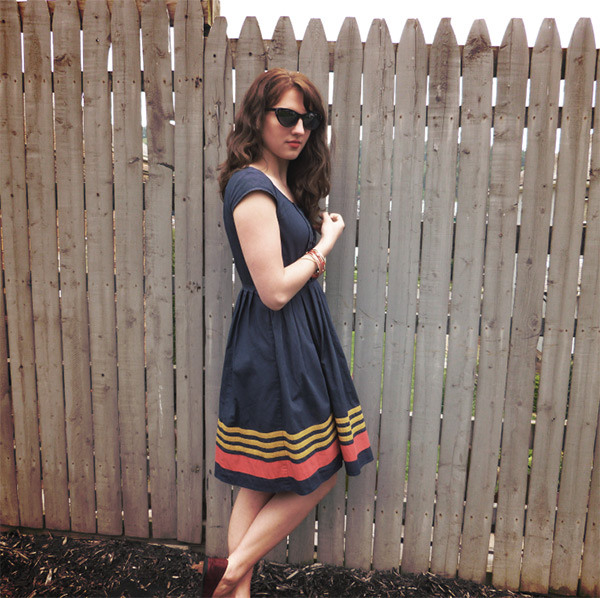
Final Image
Tutorial Details
- Program : Photoshop CS6 +
- Estimated Completion Time : 15 minutes
- Difficulty : Beginner
Resources
Step 1
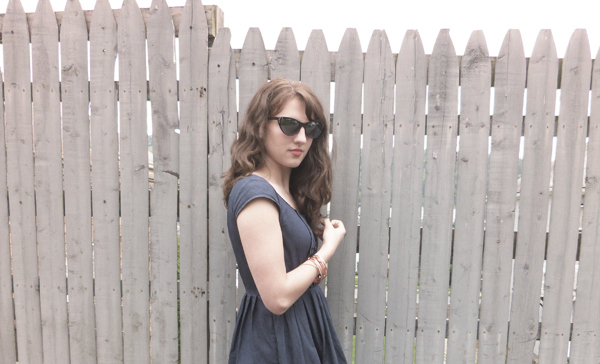
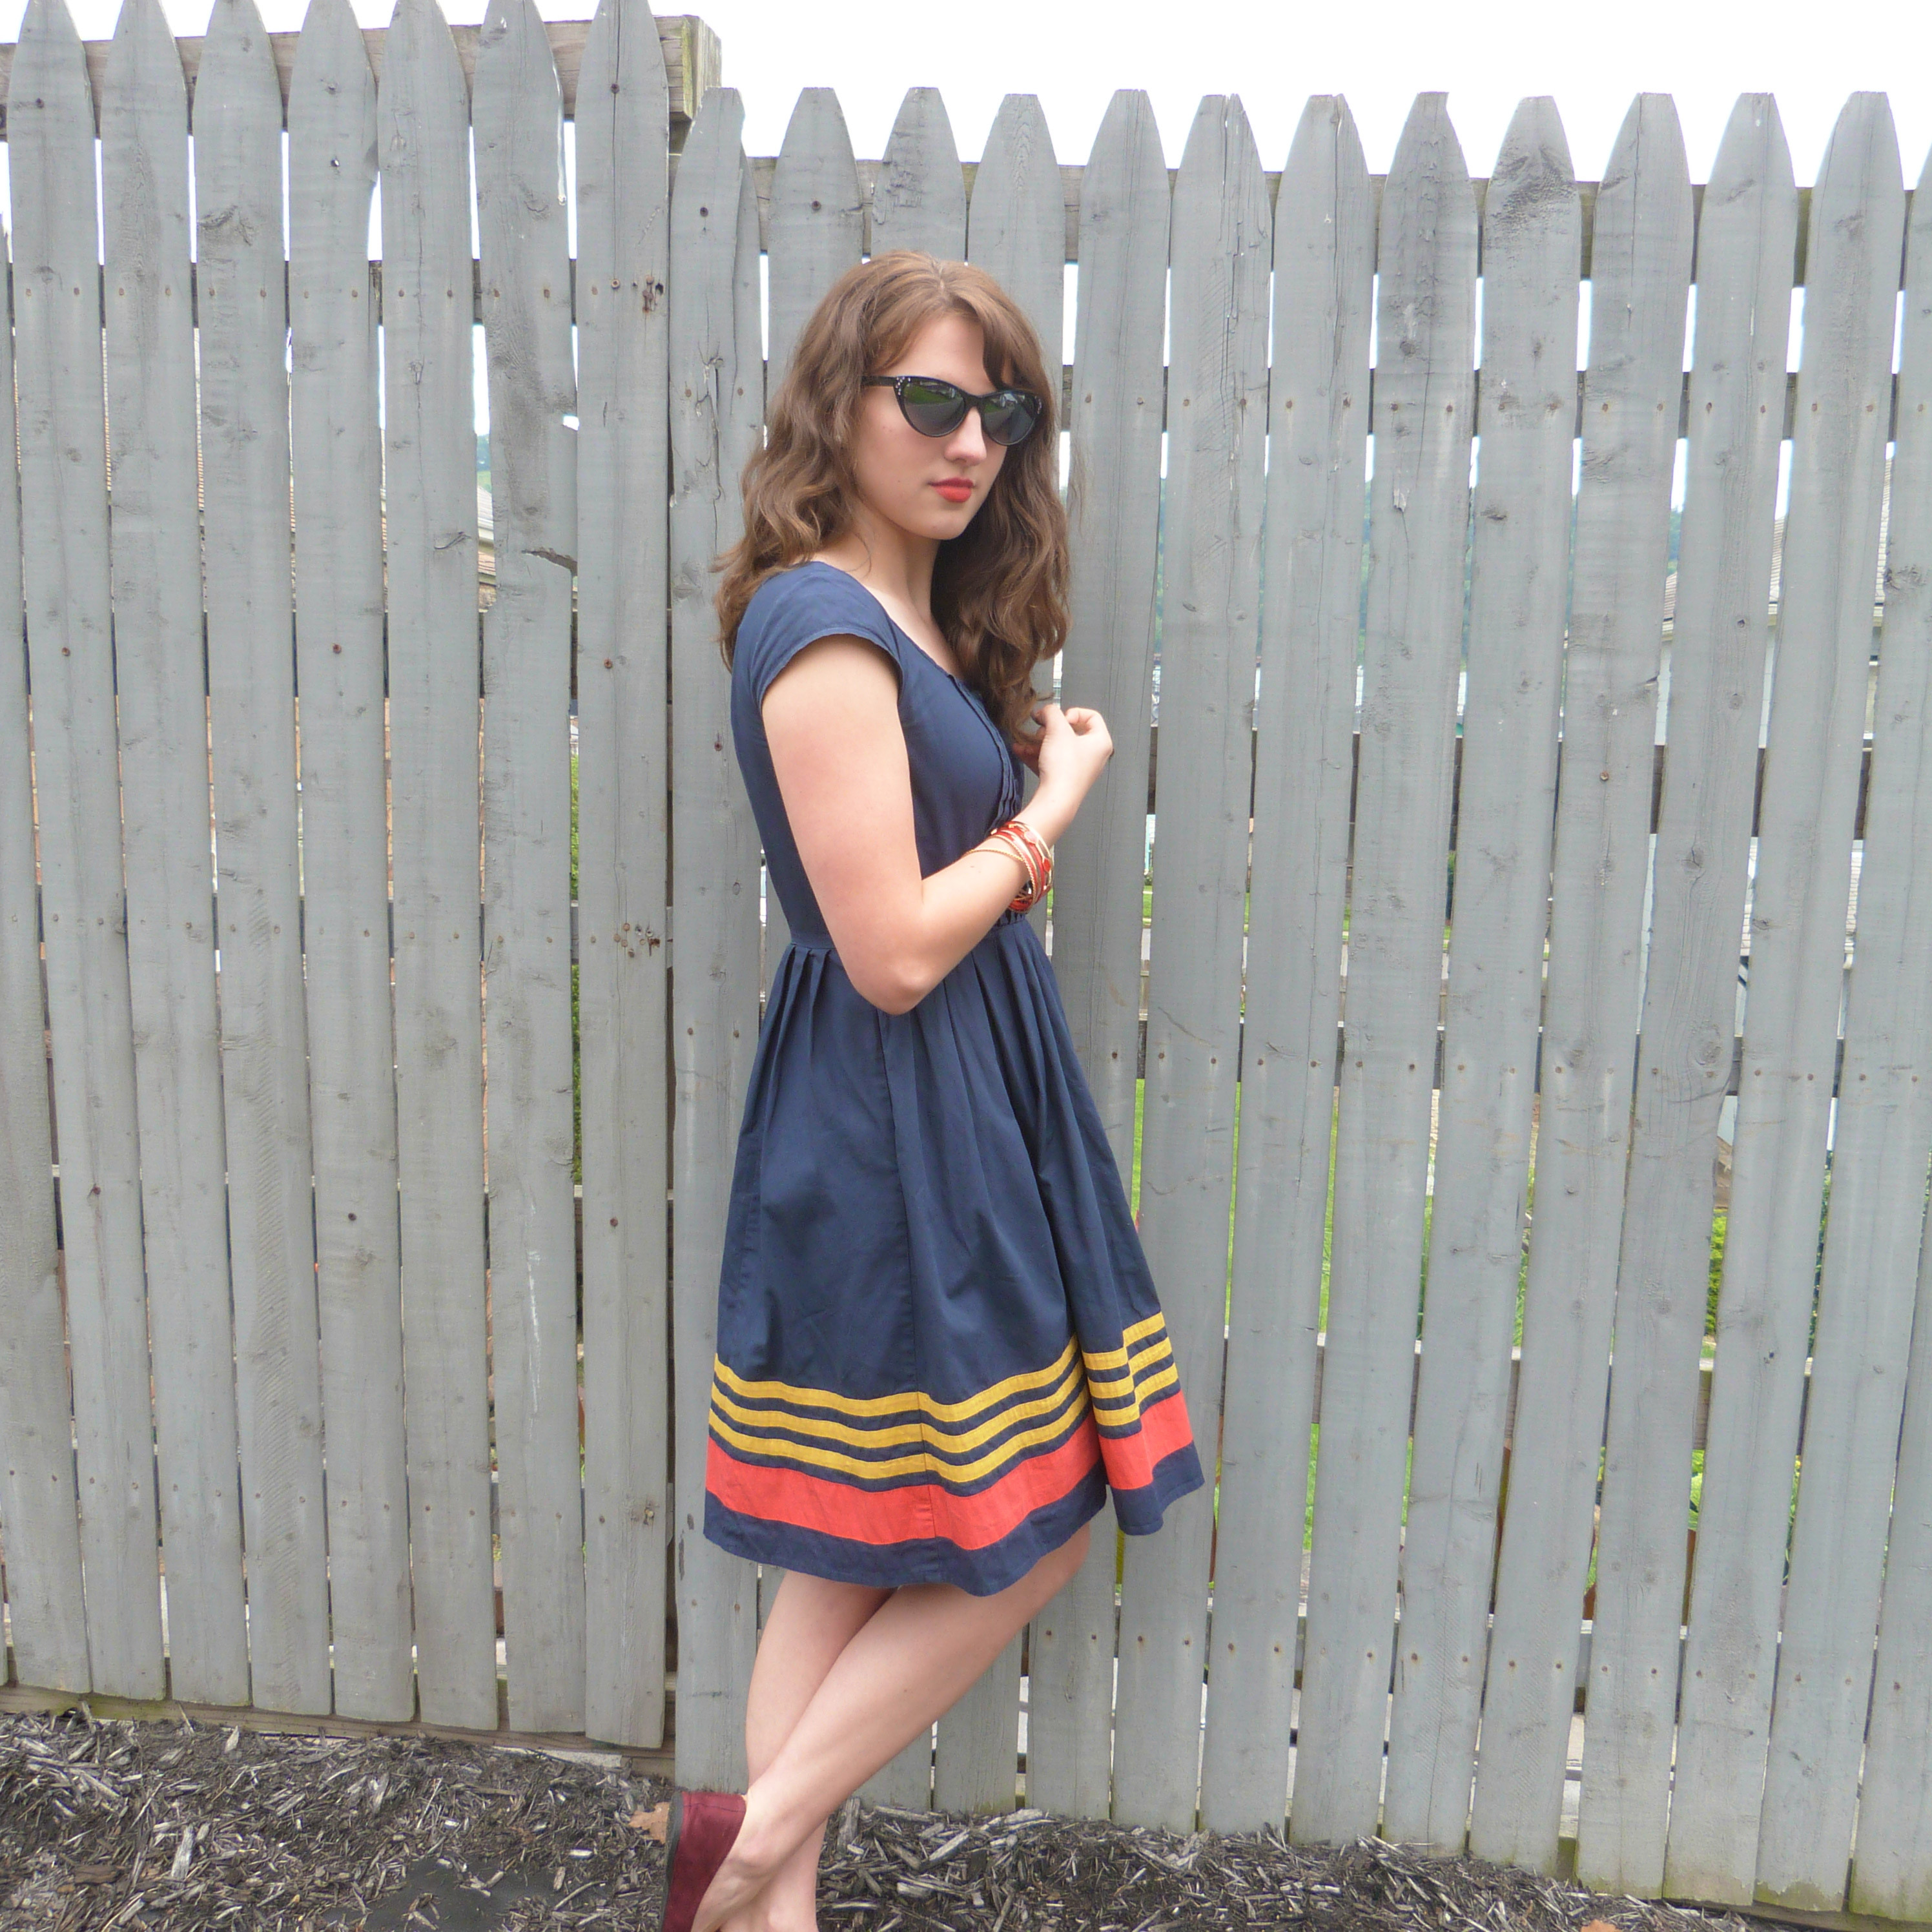
The first step is to open model.jpg up in Photoshop. Nearly all of our work will be done with Adjustment Layers so we should go ahead and open that panel up, too.
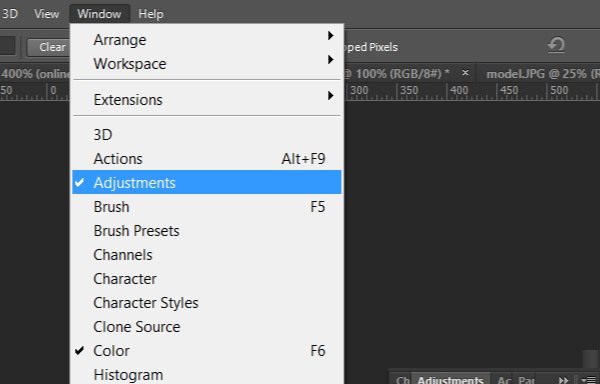 You can find the Adjustment Layers Panel by going to Window > Adjustments.

Step 2
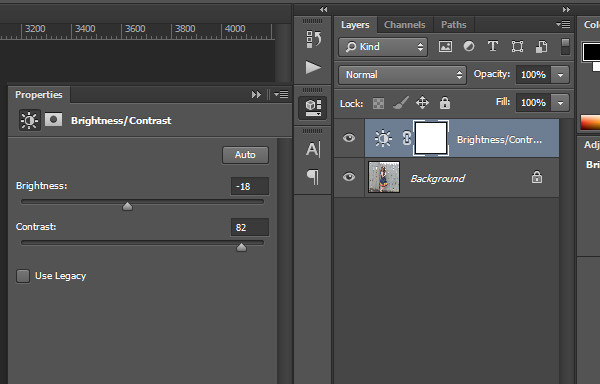
Next, we are going to add a Brightness/Contrast Adjustments Layer. Set the Brightness to “-18” and the Contrast to “82”. This will lighten up the shadows and make the image more vivid and even-toned overall.
 If you’re using an different image, try playing around with the levels to achieve a similar effect as the image below.
 Basically, try to get your bright colors very bright.
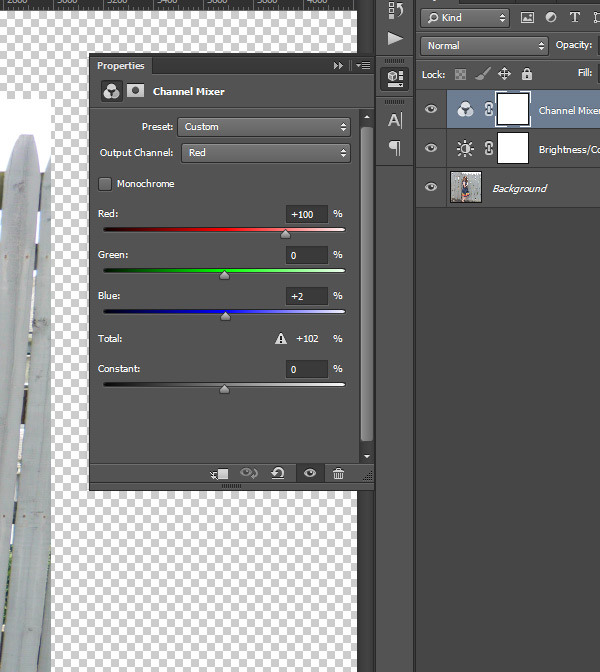
Step 3
Add a Channel Mixer Adjustments Layer, keeping the Preset and Output to the default settings. Bump the Blue channel to +2. Leave the Red and Green settings as they are.
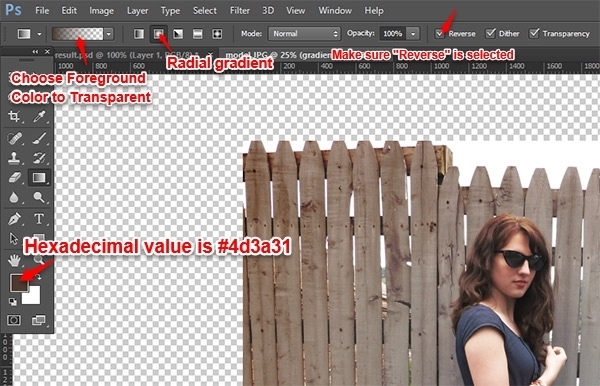
Step 4
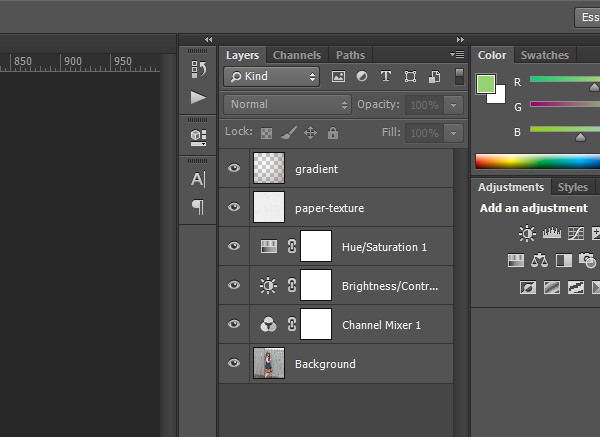
Create a new layer and call it “gradient”. Click the keystroke G and choose a radial gradient.
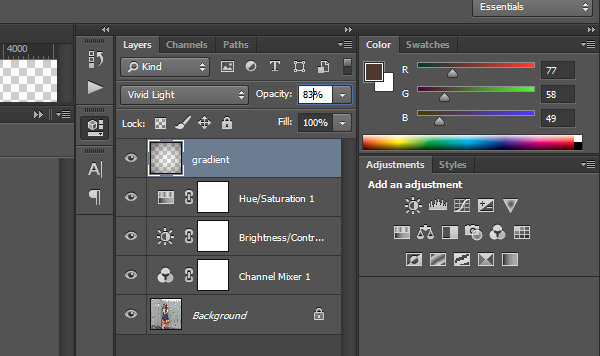
 Set the Layer Overlay to “Vivid Light” and the Opacity to 83%.
 The end result should look like this:
Step 5
Go to Lost and Taken and download seamless paper texture. (Special thanks to Caleb Kimbrough and all his beautiful textures that he offers to the design community for free!)
Step 6
Place texture over image.
Step 7
Go to Edit > Transform > Scale and drag the paper texture to cover the entire image. Hold down the Shift key while dragging to make sure that the image keeps the correct ratio.
Step 8
Set the Layer Mode to “Soft Light” and the Opacity to 30%.
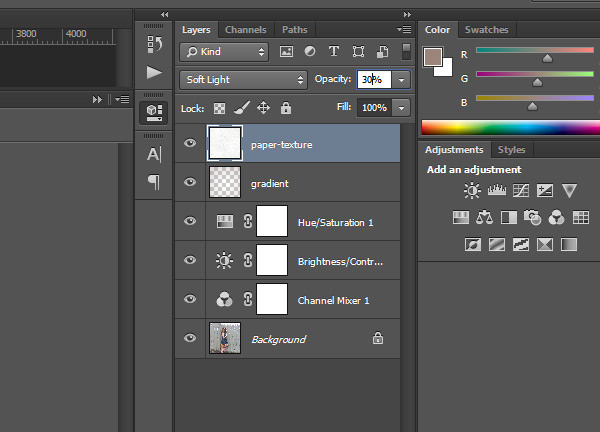 The image should now look like this:

Step 9
The ninth and final step is to rename the layer to “paper-texture” and drag below the gradient layer.
And We’re Done!
I hope that you enjoyed the tutorial. Below are several different images with this Retro Desaturation effect applied.