In this quick Photoshop tutorial I’m going to show you how to design a sweet-lookin’ a golden badge, pretty much like this one I’ve designed below. For this tutorial I’ve used the example ‘100% satisfaction guaranteed seal/badge.’

1. New Document & Settings
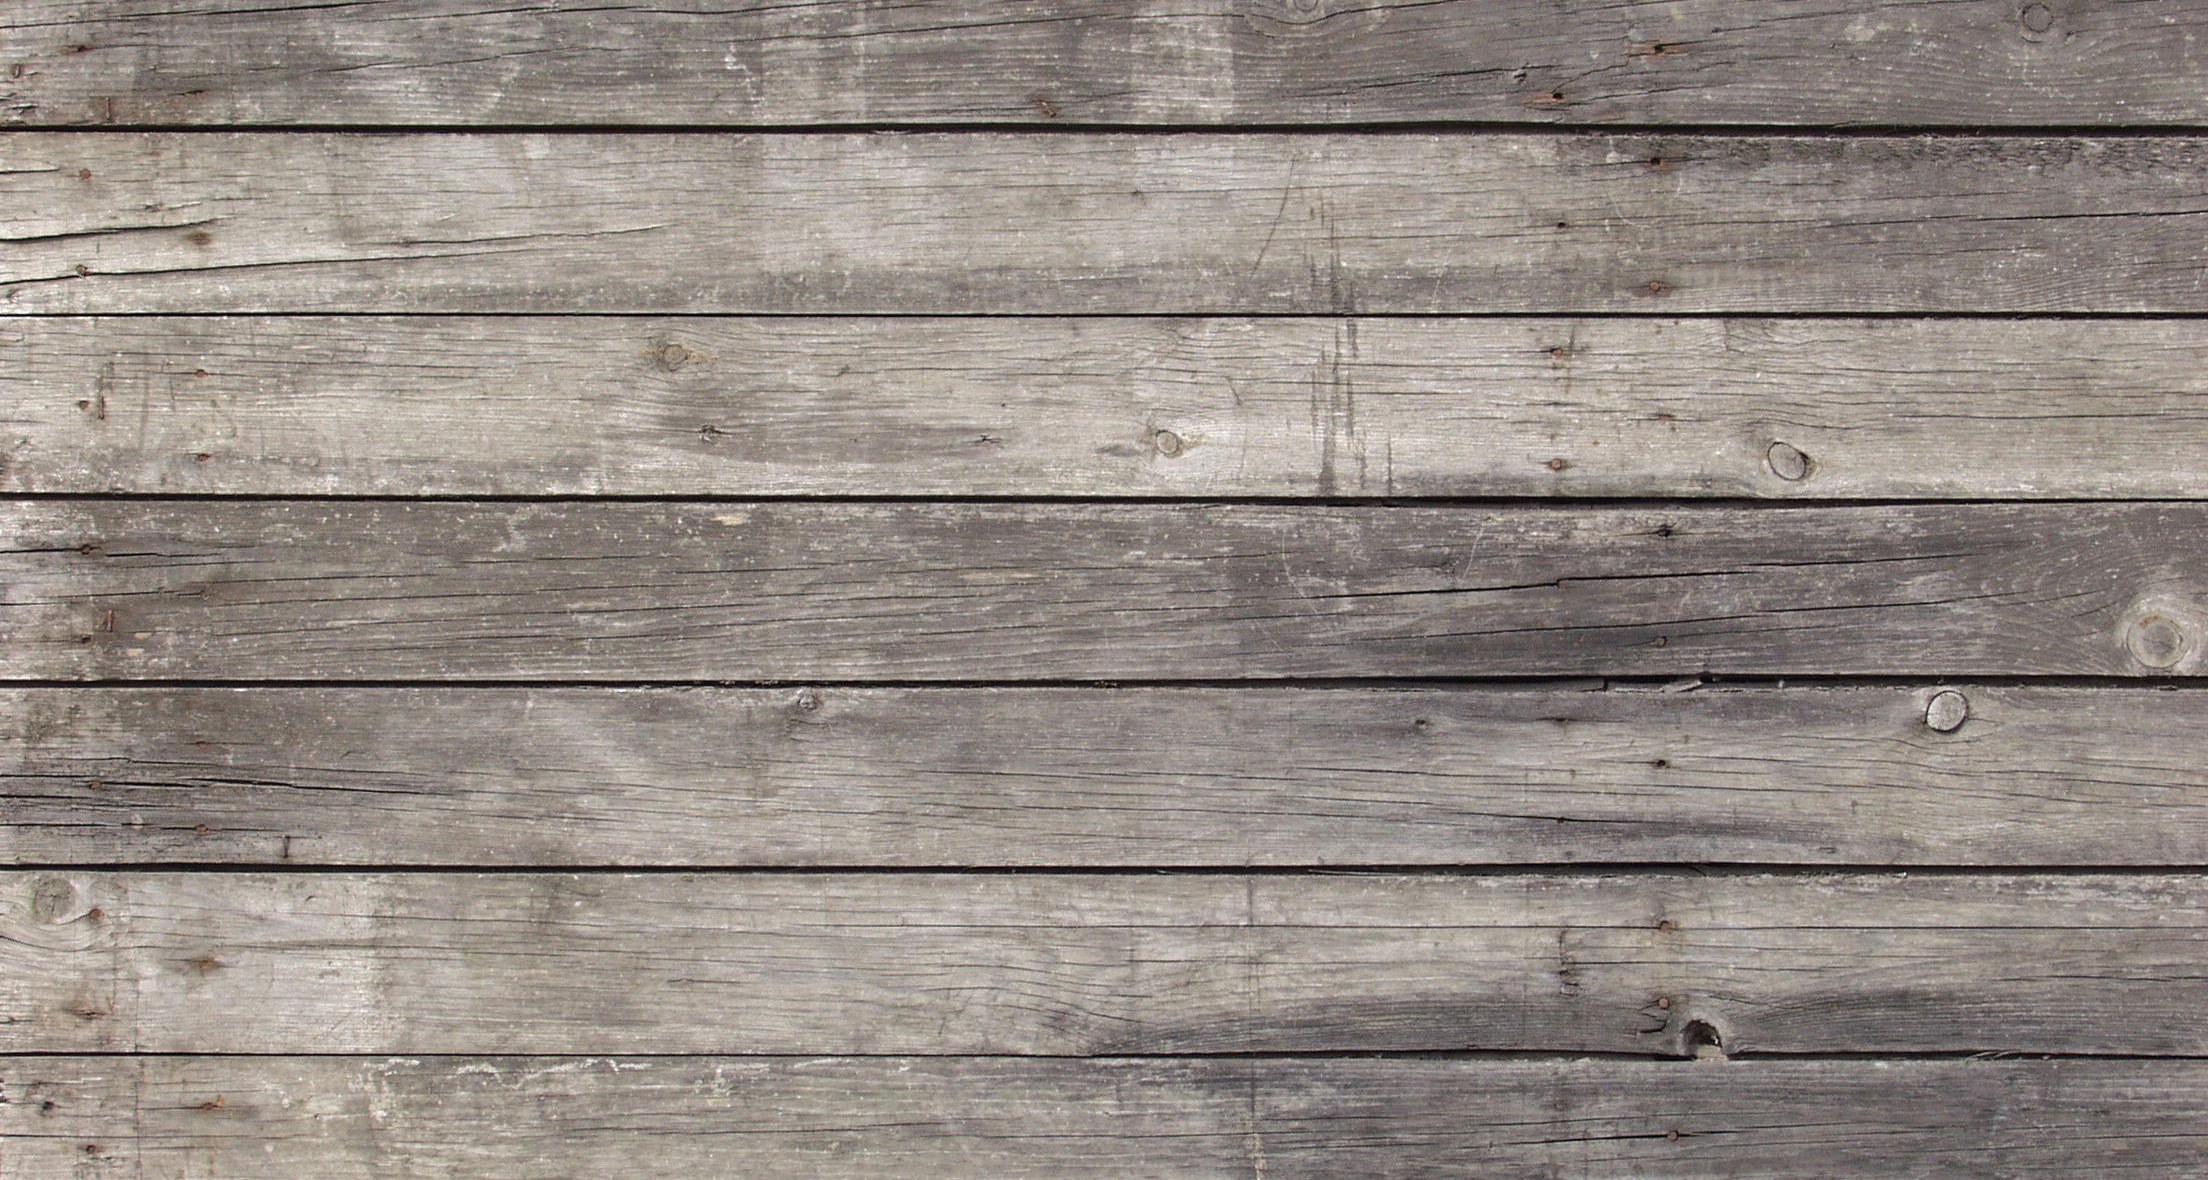
Let’s start by creating a new document (as usual), or you can of course open one of your previous documents to work in! I used a small document size of 400 x 150 pixels for this job. After creating your document, you might want to add in a background texture to make it look a bit more interesting. I’ve used this texture of wooden boards for the background, I then changed the color by creating a new layer, filling the layer with dark brown then changing the layer mode to Hard Light (easy, huh?)

2. Create the Badge Shape
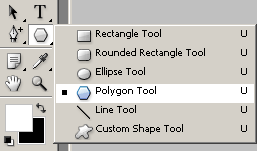
Now it’s time to create the shape. Do this by first finding and selecting the Polygon Shape Tool, which you can see in the screenshot below.
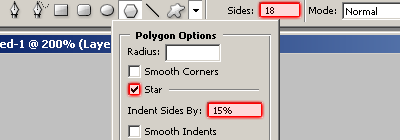
After you’ve gotten your tool out you’ll need to edit your settings so that you get a nice badge out of it. I used the following settings:
Now after you’ve got all the settings to your liking, start drawing some badges on your canvas to get one of your liking. Note that the color you use for your shape doesn’t matter at the moment! I ended up with a badge like this:

The next part is detailing the badge!
3. Adding Gold Effect to Badge
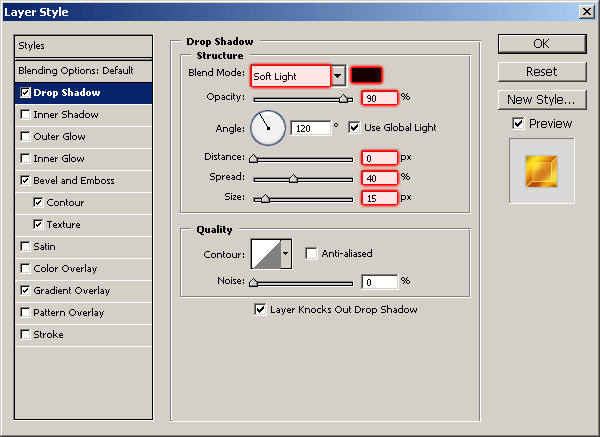
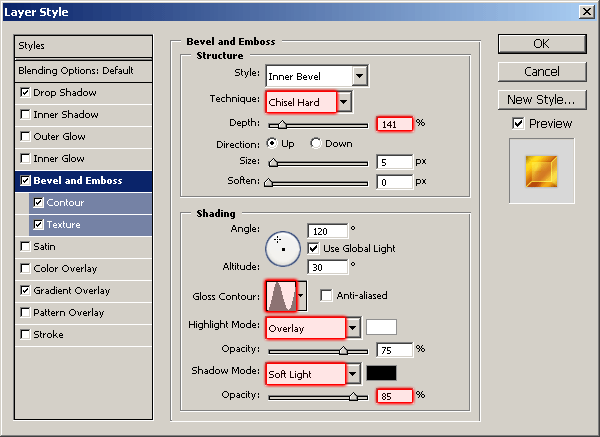
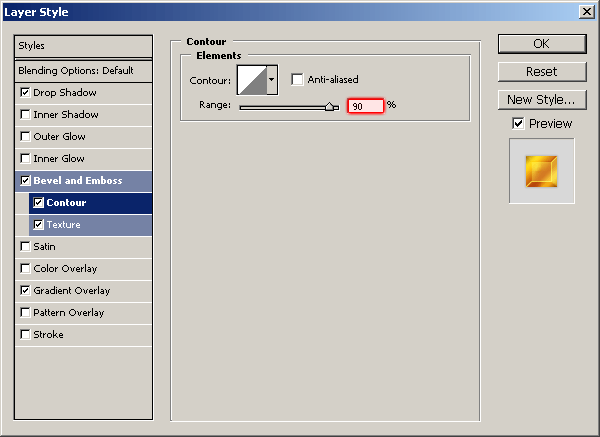
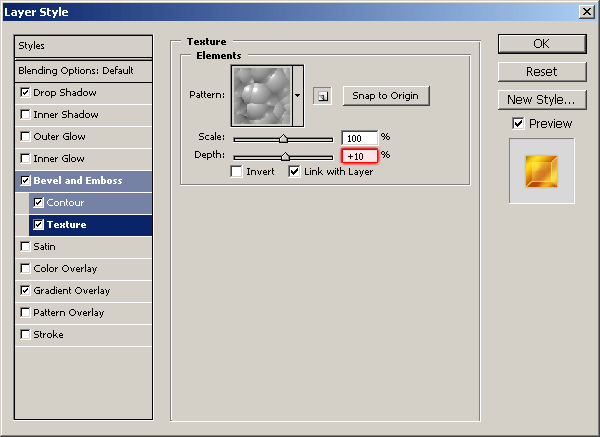
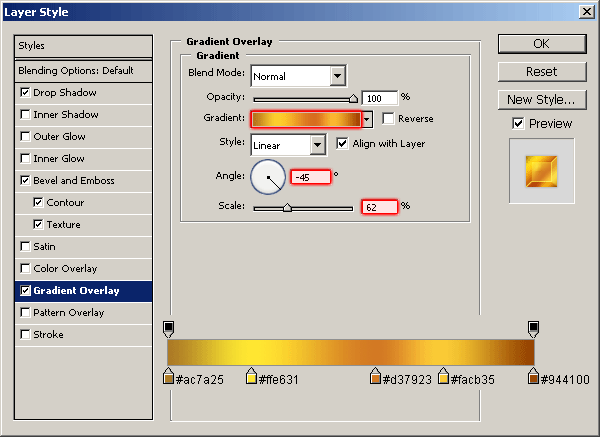
To add texture and detail to your badge, you’ll need to apply blending options/layer styles to it. Do this by first right-clicking the layer in the layer’s palette then going into the Blending Options. When you’re in the Blending Options, click and apply the following layer styles/settings:
- Drop Shadow
- Bevel and Emboss
- Bevel and Emboss – Contour
- Bevel and Emboss – Texture
- Gradient Overlay
Please note that the gradient does not need to be perfect or exact, just mess with the settings, colors & positions!
Now your badge should have this gold effect on it:

Looking great now! Onto the next step.
4. Inner Shapes/Details
Now it’s time to add some extra details and text. Start by creating a circle shape in the middle of your badge. I did this by first creating a new layer, then using the Elliptical Marquee Tool I made a selection inside of the badge then filled it with white.

Now, to give this circle some more character, apply a Stroke layer style. For the gradient colors part, simple use a very dark gray color to black. I have this outcome:
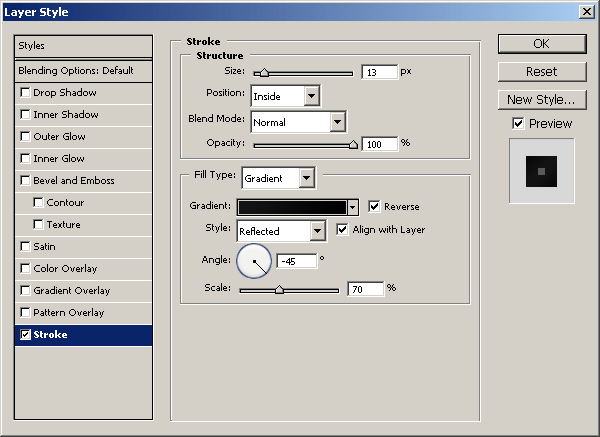

This is where you need to get creative and add your own touches – anything you can think of. Now it’s time to add some text.
5. Adding Text
Now we need to finish this tutorial off by adding text to the seal – what’s a guarantee seal/badge without text?! 🙂
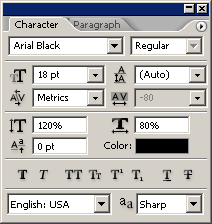
Start by getting out the Horizontal Type Tool and writing out “100%” in the middle of your badge. I used the font Arial Black with the following advanced type settings:
Now I’ve got this:

Lastly add text such as “Satisfaction” at the top and “Guaranteed” down the bottom. I successfully added the text to the top, but it’s around the wrong way on the bottom.

Now, there’s two ways you can do this, you can either use the Warped Text Feature, or you can write your text out on a path using Photoshop CS+, I wrote my text on a path. Do this by creating a circle path around the same size as your inner circle, then clicking on the path with the type tool selected.
Please note that the font I’ve used here is also Arial Black, but white and a much smaller font size.

I hope that wasn’t explained too crudely for any of you readers! If you desperately need help, please feel free to leave a comment below and I’ll get back to you!
Thanks for reading this tutorial everyone, I hope you enjoyed it!