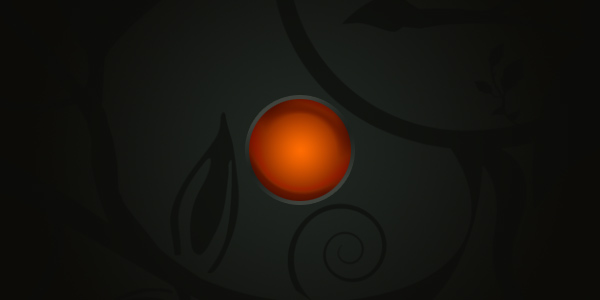
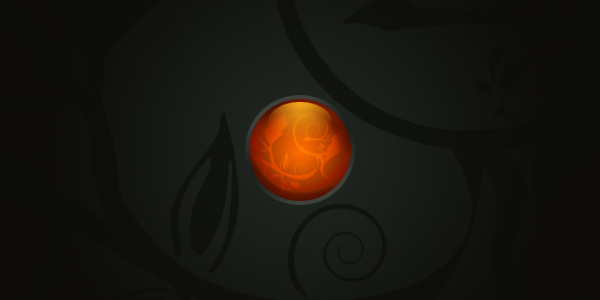
In this simple Photoshop tutorial, I’ll be teaching you how to design a simple, attractive orb. Just like the one shown below.

1. Document Creation
Firstly, start by making a new document in Photoshop – I used a size of 600 x 300 pixels with the default Resolution, 72. After making your document, fill the background with a dark color, or a dark gradient.

Next, for the background, you can either add in an ornament-style brush, or you can do some grunge brushing, or add a texture. Get creative. A few good places to look for brushes and textures:
I used a nice ornament brush for my background, then lowered the opacity a little bit.

Ok, we’re done for our background 🙂
2. Base Orb
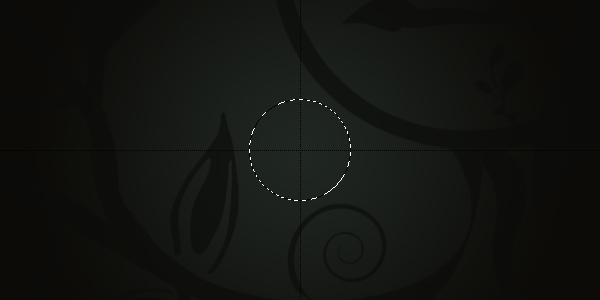
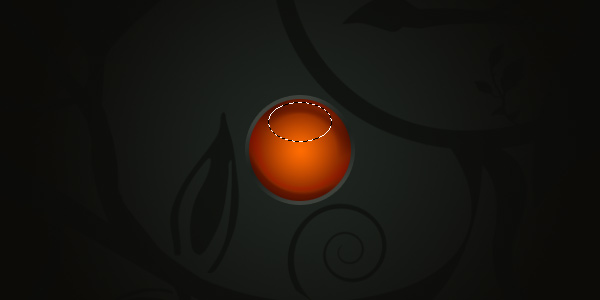
Time to create the base for our orb. Start by making a new layer, now make the selection that you will turn into our orb. Use the elliptical marquee tool.
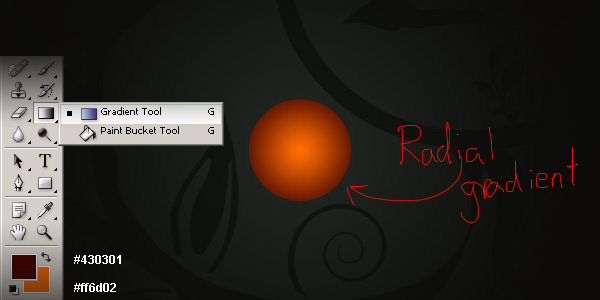
Now you’ve got your orb selection, fill it with a nice, radial gradient using the Gradient Tool.
We’re done for the base of our orb, now time to apply some effects.
3. Apply Effects
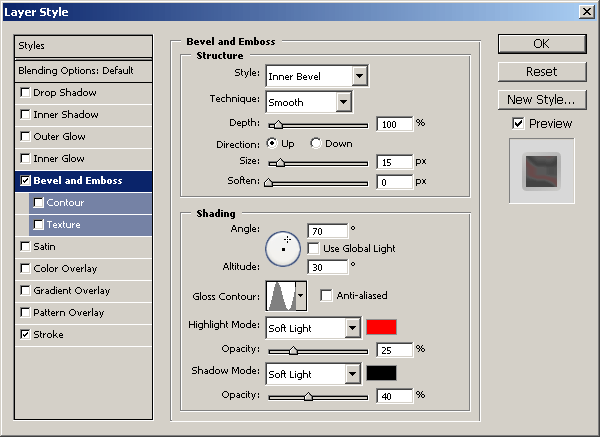
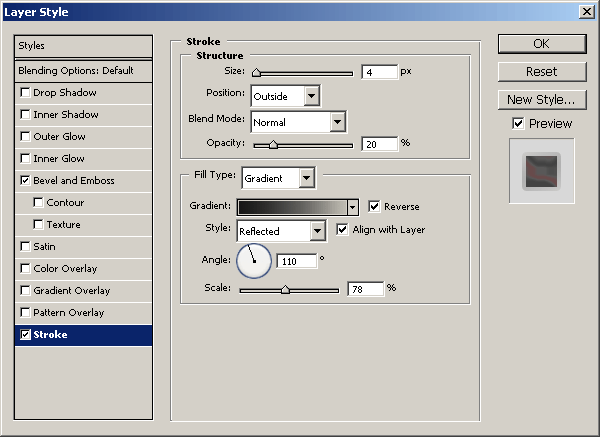
Let’s add some effects to our orb. Start by right-clicking the orb layer in the layer’s palette, then going into the Blending Options. Apply the following layer styles (click for settings):
Looking a bit more interesting now.
Next, get out the elliptical marquee tool again and make a small, football-shaped selection near the top of our orb, like the one I’ve made in the image shown below.
 After you’ve got a selection like that, make a new layer then get out the Gradient Tool again. Drag a gradient inside of your selection so you get something like this:
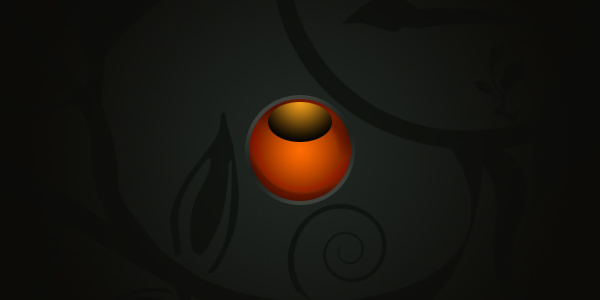
Please note: The colors I used in my radial gradient were #ee9c1a and black (#000000), the lighter orange being the color in the center at the top.
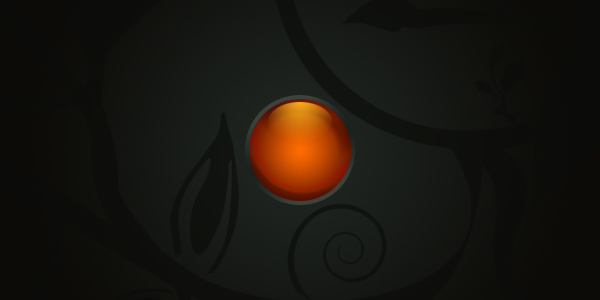
After you’ve got your gradient all set, change the layer mode to either Screen, Color Dodge, or Linear Dodge, your choice. You may also want to lower the layer opacity.
Lastly, for effect, I added in an ornament inside of the orb.
To achieve the effect like the one shown above, follow these simple steps:
- Make a new layer, then get out your brush/shape tool.
- Select a nice ornament brush or shape you want to use.
- Put your shape on the canvas, in an orange color.
- Make a selection inside of your orb (smaller than) then feather your selection (Select > Feather…)
- Invert your selection and press delete, this will remove the ornament shape on the outside of your orb.
- Mess with the layer mode and opacity of your ornament layer.
Ok… I’m hoping that worked out for you. You can of course download the PSD file from this tutorial at the bottom of the page anyway, if you need it for anything.
4. Add Text
Last part of the tutorial now. I think we need to add some text to our orb, or underneath the orb. I think something like ‘enter’ or ‘forums’ would be suitable.

Click the above image to be taken to a screenshot of my text and my text settings. I also finished off by adding in a Drop Shadow to my text layer.
Complete
Well, looks like we’re done for this tutorial. I hope you enjoyed it 🙂