Glossy & Shiny (Highlight) Effects

In this simple Photoshop tutorial we’ll be looking at a simple technique that’s quite popular at the moment. The technique is using gradients/brushes to make soft highlights/glows on things, it’s particularly popular with some styles of forum skins. You can see the end result of this tutorial below.

Glossy & Shiny Effects (Photoshop Tutorial)

1.

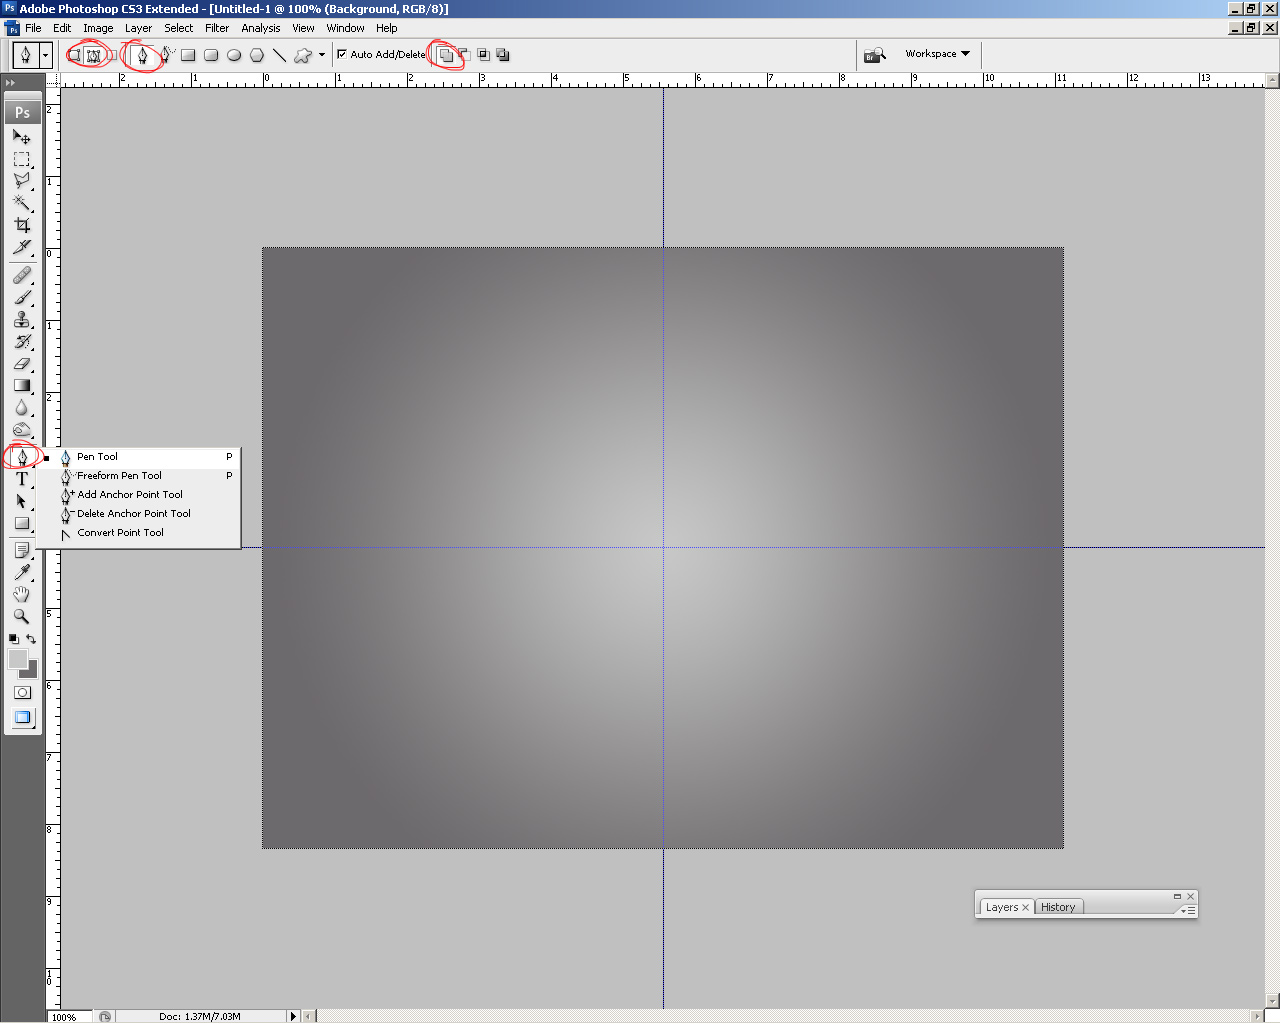
Start by making a new document in Photoshop - something around 800 x 600 pixels will be good for practicing. Use the default resolution (72) and default color settings (RGB).

Fill the background with a (radial) gradient of your choice. I had a hard time deciding between a dark grey gradient and a relatively dark orange/red gradient. I went with the grey gradient for this.

Radial Gradient + Color Hex Codes

2.

Start by finding and getting out the Pen Tool (P). Set the options to what I’ve shown in the below screenshot:

Pen Tool Screenshot + Settings

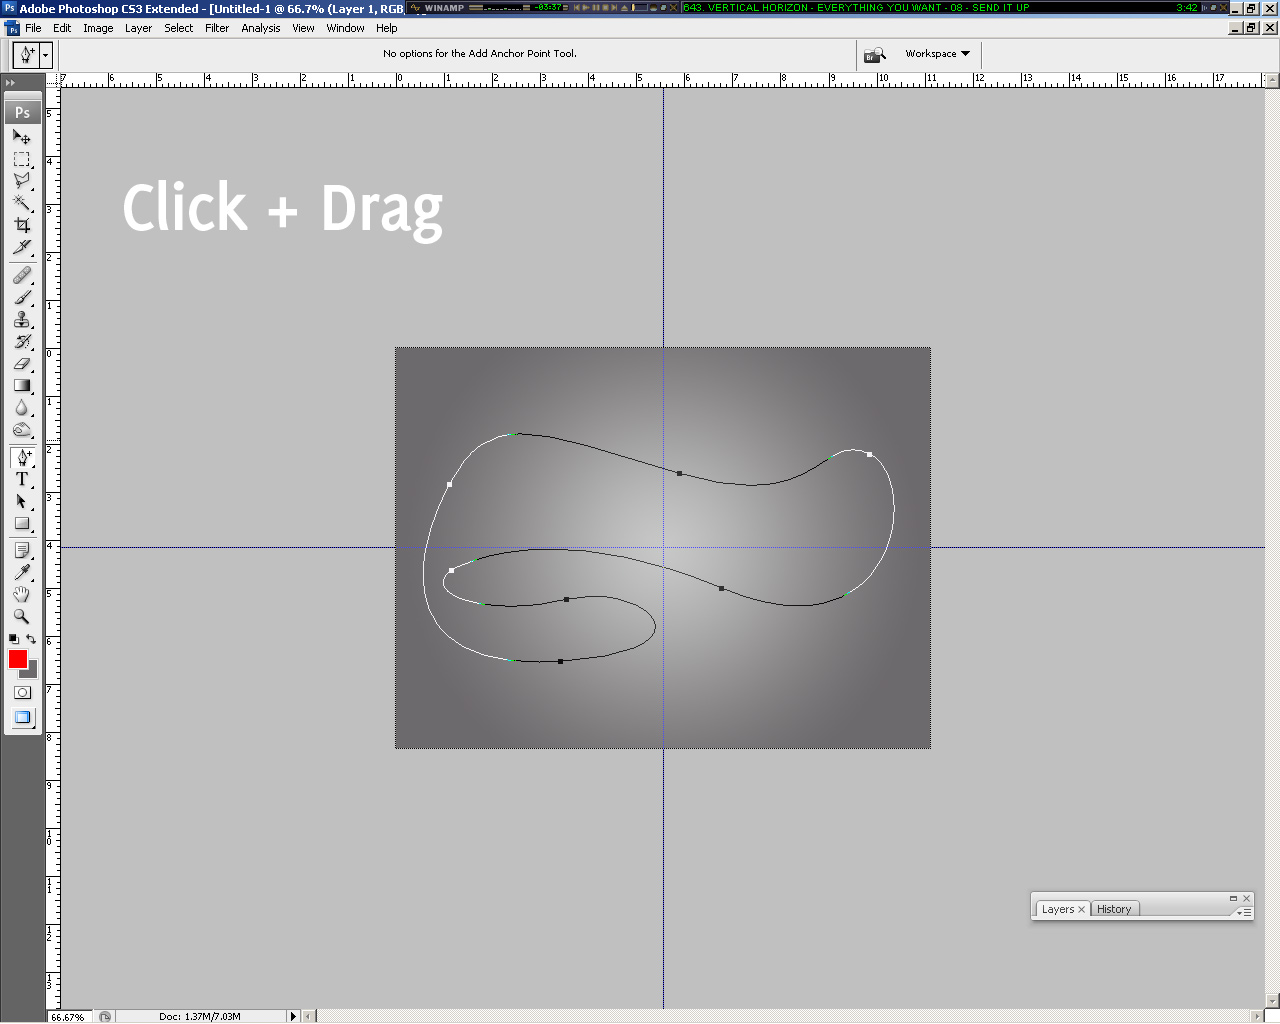
Now I’m hoping you know how to use the pen tool! All you have to do here is select the pen tool, click on the canvas, click again, drag the mouse around to make a curved path, connect the dots.

You want to come up with a smooth & curvy shape like this one:

Pen Tool Path + Screenshot

3.

Making the path was the main part, now for the easy part. Once your path is complete, right-click the path with the pen tool still active, then go to make selection. After you’ve made the selection out of your path, create a new layer then get the brush tool (B) out.

Using a large, soft brush, brush inside of your selection a little bit, very lightly.

Large Soft Brushing

As you can see, I basically used a moderate grey from the background gradient, it’s fine doing this. Change the layer mode of your brushing layer to something suitable - something that looks the best, so you may need to go through all of the layer modes! I ending up using Color Dodge.

Color Dodge Layer Mode

See, much better!

4.

OK, so basically we should repeat step 2 and 3, but make the path smaller inside of our first one, then we use a layer mode that multiplies the brushing onto the background.

Darker Brushing Visible

Here are the steps that I used to achieve what’s shown below:

  1. Make a new path, inside of your first lot of brushing
  2. Make your path into a selection and softly brush inside of it (same color as before)
  3. Change the layer mode for your brushing layer mode to something like Multiply or Linear Burn

That’s all. Now it’s time to mess with different paths, shapes, brushes, and all that ;)

PSD Download

Although it was a very easy tutorial, you can download the PSD file from this tutorial below. You may also want to consider subscribing to our site, to keep up-to-date!

Download PSD (800kb) Right-click the link and click “save target as…” or “save link as…”

Return home. Published Jun 28th, 2006 under Web Graphics, Website Design.
Previous Random Next
Digg Delicious Reddit Float Stumble

You must be logged in to post a comment.

31 responses

MaZa said:July 4th, 2006

I´m liking this one, simple but stylish.

EliteGFX.com said:July 4th, 2006

Nice simple tutorial for begginers ;) good job :D

KewL said:July 4th, 2006

good tutorial, ive been wondering how crete that effect.

Nightmare said:July 5th, 2006

Cool man…it’s nice & stylish

rugged lion said:July 8th, 2006

cool thanks!

fsd said:July 13th, 2006

nice tutorial
short and simple

Jeb said:July 17th, 2006

Can you do that on Photoshop Elements 4?

amr darwish said:July 18th, 2006

good

admin said:July 20th, 2006

Jeb: Should be able to.

aparecium said:July 22nd, 2006

this is going to sound like a dumb question, but how do you get it to curve like that? when I try freeform, it comes out looking really bad :-/

admin said:July 30th, 2006

aparecium:
Click once outside of the document in the window (This will start the path)
Click in the middle somewhere, while holding the click down move your mouse downwards and toward the right or something similar, that will make it curved.
Make sure you’ve got the right settings for the pen tool etc.

bhoobala said:August 18th, 2006

NICE GOOD

yenis aka chato said:October 28th, 2006

This is a good tutorial for begginers maine for i feel this keep postin up more tutorials this is interesting stuff…its all good ima keep coming back to do more tutorials.. ANYONE KONWS HOW TO POST UP BANNERS? LET ME KNOW THANK U =D

SkAkAuEcA said:December 12th, 2006

So,i want banner in my site ;)

fuser said:December 18th, 2006

Great template…i will use in a design ;)

Thanks, fuser

kmsl said:January 9th, 2007

cool, nice lookin

WelshAngel (student doing photoshop) said:January 26th, 2007

I was reccomended to use this site from my teacher. That is a cool banner, i tried it and i failed, so jealous.

shinegame.com said:June 26th, 2007

Cool, simple and useful for begginers.

Noobie said:July 27th, 2007

How do you get the transparent gradient like that? when i try it is a solid white selection!!

Joseph said:August 20th, 2007

Hi, Can some one explaine to me how can I do that step by step, because I can get it, my email is jamarchi@yahoo.com

Thank you

Kristjan said:August 22nd, 2007

Looks nice :P Its very similar to default mac background

ganesh said:October 23rd, 2007

thank you

razi said:October 31st, 2007

i couldn’t design because lack of description about pen:9=(

Jacky said:November 12th, 2007

I have no idea how to create curvy shape with pen, can some one explains that to me please :$

goldbraun said:December 29th, 2007

thank you for sharing this, your site is full of inspiration

John K said:February 16th, 2008

Cool!
I’m wondering if I can do some great smoke effects with this technique…

messo f said:February 29th, 2008

The banner is cool

mangesh chavan said:April 29th, 2008

Very nice tutorial. its useful for website creaton or designing.
thank u.

ArT said:July 6th, 2008

Superb ;) yet yet :) everything just like that to keep ;)

AA said:July 6th, 2008

Superb ;)

Trackbacks

  1. PhotoshopStar.com » Blog Archive » Dollar Sign Logo