So, in this Photoshop tutorial I’m going to be showing you how to make a simple, nice & colorful circus-style logo, mainly using text and layer styles, but we’ll also add in some nice details.

You can see my outcome in the above image, which you’ll be making something very similar to it in this tutorial.
1. Beginning.
Alright, you can start by first creating a new document, as usual, I used a document size of 400 x 150 pixels, using the default DPI/Resolution. Now you’ll want to write out your text that we’re going to add the effect to. I used the word Circus with the following text settings:
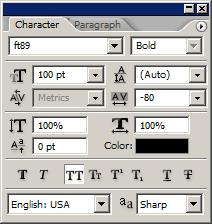
In the above image you can see all the settings I’ve used for my text, including the font “ft89”, which you can download from here. The font choice is very important, as you want it to suit a circus-style, or look a bit fun/childish, so if you’re going to use another font, go to DaFont or UrbanFonts and look under a category such as “cartoon”. Your text should look something like this now:

Now, I’d like to give it a bit of a bend in the text so that it looks more interesting, so select your text again and near the top of Photoshop click the following button: ![]()
You can use any settings you want, but if you want to do what I did, use the following settings:
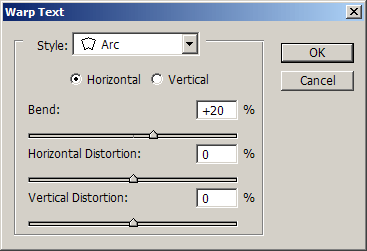
You should be left with some text with a bend in the middle going upwards:

2. Adding Layer Styles for more effect.
Obviously it’s too plain right now, so you’ll want to add in some layer styles to make it look amazing, right? 😉
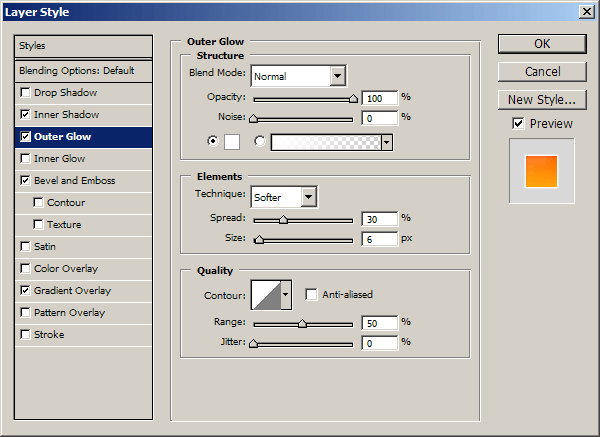
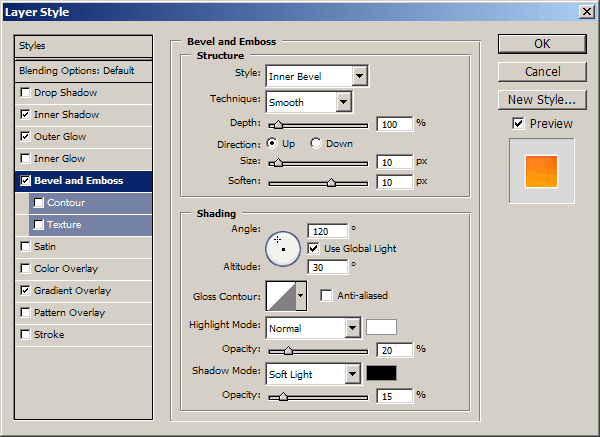
Firstly, right-click your text-layer in the layer’s palette, and go into the Blending Options, now you click what effects you want to add then tweak them. I used the following layer styles (click them for settings):
If you used all the corrext settings, your text should now look like this:

A lot better, but still not very interesting, continue onto the next step to add some nice details.
3. Add some final effects.
For this step I’m simply going to add a light pattern to the background and some lightbulb kind of things to the text. Start by creating a new layer. Once you’ve done that, find and get out the Elliptical Marquee Tool, then make a small selection inside of one of your letters, similar to mine:

Now fill your selection with a color that will go well with the background, I actually used an orange here, but on the others I used different colors 🙂 (#ff4800)

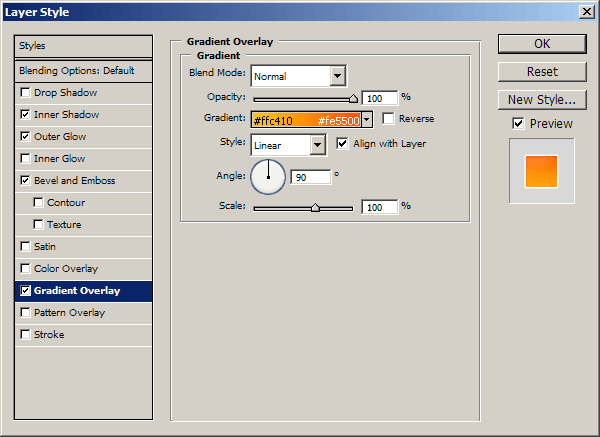
Into the blending options again, then apply the following layer styles:
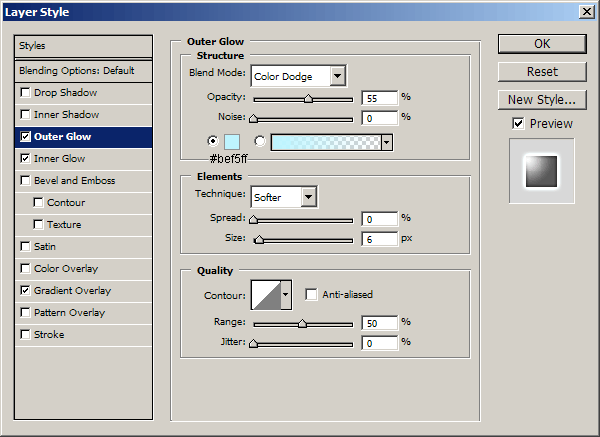
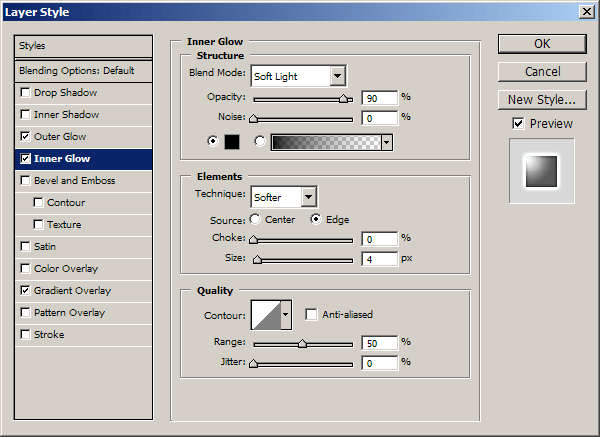
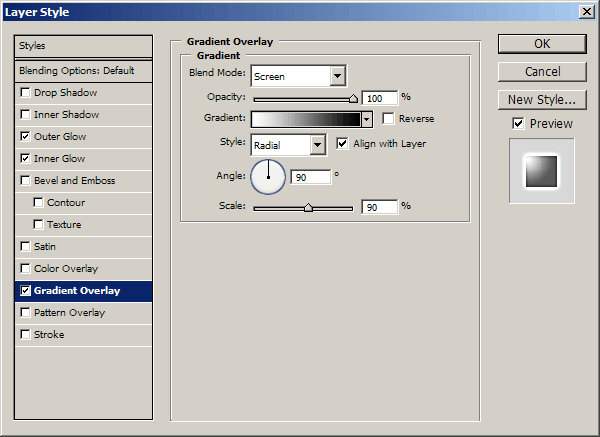
And now your bulb should look pretty much like this:

Now you need to duplicate this layer and move it around to fill up the whole letter, as shown in the below image:

You’ll want to make sure that you don’t simply make more selections and fill them on the same layer, this way the gradient overlay won’t work properly.
Next thing to do is fill in another letter or two with different colored bulbs, I filled in the I with light-blue bulbs, as shown in the below image:

The color I used was #3bc0eb. I then made some green bulbs for the U:

You can of course be creative and use varying colors all over the letters, you can do what you want really. Be creative!
I finished off by adding a light pattern in the background the same style as the bulbs, then I added a shadow to the text, which you can easily do with the brush tool, or some other method.
Thanks for reading the tutorial, everyone! I hope you enjoyed it, at least a little 😉