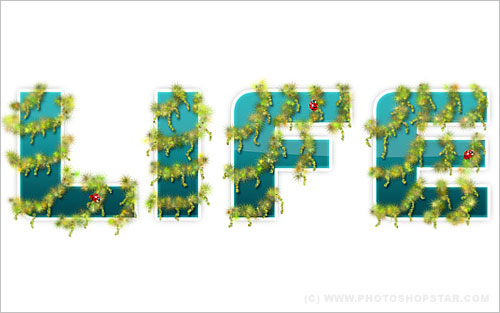
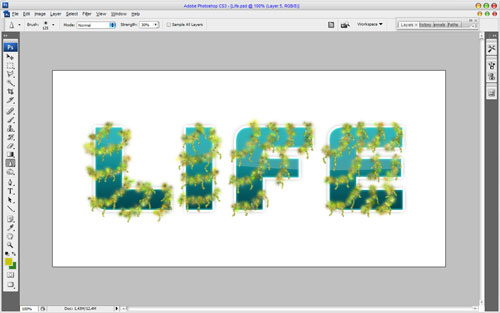
Hey, are you interesting in creating more creative text decorations? If yes, then I will teach you how to create text effect in techno style and decorate it with nature elements.
You should begin from creating a new document about 1000×500 pixels and fill it with white color.
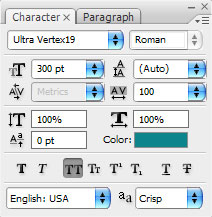
After that use the Horizontal Type Tool and write out some text with color of #0d848b. Also you have to set up following presets for current text line:
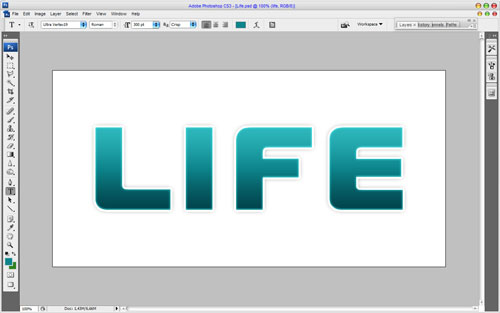
The result should be next:
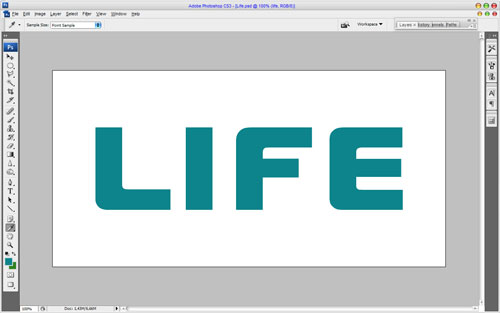
In the above image I’ve used a font called Ultra Vertex19, which is sadly a commercial font. Feel free to use another font or buy or ‘get’ a nice font from somewhere. Then we need to add our text techno style view, for this effect we have to apply following Blending Options to this text layer:
• Inner Shadow
• Outer Glow
• Inner Glow
• Gradient Overlay
• Stroke
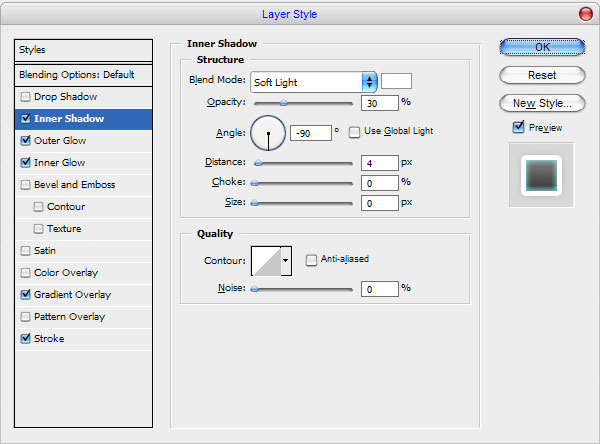
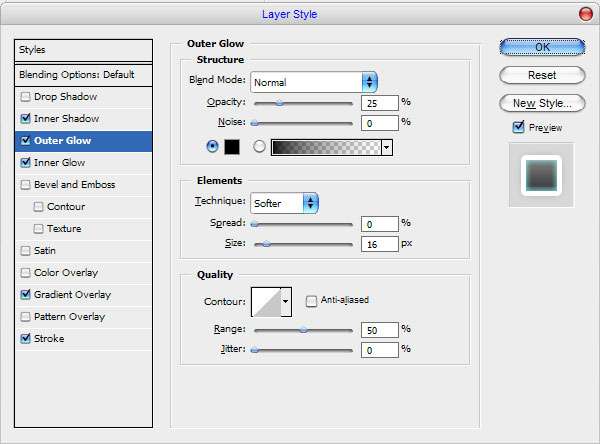
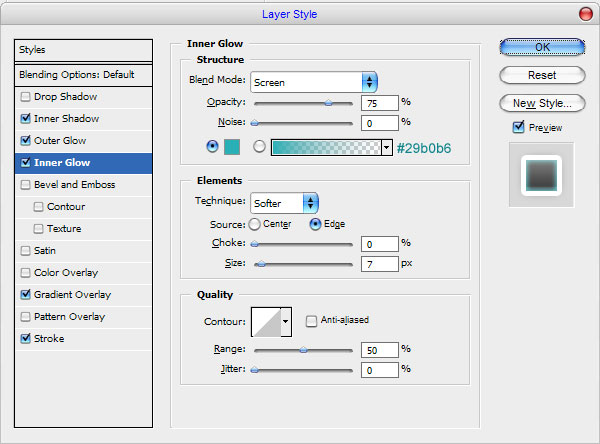
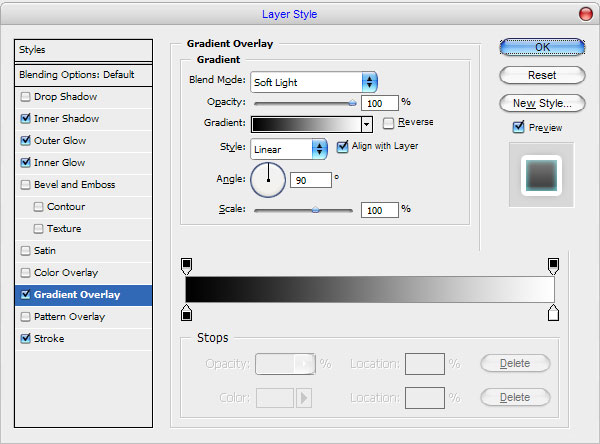
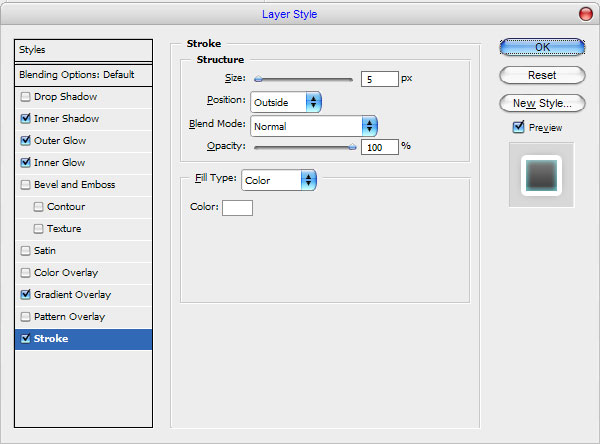
Can you see effect now?
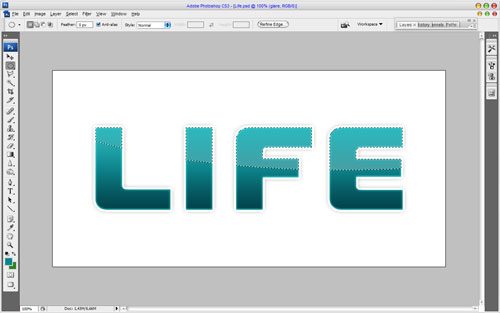
To finish off this effect I would like to bring some glare for letters. Load text selection (Ctrl+ left click the text layer thumbnail in the layers palette), then holding Ctrl+Shift cut off part of selection as shown on my picture below:
Fill selected area with white to transparent gradient on the new layer.
Remove selection with Ctrl+D. Now, time to add some natural elements to our techno style text to mix two styles in one. For that create new layer and set up foreground color as #c6c800 and background color as #328122, then select the Brush Tool and one of standard brush from Photoshop palette:
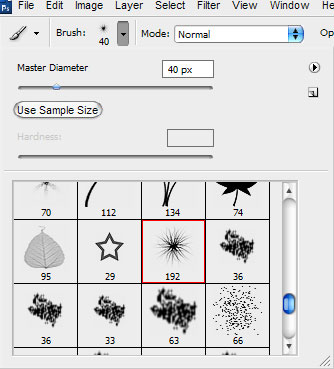
Now, change brush size for chosen brush to 40 pixels and then click the button ‘Toggle the Brushes palette’ on the Options Bar to open brush presets window or by choosing Window > Brushes. Here we can see a couple of presets. Set up the following presets for current brush:
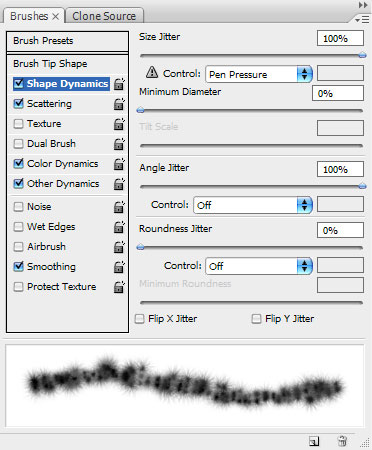
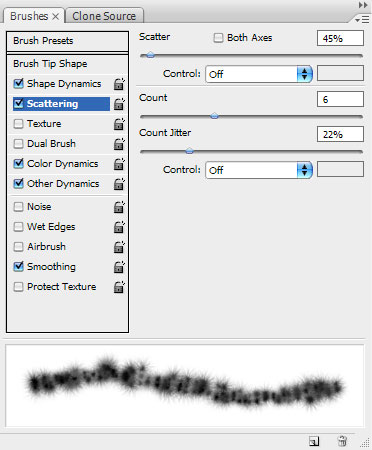
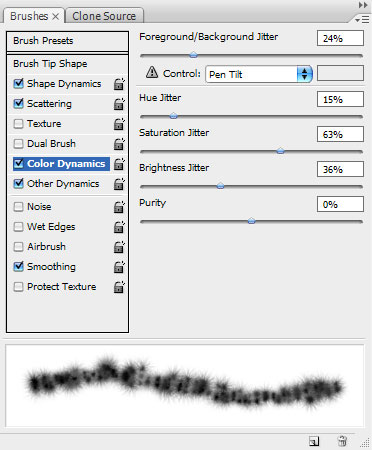
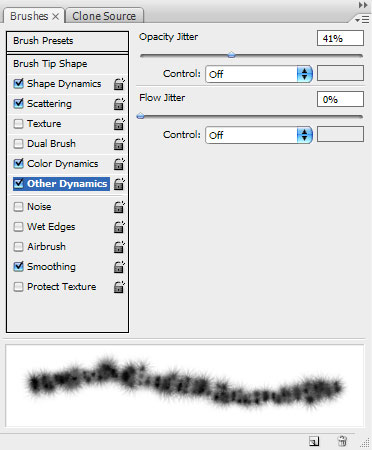
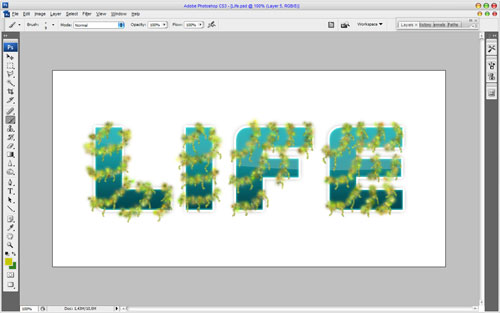
After that add a few curved lines to letters as shown on my screenshot which you can see below:
Then reduce brush size to 9 pixels and add some small appendices on the same layer.
Using the Sharpen Tool increase the sharpness for these lianas.
To bring our lianas more realistic view I would like to add some shadow from it to letters. Apply Drop Shadow layer style for this layer.
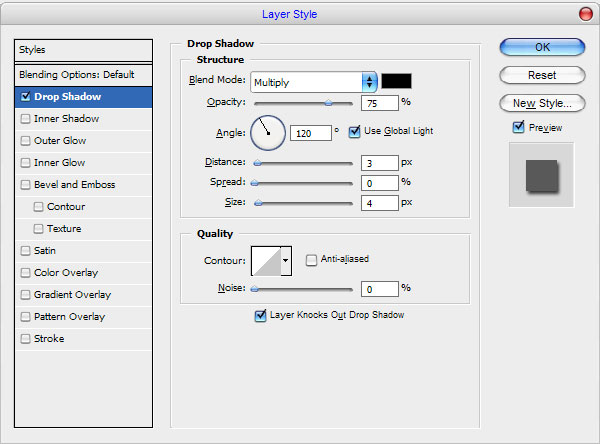
Divide layer style from current layer with Layer > Layer Style > Create Layer. Now, select text shape again (Ctrl+ left click the text layer thumbnail in the layers palette) and go to the layer under, then inverse selection with Ctrl+Shift+I and press Delete to clear selected area.
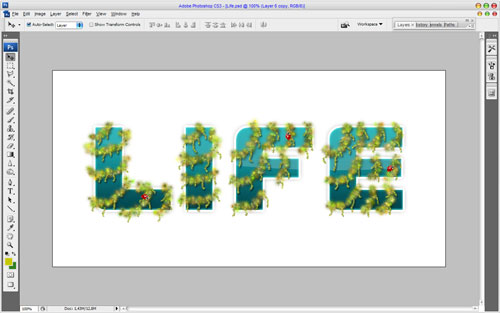
Deselect chosen area with Ctrl+D. And the last thing that I would like to do is to bring some insects to our lianas. You can use Google Images for finding some appropriate picture or feel free to use mine. Open up it and copy a few times to our main canvas. Don’t forget to reduce copies and rotate it a little bit with Ctrl+T.
We are done for this step! Our mixed text style looks pretty much good, isn’t it?

