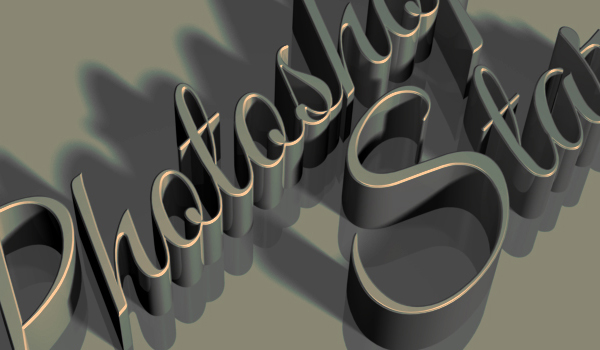
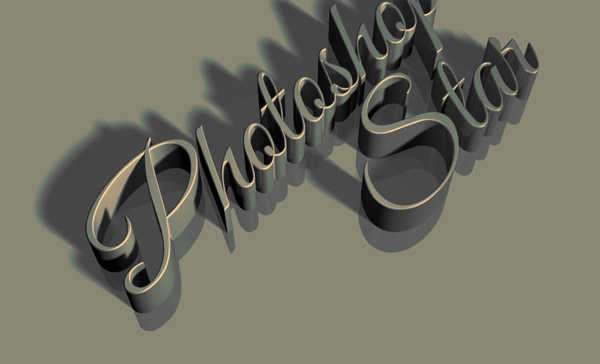
The 3D Environment in Photoshop CS6 is a great way to create amazing 3D text effects without the need for any other 3D software. This tutorial will explain how to use the many tools and settings to create a nice vintage 3D text effect.
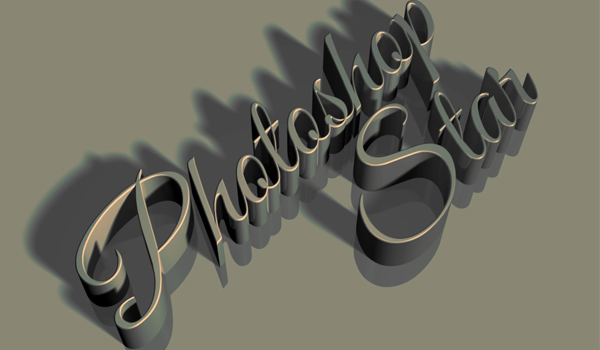
Final Image
Resources
- Great Vibes font.
Step 1
Create a new 1000×1000 px document, set the Foreground color to #acacac, and fill the Background with that color using the Paint Bucket Tool.
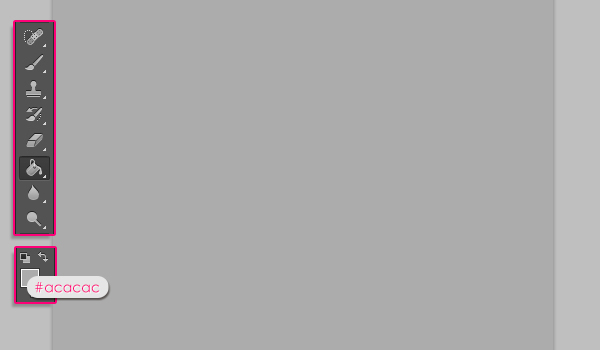
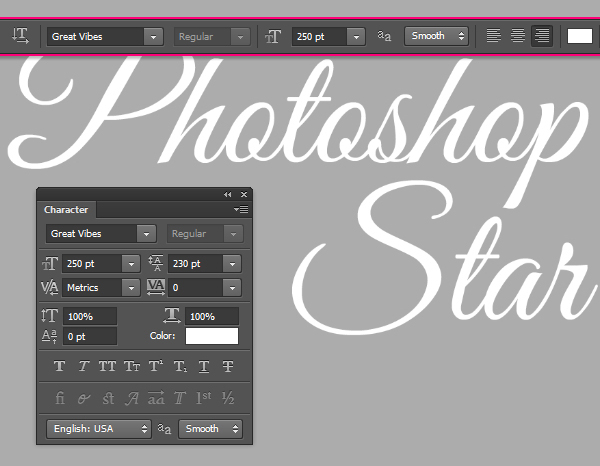
Create the text in white. The font used is Great Vibes, and the Size is 250 pt.
If you have more than one line of text, click the “Right align text” icon in the Options bar, then change the Leading value to a value that will decrease the space between the lines without making them overlap. The value used here is 230 pt, but if you are using a different text, then you might need to use a different value.
Step 2
With the text layer selected, go to Type -> Extrude to 3D. This will convert the text into a 3D mesh.
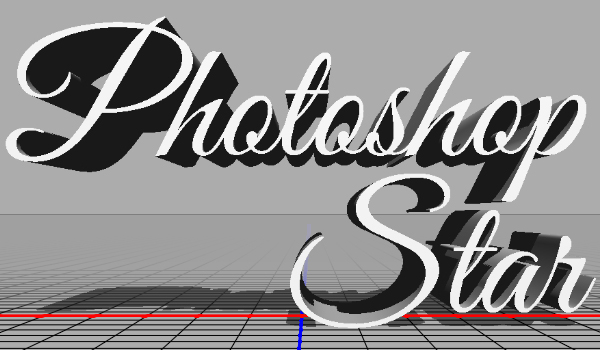
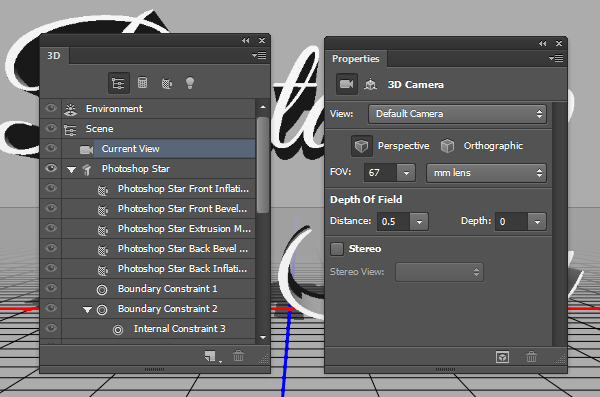
To access the 3D mesh settings and properties, you’ll need to open two panels: The 3D panel, and the Properties panel (both found under the Window menu).
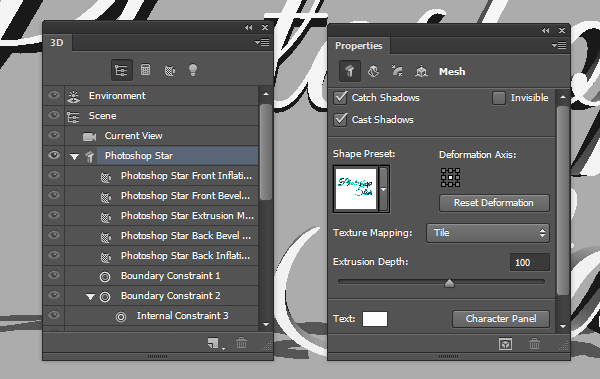
The 3D panel has all the components of the 3D scene, and when you click the name of any of those, you’ll be able to access its settings in the Properties panel. So make sure to always select the name of the element you want to modify in the 3D panel before you change its settings in the Properties panel.
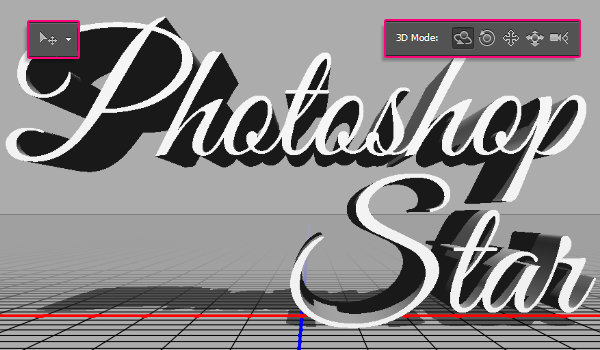
In the new 3D environment in CS6, there are no special 3D Tools anymore. If you select the Move Tool and check its Option bar now, you’ll find a set of 3D Modes for the tool to the right of the bar. When you choose one of those, you can then click and drag to perform any changes (on the selected element in the 3D panel).
Step 3
To start modifying the 3D mesh, select its name in the 3D panel, then move to the Properties panel, and change the Extrusion Depth to 100.
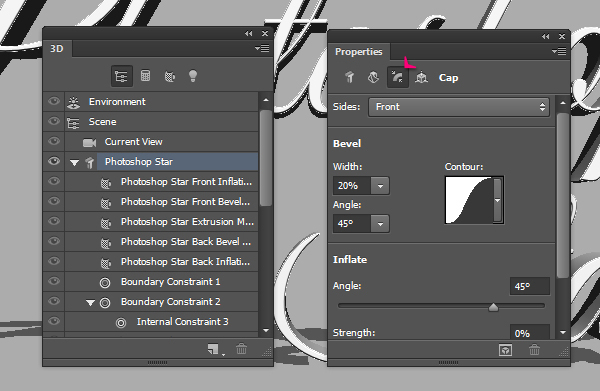
Click the Cap icon at the top, then change the Width to 20%, and the Contour to Gaussian. This will make the edges a bit rounded.
Step 4
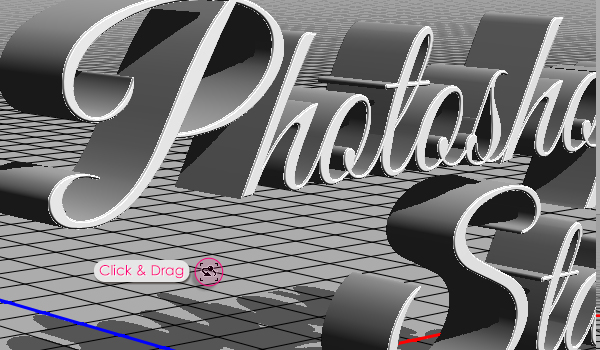
If you want to check how the mesh looks from a different angle, you can pick the Move Tool, click “Current View” in the 3D panel, then click and drag in an empty area to move the scene around.
It’s better to move the scene (the camera view) instead of the mesh itself. This helps prevent any unwanted change in the lighting.
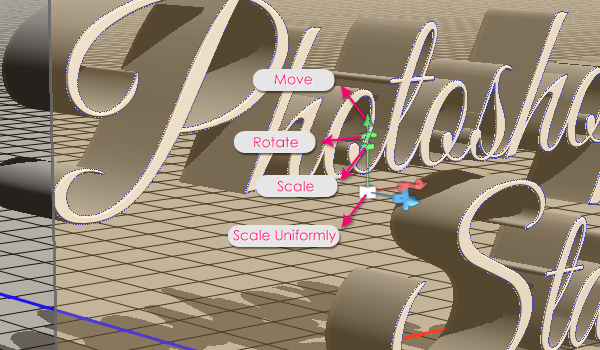
If you want to move the mesh, make sure that it is a permanent change (not only to change the view). Then, you can click the mesh in the 3D scene (or select its name in the 3D panel), and use the 3D axis to make any changes.
The arrows at the ends of the axis move the mesh, the part below them is used for rotation, and the cubes are used for scaling. The cube in the center is used to scale the object uniformly. All you need to do is click and drag the wanted part.
It might seem a bit hard at first, and things will start flying everywhere, but you’ll get used to working in the 3D space with time and practice.
You can as well enter certain values to change the settings. So click the Coordinates icon in the Properties panel, then change the X Rotation value of the 3D mesh to 90°.
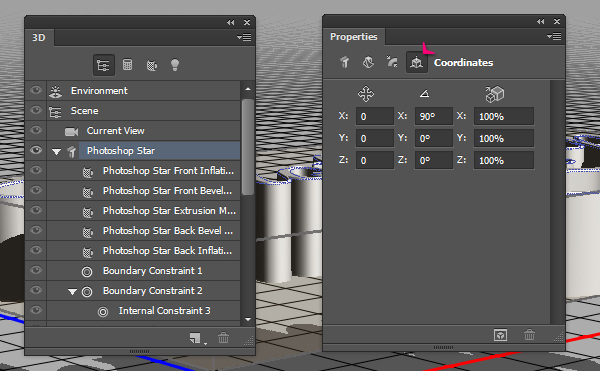
This will rotate the mesh so that it faces upwards.
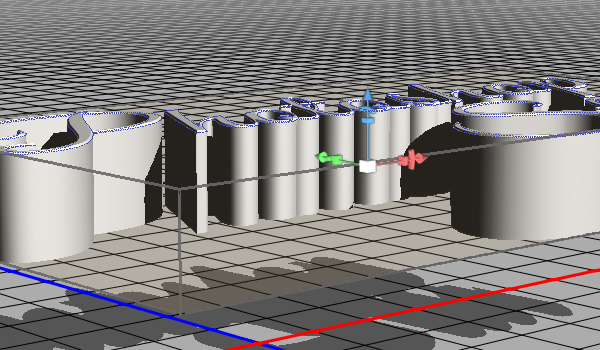
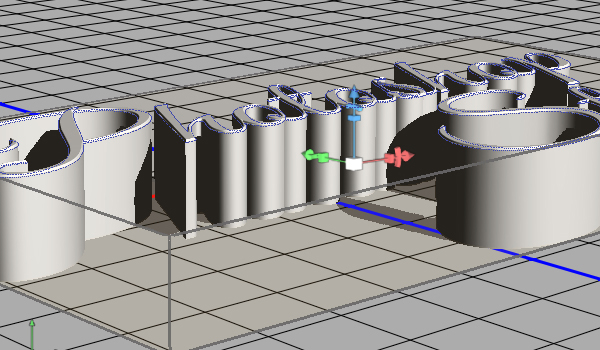
You’ll notice that the mesh is floating above the ground plane. To fix that, go to 3D -> Snap Object to Ground Plane.
Step 5
Now, you’ll need to change the Camera View so that it point towards the text. Go ahead and use the Move Tool 3D Modes to move your camera around until you like the view.
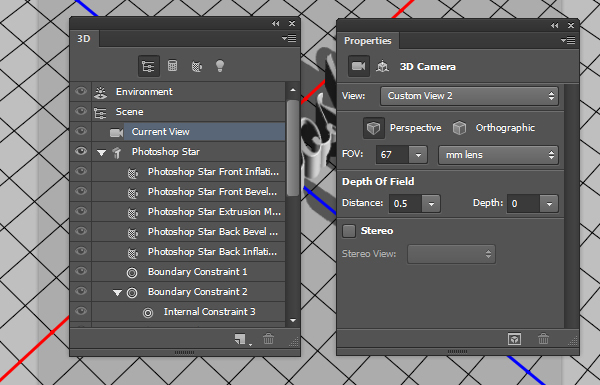
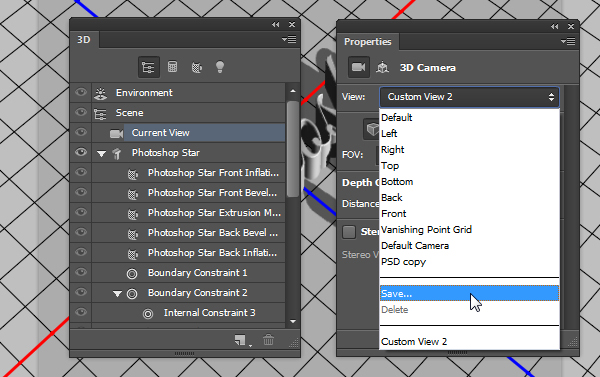
You can save the camera position by clicking the “Save…” option from the View drop down menu in the Properties panel.
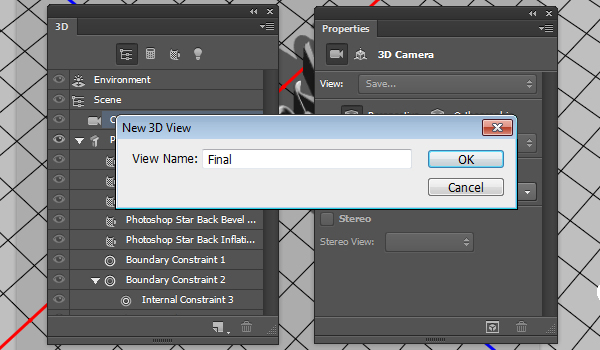
Enter a name for the view then click OK.
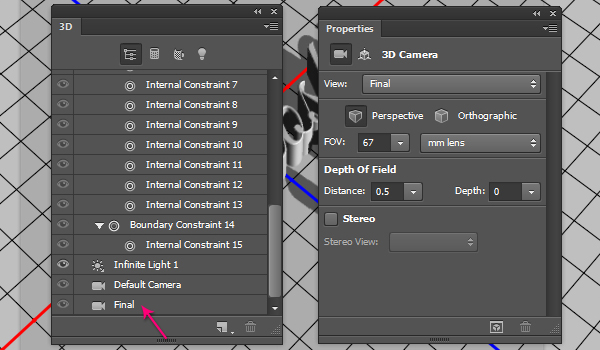
The camera view will be saved, so if you change the camera angle then want to get back to this view, you can choose it from the View drop down menu, or click its name down the 3D panel.
Step 6
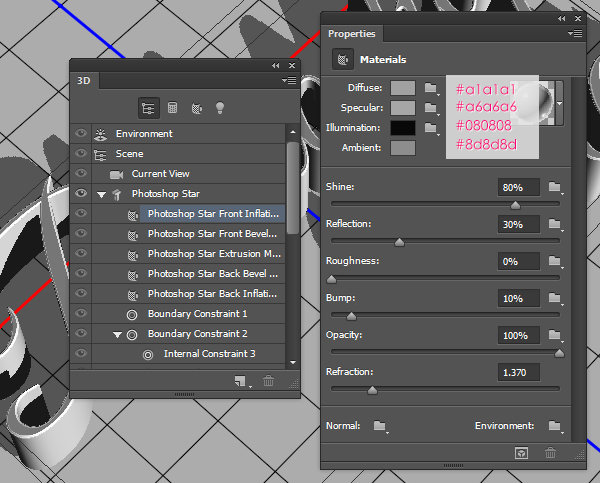
Time to modify the 3D mesh materials. Start by clicking the “Front Inflation Material” in the 3D panel. In the Properties panel, change the Diffuse color to #a1a1a1, the Specular to #a6a6a6, the Illumination to #080808, and the Ambient to #8d8d8d. Then change the Shine value to 80%, the Reflection to 30%, and the Refraction to 1.37.
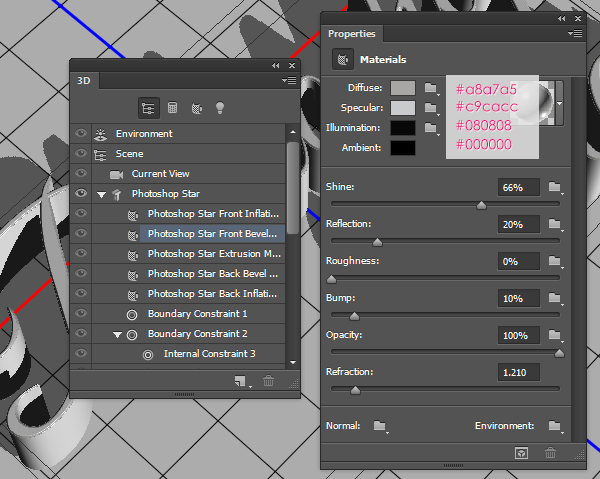
Move on to the “Front Bevel Material”. Change the Diffuse color to #a8a7a5, the Specular to #c9cacc, the Illumination to #080808, and the Ambient to #000000. Then change the Shine value to 66%, the Reflection to 20%, and the Refraction to 1.21.
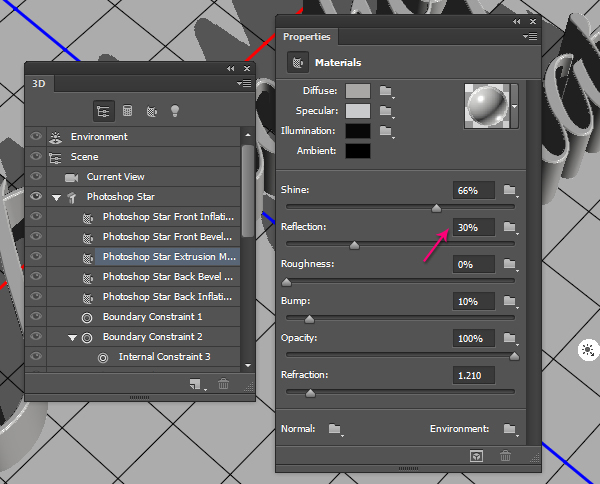
Next is the “Extrusion Material”. Use the same Front Bevel Material settings, except for the Reflection value, which is set to 30%.
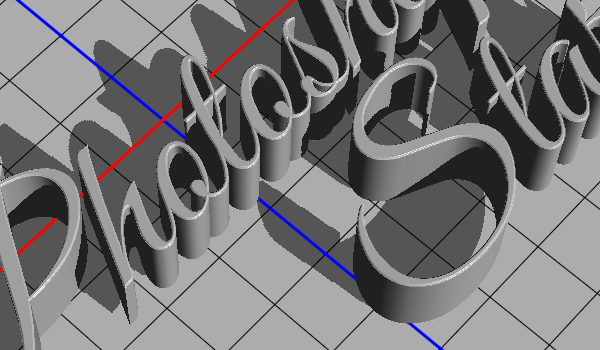
This will give the text a polished slick appearance.
Step 7
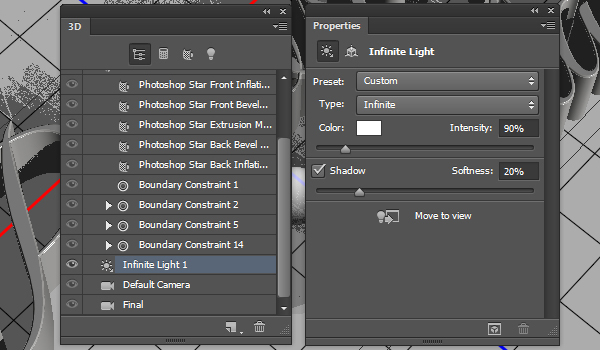
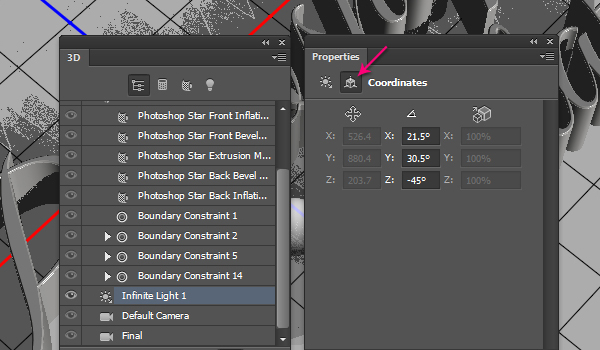
Select the “Infinite Light 1” in the 3D panel. Then, in the Properties panel, change the Intensity to 90%, and the Shadow Softness to 20%.
Click the Coordinates icon in the Properties panel to change the Light direction.
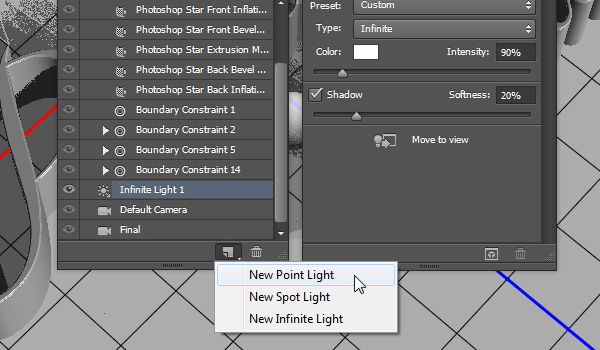
Click the “Add new Light to Scene” icon down the 3D panel, and choose New Point Light.
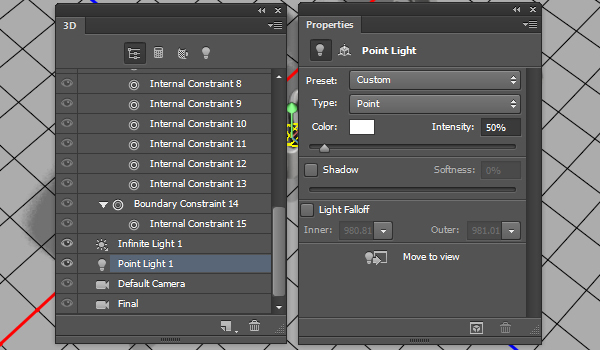
Change the new light’s Intensity to 50%, and uncheck its Shadow box, as we only need shadows from one light source, which is the Infinite Light.
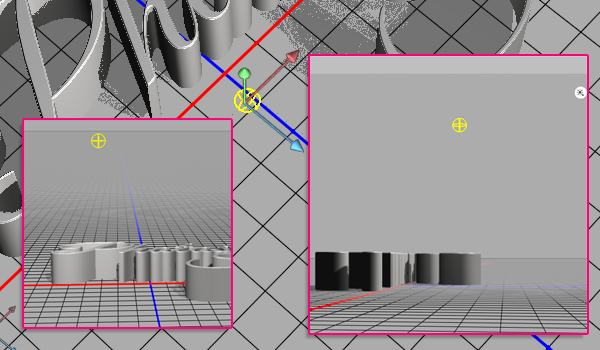
Click the Coordinates icon in the Properties panel to change the Light position. The same exact values might not work on the scene or the text you’re creating. So just use the Move Tool to change the lights position or direction however you like.
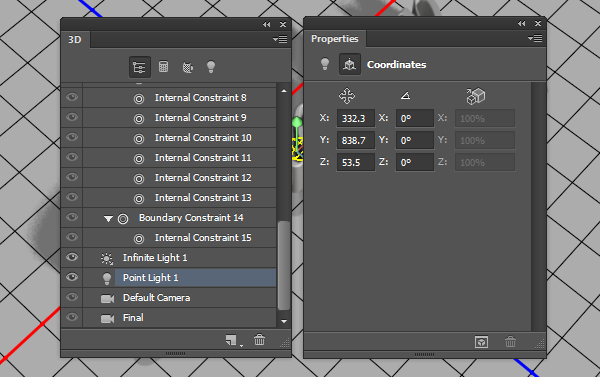
These are screenshots for the lights from different angles. You can use them as a guide to place your own lights.
Step 8
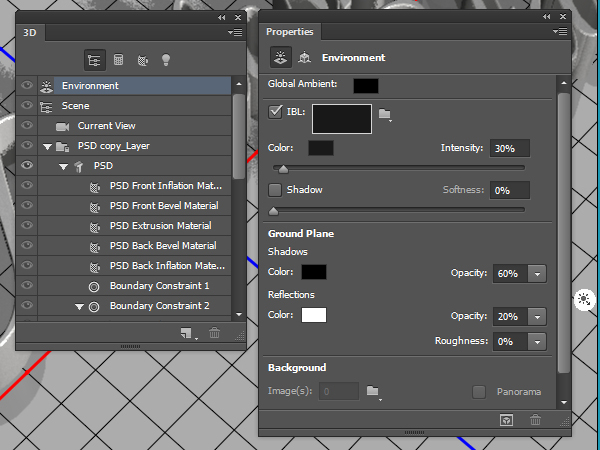
Click Environment in the 3D panel, then, in the Properties panel, change the Intensity to 30%. To make the Ground Plane reflective without the need to add any new 3D meshes, change the Reflection Opacity to 20%. The higher the value the more reflective the ground plane is.
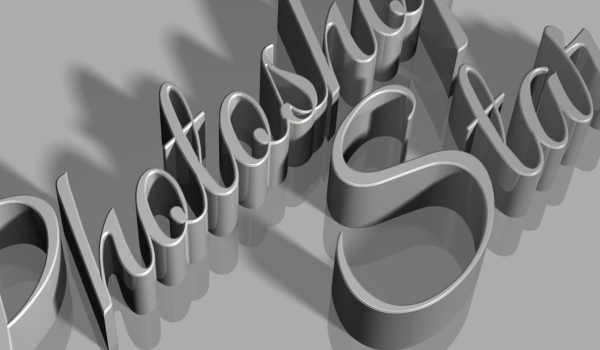
Once you’re done modifying the scene, go to 3D -> Render. The rendering might take some time. You can stop rendering anytime by clicking anywhere in the document.
Step 9
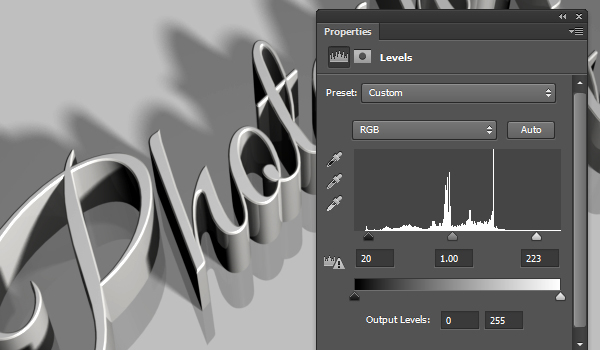
Once the rendering is done, save the final result. Then click the “Create new fill or adjustment layer” icon down the Layers panel, and choose Levels.
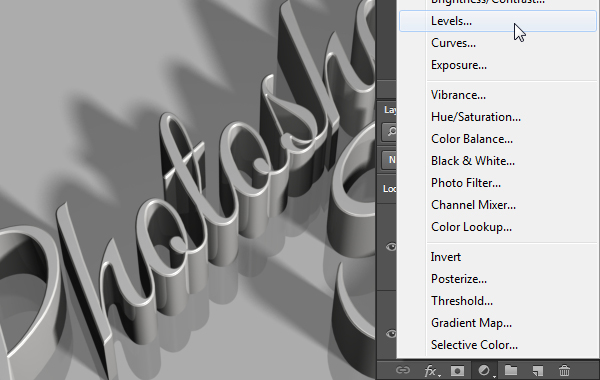
Change the Shadows value to 20 and the Highlights value to 223.
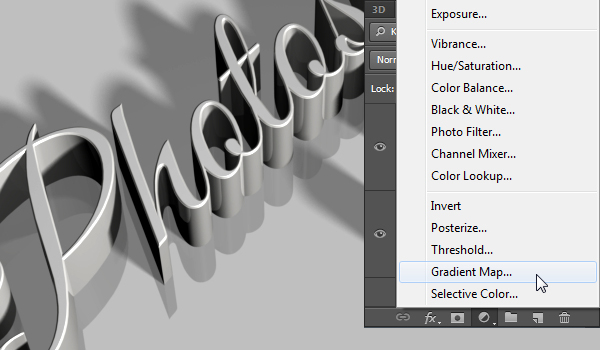
Click the “Create new fill or adjustment layer” icon again, but this time, choose Gradient Map.
Change the Gradient Map adjustment layer’s Blend Mode to Linear Burn, and its Opacity to 40%. The gradient used is one of Photoshop’s default gradients, and it’s called “Violet, Green, Orange”.
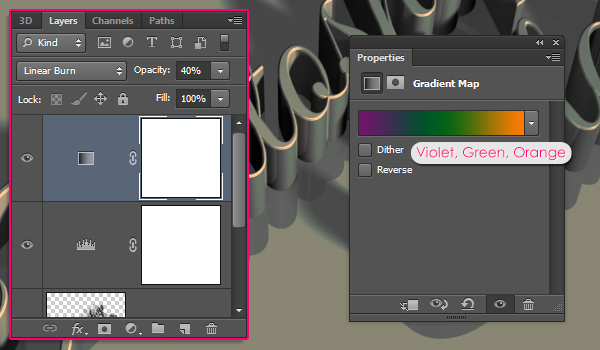
The cool thing about creating the 3D text in grayish colors is that you can colorize the final result using a wide variety of gradients. So you can go ahead and try some different gradients if you like, and you’ll get some awesome results.
Final Image
Hope you enjoyed the tutorial and found it useful as an introduction to the 3D environment in Photoshop CS6. Please feel free to leave your comments below.
