
Learn how to create space tiles text effect in this simple Photoshop tutorial.
Layer Styles are a powerful feature in Photoshop that can help you achieve brilliant effects easily and quickly. Layering those styles is a great way to add dimension and details to the effect.
This tutorial was originally published on Oct 14, 2013.
Final Image

Tutorial Details
- Program: Adobe Photoshop CS6 (CS3+ versions will work as well)
- Estimated Completion Time: 50 minutes
- Difficulty: Intermediate
Tutorial Resources
- Garnet font.
- Space Dust Texture.
- Metal Mesh Patterns – Pack 1.
- gradient-shapes for Photoshop.
- Brushed Steel Metallic Texture. (Note: Before you begin the tutorial, open this image in Photoshop, then go to Edit -> Define Pattern, and click OK, to add the texture to your Patterns preset.)
Step 1
Create a new 1024 × 750 px document, place the “Space Dust Texture” image on top of the Background layer, then resize it until it fits within the document.
The texture is quite big, so if you are creating a longer text than the one in the tutorial, you can use bigger dimensions for your document.
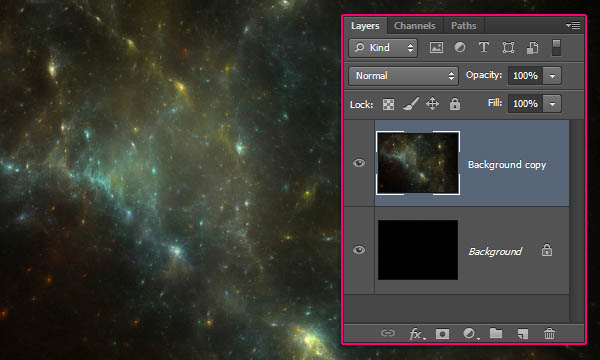
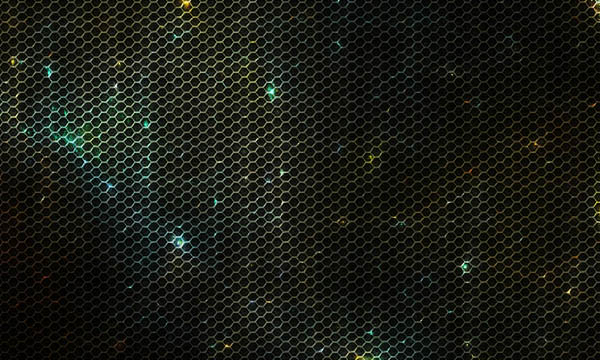
Double click the texture layer to apply a Pattern Overlay effect, by changing the Blend Mode to Overlay, and choosing the “Hex Metal Mesh” pattern from the “Metal Mesh Patterns – Pack 1” pattern pack.
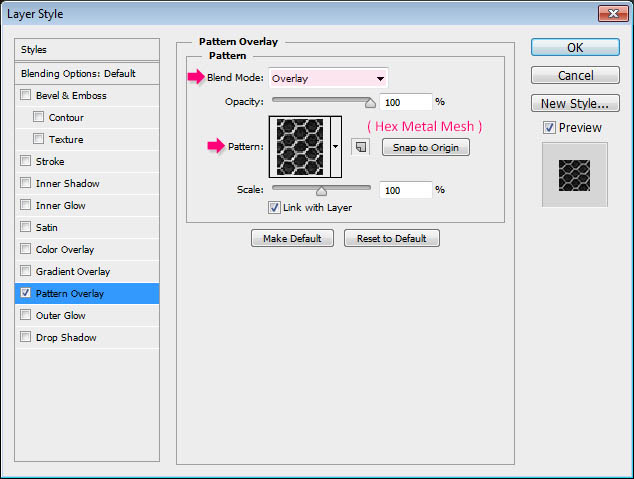
This will create the in-space-like background.
Step 2
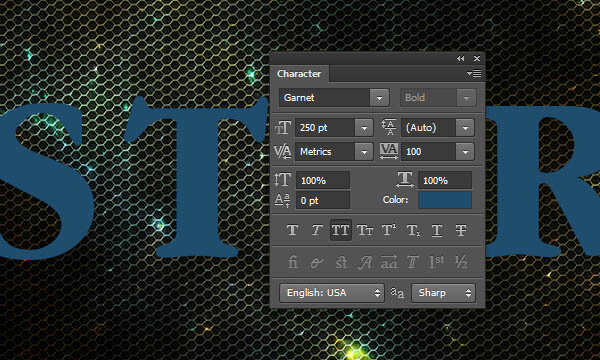
Create the text in All Caps using the font “Garnet”, the font size 250 pt, and the color #1e4d6e. Then, set the Tracking value to 100 pt.
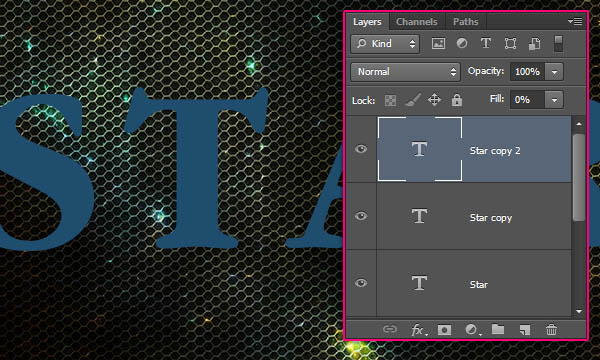
Duplicate the text layer twice, then change the second copy’s Fill value to 0. Next, we are going to style each of the text layers.
Step 3
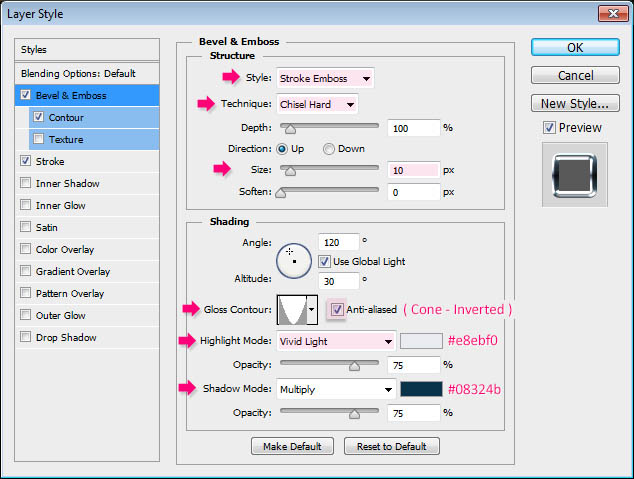
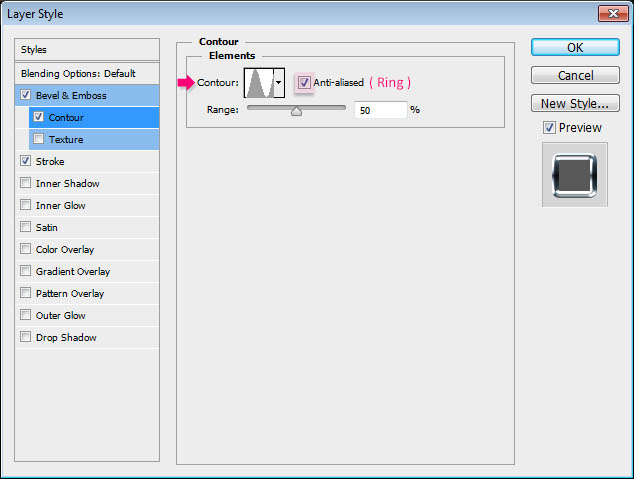
Double click the original text layer to apply the following Layer Style:
– Bevel and Emboss: Change the Style to Stroke Emboss, the Technique to Chisel Hard, the Size to 10, the Gloss Contour to Cone – Inverted, check the Anti-aliased box, change the Highlight Mode to Vivid Light, its color to #e8ebf0, and the Shadow Mode color to #08324b.
– Contour: Choose the Ring contour, and check the Anti-aliased box.
– Stroke: Change the Size to 7, the Fill Type to Gradient, the Style to Reflected, the Angle to 90, and choose the “stove pipe 155b” gradient from the “CHROMES.grd” file found in the “gradient-shapes for Photoshop” gradients pack.
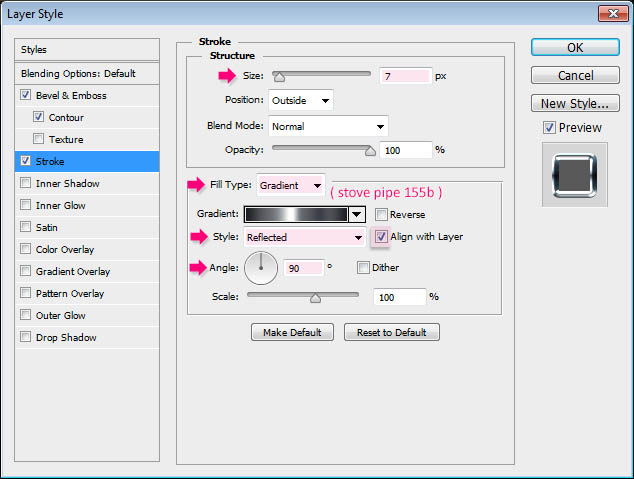
This will create the outer stroke of the text.

Step 4
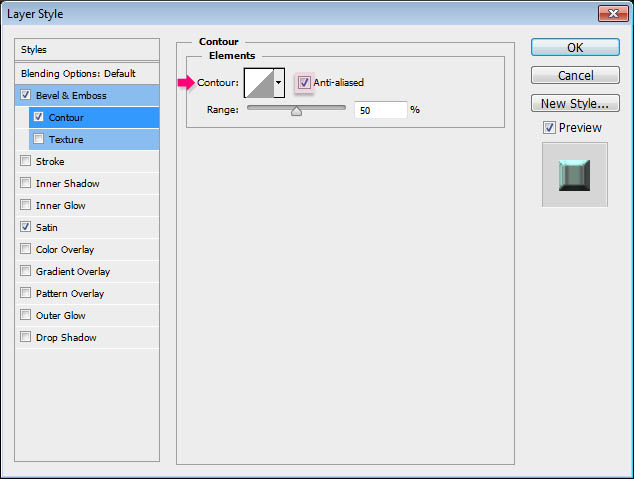
Double click the first copy text layer to apply the following Layer Style:
– Bevel and Emboss: Change the Technique to Chisel Hard, the Gloss Contour to Rounded Steps, check the Anti-aliased box, change the Highlight Mode to Vivid Light, and its color to #e2ffff.
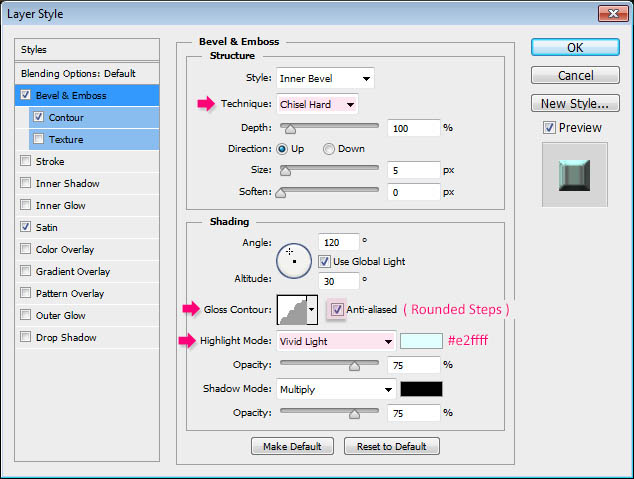
– Contour: Just check the Anti-aliaeds box.
– Satin: Change the Blend Mode to Overlay, the color to #c1ffe8, the Angle to 0, the Distance to 35, the Size to 70, and the Contour to Ring – Double.
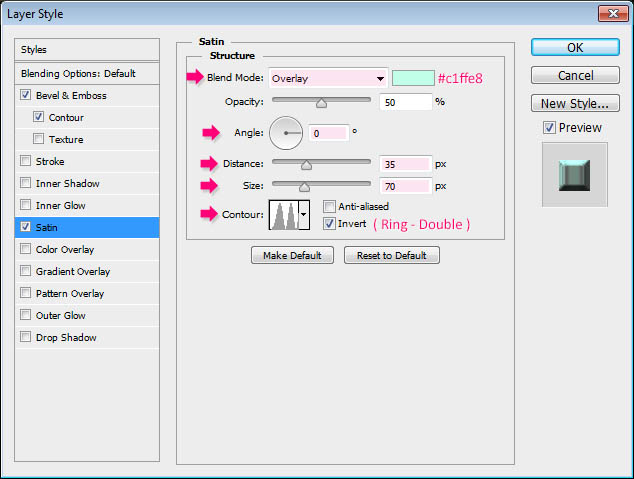
This will create the first layer of the styled text.

Step 5
Double click the second copy text layer to apply the following Layer Style:
– Bevel and Emboss: Change the Technique to Chisel Hard, the Size to 40, uncheck the Use Global Light box, change the Angle to 65 and the Altitude to 75, change the Gloss Contour to Gaussian, check the Anti-aliased box, change the Highlight Mode to Vivid Light, and its color to #efe6d2.
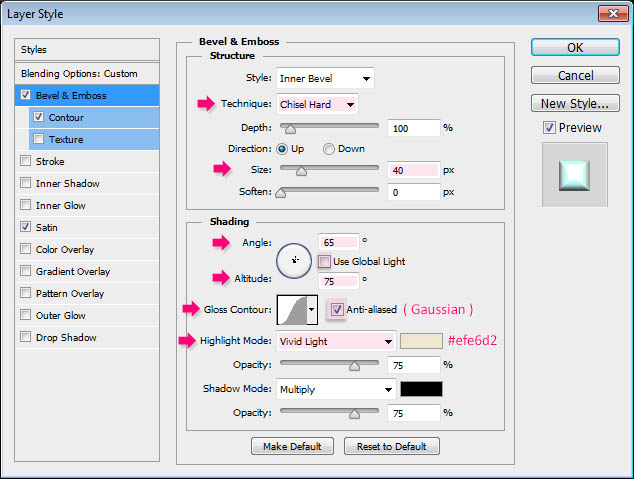
– Contour: Choose the Half Round contour, and check the Anti-aliased box.
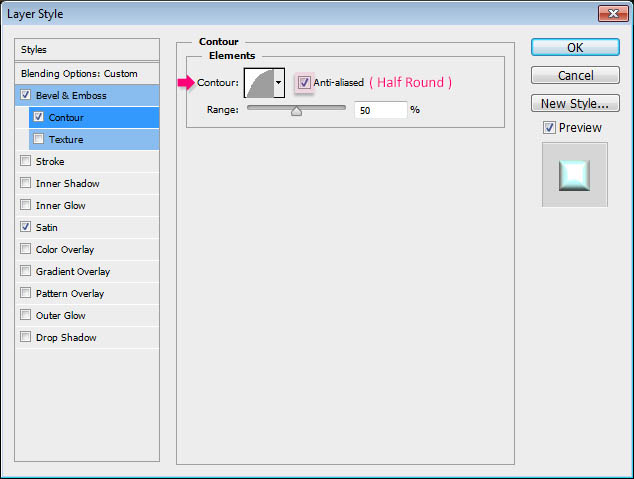
– Satin: Change the Blend Mode to Vivid Light, the color to #2fffc7, the Distance to 28, the Size to 35, and the Contour to Gaussian.
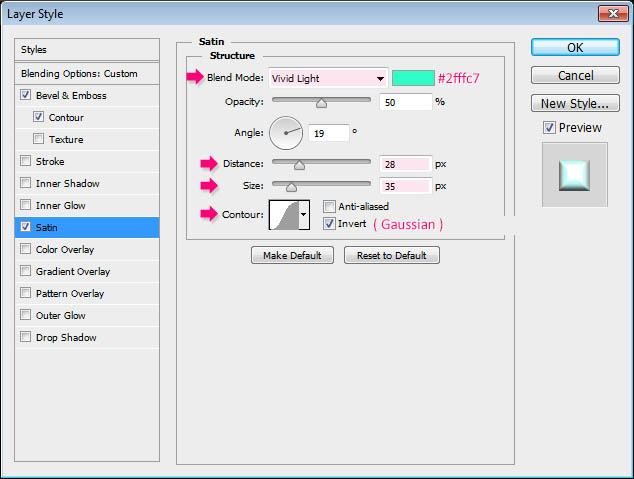
This will create the second layer of the styled text, adding more depth and some extra details.

Step 6
Ctrl + click any text layer’s thumbnail to create a selection.
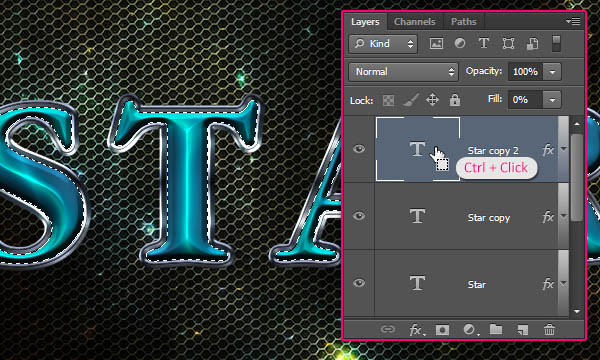
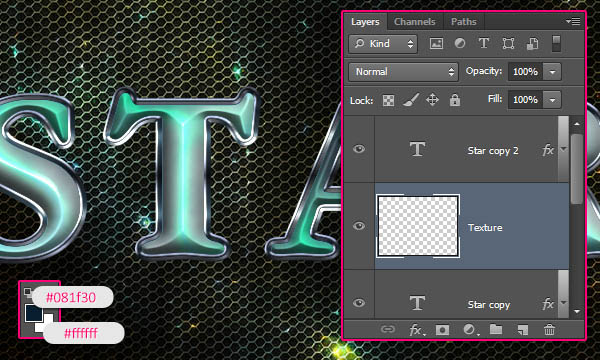
Create a new layer between the two copy text layers and call it “Texture”, set the Foreground and Background colors to #081f30 and White, and go to Filter -> Render -> Clouds. Then, go to Select -> Deselect to get rid of the selection.
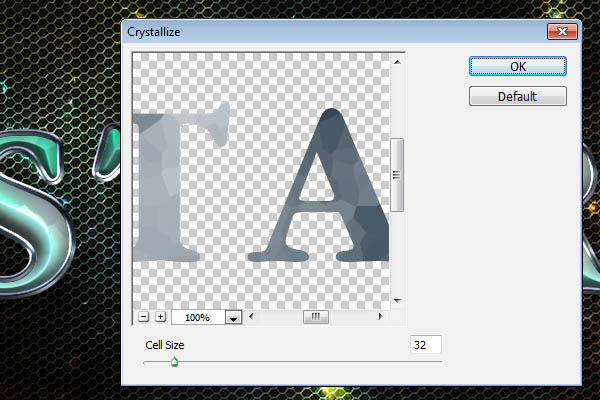
Go to Filter -> Pixelate -> Crystallize, and set the Cell Size to 32.
Go to Filter -> (Filter Gallery) -> Brush Strokes -> Accented Edges, and use the values shown below.
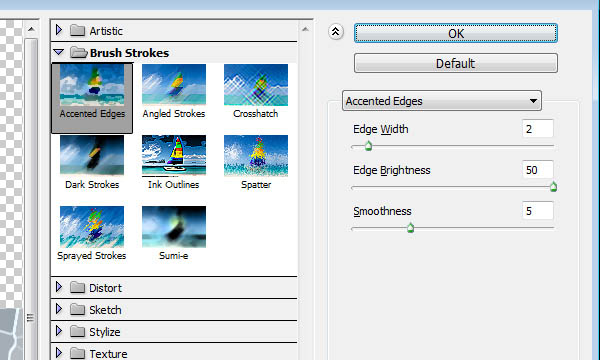
This will create a bright cracks texture.

Go to Filter -> Filter Gallery -> Brush Strokes -> Angled Strokes, and use the values below as well.
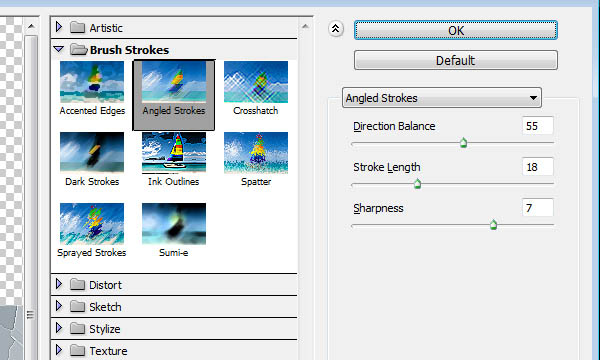
This will sharpen the cracks a little bit.

Go to Filter -> Sharpen -> Smart Sharpen, and use the settings below.
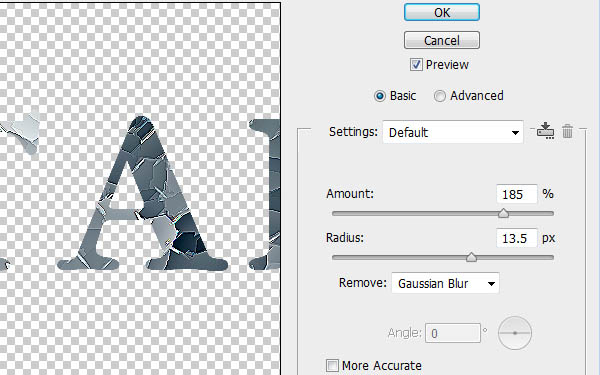
This will intensify the cracks and enhance the contrast of the texture.

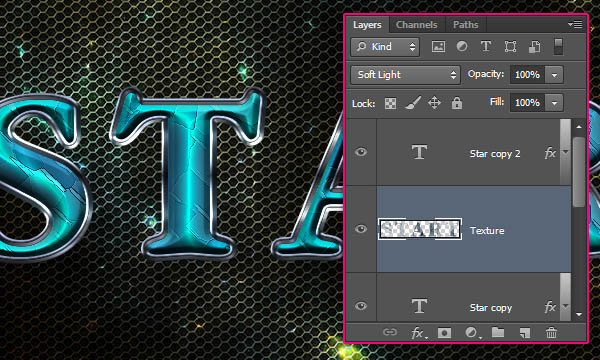
Change the “Texture” layer’s Blend Mode to Soft Light.
Step 7
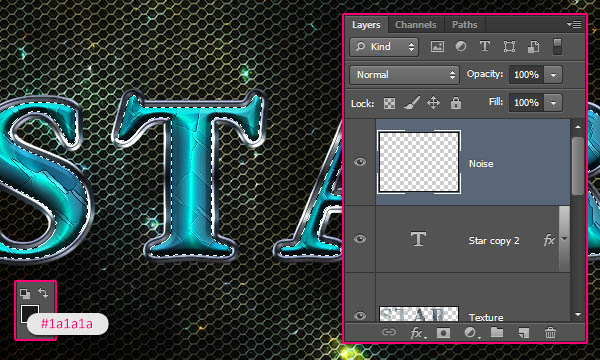
Ctrl + click a text layer’s thumbnail again to create a selection, change the Foreground color to #1a1a1a, create a new layer on top of all layers and call it “Noise”.
Go to Filter -> Render -> Clouds, then go to Select -> Deselect to get rid of the selection.

Go to Filter -> Texture -> Grain, and use the values below.
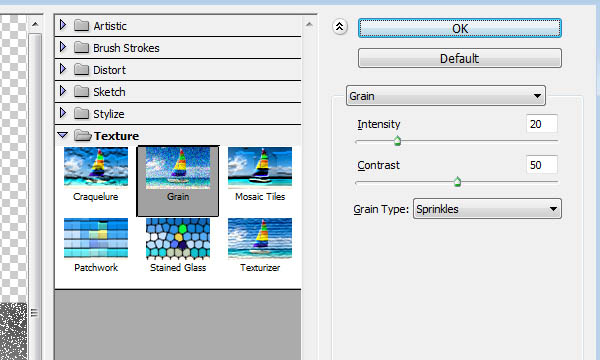
This will create a simple noise texture.

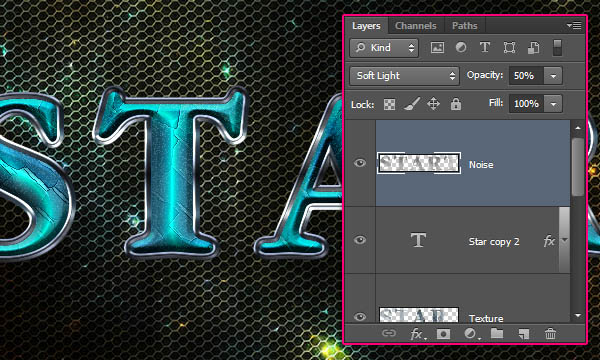
Change the “Noise” layer’s Blend Mode to Soft Light, and its Opacity to 50%.
Step 8
Click the layer at the top, then Shift + click the original text layer to select all the layers except for the Background layers, then go to Layer -> Group Layers.
Duplicate the group, make the original invisible by clicking the eye icon next to it, then select the copy and go to Layer -> Merge Group. This will rasterize the group layers into one layer.

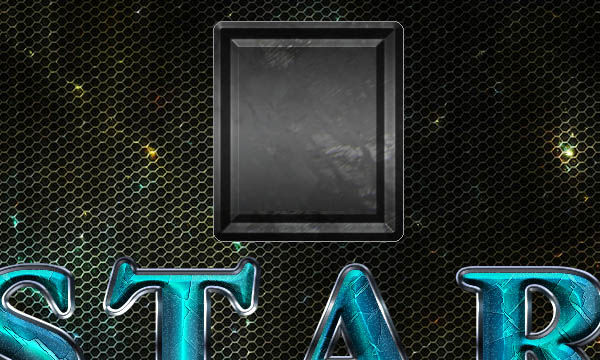
Pick the Rounded Rectangle Tool, choose the Shape option in the Options bar, and set the Radius to 10. Then click and drag to create a rounded rectangle that is big enough to place a letter inside it. Drag the shape layer right below the rasterized group layer.
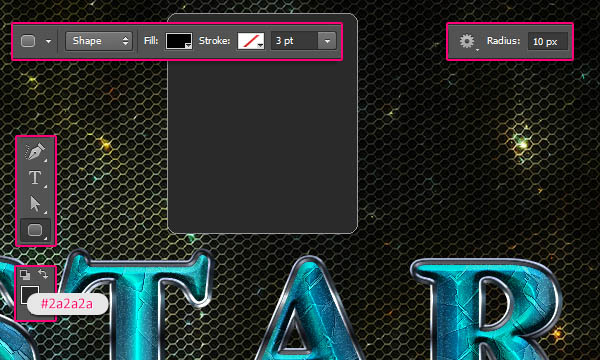
Double click the shape layer to apply the following Layer Style:
– Bevel and Emboss: Change the Technique to Chisel Hard, the Size to 25, check the Anti-aliased box, change the Highlight Mode to Vivid Light, and the Shadow Mode Opacity to 65%.
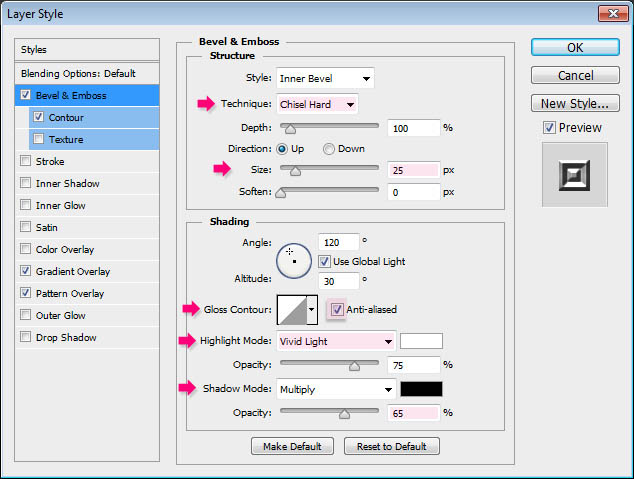
– Contour: Choose the Ring contour, and check the Anti-aliased box.

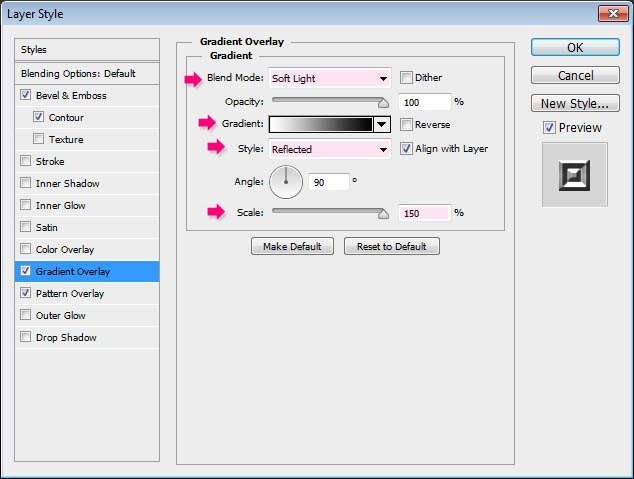
– Gradient Overlay: Change the Blend Mode to Soft Light, choose a White to Black gradient, change the Style to Reflected, and the Scale to 150%.
– Pattern Overlay: Change the Blend Mode to Overlay, and choose the “Brushed Steel Metallic Texture” Pattern. You can click and drag the texture around inside the tile if you want to change its position as well.
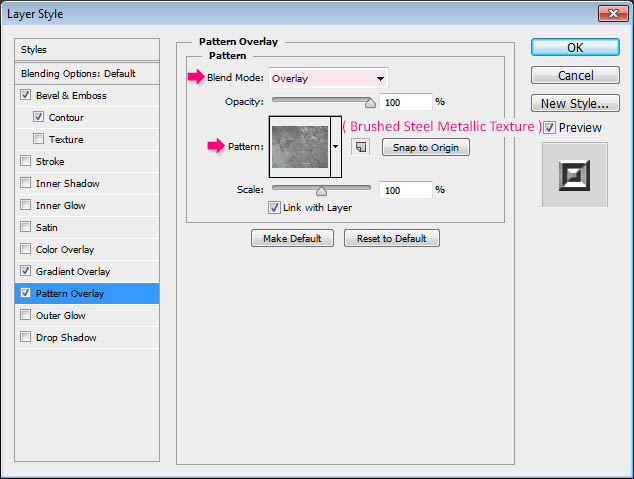
This is what you should get.
Step 9
Duplicate the rectangle so that you have one for each letter you created.
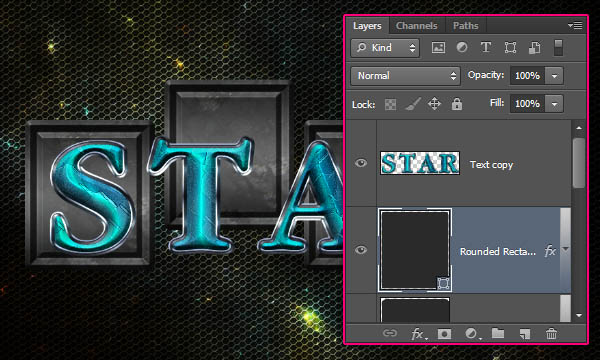
Double click the rasterized group’s layer to apply a simple Drop Shadow effect by changing the Distance to 16 and the Size to 10.
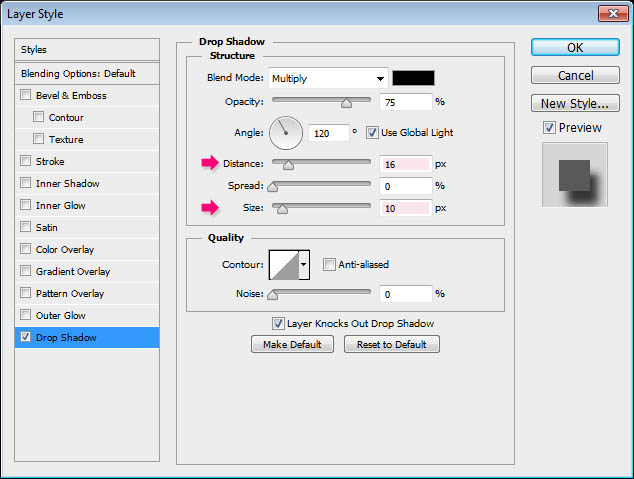
This will add shadow to the text. The reason why it wasn’t added earlier is because it would’ve been rasterized, which will make it a solid color instead of a color that interacts with the Background elements through the Multiply Blend Mode.

Step 10
Pick the Polygonal Lasso Tool, then select the first letter you have. Click once to add a point, then release and drag the mouse to move, click to add another point, and so on, until you arrive back at the start point to close the selection.
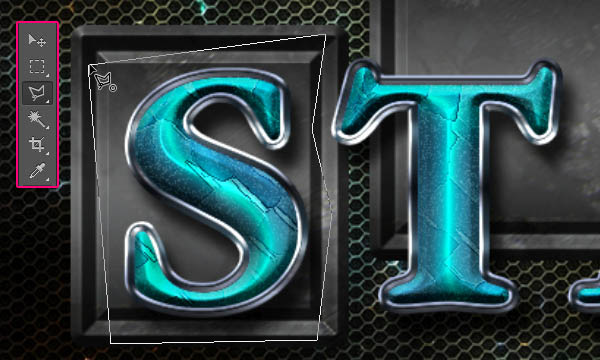
Press the Ctrl/Cmd + J keys to duplicate the selected letter, with its shadow, in a separate layer.
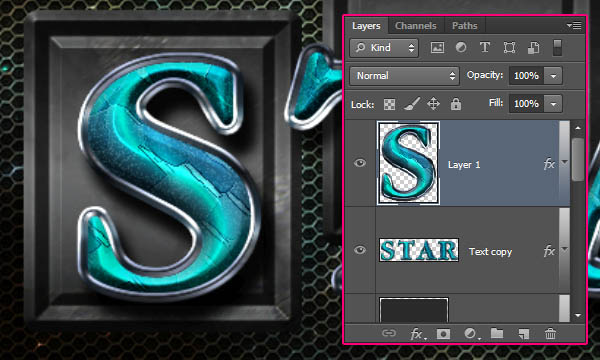
Select the rasterized layer once again, and repeat the steps until you extract all the letters. When you’re done, make the rasterized layer invisible.
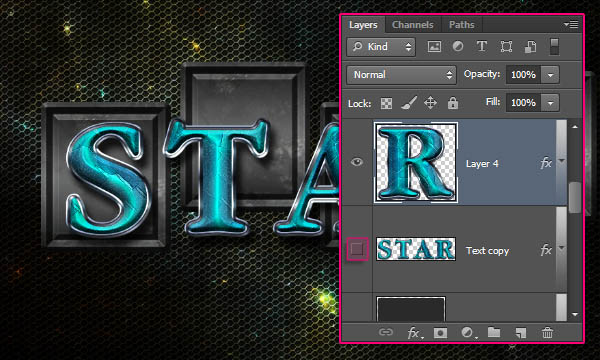
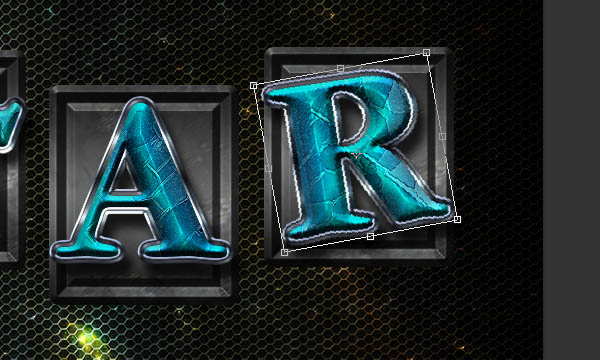
Next, you will have to arrange the rectangles and the letters in the document. And you can go to Edit -> Free Transform to rotate the letters and/or the rectangles if you like. Don’t forget to hit the Enter/Return key to accept the changes you make in the Free Transform Mode.
Step 11
Create a new layer on top of all layers and call it “Glow”, then change its Blend Mode to Linear Light. Set the Foreground color to #6dcff6, pick the Brush Tool, and choose a soft round 35 px brush.
Start adding glow dots on the outer stroke of the letters.
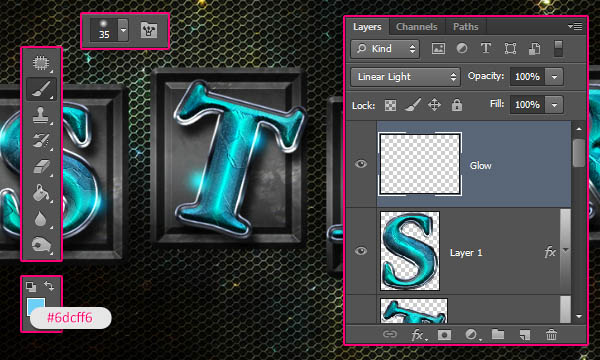
Once you’re done, go to Filter -> Distort -> Ripple. Set the Amount to 100 and the Size to Large.
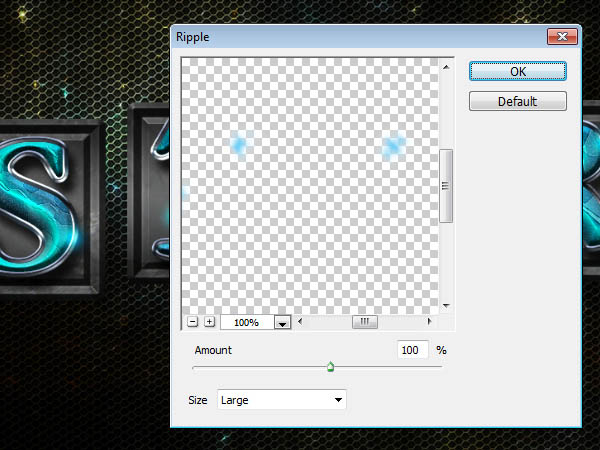
This will add a nice touch to the glow dots.

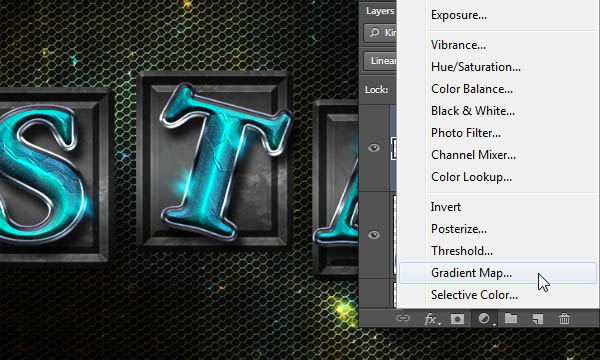
Finally, click the ‘Create new fill or adjustment’ layer icon down the Layers panel, and choose Gradient Map.
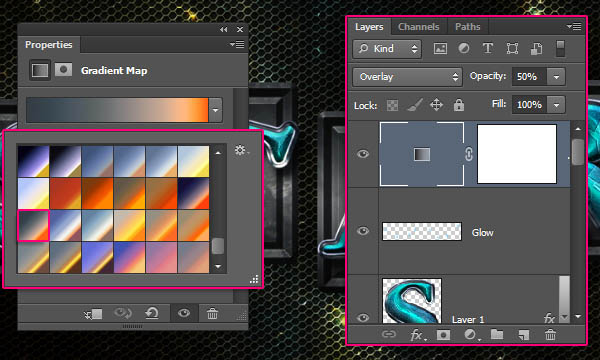
Choose the gradient shown below from the “CSP True Sky Gradients.grd” file in the gradients pack. Then, change the adjustment layer’s Blend Mode to Overlay and its Opacity to 50%. This will enhance the coloring of the final result.
And We’re Done!
Hope you enjoyed the tutorial and found it useful. Please feel free to leave your comments below.