This tutorial will demonstrate an easy way to create an outline-sketch Photoshop text effect using simple layer styles, a brush, and a blur filter.
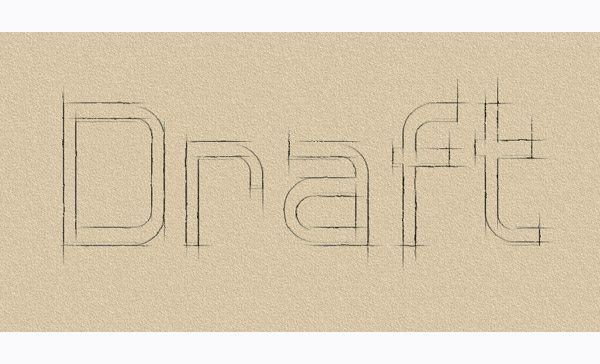
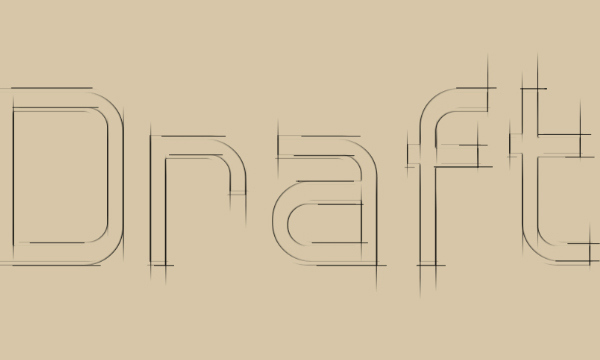
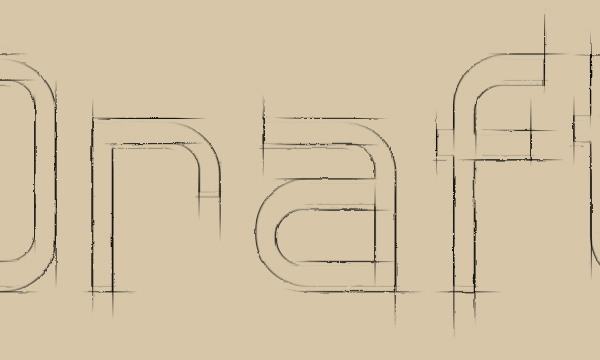
Final Image
As always, this is the final image that we’ll be creating:

Tutorial Details
- Program: Adobe Photoshop CS6 (CS3+ versions will work as well)
- Estimated Completion Time: 30 minutes
- Difficulty: Beginner
Resources
- Hall Fetica font.
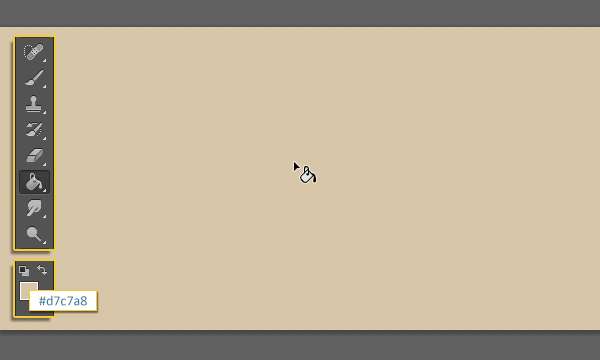
Step 1
Create a new 1000 x 500 px document with all the default settings, then fill it with color #d7c7a8.
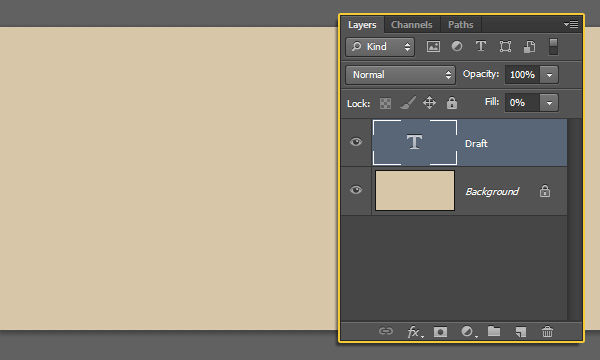
Create the text in Black using the font “Hall Fetica” and the font Size 350 px.
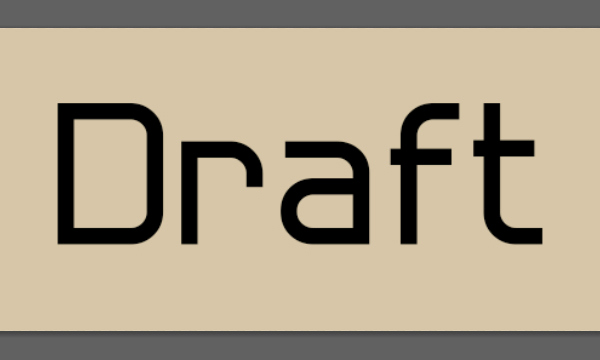
Change the text layer’s Fill value to 0.
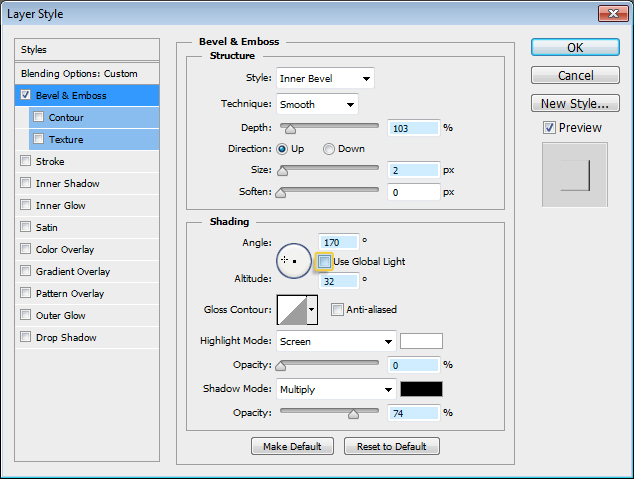
Step 2
Double click the text layer to apply a Bevel and Emboss effect. Change the Depth to 103, the Size to 2, un-check the Use Global Lights box, change the Angle to 170 and the Altitude to 32, then change the Highlight Mode Opacity to 0 and the Shadow Mode Opacity to 74.
This is how the text should look like.

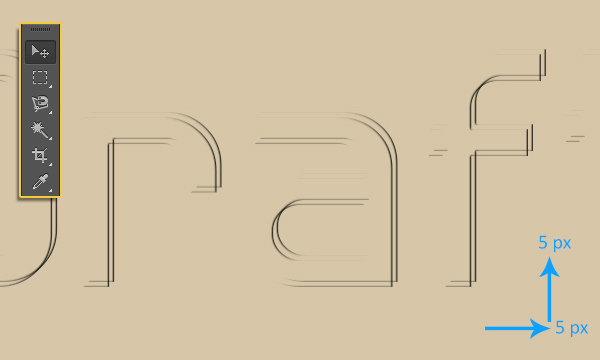
Step 3
Duplicate the text layer.

Select the Move Tool, then move the duplicated text 5 px to the left and 5 px upwards, by clicking the Left Arrow Key (on the keyboard) 5 times, then clicking the Up Arrow Key 5 times as well.
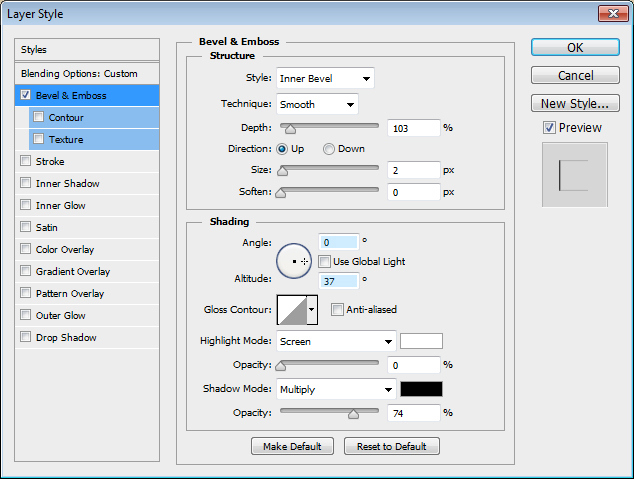
Step 4
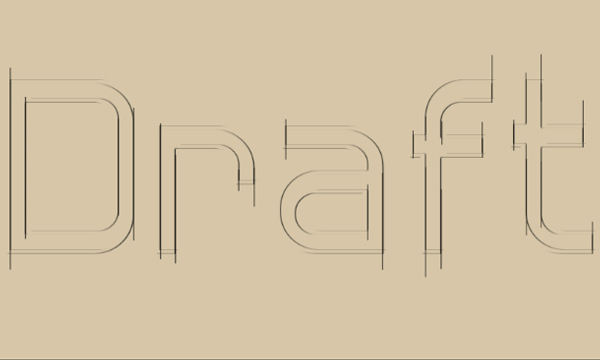
Double click the copy text layer to adjust the Bevel and Emboss values, by changing the Angle to 0, and the Altitude to 37.
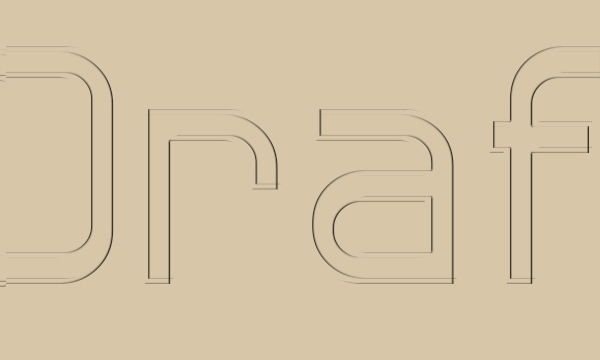
This is what you should get.
Step 5
Now pick the Brush Tool, choose a hard round 1px brush tip, set the Foreground color to Black, and create a new layer on top of all layers then call it “Vertical”.
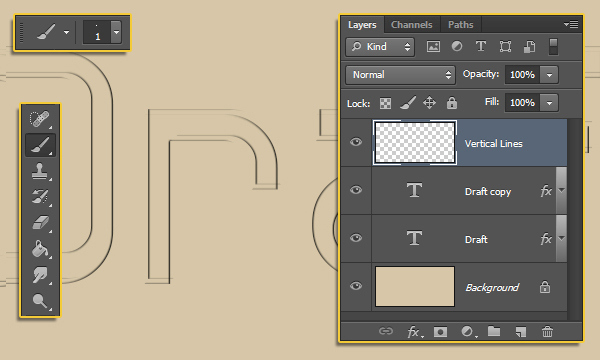
Next, you’ll need to draw vertical lines over the vertical edges of the text. To create straight lines, click and hold the mouse button, press and hold the Shift key, then drag the brush. When done, release all, then repeat to create the other lines.
You can also use the Line Tool for that, but you’ll need to merge and rasterize all the line layers when done.
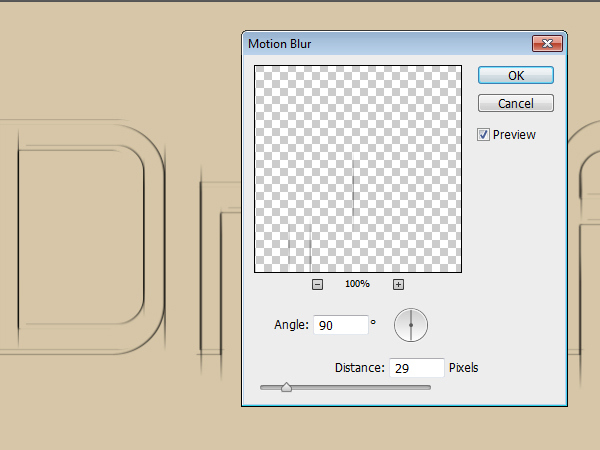
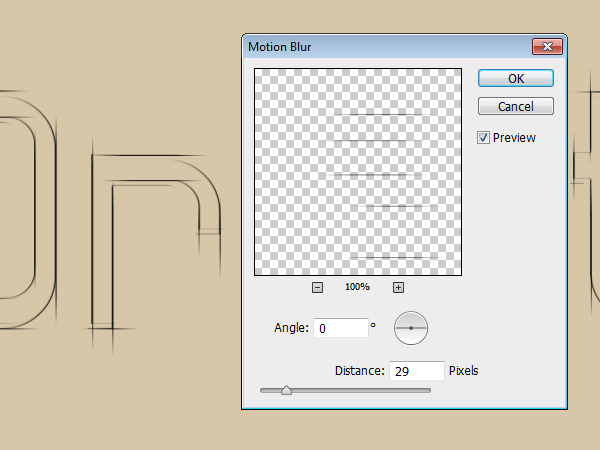
After adding all the vertical lines you want, go to Filter -> Blur -> Motion Blur. Change the Angle to 90 and the Distance to 29. This will make the lines fade vertically.
Step 6
Create a new layer on top of all layers and call it “Horizontal Lines”.
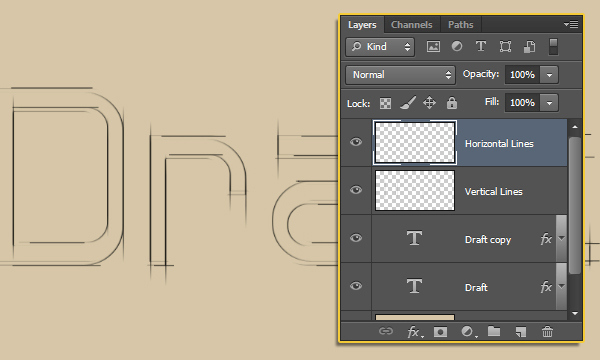
Create horizontal lines over the horizontal edges of the text.
Go to Filter -> Blur -> Motion Blur. Change the Angle to 0 and the Distance to 29. This will make the lines fade horizontally.
Step 7
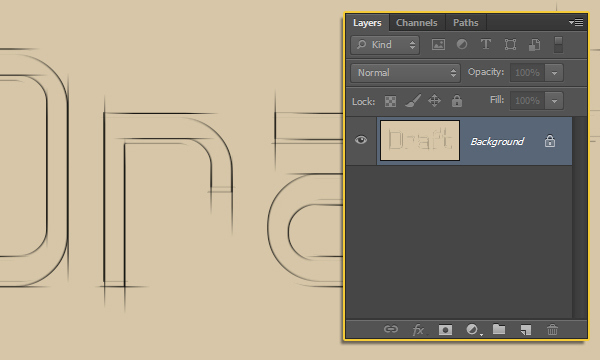
Select all layers (click the one at the top, then Shift + click the Background layer), and go to Layer -> Merge Layers.
Go to Filter -> (Filter Gallery) -> Brush Strokes -> Spatter. Change the Spray Radius to 4 and the Smoothness to 15.
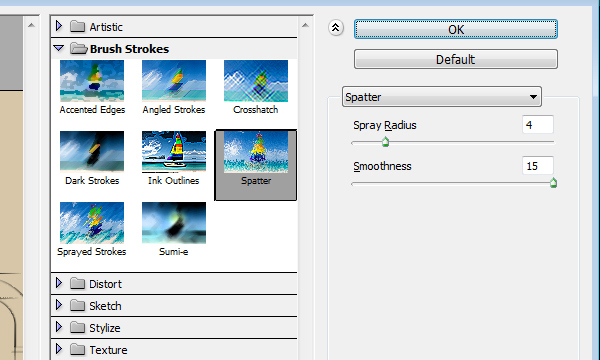
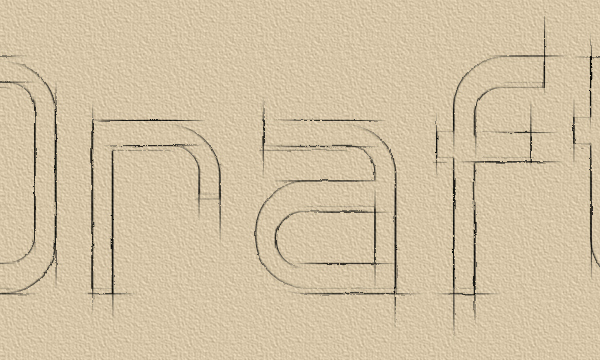
This will make the sketch effect more messy and realistic.
Go to Filter -> (Filter Gallery) -> Texture -> Texturizer. Choose Sandstone, set the Scaling to 67, the Relief to 3, and the Light to Top Right.
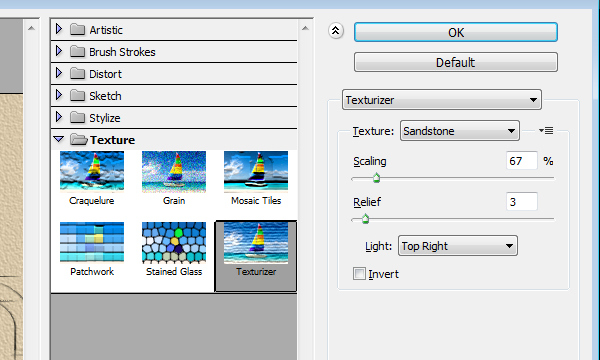
This will add a paper-like texture.
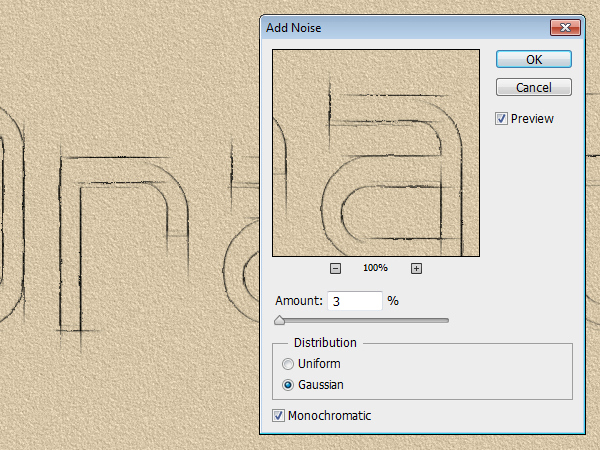
Finally, go to Filter -> Noise -> Add Noise. Change the Amount to 3, select the Gaussian button, and check the Monochromatic box.
And We’re Done!
Hope you enjoyed the tutorial and found it helpful.