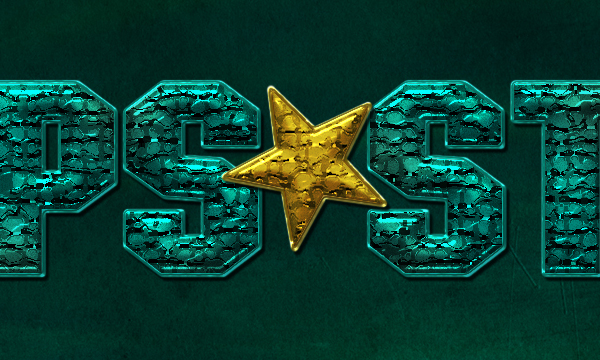
This Photoshop tutorial will explain how to create a beautiful frosted-rolled glass inspired text effect, using Photoshop Filters and Layer Styles.
Final Image Preview
Resources
- fire texture 02 by Fire-Love-Account.
- Weathered Texture by greyghostXXX.
- Atrox font
Step 1
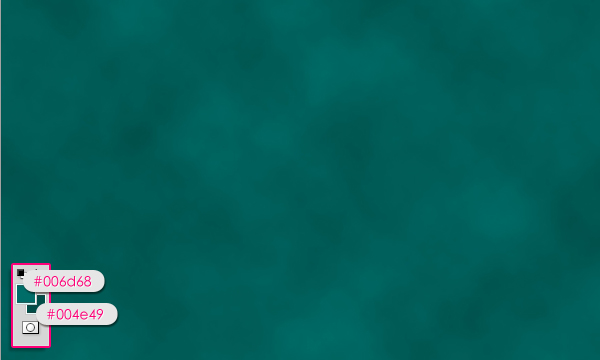
Create a new document, 1152×864 pixels, set the Foreground color to #006d68, and the Background color to #004e49, then, go to Filter -> Render -> Clouds.
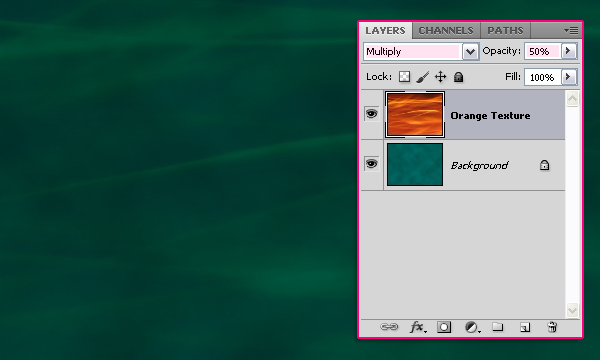
Place the “fire texture 02” on top of the Background layer, and change its layer’s Blend Mode to Multiply, and its Opacity to 50%.
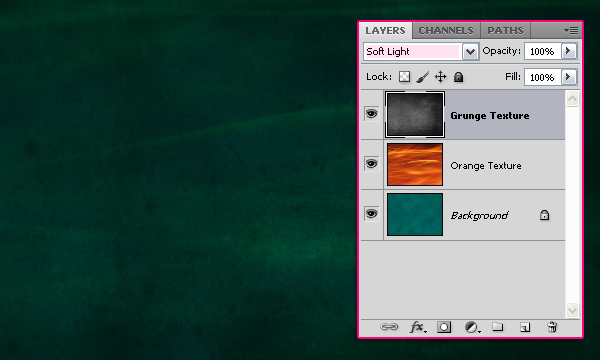
Place the “Weathered Texture” on top of both layers and change its layer’s Blend Mode to Soft Light.
Step 2
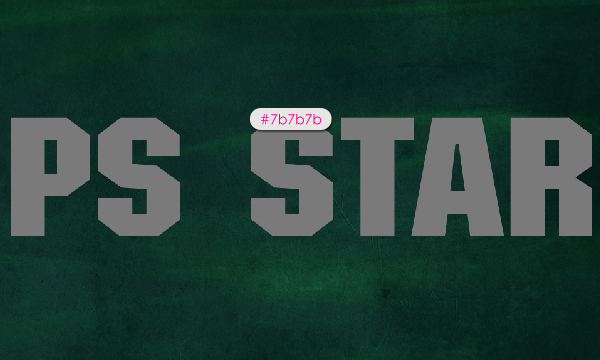
Create the text using the color #7b7b7b. The font used is “Atrox”, and the Size is 330 pt.
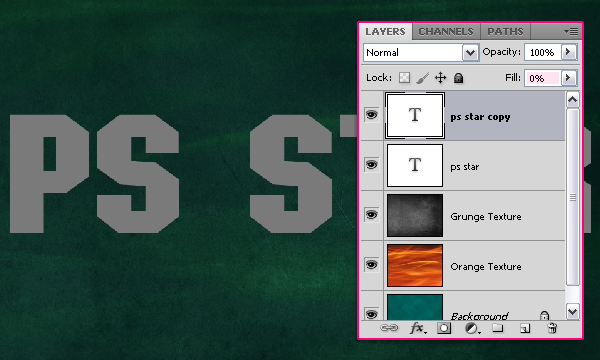
Duplicate the text layer, and change the copy’s Fill value to 0%.
Step 3
Double click the original text layer to apply the following Layer Style.
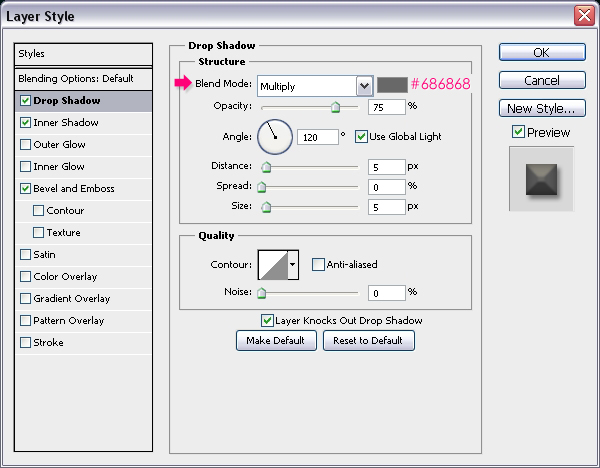
– Drop Shadow: Just change the color to #686868.
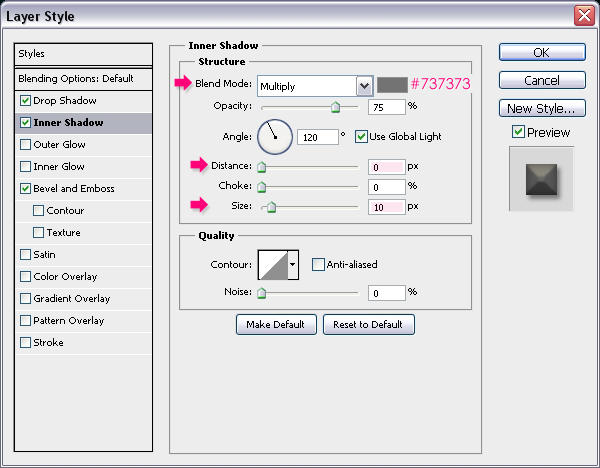
– Inner Shadow: Change the color to #737373, the Distance to 0 and the Size to 10.
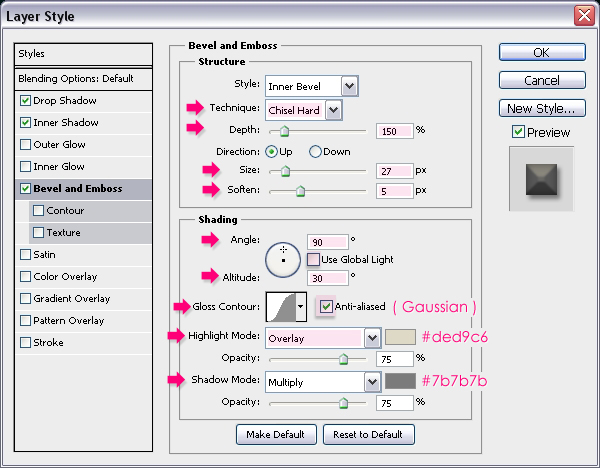
– Bevel and Emboss: Change the Technique to Chisel Hard, the Depth to 150, the Size to 27, and the Soften value to 5. Un-check the Use Global Light box, then, change the Angle to 90, the Altitude to 30, the Gloss Contour to Gaussian, and check the Anti-aliased box. Also, change the Highlight Mode to Overlay, its color to #ded96c, and the Shadow Mode’s color to #7b7b7b.
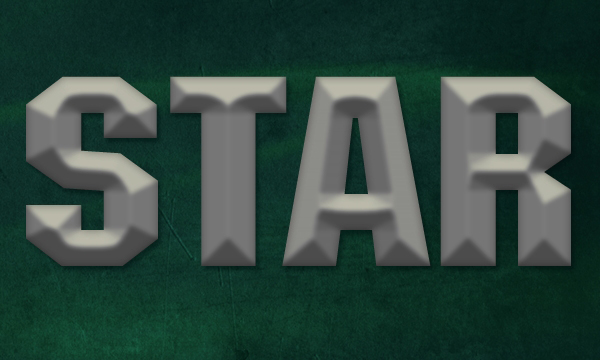
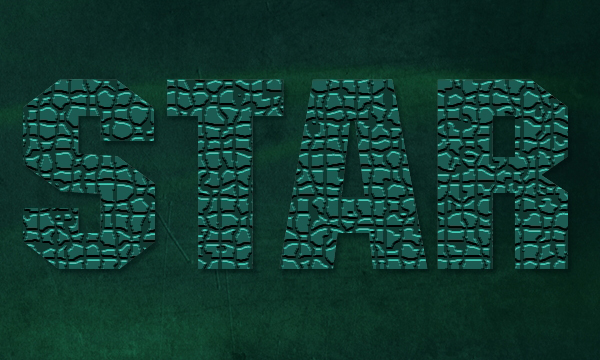
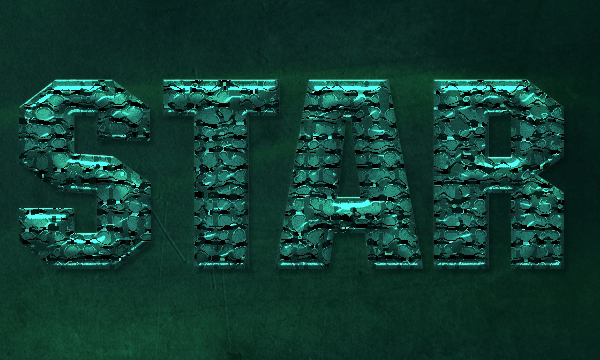
This is what you should get after applying the style above:
Step 4
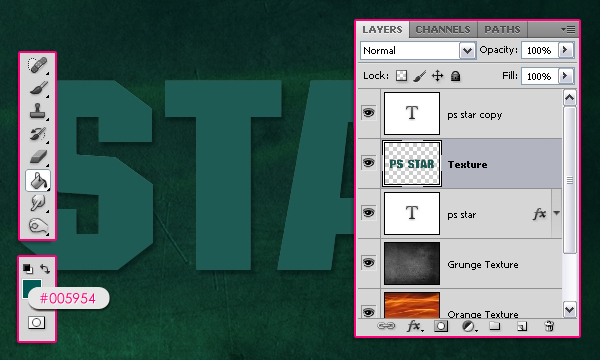
Press the Ctrl/Cmd key, and click a text layer’s thumbnail (icon) to create a selection.

Create a new layer between the two text layers and call it “Texture”. Fill the selection with the color #005954. Then go to Select -> Deselect (or press Ctrl/Cmd + D) to get rid of the selection.
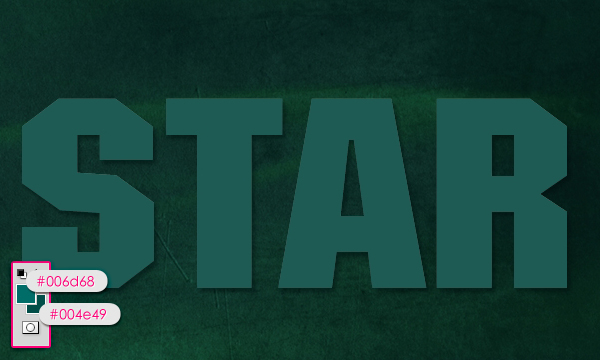
Set the Foreground color to #006d68 and the Background color to #004e49.
Step 5
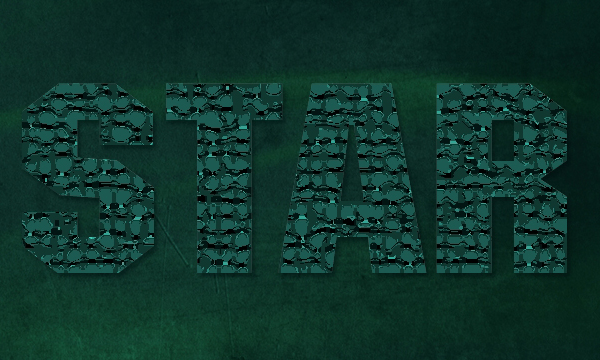
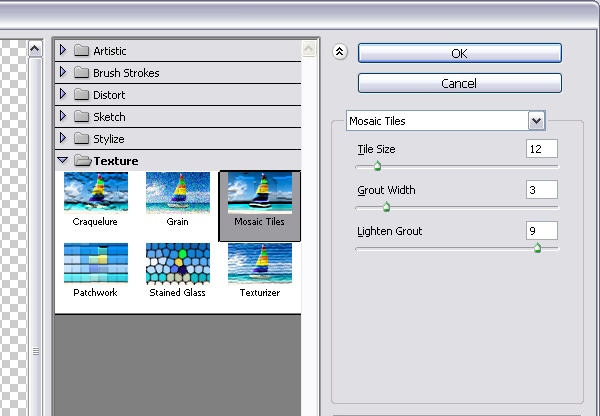
It’s time to apply the Filters to create the texture, so change the values as shown in the images below for each filter. Start by going to Filter- > Texture -> Mosaic Tiles:

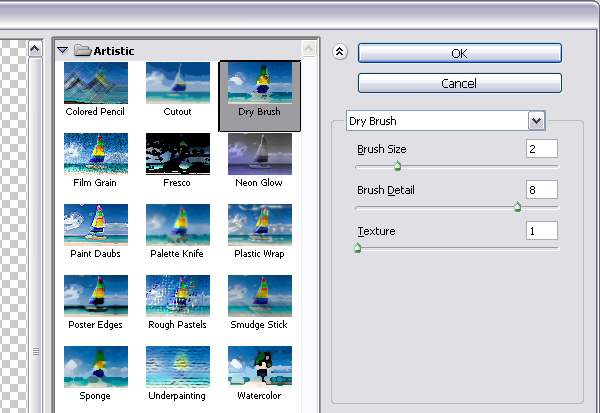
Next, go to Filter -> Artistic -> Dry Brush:
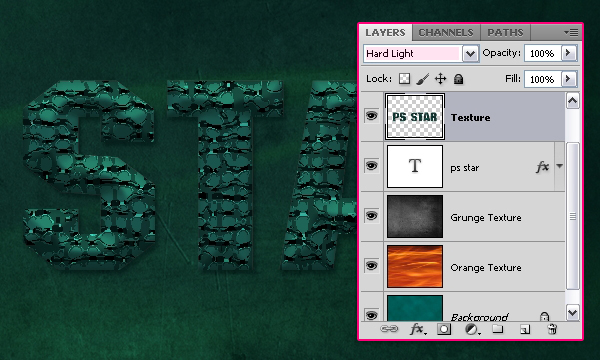
Now, change the “Texture” layer’s Blend Mode to Hard Light.
Step 6
Double click the copy (top) text layer to apply the following Layer Style.
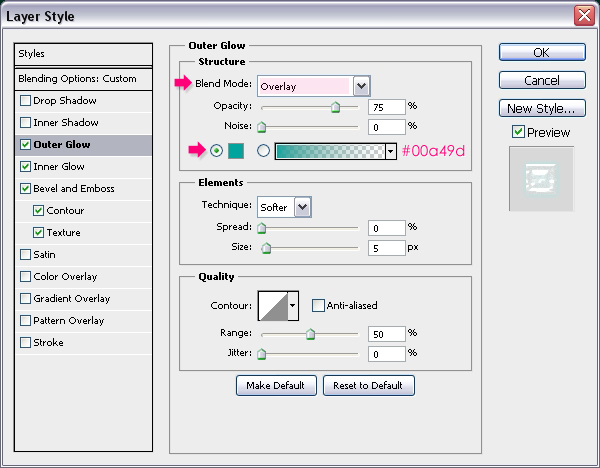
– Outer Glow: change the Blend Mode to Overlay, and the color to #00a49d.
– Inner Glow: Change the Blend Mode to Overlay, the Opacity to 50%, the Noise to 50% as well, the color to 8df4f2, the Technique to Precise, the Source to Center, and the Size to 20.

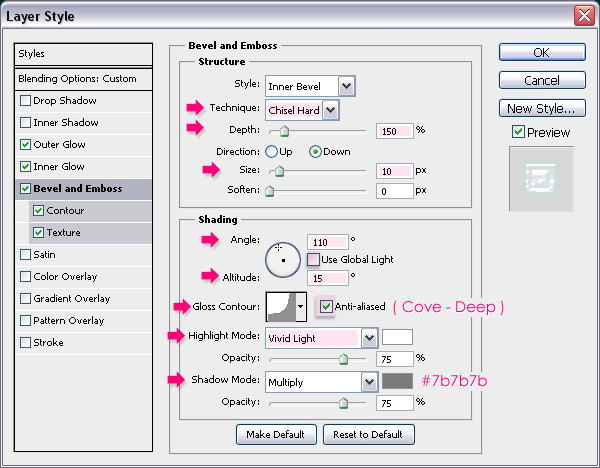
– Bevel and Emboss: Change the Technique to Chisel Hard, the Depth to 150, and the Size to 10. Un-check the Use Global Light box, then, change the Angle to 110, the Altitude to 15, the Gloss Contour to Cove – Deep, and check the Anti-aliased box. Also, change the Highlight Mode to Vivid Light, and the Shadow Mode’s color to #7b7b7b.
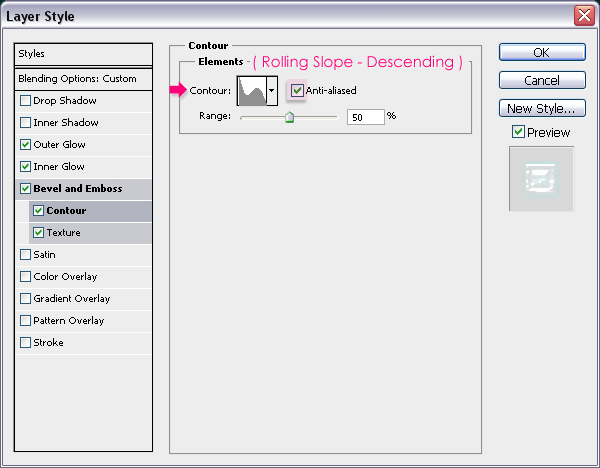
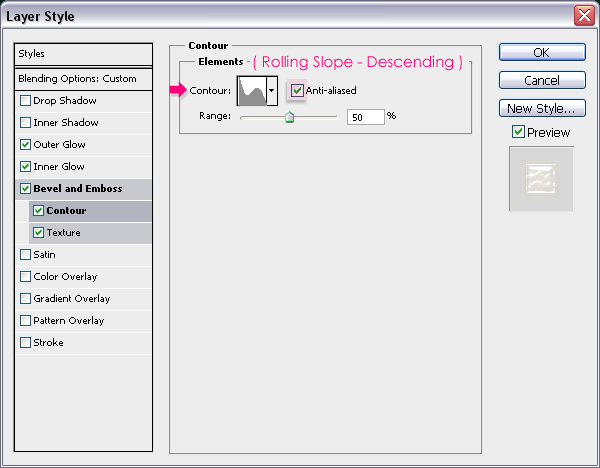
– Contour: Choose the Rolling Slope – Descending contour, and check the Anti-aliased box.
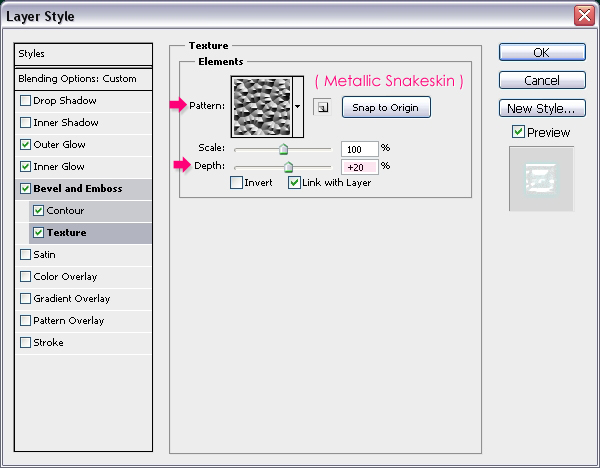
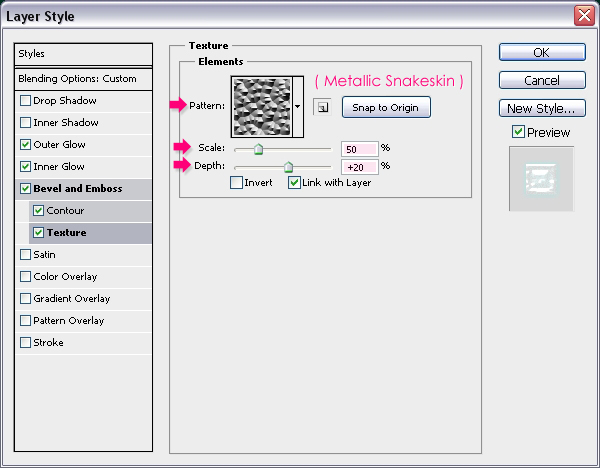
– Texture: choose the Metallic Snakeskin Pattern, and change the Depth to 20.
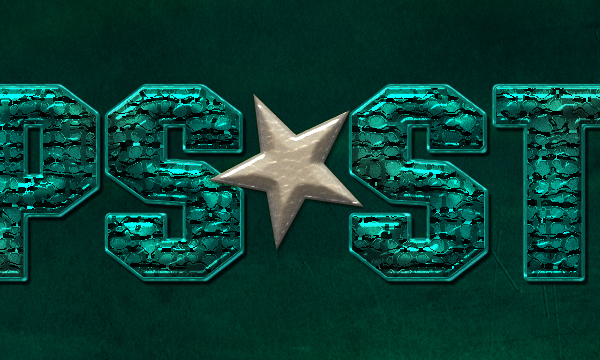
This will add a nice glossy effect to the text.
Step 7
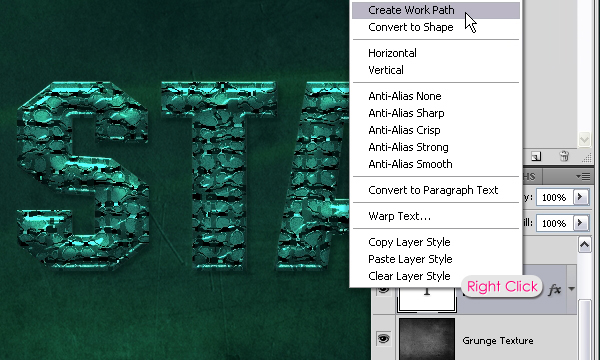
Right-click a text layer and choose Create Work Path.
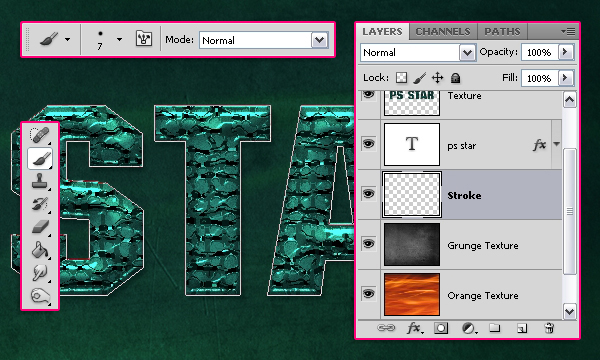
Create a new layer right below the original text layer and call it “Stroke”, then choose a hard round 7 px brush.
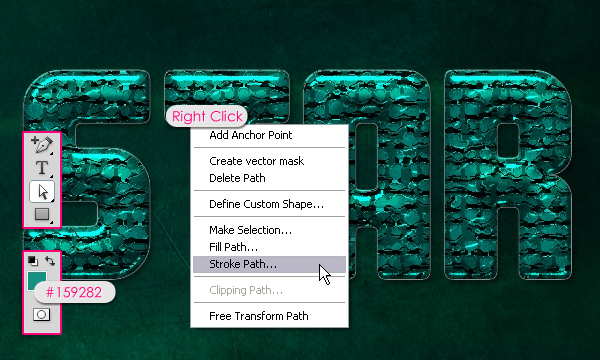
Set the Foreground color to #159282. Then, pick the Direct Selection Tool, right click the path you’ve just created, and choose Stroke Path.
Choose Brush from the Tool drop down menu, and make sure that the Simulate Pressure box is unchecked.
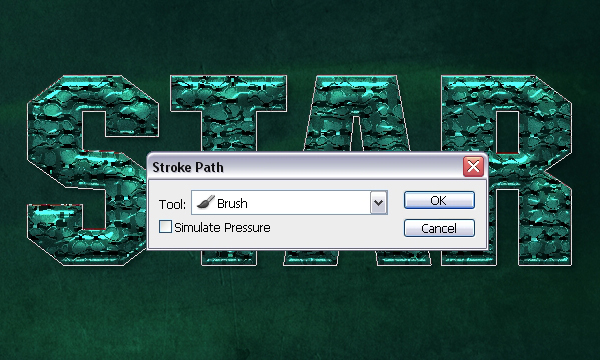
Hit Enter/Return to get rid of the path.
Step 8
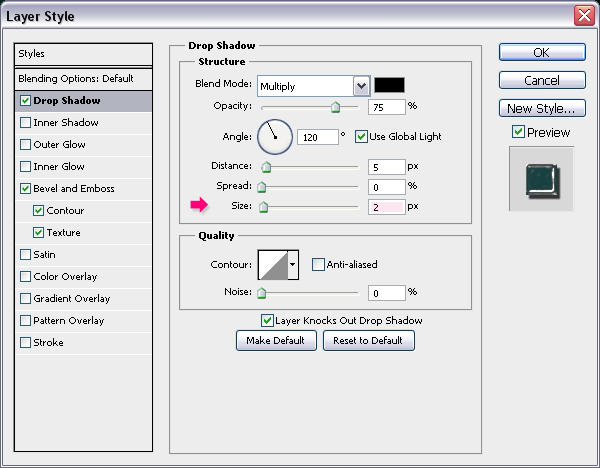
Double click the “Stroke” layer to apply the following Layer Style:
– Drop Shadow: Just change the Size to 2.
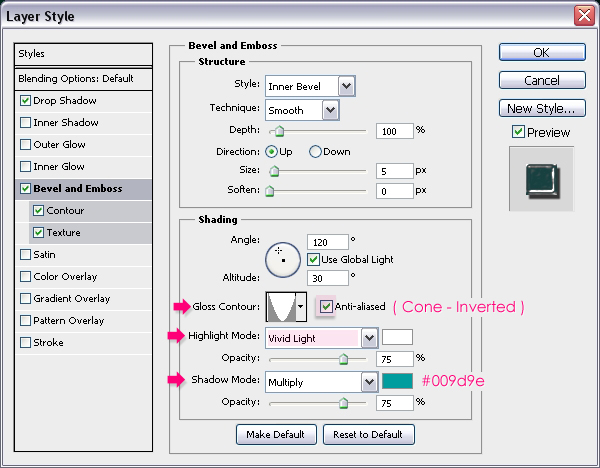
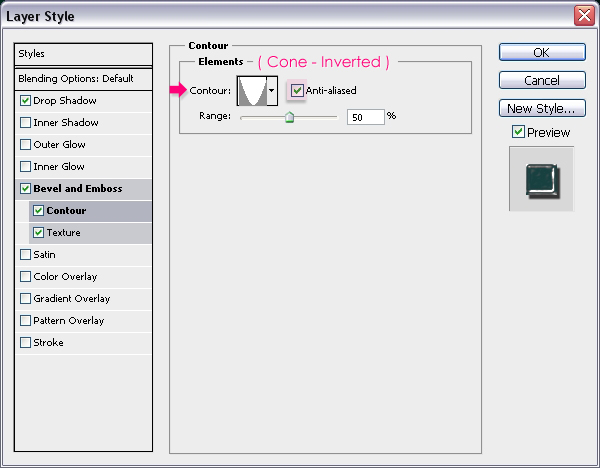
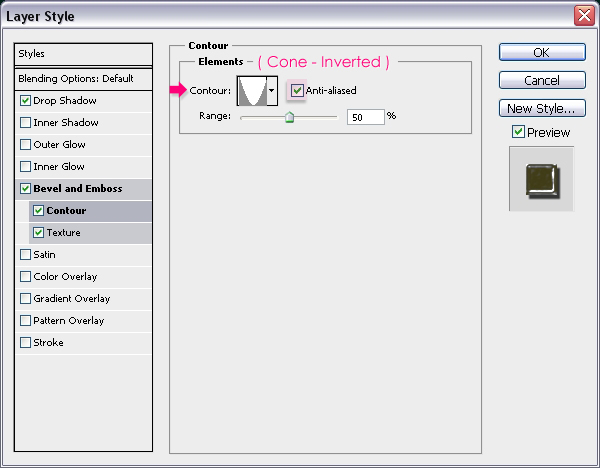
– Bevel and Emboss: Change the Gloss Contour to Cone – Inverted and check the Anti-aliased box. Also, change the Highlight Mode to Vivid Light, and the Shadow Mode’s color to #009d9e.
– Contour: Choose the Cone – Inverted contour and check the Anti-aliased box as well.
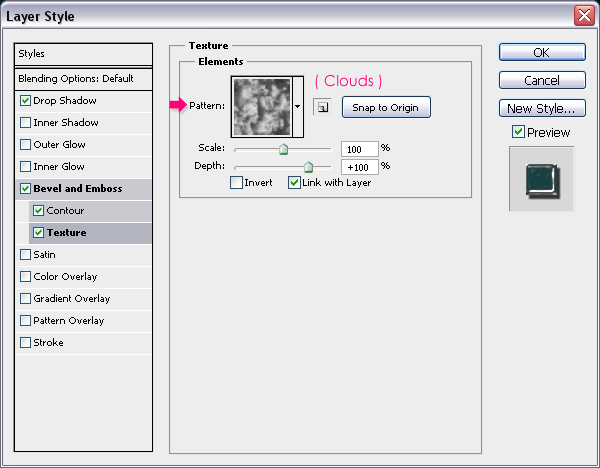
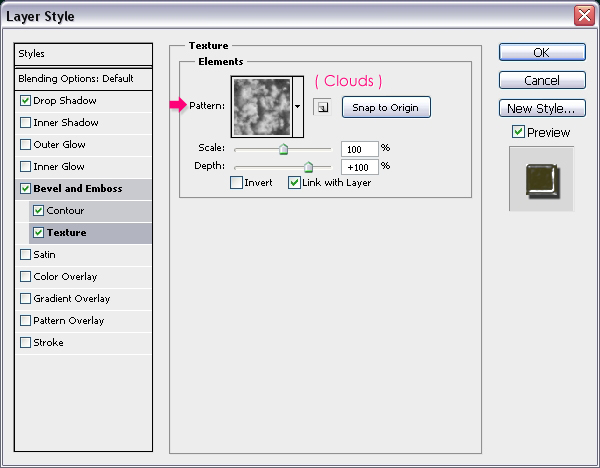
– Texture: Just choose the Clouds Pattern.
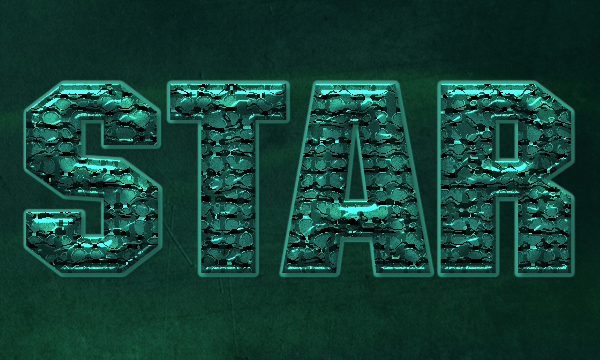
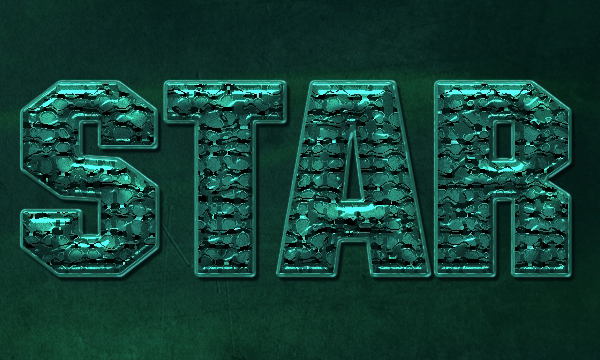
This is what you should get.
Step 9
Ctrl/Cmd + Click a text layer’s thumbnail once again to create a selection, then press Delete to get rid of the inner part of the stroke. .
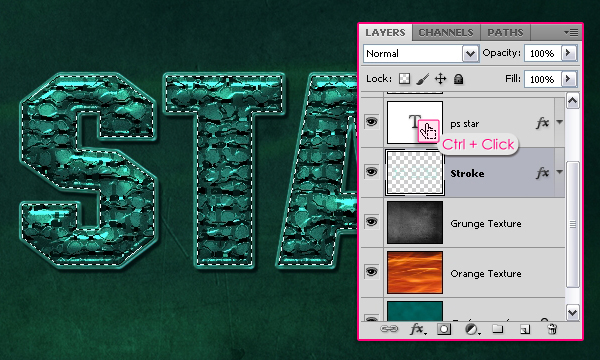
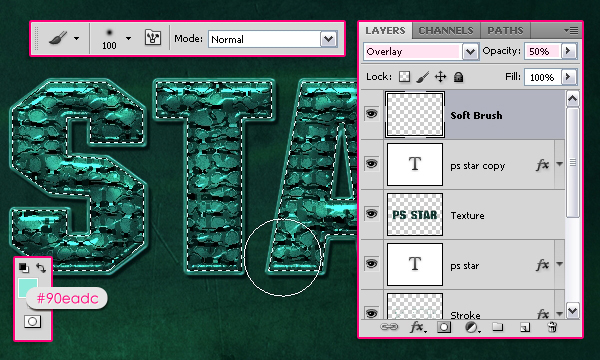
With the text selection still active, create a new layer on top of all layers and call it “Soft Brush”, then change its Blend Mode to Overlay and its Opacity to 50%. Set the Foreground color to #90eadc, and use a soft round brush, with a quite big size (around 100 px) to add some bright dots over some parts of the text. Try not to add too much dots as this will ruin the original effect.
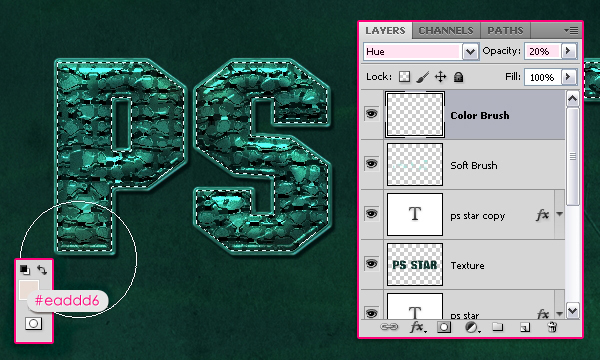
Create another new layer on top of all layers and call it “Color Brush”, then change its Blend Mode to Hue and its Opacity to 20%. Set the Foreground color to #eaddd6, and use a little bit bigger soft round brush (around 150 px) to add some color dots. The color is very subtle, but it adds nice depth to the effect. Try not to overdo it as well.
Step 10
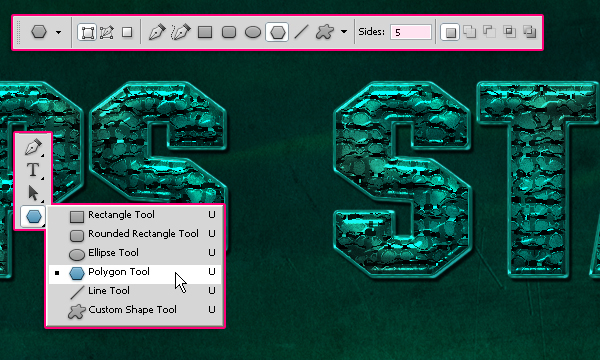
Next, we are going to apply the same effect using different colors to a star shape. So pick the Polygon Tool, and make sure that the “Shape Layers” icon in the Options bar is clicked, then enter 5 in the “Sides” box.
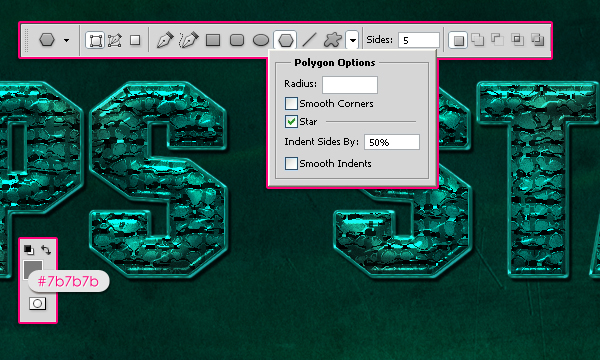
Also in the Options bar, under the Polygon Options, check the Star box and set the “Indent Sides By:” value to 50%. Then, set the Foreground color to #7b7b7b.
Create the star shape wherever you want to, then duplicate the shape layer and set the copy’s Fill value to 0%.
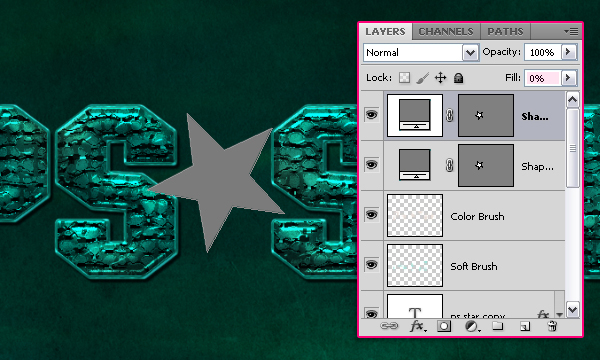
Step 11
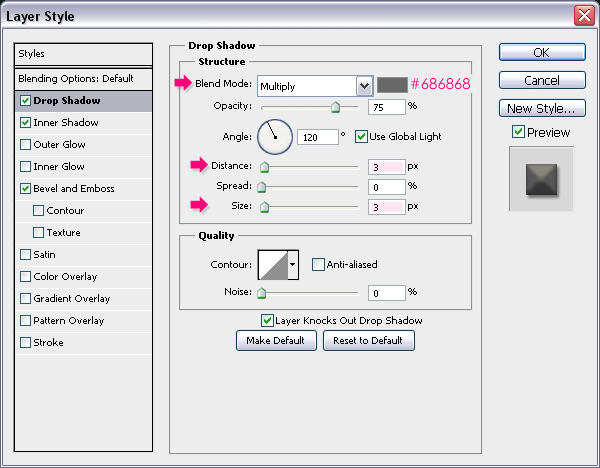
Double click the original shape layer to apply the following Layer Style:
– Drop Shadow: Change the color to #686868, the Distance to 3, and the Size to 3 as well.
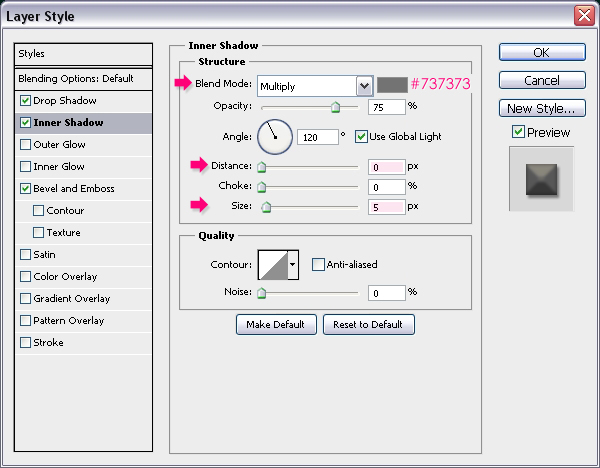
– Inner Shadow: Change the color to #737373, the Distance to 0 and the Size to 5.
– Bevel and Emboss: Change the Technique to Chisel Hard, the Depth to 150, the Size to 14, and the Soften value to 3. Un-check the Use Global Light box, then, change the Angle to 90, the Altitude to 30, the Gloss Contour to Gaussian, and check the Anti-aliased box. Also, change the Highlight Mode to Overlay, its color to #ded96c, and the Shadow Mode’s color to #7b7b7b.
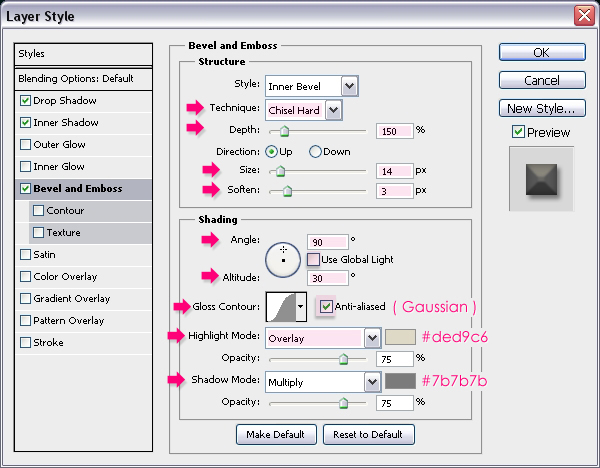
This is almost the same Layer Style applied to the original text layer, but using different size values to suit the shape used. So you can modify the values depending on the shape you created and its size compared to the text.
Step 12
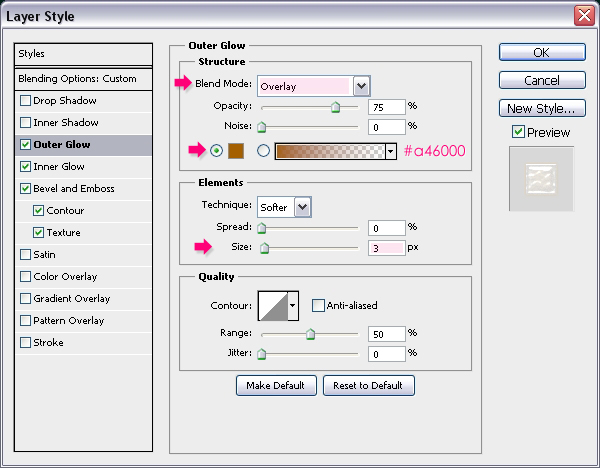
Now double click the copy shape layer to apply the following Layer Style:
– Outer Glow: Change the Blend Mode to Overlay, the color to #a46000, and the Size to 3.
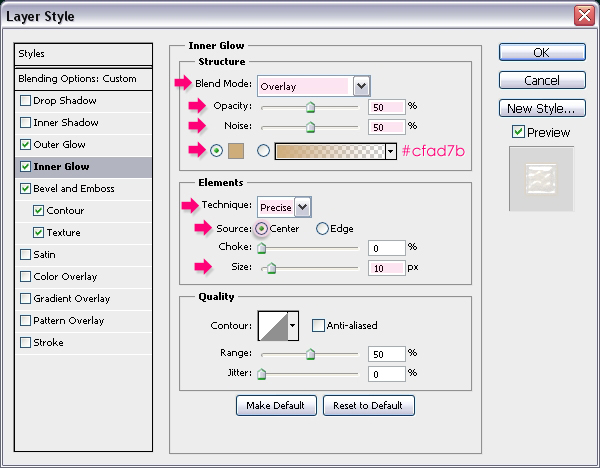
– Inner Glow: Change the Blend Mode to Overlay, the Opacity to 50%, the Noise to 50% as well, the color to #cfad7b, the Technique to Precise, the Source to Center, and the Size to 10.
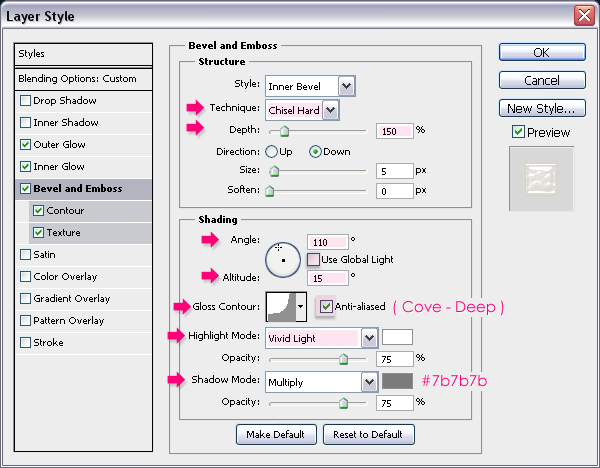
– Bevel and Emboss: Change the Technique to Chisel Hard, and the Depth to 150. Un-check the Use Global Light box, then, change the Angle to 110, the Altitude to 15, the Gloss Contour to Cove – Deep, and check the Anti-aliased box. Also, change the Highlight Mode to Vivid Light, and the Shadow Mode’s color to #7b7b7b.
– Contour: Choose the Rolling Slope – Descending contour, and check the Anti-aliased box.
– Texture: Choose the Metallic Snakeskin Pattern, then change the Scale to 50% and the Depth to 20.
Once again, this is similar to the copy text layer’s Layer Styles, but with different size and color values.
Step 13
Create a new layer on top of the original shape layer, call it “Star Texture”, and change its Blend Mode to Hard Light. Then Ctrl/Cmd + Click the shape’s vector mask thumbnail to create a selection.
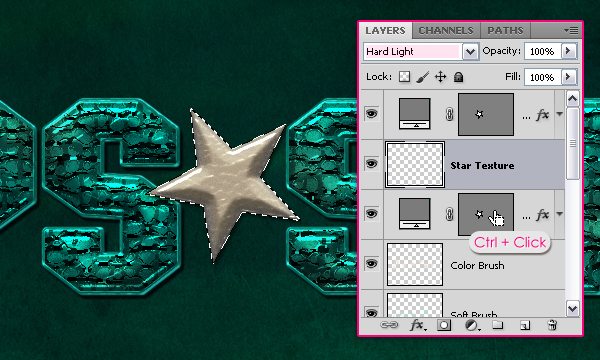
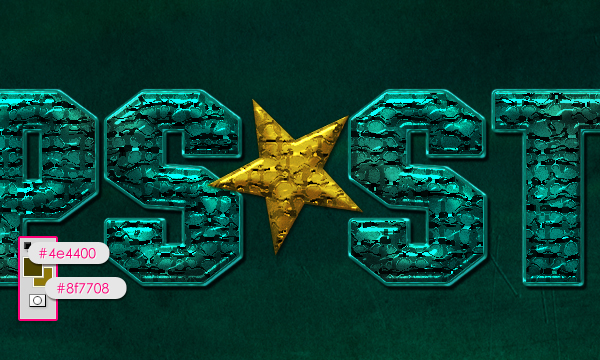
Fill the selection with the color #8f7708, then press Ctrl/Cmd + D to get rid of the selection.
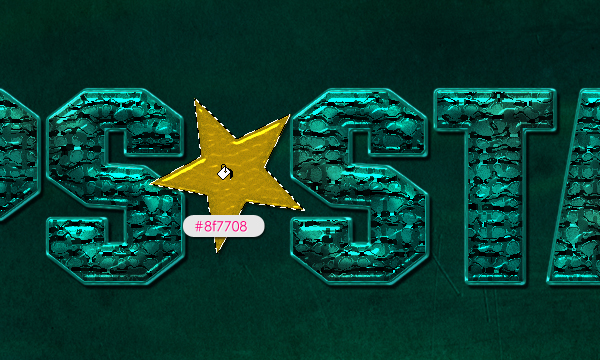
Set the Foreground color to #4e4400 and the Background color to #8f7708. It’s time to apply the Filters to create the texture (like we did in Step 5), so change the values as shown in the images below for each filter. Start by going to Filter- > Texture -> Mosaic Tiles:
Next, go to Filter -> Artistic -> Dry Brush:

Step 14
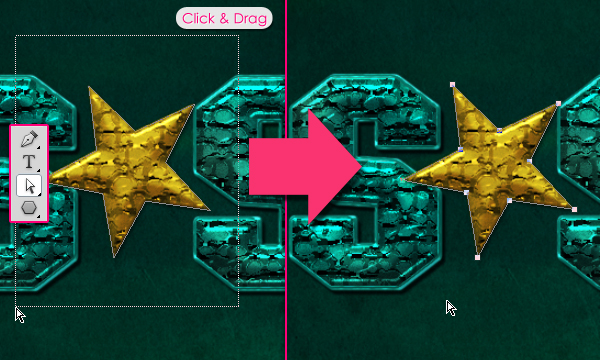
Creating the path to add the stroke is a little bit different as this is a shape. You’ll need to pick the Direct Selection Tool, click the star shape itself, then click and drag around the star shape to select its anchor points. After that, go to Edit -> Copy to copy the path
Create a new layer below the original shape layer and call it “Star Stroke”, then go to Edit -> Paste to paste the path to the new layer.
Set the Foreground color to #958938 and choose a hard round 7 px brush.
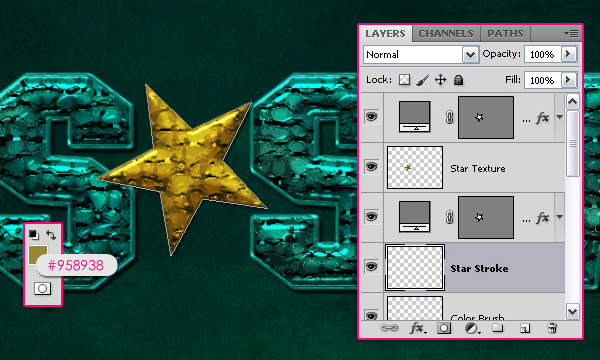
Pick the Direct Selection Tool again, then stroke the path just like you did before. Right-click the path you’ve just created, and choose Stroke Path. Choose Brush from the Tool drop down menu, and make sure that the Simulate Pressure box is unchecked. Hit Enter/Return to get rid of the path.
After that, Ctrl/Cmd + Click the shape layer’s vector mask thumbnail and press Delete to get rid of the inner parts of the Stroke, and press Ctrl/Cmd + D to get rid of the selection.
Step 15
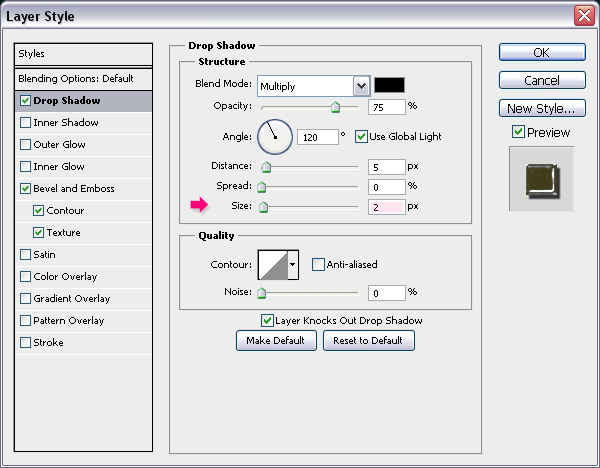
Double click the “Star Stroke” layer to apply the following Layer Style:
– Drop Shadow: Just change the Size to 2.
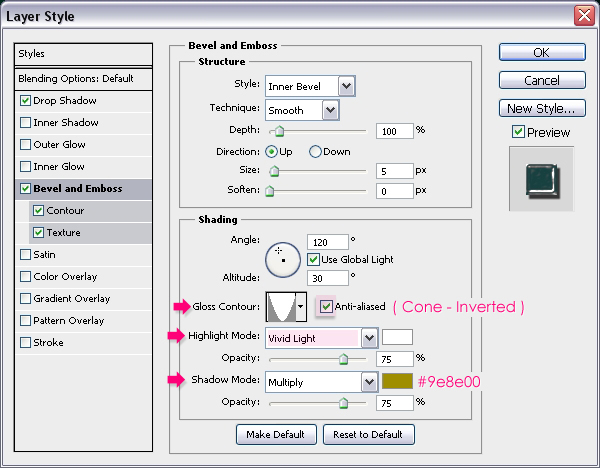
– Bevel and Emboss: Change the Gloss Contour to Cone – Inverted and check the Anti-aliased box. Also, change the Highlight Mode to Vivid Light, and the Shadow Mode’s color to #9e8e00.
– Contour: Choose the Cone – Inverted contour and check the Anti-aliased box as well.
– Texture: Just choose the Clouds Pattern.
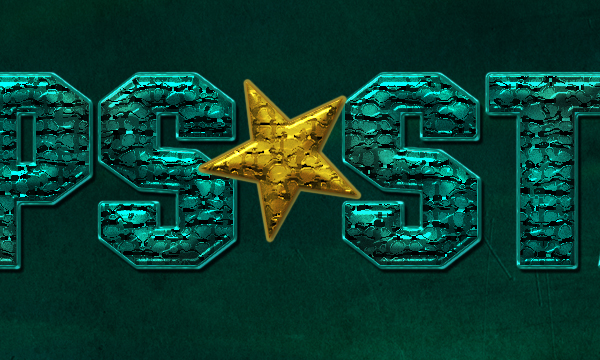
This is what you should get.

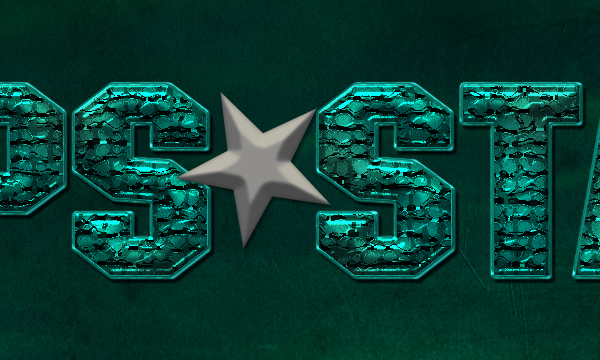
Final Image
And that’s it! You can use other color shades as well if you like, and the effect will look awesome in all colors.
Hope you enjoyed the tutorial and found it useful.