In the following Photoshop tutorial you will learn to create a 3D extrusion from a text layer, apply and modify textures and materials.
Final Image
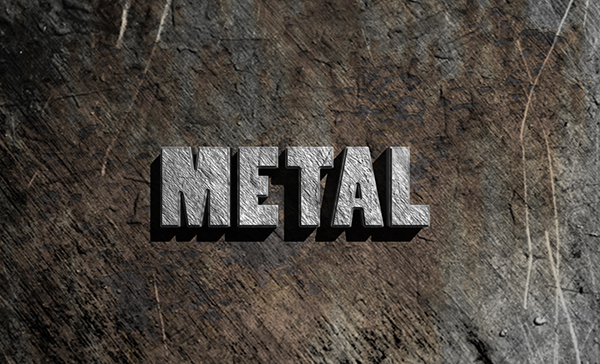
As always, this is the final image that we’ll be creating:

Tutorial Details
- Program: Adobe Photoshop CS6
- Estimated Completion Time: 40 minutes
- Difficulty: Beginner-Intermediate
Resources
Step 1
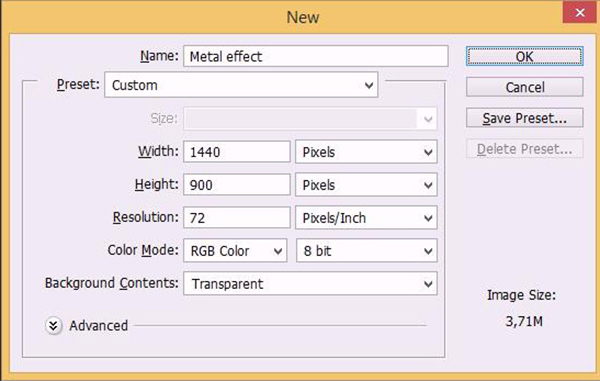
Launch Photoshop and create a New document by pressing (Ctrl + N) keys or go to File > New… Set width to 1440 px, height to 900 px, resolution 72 and name it Metal effect. Press OK.
Step 2
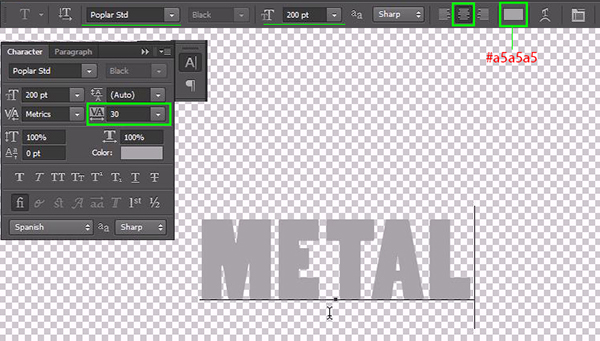
Select the Horizontal Type Tool in the Toolbar or by pressing (T) and set the Font to Poplar Std, Size to 200 pt, select Align Center, set Color to #a5a5a5. Now open the Character panel (Window > Character) and set 30 for the VA values if you want the letters more separated.
Now type METAL, or any other word you like, at the bottom of the stage. Don’t press the Enter key yet.
Step 3
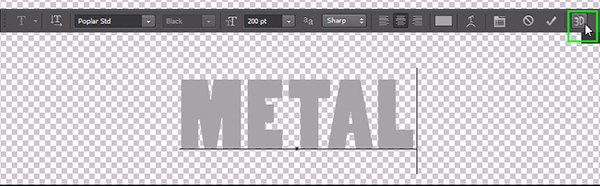
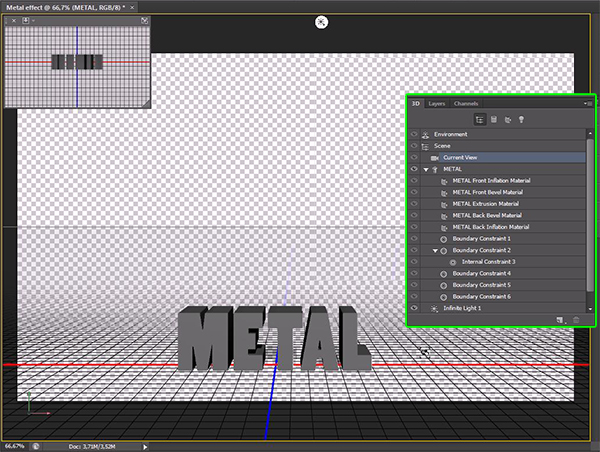
Now let’s create the 3D Extrusion.
To do so, click on the 3D button in the options bar . Also you can do it by right clicking on the text layer in the Layers Panel and selecting the New 3D Extrusion from Selected layer option. This will change automatically to 3D mode and the 3D panel appears next to the layers.
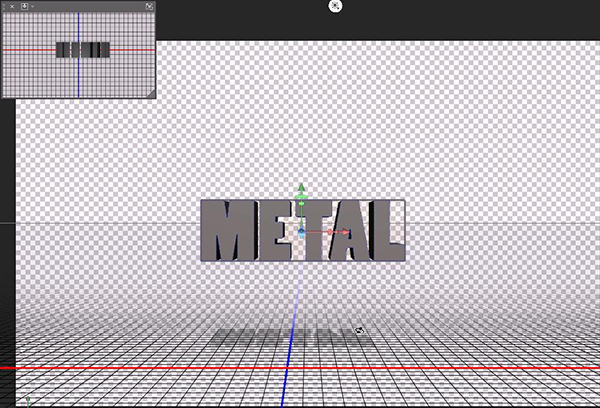
Step 4
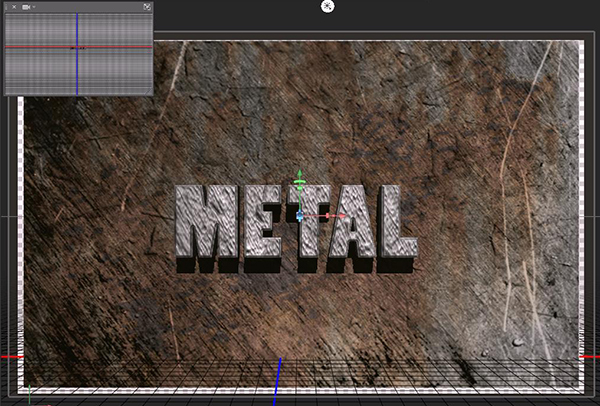
Use the axis controls to move the object to the center of the stage.
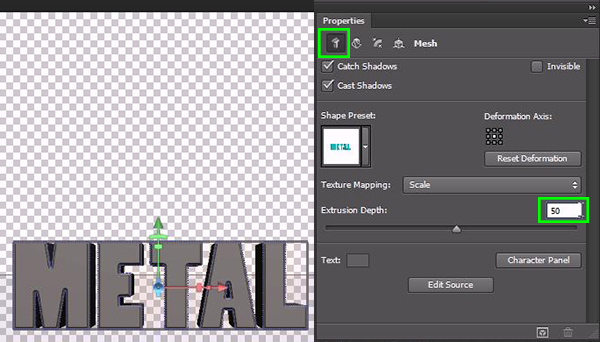
Step 5
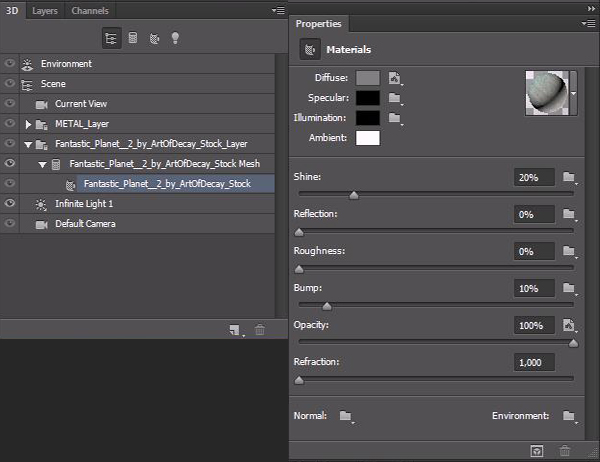
From now on, pay attention to the 3D Panel and Properties Panel. The last one will change showing the properties and parameters of "each" object or material layer you had selected in the 3D panel. With the METAL object selected, in the 3D Panel, go to properties and change the Extrusion Depth to 50.
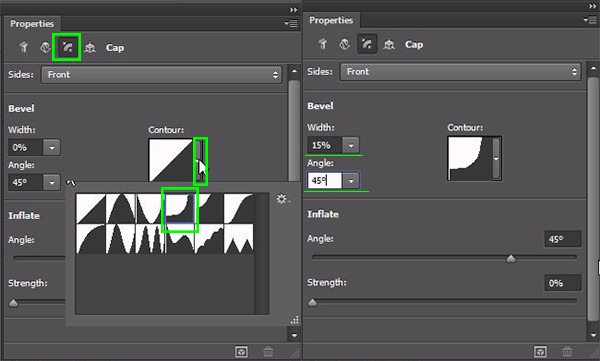
Then click on Cap and change width to 15%, angle to 45% and Contour to Cove – Deep.
Step 6
Now, with "all" the material layers selected, change the colors in the Properties Panel. Set Diffuse color to #7f7d73, Specular to #515151, Illumination to #080808 and Ambient to #000000.

Step 7
Let’s add some texture to the text.
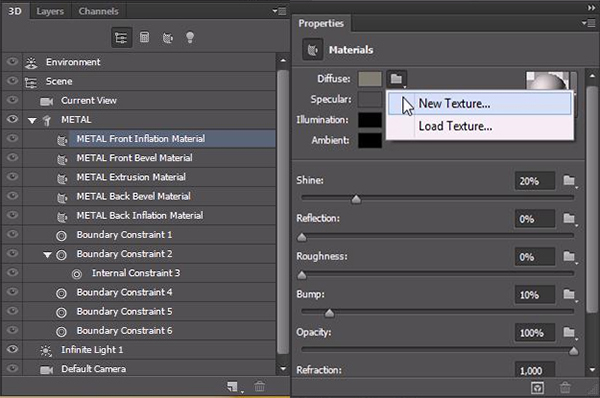
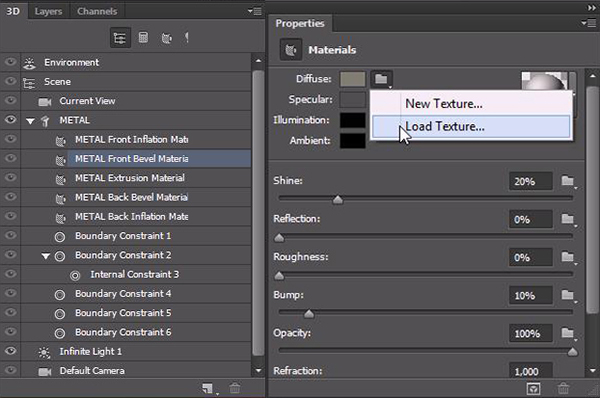
Select under the METAL object in the 3D panel, METAL front Inflation Material. Go to the Properties panel and click in the icon folder right next to Diffuse color, select New Texture.
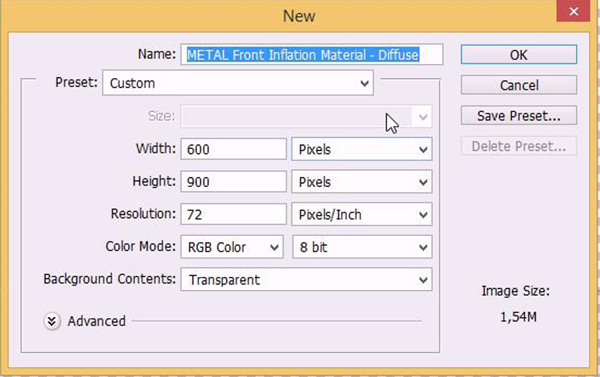
Set 600 px for width and 900 px for height. Press OK.
Step 8
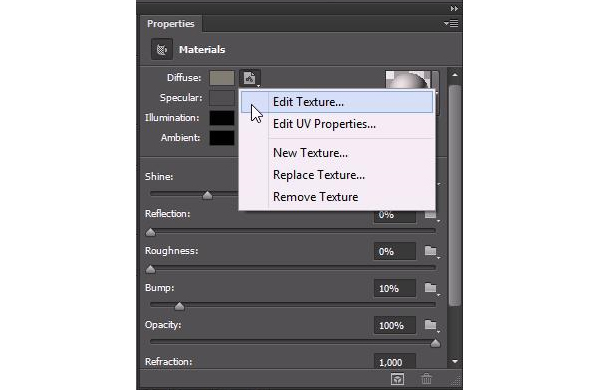
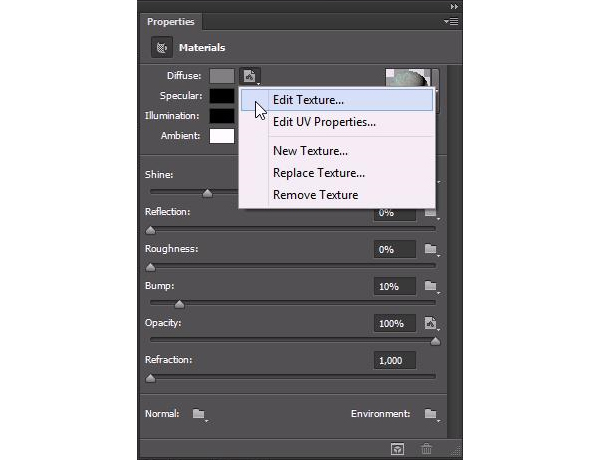
The icon folder will change for the texture icon. Click again and select Edit Texture.
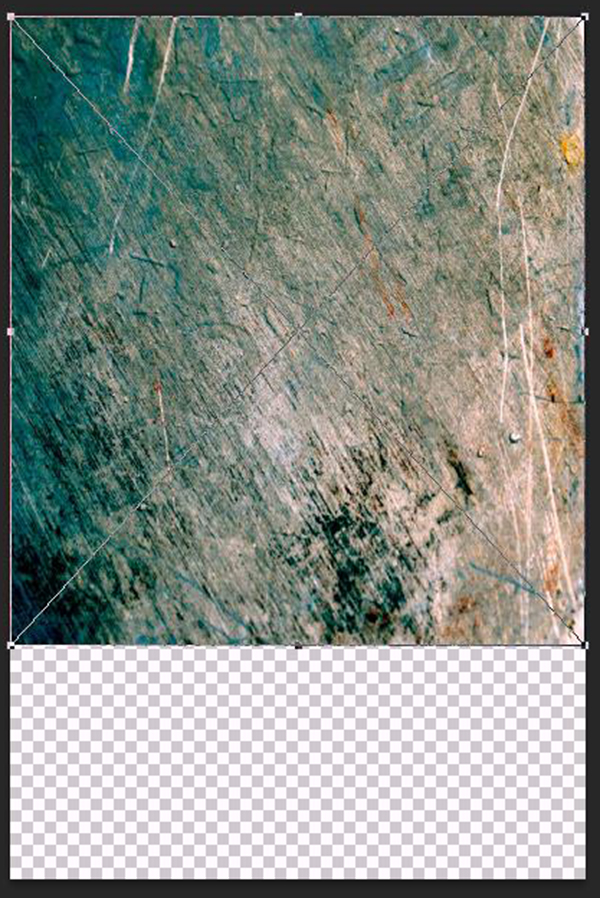
Automatically a new empty window will be opened. Once there insert the metal texture you previously downloaded and place it as shown below.
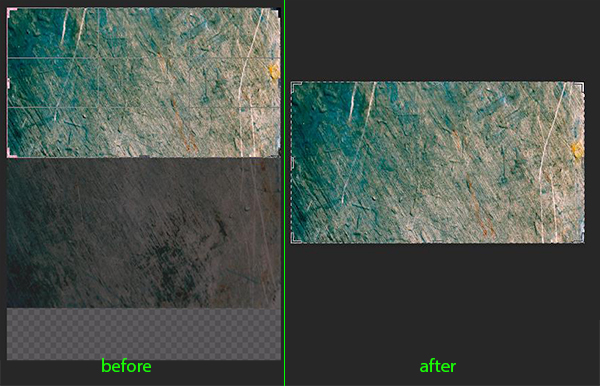
Step 9
We only need the upper section of the image so crop it.
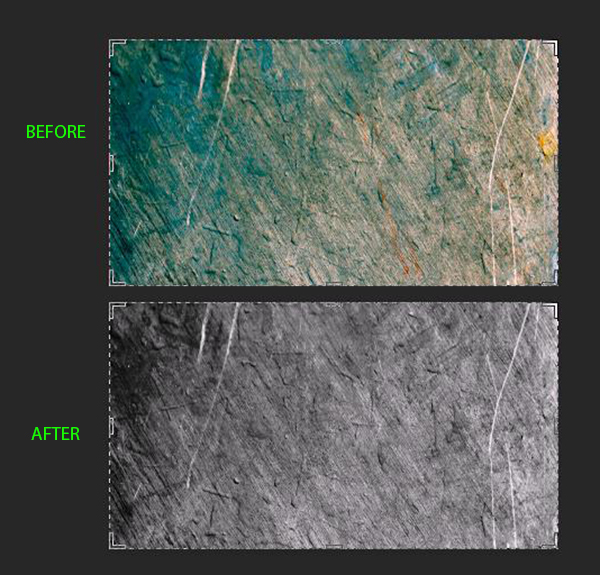
Step 10
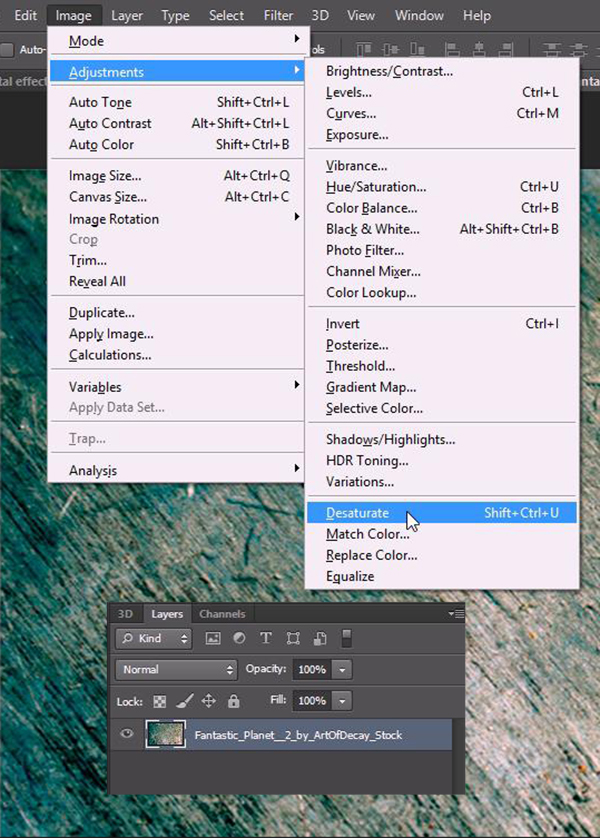
Rasterize this layer (Right click > Rasterize Layer). Then Go to Image > Adjustments > Desaturate.
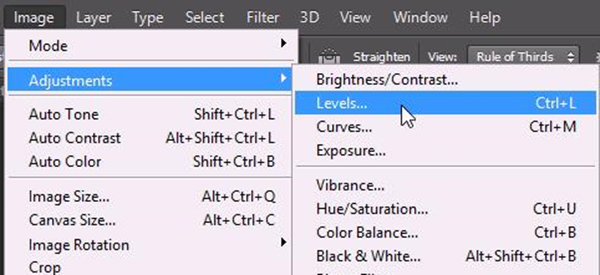
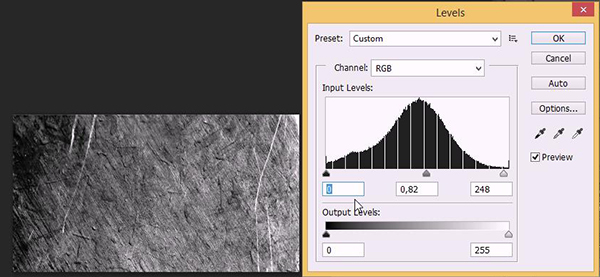
Step 11
Now go to Image > Adjustments > Levels or press (Ctrl+L) in order to open the levels window. For Input Levels set these values: 0; 0,82; 248.
Step 12
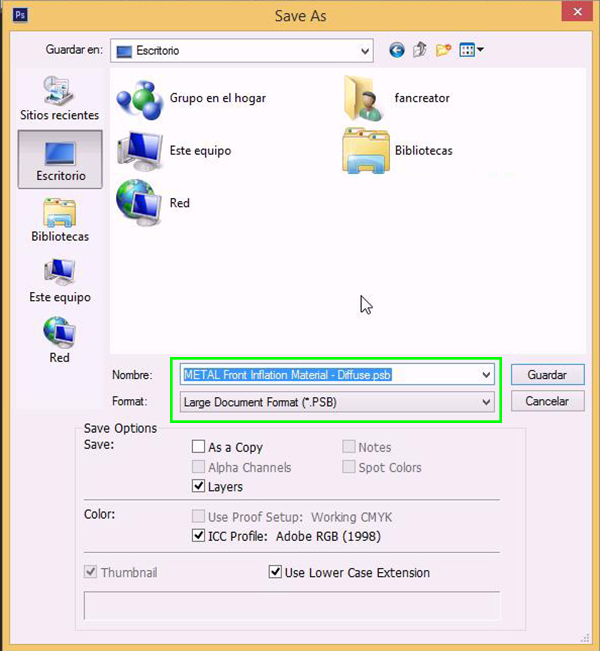
This is the texture we’ll be using for the rest of the layers, so save it. How? Go to File > Save As, enter the name you want, Photoshop by default, sets the material layer’s name as a file name. Select the format Large Document Format (*.PSB). I saved it into the Desktop folder for easy further access. Close this window and go back to the main project.
Step 13
With the METAL Front Bevel Material layer selected, go to the Properties panel and click in the icon folder right next to Diffuse color, select Load Texture. Go where you saved the PSB file and Open it. Repeat this step for METAL Extrusion Material. If you change the angle of the object the apply the texture to the rest of the layers.
Step 14
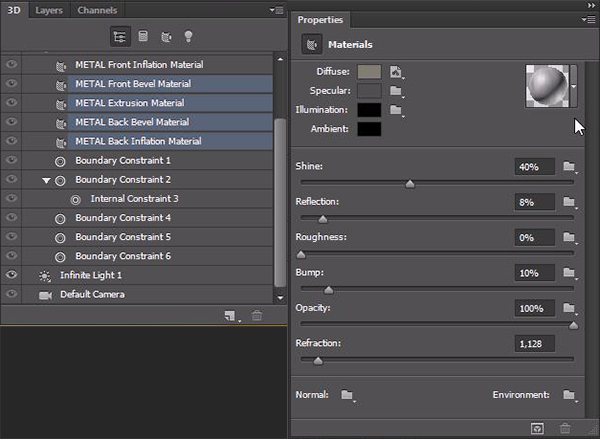
Select all the material layers except the first one (METAL Front Inflation Material). Go to the Properties panel and change these parameters: Shine to 40%, Reflection to 8%, Roughness to 0%, Bump to 10%, Opacity to 100% and Refraction to 1.128.
Step 15
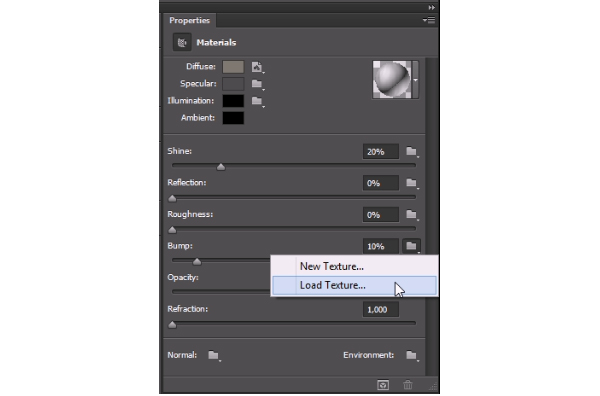
Select METAL Front Inflation Material layer and in the Properties panel click on the icon folder right next to Bump’s value box, select Load Texture. Open the same texture you saved before.
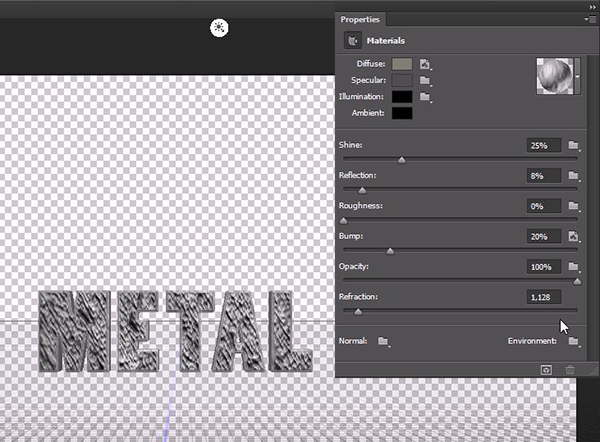
Step 16
Change the following parameters for this material. Set
Shine to 25%, Reflection to 8%, Roughness to 0%, Bump to 20%, Opacity to 100% and Refraction to 1.128
Step 17
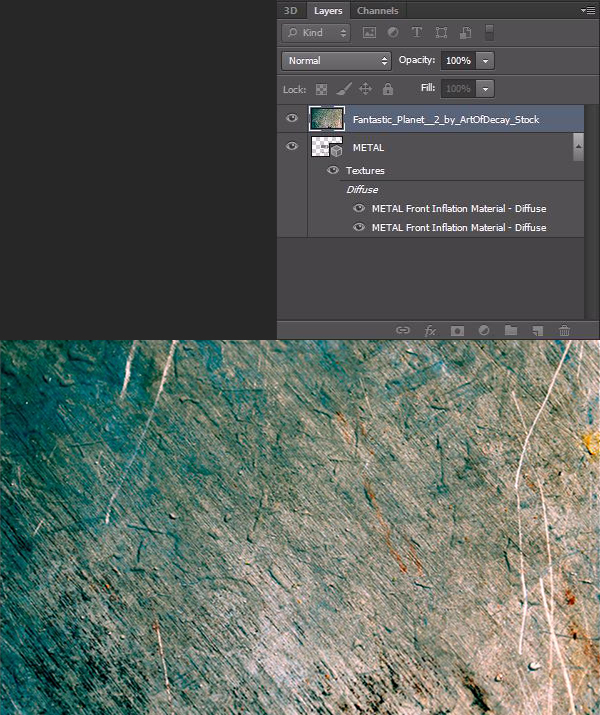
Let’s create the background.
Back to the Layers Panel, insert the metal texture image on to a new layer on the top and transform it to see just the top part.
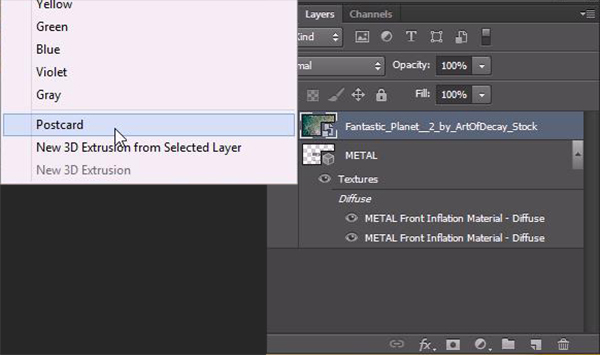
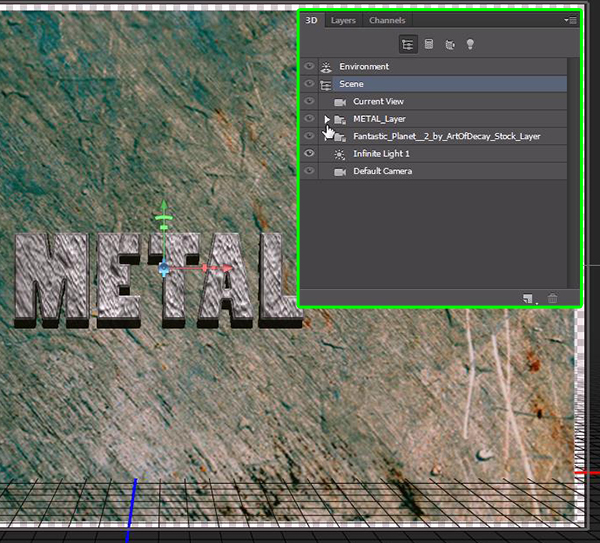
Right click on this layer and select Postcard. This will create a new 3D layer separated from the 3D text. Make sure this new layer is above the text layer. Then select both layers and go to 3D > Merge 3D Layers.
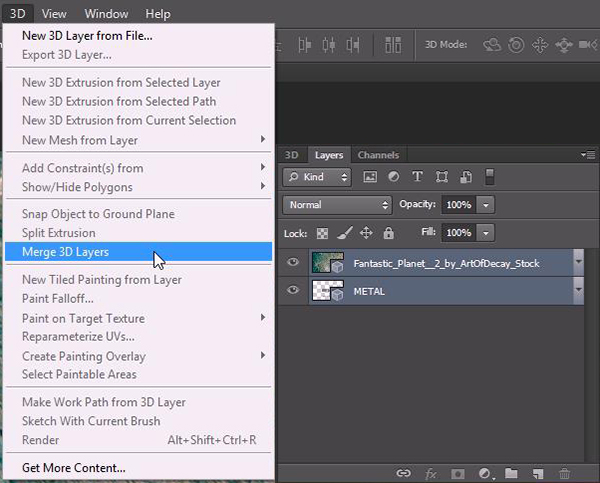
All layers will came together into one 3D object. Go back to the 3d panel and check.
Step 18
Select your postcard material layer and change Diffuse color value to #7f7f7f. Now click on the icon right next to it and select Edit Texture… This option will open a new window with our texture, ready to be modified.
Step 19
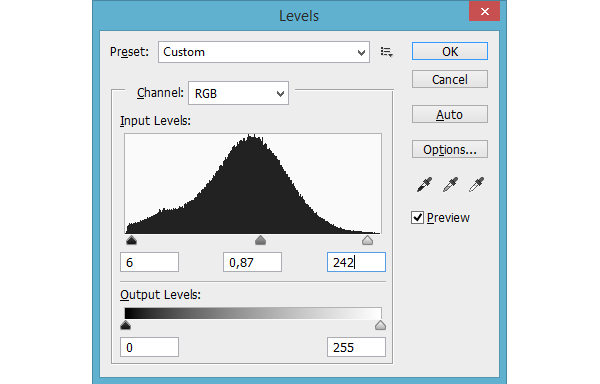
Rasterize the image (Right click > Rasterize Layer). Then go to Image > Adjustments > Desaturate or simply press (Shift+Ctrl+U). Now go to Image > Adjustments > Levels (Ctrl+L) and enter the following values for the Input Levels: 6; 0,87; 242.
Step 20
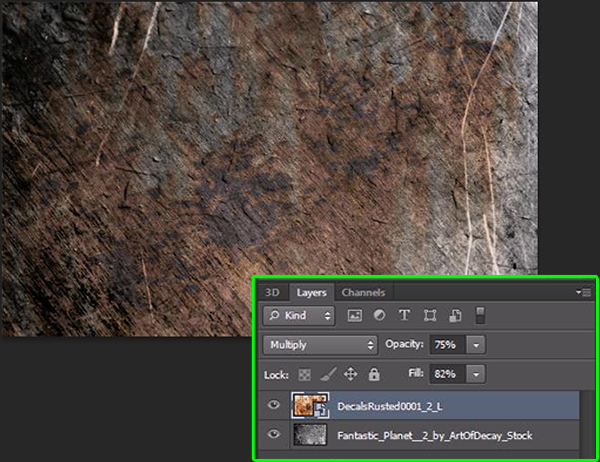
Create a new layer above (Ctrl + Shift + N) and insert the crack texture. Set the layer mode to Multiply, Opacity to 75% and Fill to 80%. Transform it until you get this. Save and close the window. The main project will update automatically every time you save the changes.
Step 21
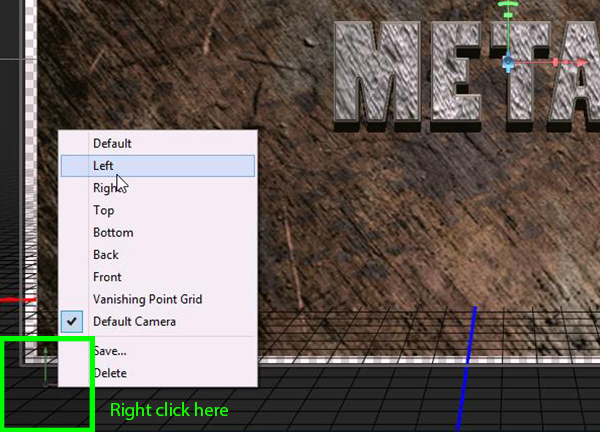
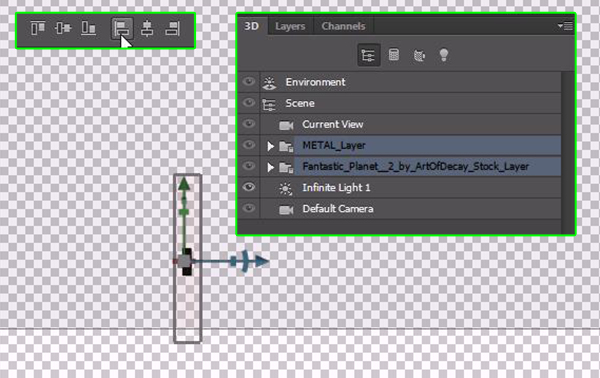
Back to the main project, let’s align the layers. Right click on the axis box in the bottom left corner and select Left. Select the two layers and with the Move Tool (V) selected go and click on Align left edges in the options bar.
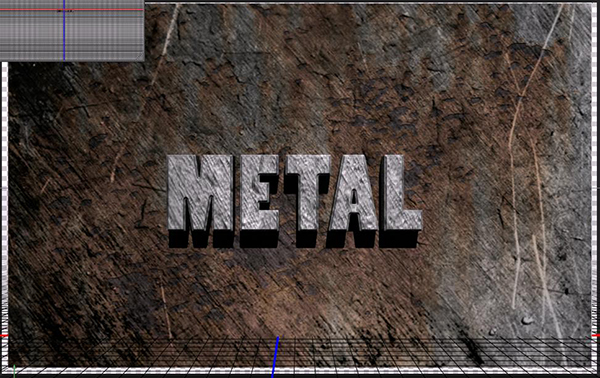
Step 22
Right click again on the axis in the bottom left corner and select Default. You should get this:
Step 23
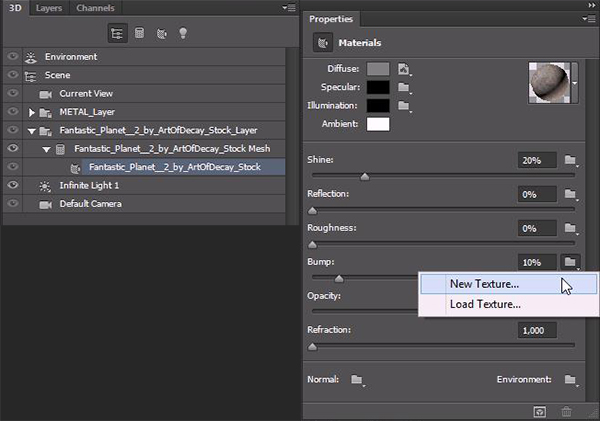
Select the Postcard Material Layer in the 3D panel and go to the Properties panel and click on the icon folder in the Bump’s value box, select New Texture….
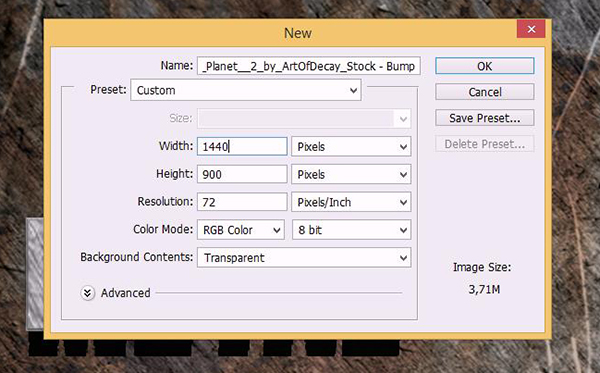
In the prompt set Width to 1440 px and Height to 900 px. Press OK.
Step 24
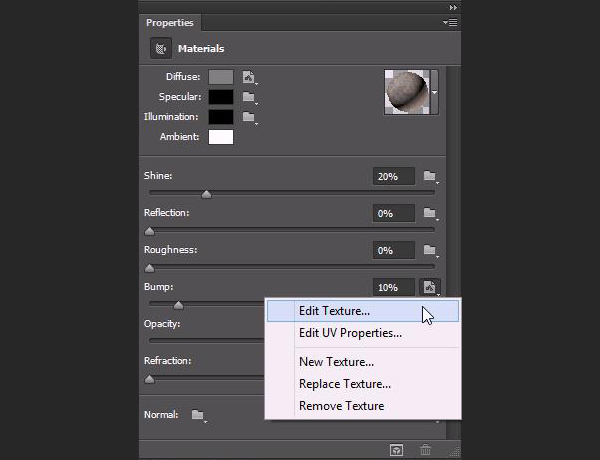
Click again in the same icon, now chose Edit Texture… In this new document insert the crack texture and place it as you did before in step 20, don’t modify the blend mode, just set Fill to 85%. Save, close and go back to the main project.
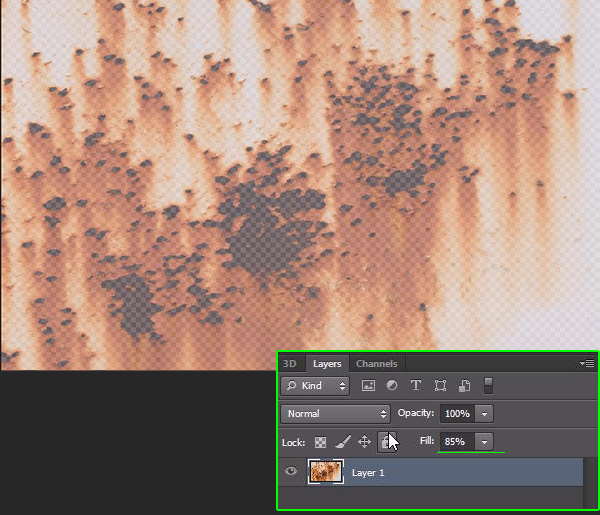
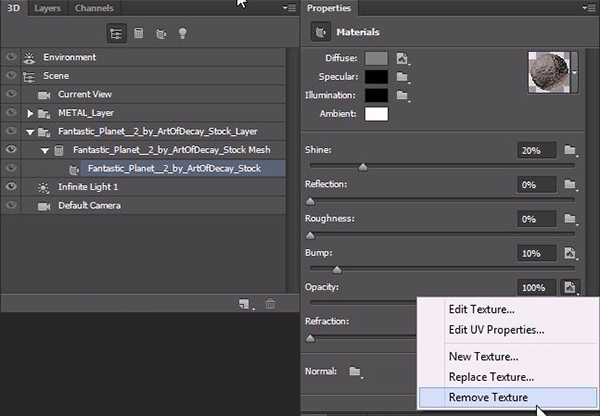
Step 25
Now, click on the icon right next to the Opacity values box, select Remove Texture. Change the Bump value to 12%.
So far you should have this:
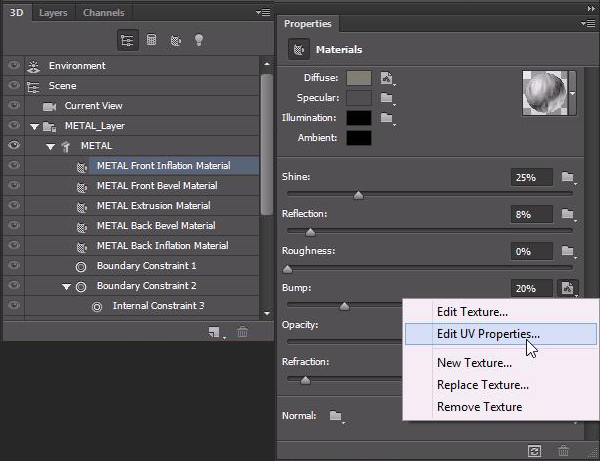
Step 26
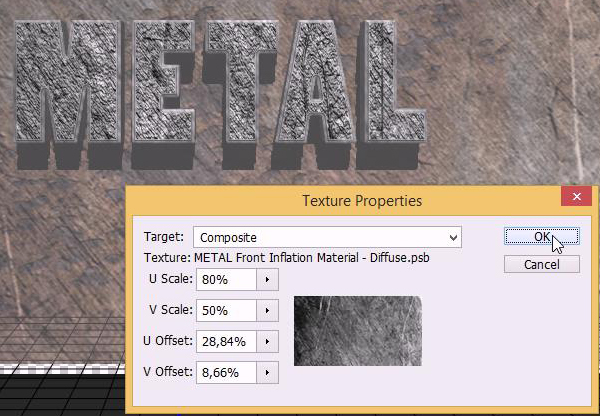
Select the METAL Front Inflation Material layer. In the Properties panel, click on the icon right next to Bump’s values box and select Edit UV Properties.
Enter the following values: set U Scale to 80%, V Scale to 50%, U Offset to 28,84% and
V Offset to 8,66%
Step 27
Now Render. Go to 3D > Render and wait until it finishes.
And We’re Done!