In this tutorial we will add reflections to sunglasses with Photoshop. The techniques used here are pretty simple so the beginners shouldn’t have any problems.
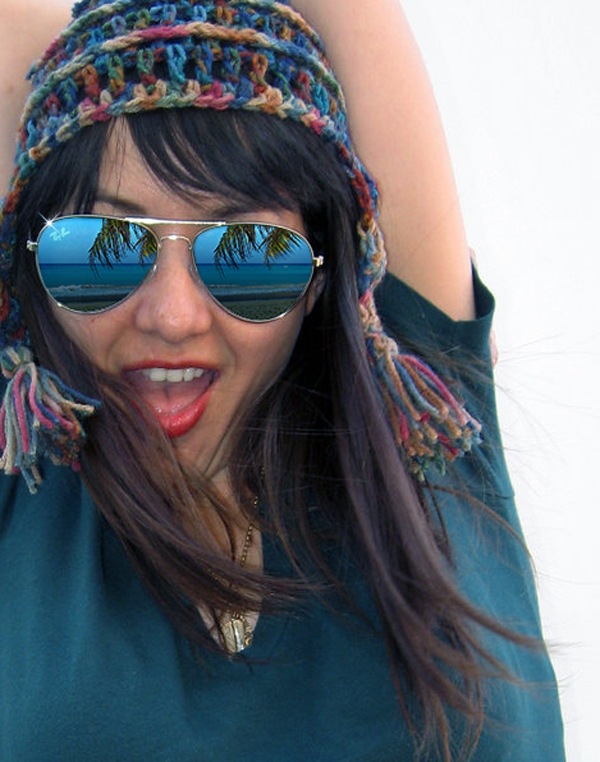
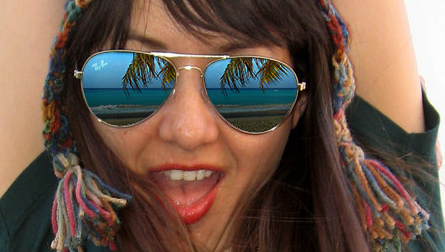
Final Image
Resources
Step 1
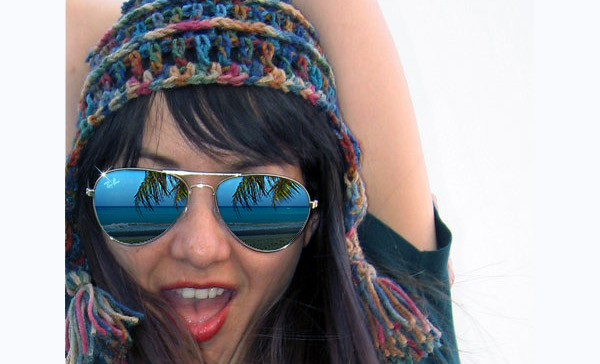
Open image “Girl”. This image is too big so let’s crop it a little. Select the Crop Tool ( C ) and drag the handles until the image looks like the one below. Press Enter after you’re done.

Step 2
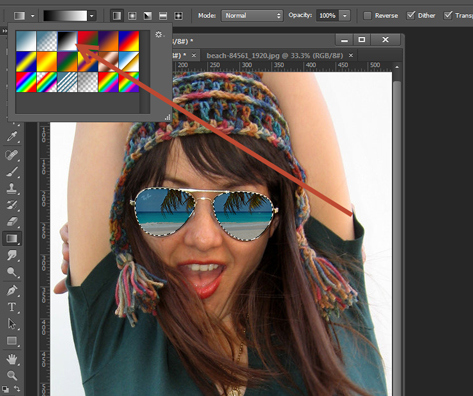
We need to create a selection inside the glasses so we can replace it with the reflection. The best tool for these kind of selections is the Pen Tool (P). Select the Pen Tool and trace the inside of the glasses.
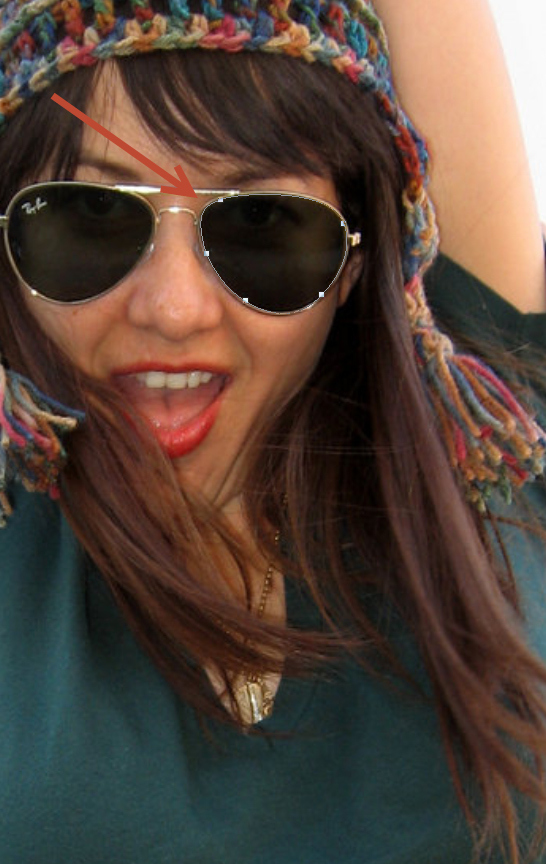
Press Ctrl + Enter to transform the path into a selection and press Ctrl + Shift + Alt + N to create a new layer. Press Ctrl + Backspace to fill the selection with the background color (it doesn’t matter what color is selected).

Step 3
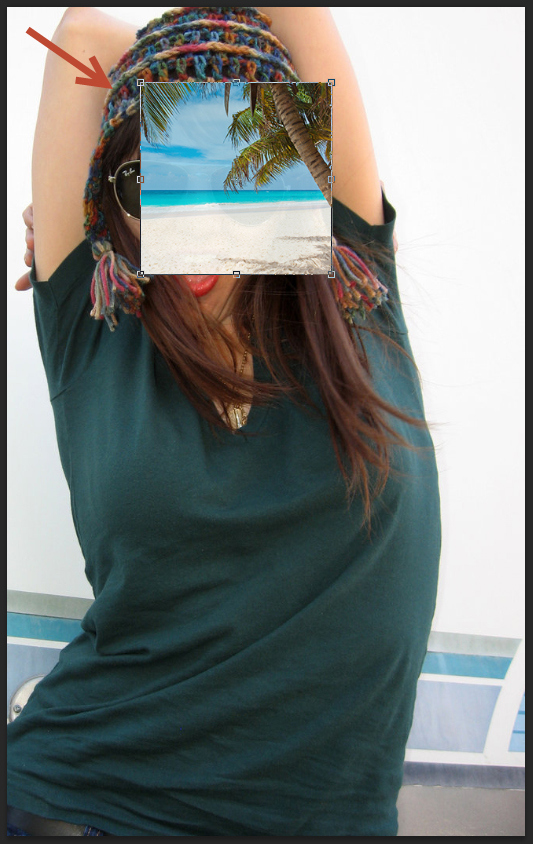
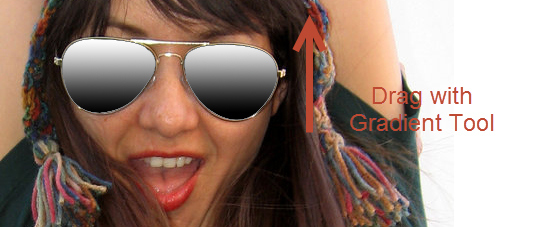
Open the image “Beach”. Select all by pressing Ctrl + A and copy by pressing Ctrl + C. Go back to our image and press Ctrl + V to paste.
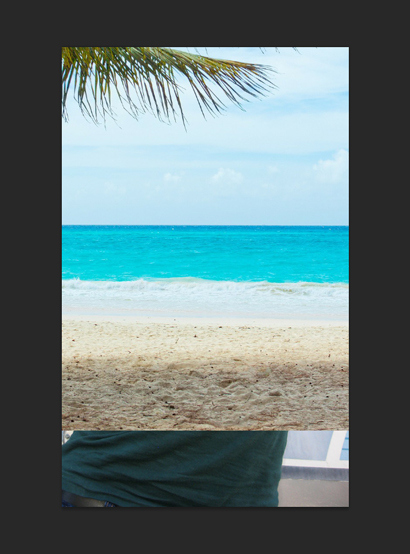
This image will be our reflection but now it’s just too big. In order to resize it select the Free Transform tool by pressing Ctrl + T. Resize and position the image as shown below.
Step 4
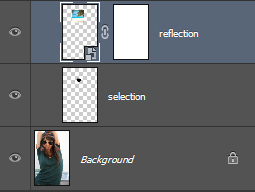
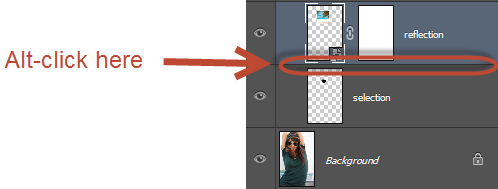
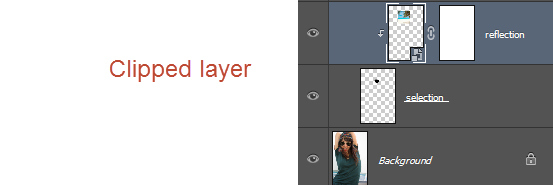
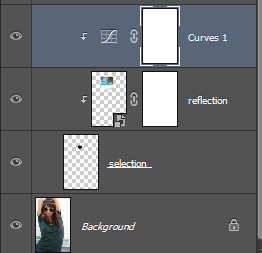
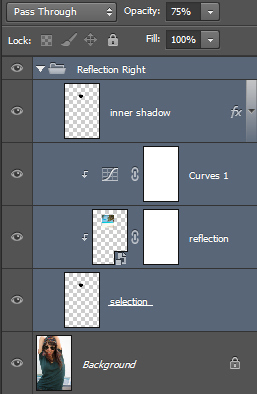
In order to show the beach image only through the selection we will have to clip the beach layer to the selection layer. Hold the Alt key and click between “reflection” layer and “selection” layer.

Step 5
The reflection is a bit too light so let’s darken it.
Create a Curves Adjustment layer by going to Layer > New Adjustment Layers > Curves. Set the layer blending mode to Multiply and clip it to the “reflection” layer (like we did in the step before).
This is the same as duplicating the “reflection” layer and changing its blending mode to Multiply but the file size is smaller and we can tweak the curve for further adjustments.

Step 6
The reflection looks a bit fake so let’s add an Inner Shadow effect to make it more realistic. Create a new layer (Ctrl + Shift + Alt + N) and name it “inner shadow”.
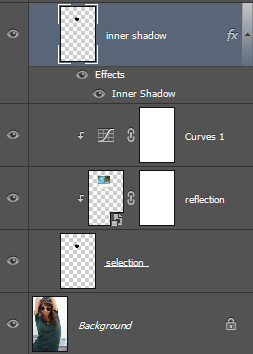
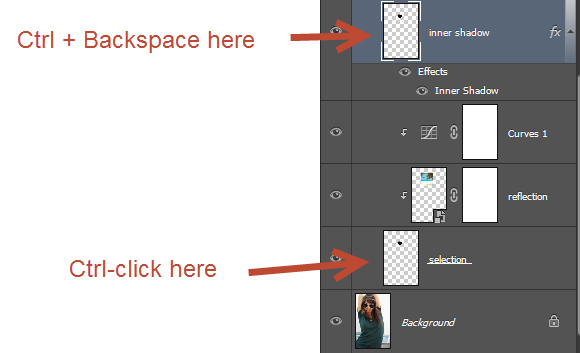
Ctrl-click on the “selection” layer in order to make a selection of the layer and click once on the “inner shadow” layer in order to select it. Press Ctrl + Backspace to fill the selection with the background color.
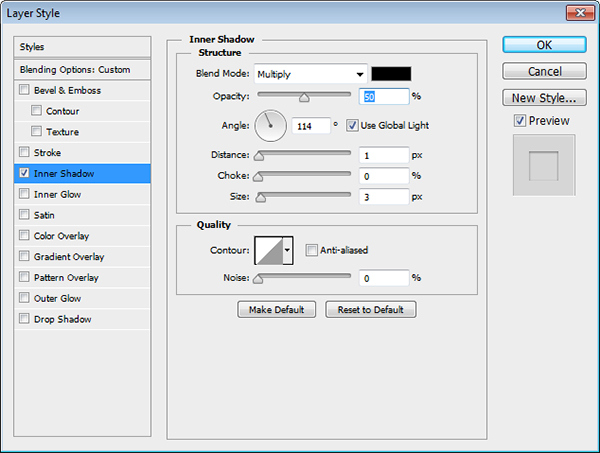
Double click on the “inner shadow” layer and add an Inner Shadow effect. Drag the fill slider to 0%.
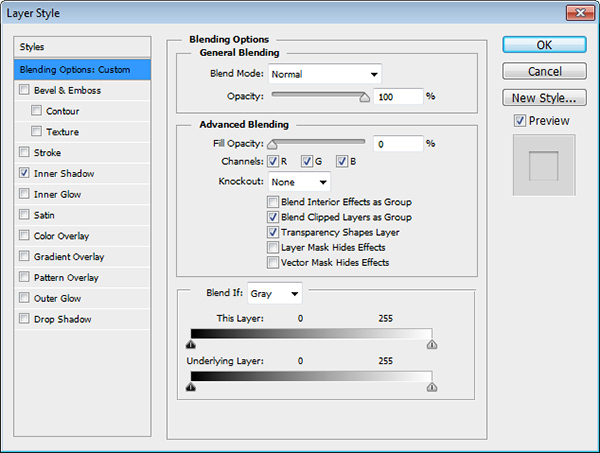

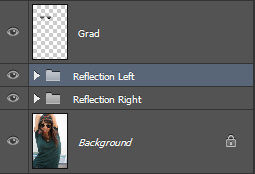
The effect is a bit strong so let’s reduce the opacity of all the layers. Select all the layers except the “Background” layer and by Ctrl-clicking on them. Press Ctrl + G to create a group from selected layers and name this group “Right reflection”. Lower the opacity of the group to 75%.
Step 7
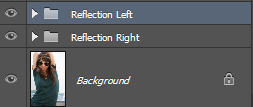
Repeat steps 2 to 6 to create the left reflection. Here’s how your image should look:

Step 8
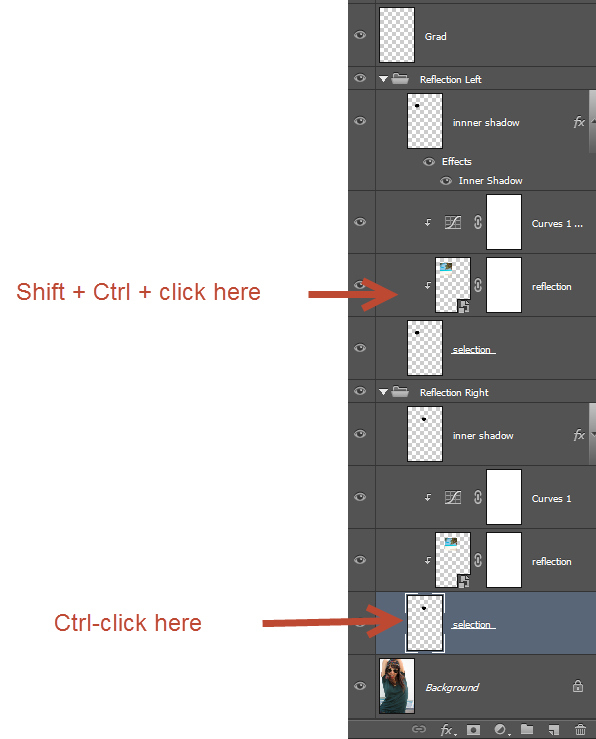
The reflections look alright but we can still make some improvements. A gradient for instance would do wonders. Create a new layer by pressing Ctrl + Shift + Alt + N and name it “Grad”.
Go to “Reflection right” group and Ctrl-click on the “selection” layer in order to select it. Go to “Reflection left” group and Shift + Ctrl + click in order to add to selection.

Step 9
Click on the “Grad” layer in order to select it and choose the Gradient Tool. From the Option bar choose Black to White gradient.
Hold Shift and drag from below the sunglasses to a place a little above them. This step should fill the selection with a nice black to white gradient. Deselect by pressing Ctrl + D.
Change the blending mode of the “Grad” layer to Overlay and you should see a nice effect on our reflections.
Step 10
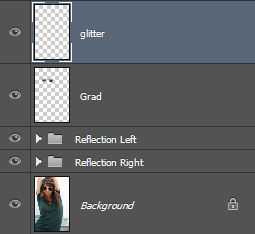
Import the “Glitter Brush” (Edit > Presets > Preset Manager) and create a new layer (Ctrl + Shift + Alt + N). Click once with a glitter brush of your choosing on the new layer. It will probably be too big so enter Free Transform by pressing Ctrl + T and resize and position the layer on the upper left reflection.

Step 11
The image looks good but I don’t really like all those warm colors (considering that the reflection in the sunglasses shows a tropical island). Let’s add a Color Balance adjustment layer (Layer > New Adjustment Layer > Color Balance). Drag the Cyan slider towards the left and the Blue slider towards the right.


Step 12
Let’s use the Crop tool again to add some more focus on the sunglasses. Select the Crop Tool ( C ) and crop the image like I did.
And We’re Done!