
In this tutorial we will create a porcelain skin effect using a beautiful portrait of a woman and the power of Photoshop’s blending modes.
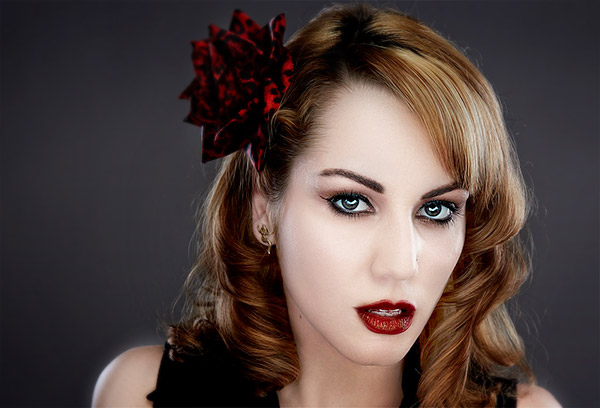
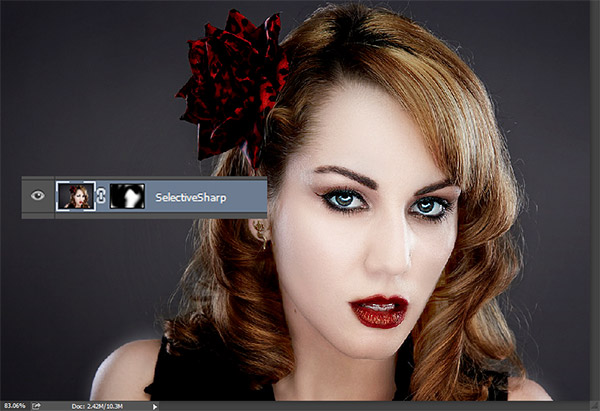
Final Image
As always, this is the final image that we’ll be creating:
Tutorial Details
- Program: Adobe Photoshop CS3
- Estimated Completion Time: 30 minutes
- Difficulty: Beginner-Intermediate
Resources
Step 1
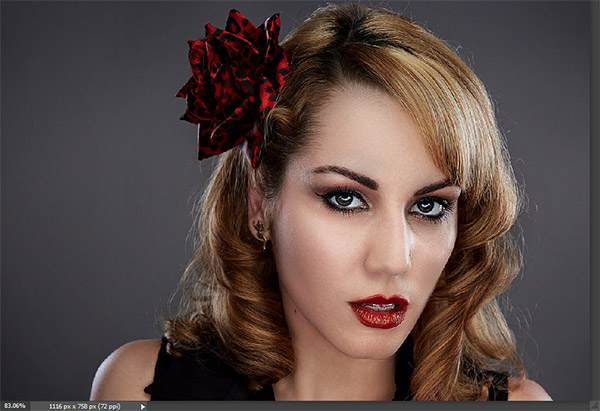
Open file “Girl”. This is our starting photo – we’ll add a porcelain skin effect to it in the next steps. Select the Crop Tool (C) and crop the image so that only the face of the girl is visible as shown below.
Step 2
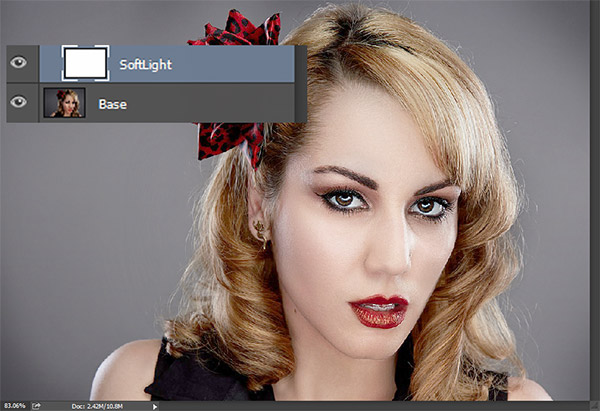
Create a new layer (Ctrl + Shift + Alt + N) and fill it with white by first pressing D to reset the foreground and background colors to default and by pressing Alt + Backspace.
Change the blending mode to Soft Light and you should see the effect shown below. This will be our starting point for the porcelain skin effect.
Name this layer “SoftLight”.
Step 3
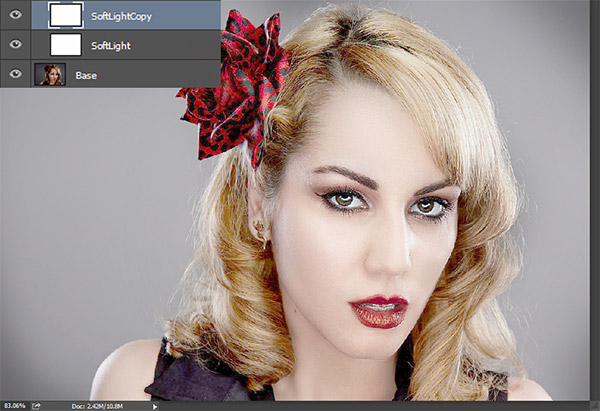
The effect is still too low for my taste so let’s increase it by duplicating the “SoftLight” layer (click on the layer in the layers palette and press Ctrl + J). The effect is a bit too strong now but we can adjust that by simply lowering the opacity of the “SoftLight” layer to 81%.
Step 4
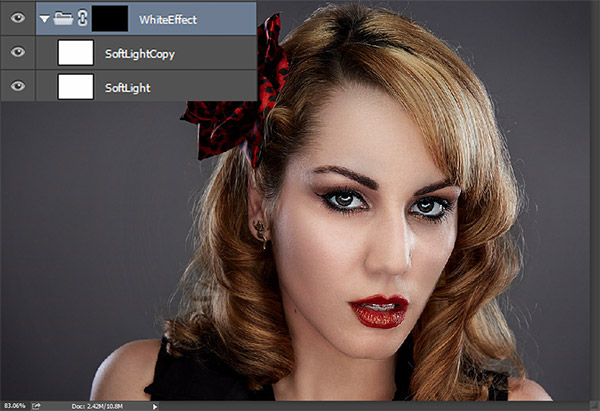
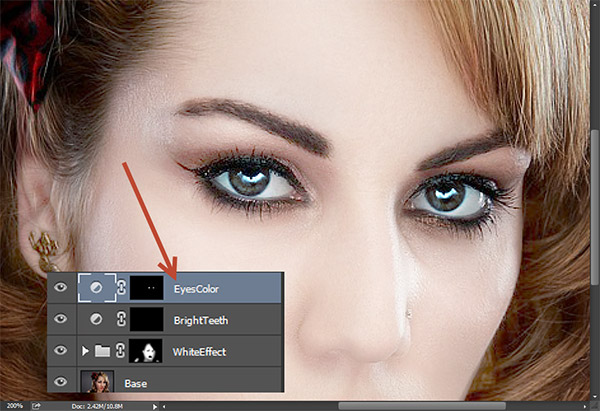
The skin is starting to look good but the hair and the background look washed out. Not to mention the eyes. Let’s start correcting that by grouping the two “SoftLight” layers – hold the Shift key and click on each of the two layers in the layer palette to select them. Than press Ctrl + G to group them. Name the group “WhiteEffect”.
Step 5
In this step we want to keep the skin effect only to the face and disable it for the hair, eyes and background. The best way to do this is with a layer mask. A layer mask is like a regular layer but you can only paint with black and white inside it. Black will hide the layer and white will reveal it. Painting with gray will only partially hide the layer. Let’s try it now.
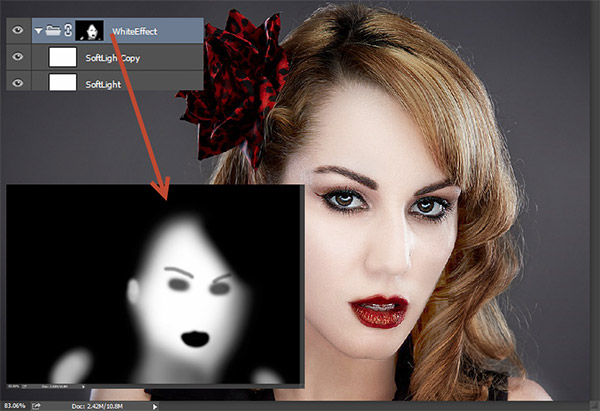
Click on the group in the layers palette to make it active and add a layer mask to the group by going to Layer > Layer Mask > Hide All.
We notice that the white effect has disappeared completely – that’s because our layer mask is completely black so it hides it.
Step 6
Select the standard round soft brush and change the foreground color to white (foreground color is the brush color found just below the tool palette). Click on the layer mask (the little black thumbnail to the right of the group) and start painting with white over the face.
Lower the opacity of the brush to 50% and paint over the shoulders to have the effect applied there too.
Step 7
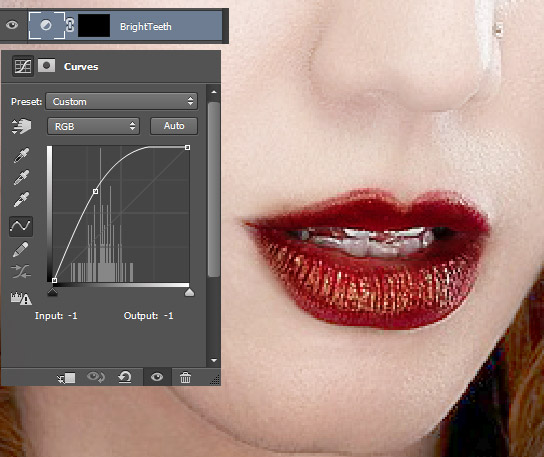
The teeth have become a bit yellow after our effect – let’s correct that. Create a Curves Adjustment Layer (Layer > New Adjustment Layer > Curves) and fill the layer mask with black (press D to set the colors to default, click on the layer mask thumbnail in the layers palette and press Ctrl – Backspace). Drag the curve up to lighten and go back to the layer mask. With the same round soft brush (just lower the size to 10px) paint over the teeth to have the whitening effect applied.
Step 8
The eyes look a bit faded out so let’s adjust that. Create a new Hue/Saturation Adjustment Layer (Layer > New Adjustment Layer > Hue/Saturation). Use the settings shown below and change the blending mode of the Hue/Saturation layer to Linear Dodge. You’ll see that the colors in our photo are very intense and don’t look good – we’ll address that in the next step.
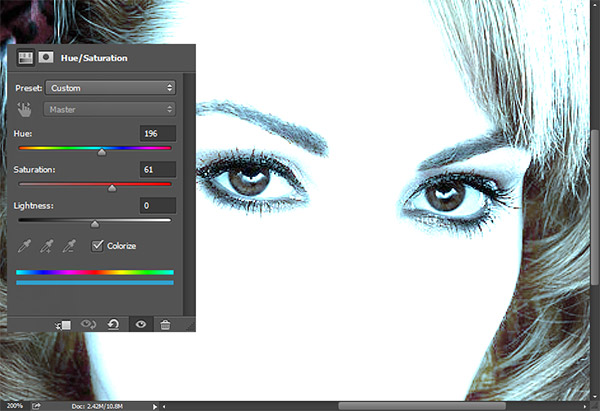
Step 9
Click on the layer mask of the Hue/Saturation Adjustment layer to make it active and fill it with black (press D first, then Ctrl + Backspace). Select the standard round soft brush and paint with white in the layer mask over the eyes. By doing this we have restricted the effect of the Hue/Saturation layer only to the eyes.
Step 10
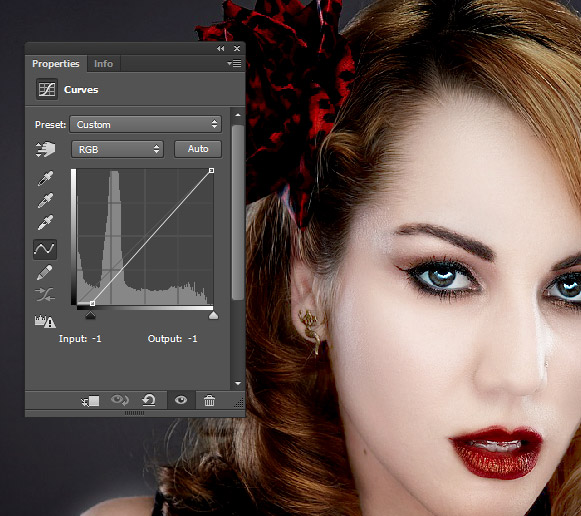
The overall image still looks a bit washed out and light for my taste. Create a Curves Adjustment Layer ( Layer > New Adjustment Layer > Curves) and drag the left slider to the right in order to both increase the contrast and darken.
Step 11
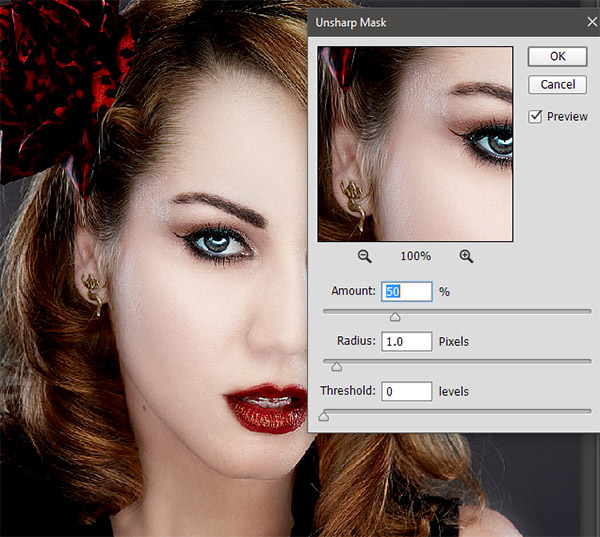
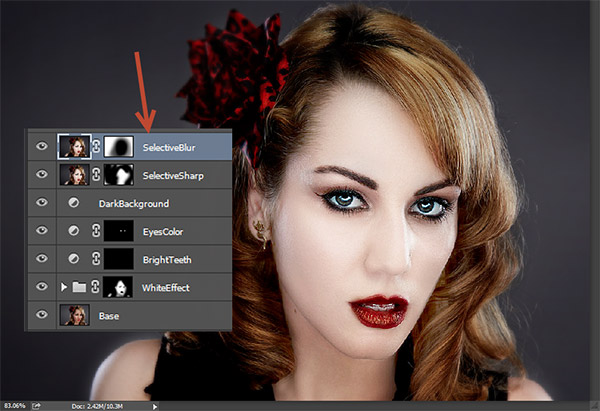
Let’s sharpen our photo a bit. Create a new layer from all the visible layers by pressing Ctrl + Shift + Alt + E and apply an unsharp effect as shown below (Filter > Sharpen > Unsharp Mask). Name this layer “Selective Sharpen”.
Step 12
We should keep the focus on the girl and not the background so let’s hide some of that sharpen effect. Add a layer mask to the “Selective Sharpen” layer by going to Layer > Layer Mask > Hide All. Click on the layer mask in the layers palette to make it active and paint with white over the face and the eyes to reveal the sharpen effect there.
Step 13
In order to put some more focus on the face let’s blur the background a bit. Create a new layer from all the visible layers (Ctrl + Shift + Alt + E) and apply a 5px Gaussian Blur (Filter > Blur > Gaussian Blur).
Add a layer mask to this layer just as we did in step 12 and fill it with black (press D then Ctrl + Backspace). Now paint with white over the background (avoid the face and the hair).
And We’re Done!