In this Photoshop tutorial we will create a fantasy nature photo manipulation. We’ll use selection tools, blending modes and various Photoshop filters.
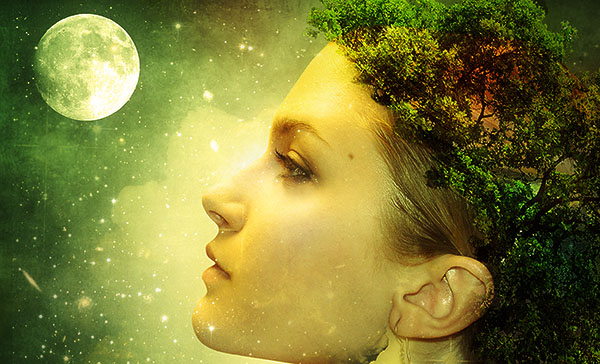
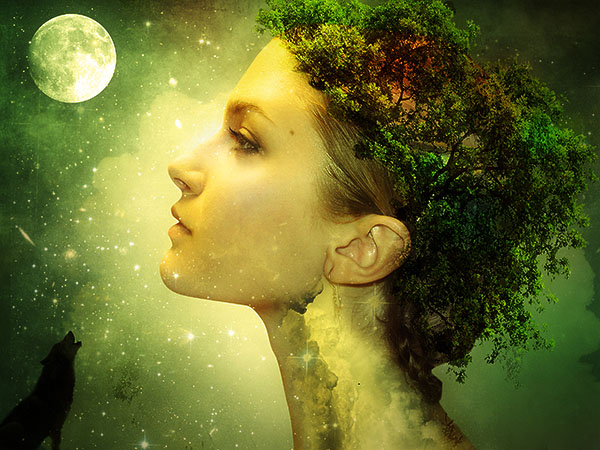
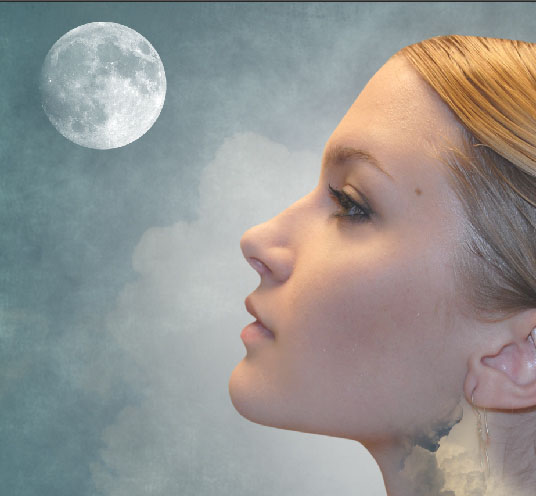
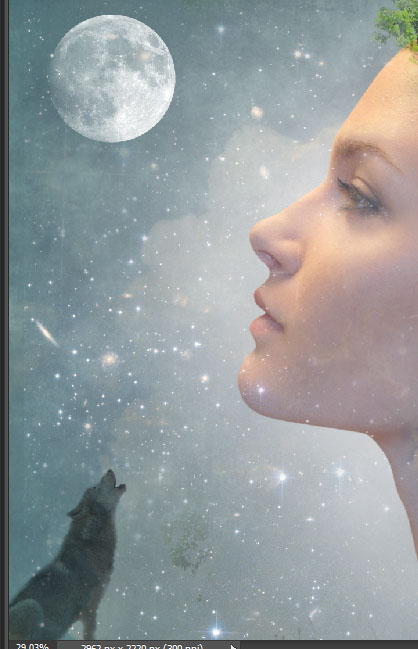
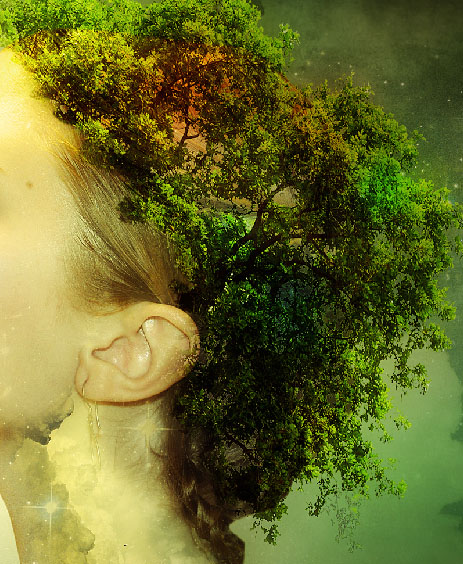
Final Image
As always, this is the final image that we’ll be creating:
Tutorial Details
- Program: Adobe Photoshop CS3
- Estimated Completion Time: 40 minutes
- Difficulty: Beginner-Intermediate
Resources
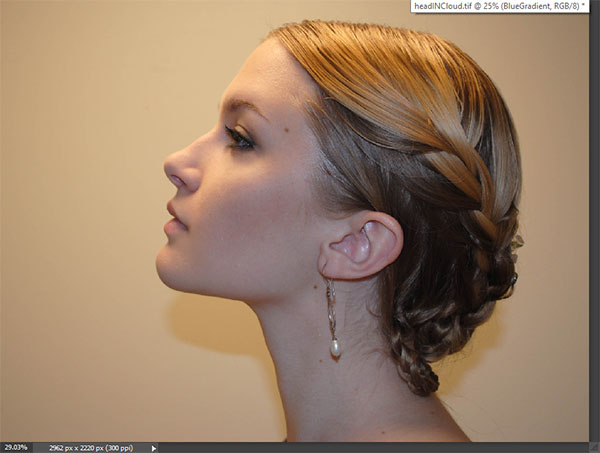
Step 1
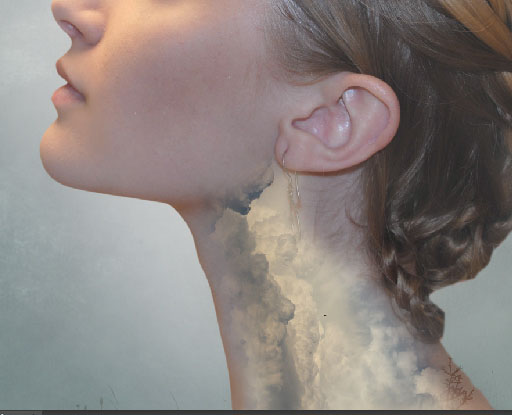
Open the file “Girl”.
Step 2
Create a new layer (Ctrl + Shift + Alt + N) and select the gradient tool (G). Choose the Radial Gradient from the options bar and set the foreground color to white and the background color to a light blue (#a9f8e6). Drag from the middle of the image to the outside to create a radial white to blue gradient and lower the layer opacity to 60%. Turn off the visibility of the Background layer.
Step 3
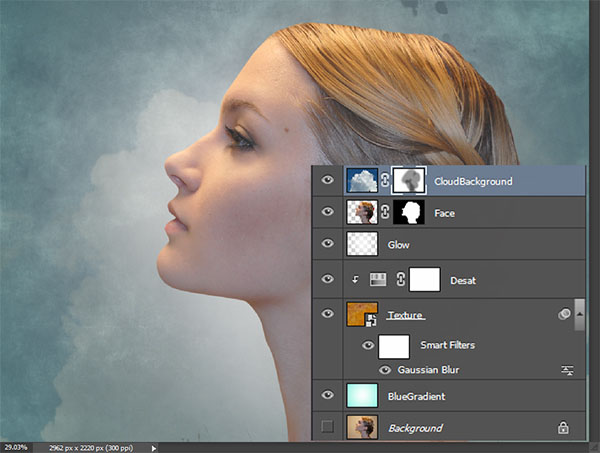
Open the file “Texture” and press Ctrl + A to copy all. Copy with Ctrl + C and paste it in our scene with Ctrl + V.
Change the texture to a smart object by right clicking on the layer in the layers palette and choosing from the drop down menu “Convert to Smart Object”.
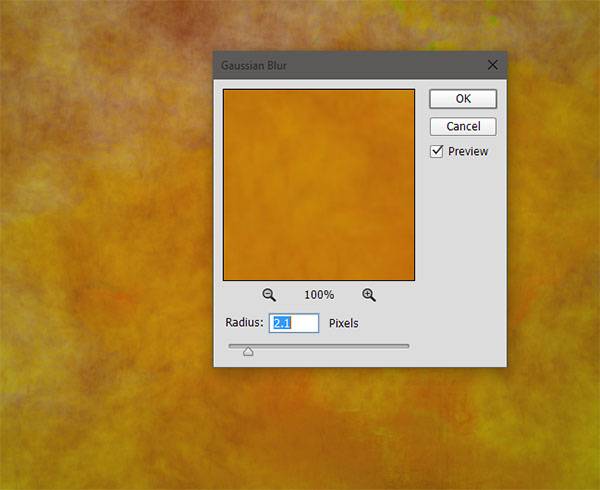
Change the blending mode to Multiply and apply a 2px Gaussian Blur.
Step 4
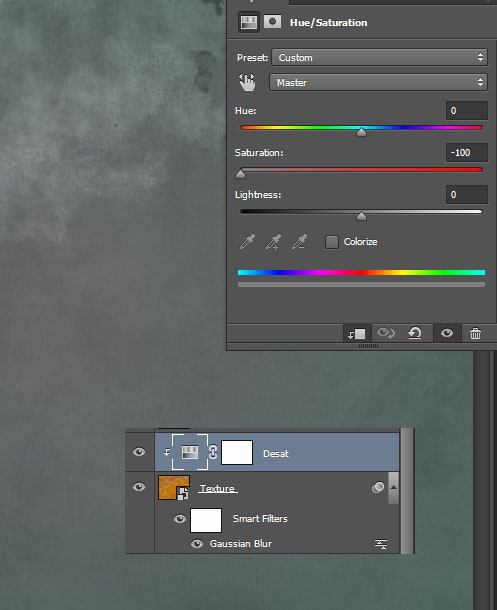
Desaturate the texture by creating a Hue/Saturation Adjustment Layer and clipping it to the texture layer (Alt click in the layers palette between the two layers). Drag the saturation slider to -100.
Step 5
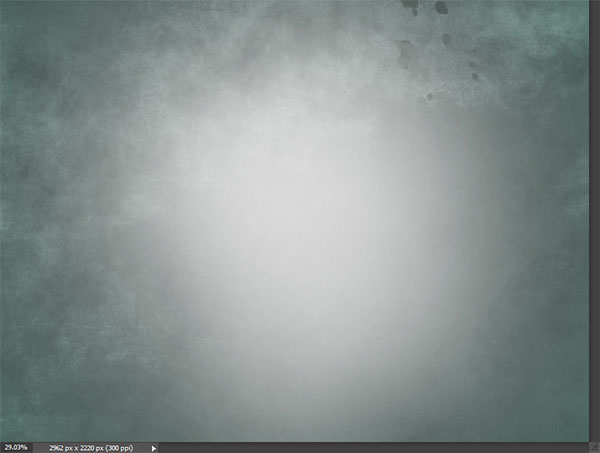
Choose the Brush Tool (B) and change the foreground color to white. Increase the brush size to 1000px and lower the opacity to 60%. Click a couple of times in the middle of the image to create a glow effect.
Step 6
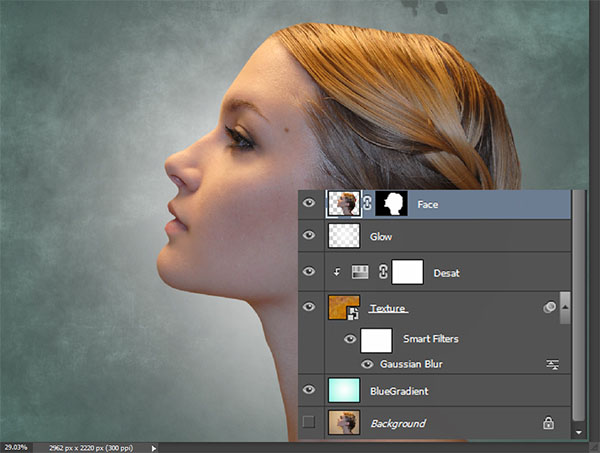
Turn on the visibility of the Background layer and turn off the visibility of all the other layers. Use the Pen Tool (P) to make a selection of the girl’s face (after you create the path press Ctrl + Enter to convert it into a selection). Move the selection to a new layer by pressing Ctrl + J and after that move the layer to the top of all the other layers. Turn off the visibility of the background layer and turn back on the visibility of all the other layers.
Step 7
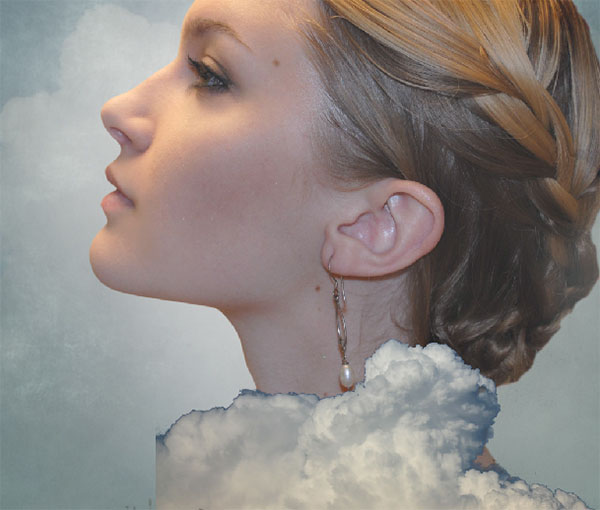
Open the file “Cloud1”. Select all and copy (Ctrl + A , Ctrl + C) and paste it in our scene (Ctrl + V).
Resize it using Ctrl + T as shown below and change the blending mode to Screen.
Lower the opacity to 33% and add a layer mask (Layer > Layer Mask > Reveal All). Choose the standard round soft brush and lower the opacity to 20%.
With black as foreground color paint in the layer mask over the girl’s face in order to reveal less of the cloud there.
Step 8
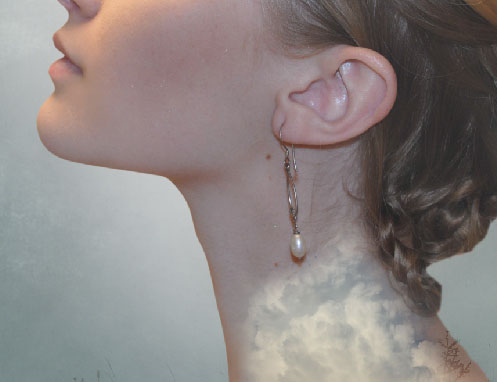
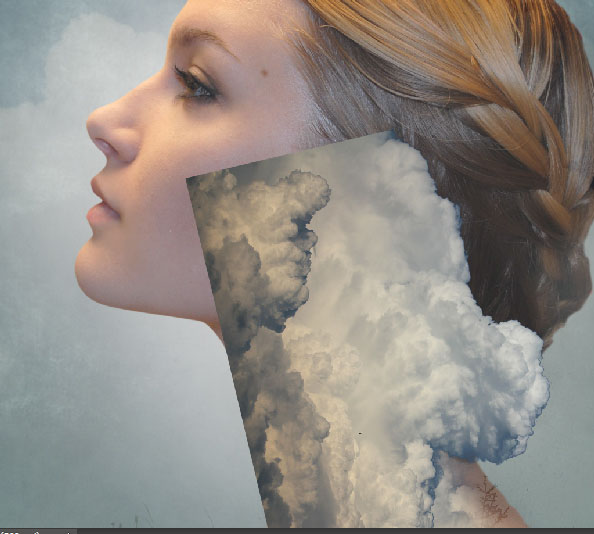
Open the file “Cloud2” Use the Select > Color range tool or the Quick Selection tool (W) to select the top cloud and copy/paste in in our scene. Resize with Ctrl + T as shown below.
Step 9
Add a layer mask to the cloud layer and use the standard round soft brush at 100% opacity to paint with black over the unwanted hard edges of the cloud until you have a result similar to the image below.
Step 10
Go back to the file “Cloud2” and this time select the bottom cloud. Copy/paste it in our scene and position it as shown below.
Step 11
Add a layer mask and use the standard soft brush to paint away the unwanted edges.
Step 12
Open the file “Moon”. Use the Elliptical Marquee Tool (M) to make a round selection of the moon and copy/paste into our scene. Change the blending mode to screen and position/resize the moon in the upper left corner of the scene.
Step 13
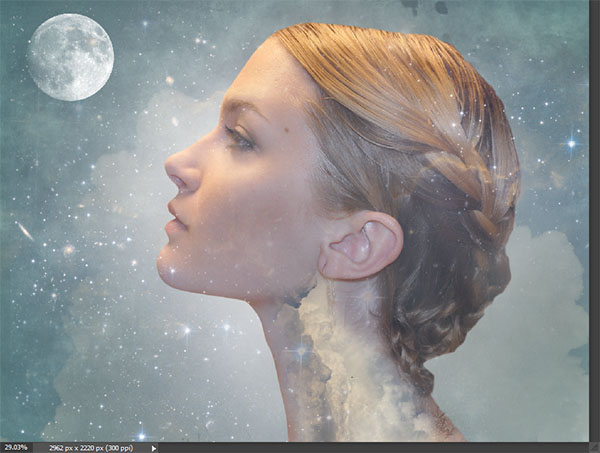
Open the file “Stars”. Select all and copy/paste in our scene. Resize the stars layer so that it covers the whole image and change the blending mode to Screen.
Add a layer mask and use the round soft brush tool to paint away (with black because in a layer mask white reveals and black conceals) all the bright stars and clusters of light.
Step 14
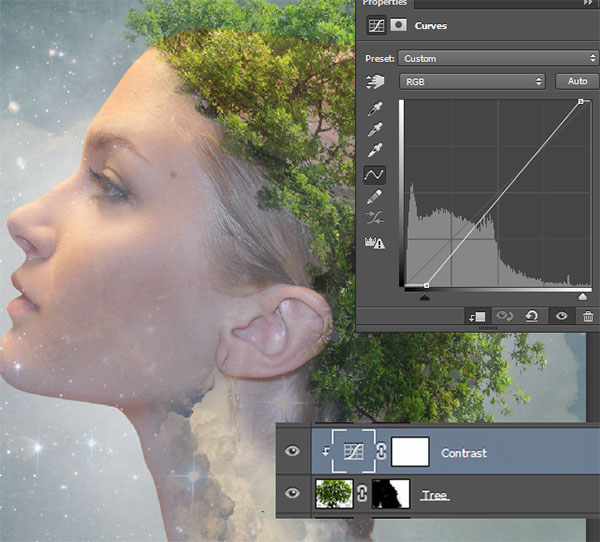
Open the file “Tree”. Copy/paste the tree in our scene and place it on the head of the girl. Add a layer mask and hide all the sections of the tree that fall on the girl’s face while keeping the ones that fall on her hair. Lower the opacity of the layer to 60%.
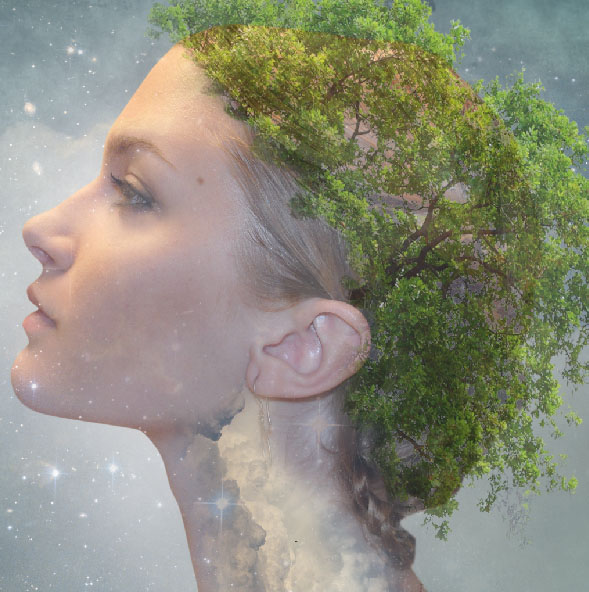
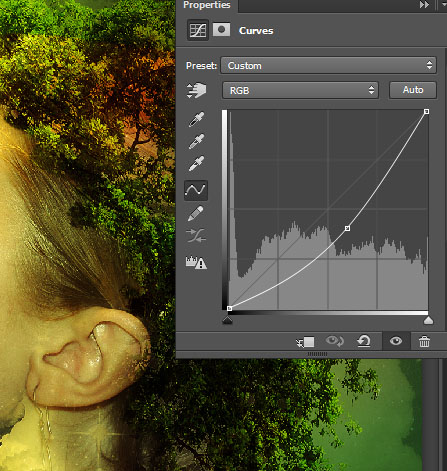
Step 15
The tree has little contrast so let’s correct that. Create a Curves Adjustment Layer (Layer > New Adjustment Layer > Curves ) and use the settings shown below to increase the contrast. Clip this layer to the tree layer (Alt-click between the two layers).
Step 16
Open the file “Wolf”. Make a selection of the wolf with your favorite selection tool (I used the Pen Tool) and copy/paste the wolf in the scene.
Resize and position the wolf (with Ctrl + T) in the lower left corner of the image. Change the blending mode to Multiply and lower the opacity to 66%.
Step 17
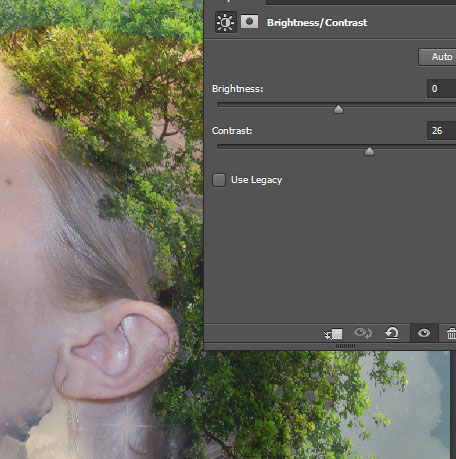
Now that we’re done with all the main elements of our scene it’s time to add some color effects that will make our scene look much better.
Let’s begin by creating a Brightness/Contrast Adjustment Layer (Layer > New Adjustment Layer > Brightness /Contrast) and increasing the contrast to 26.
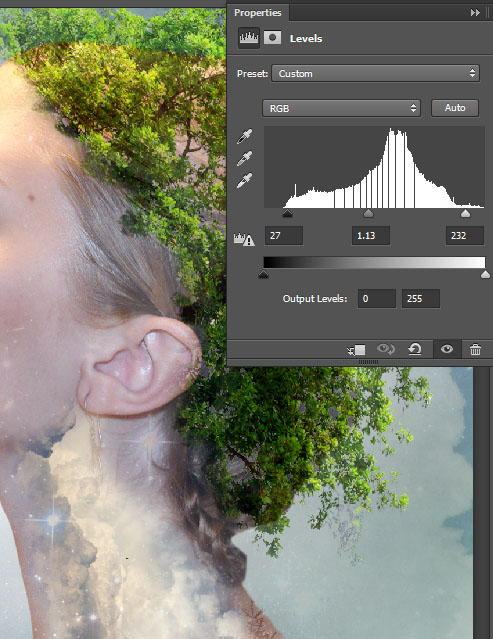
Step 18
Let’s further boost the contrast and lower the overall lightness of our scene by creating a Levels Adjustment Layer (Layer > New Adjustment Layer > Levels) and dragging the left and right sliders toward the center.
Step 19
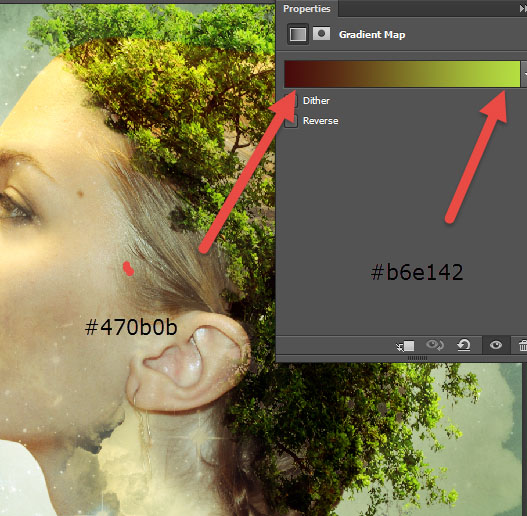
I find the colors to be a little too boring. Let’s boost the colorization by creating a Gradient Map Adjustment Layer (Layer > New Adjustment Layer > Gradient Map). Use the gradient shown below and change the blending mode to Soft Light.
Step 20
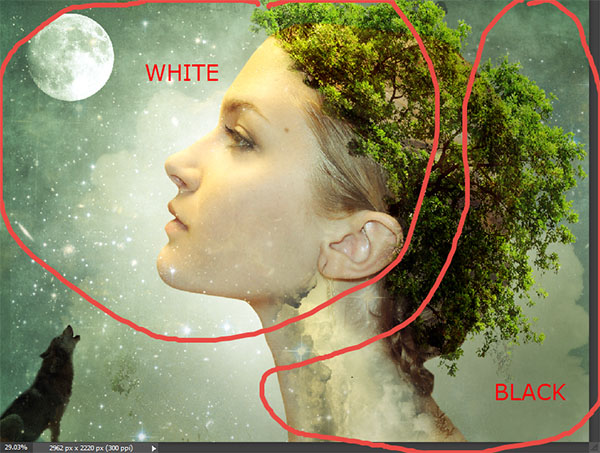
The light is coming from all directions in our scene so let’s adjust it a bit so that it puts in focus the girl’s face.
Create a new layer and with the standard round soft brush tool paint with white and black in the areas indicated below. The brush opacity should be very low, 2-5%.
Step 21
Let’s soften the tones a bit and improve the overall contrast. In order to do this first create a new layer from all the visible layer by pressing Ctrl + Alt + E. Change the blending mode to Soft Light and apply a 50px Gaussian Blur. If the black colors are too strong in any part of the image add a layer mask and hide the unwanted areas with a black brush.
Step 22
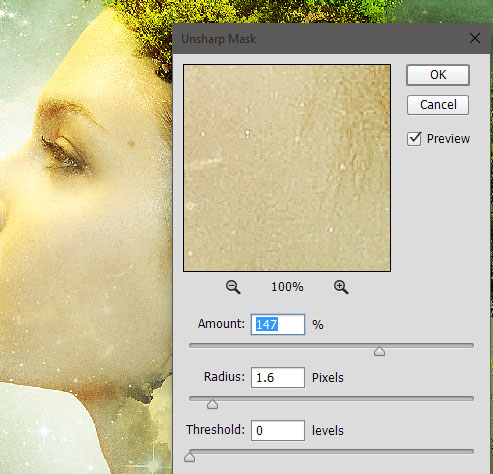
We can always improve an existing image by sharpening it. Create a new layer from all the visible layers again and use Filter > Sharpen > Unsharp mask to improve the details in our scene.
Step 23
I wanted our scene to look a bit more warm in terms of color so I added a Photo Filter Adjustment Layer (Layer > New Adjustment Layer > Photo Filter) with the settings shown below.
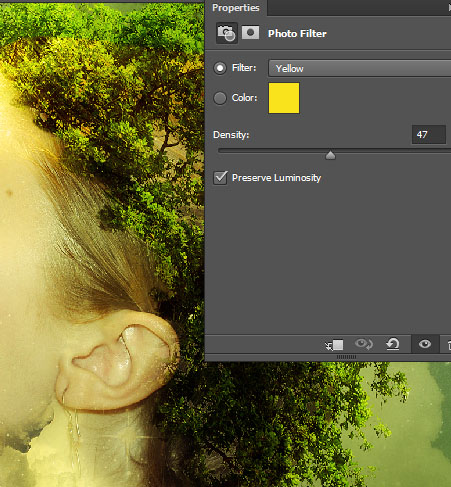
Step 24
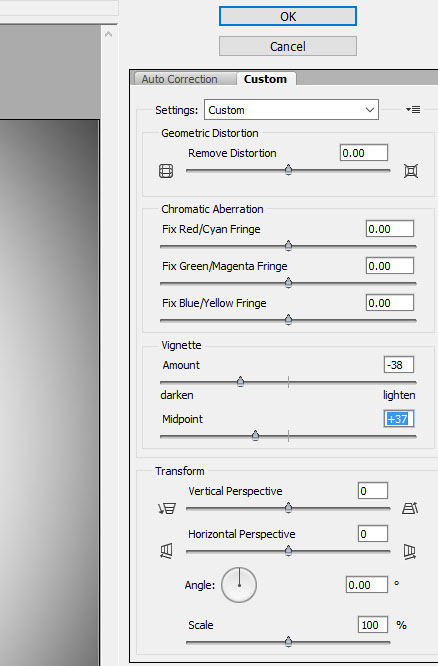
Let’s add a vignette by first creating an empty layer and filling it with white (press D to set default colors and Ctrl + Backspace to fill the layer with white).
Change the layer blending mode to Multiply and apply a Lens Correction filter as shown below (Layer > Lens Correction).
Step 25
In order to add some more color variation I created a new layer and changed the blending mode to Overlay. With the standard round soft brush at 10% opacity and using a variety of bright colors (blue, red, magenta) I painted some patches of color here and there.
Step 26
As a final step let’s boost the contrast of our scene to a maximum. Create a Curves Adjustment Layer (Layer > New Adjustment Layer > Curves) and drag the curve down. Use a layer mask to hide the areas that are way too black.
And We’re Done!