In this Photoshop tutorial we will add an intense effect to a photo using simple and easy techniques.
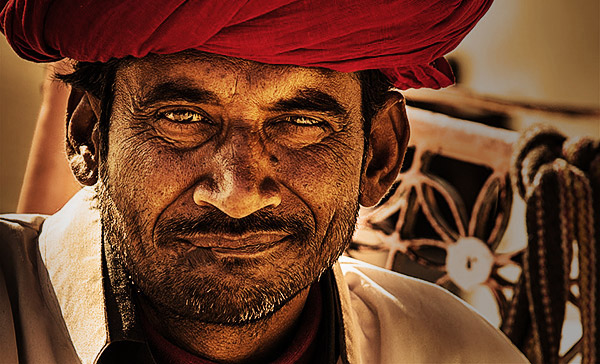
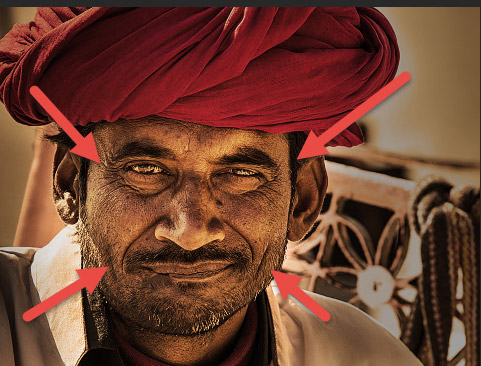
Final Image
As always, this is the final image that we’ll be creating:
Tutorial Details
- Program: Adobe Photoshop CS3
- Estimated Completion Time: 30 minutes
- Difficulty: Beginner-Intermediate
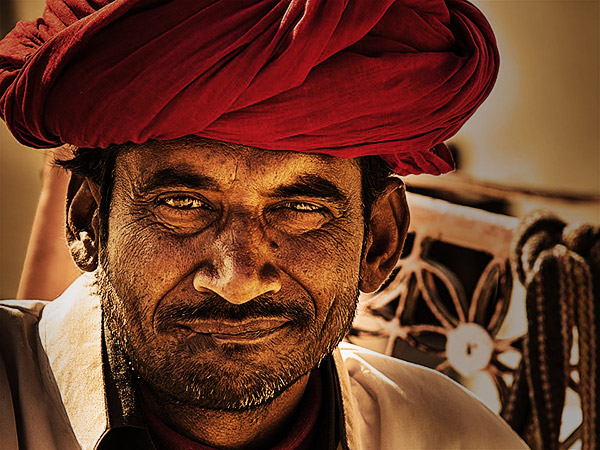
Resources
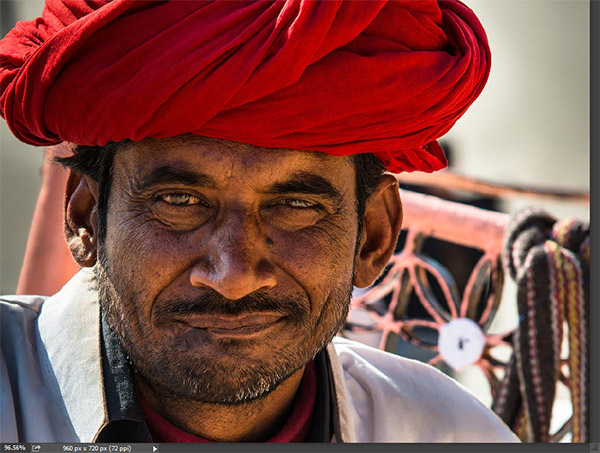
Step 1
Open the photo “Man”. We will increase the intensity of this photo to max levels by boosting the tones, sharpening and using a dominant yellow hue. You can use any image you’d like but for this kind of effect portraits work best, especially portraits with bearded guys or otherwise rough faces. The reason for this is that all that detail really comes out after the sharpen effect – which doesn’t happen that much for portraits of women or smooth skinned guys.
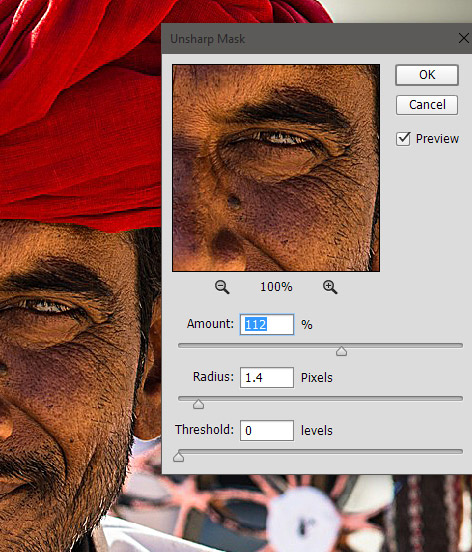
Step 2
Duplicate the background layer by selecting in the layer palette and pressing Ctrl + J.
Apply a strong sharpen effect by going to Filter > Sharpen > Unsharp Mask and apply the settings shown below.
Step 3
Now let’s play a bit with the colors. What should we do next?
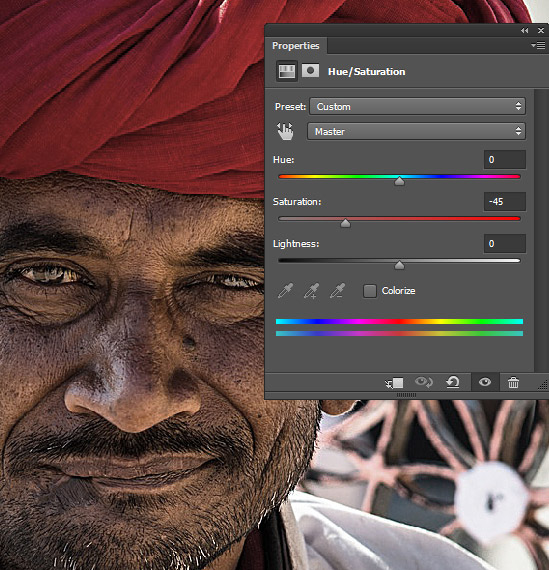
Well, a good first step is to lower the saturation by using a Hue/Saturation Adjustment Layer (Layer > New Adjustment Layer > Hue/Saturation). I know it seems a bit counterintuitive – how are we going to increase the intensity of a photo by lowering the saturation?
There is no short answer to the question above, the best explanation that I can give you is that muted colors allow for better future effects – desaturated tones are more “united” than highly contrasted ones.
Step 4
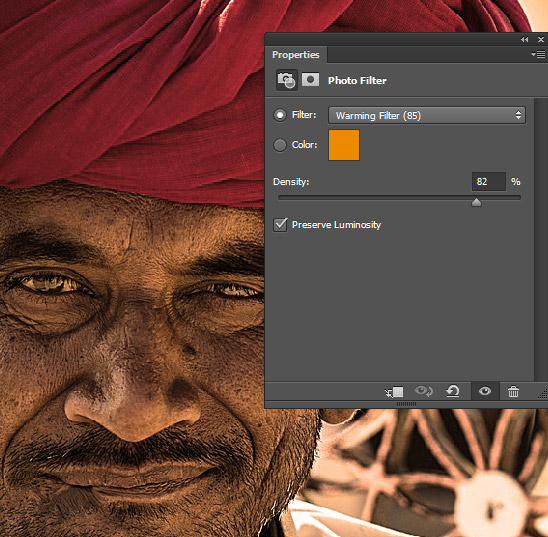
In order to further “unite” the tones but also give them a strong, powerful hue let’s add a Photo Filter Adjustment Layer. Use the settings shown below.
Now you can test my statements from step 3 – let’s see how the photo would look if we hadn’t desaturated the photo before applying the photo filter. Simply turn off the Hue/Saturation Adjustment layer (there’s an eye icon next next to the thumbnail in the layer palette which you can toggle the visibility on and off) and notice how the intensity is way through the roof – not a very pleasing effect in my opinion.
Step 5
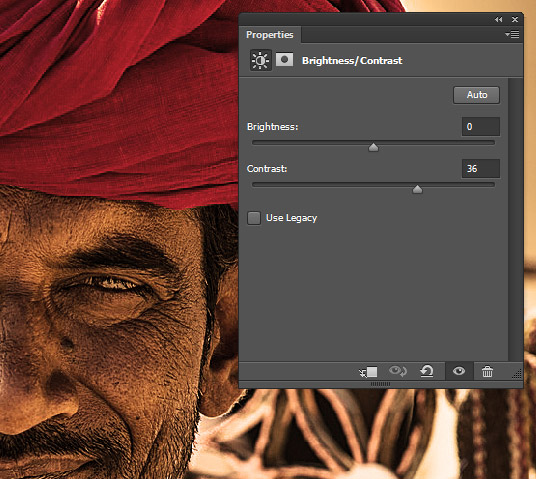
Let’s add some contrast to our scene. Create a Brightness/Contrast Adjustment Layer and drag the Contrast slider to 36.
By doing this we’ll boost the contrast of the scene nicely.
Notice how I’m using adjustment layers instead of applying image adjustments on the Background layer from Image > Adjustment menu. This is because I’ve adopted a non destructive way of editing my photos which allows me to make changes that are not permanent (aka can be turned on and off and can also be tweaked) and thus it gives me greater flexibility. I strongly encourage you to follow my example and adopt a non-destructive way of editing your photos.
What does non-destructive exactly mean in this context?
Use of Adjustment layers instead of applying the adjustments directly to a layer, use of smart objects (which allow for countless resizes without loss of quality as opposed to standard resizing), layer styles, etc.
Step 6
Our photo is starting to look quite good but there are still a few steps to go.
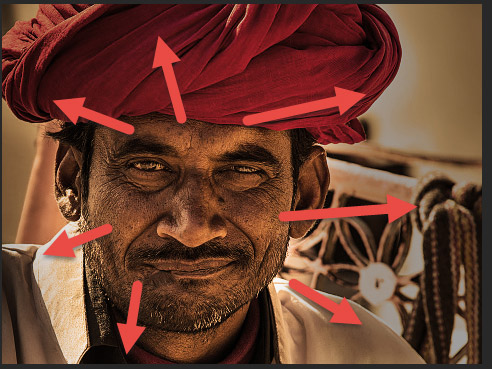
Let’s add a vignette effect in order to put more focus on the face.
Create a new layer (Ctrl + Shift + Alt +N) and change the blending mode to Multiply.
Select the Brush Tool (B) and choose the standard round soft brush. Lower the opacity to 30% and increase the size to 200-300px. Paint on the margins of our scene as shown below but leave the face alone.
Step 7
Create a new layer (Ctrl + Shift + Alt +N) and change the blending mode to Overlay. With a round soft brush at 10% opacity and 300px size paint over the face in large, generous strokes.
This step will add some tonal variety and put focus on the face at the same time.
Step 8
We’re almost there!
In order to give our image richer tones and increase the contrast at the same time we are going to use the Soft Light blending mode.
Create a new layer from all the visible layers by pressing Ctrl + Shift + Alt + E and change its blending mode to Soft Light.
You’ll notice a huge increase in saturation and color – let’s tone this down a bit by simply lowering the Fill to 58%.
As you can see we succeeded nicely in giving our photo a high intensity look using some fairly simple tools and techniques.

And We’re Done!