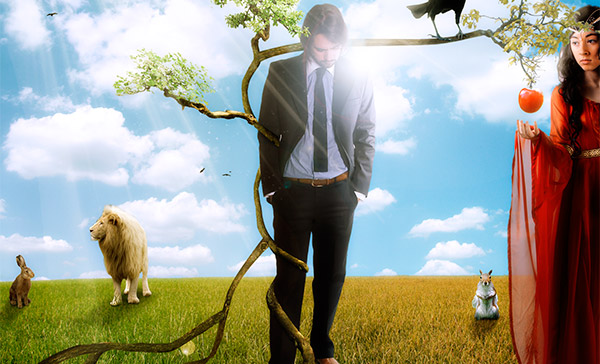
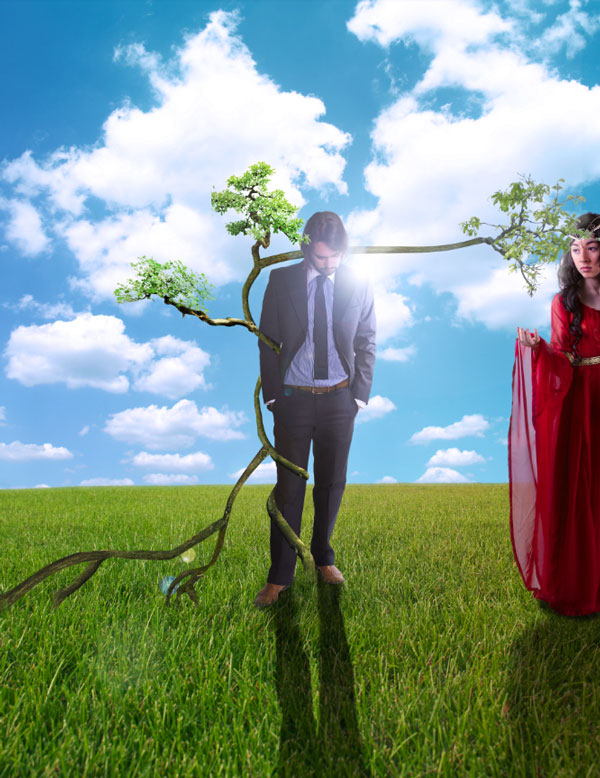
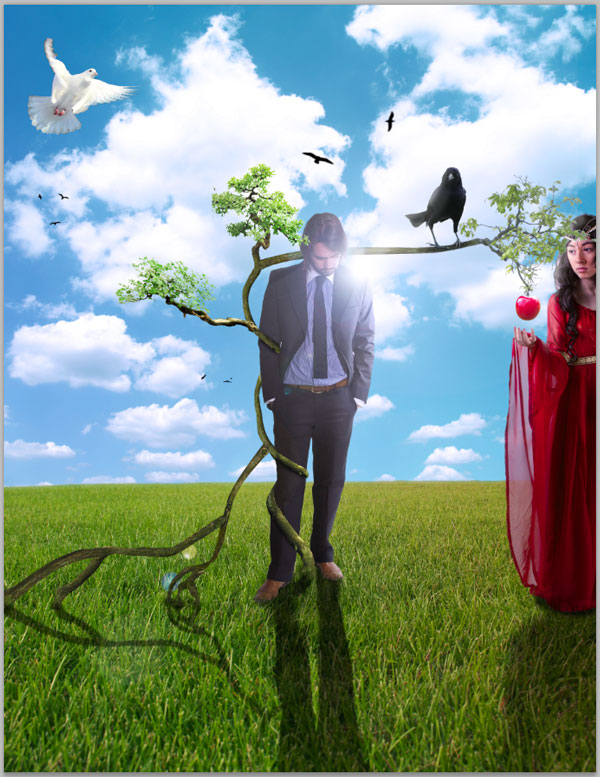
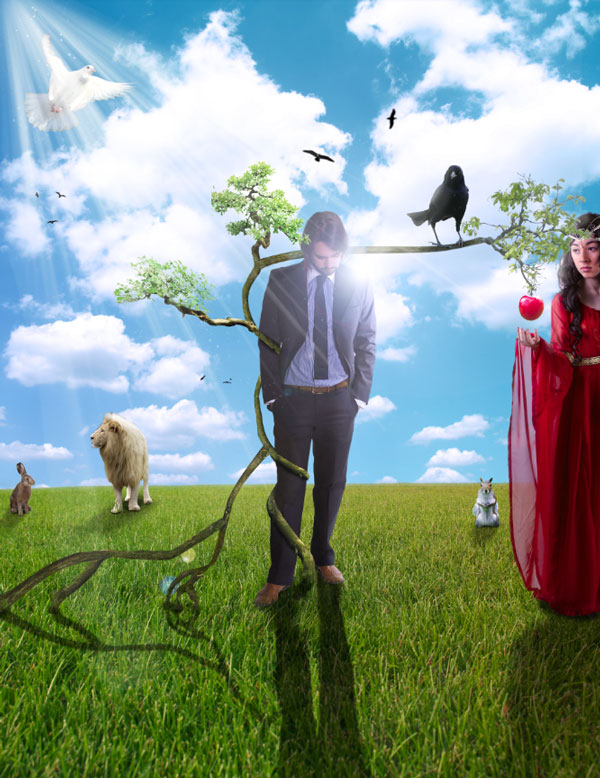
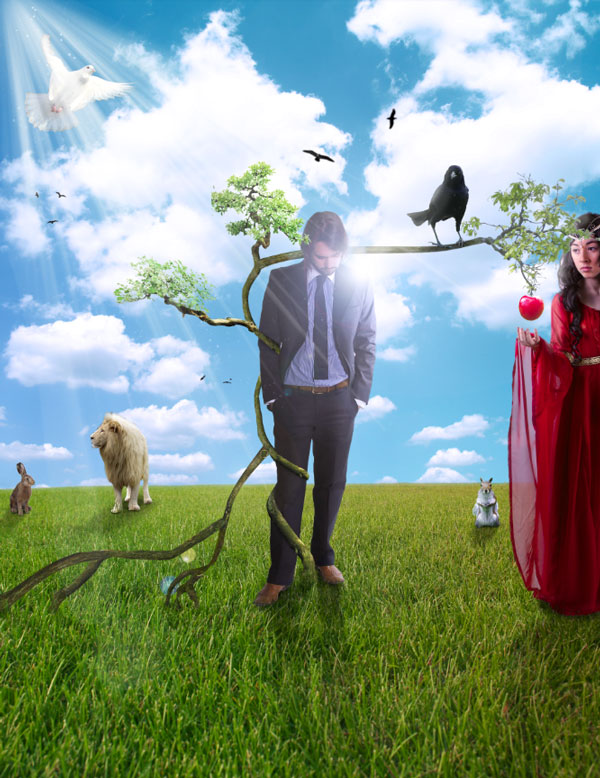
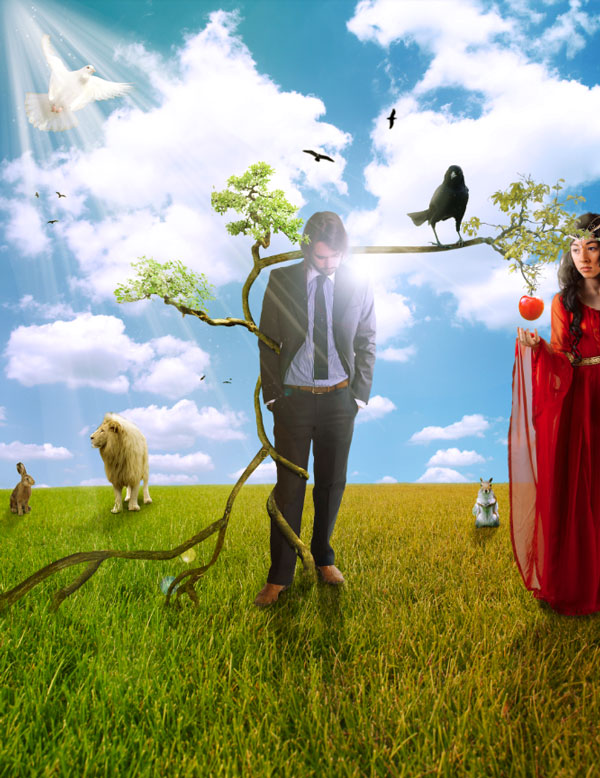
In this Photoshop manipulation tutorial we will create an Adam and Eve scene with warm colors and rays of light. We learn some advanced masking techniques so get your selections tools ready. Let’s get started then.
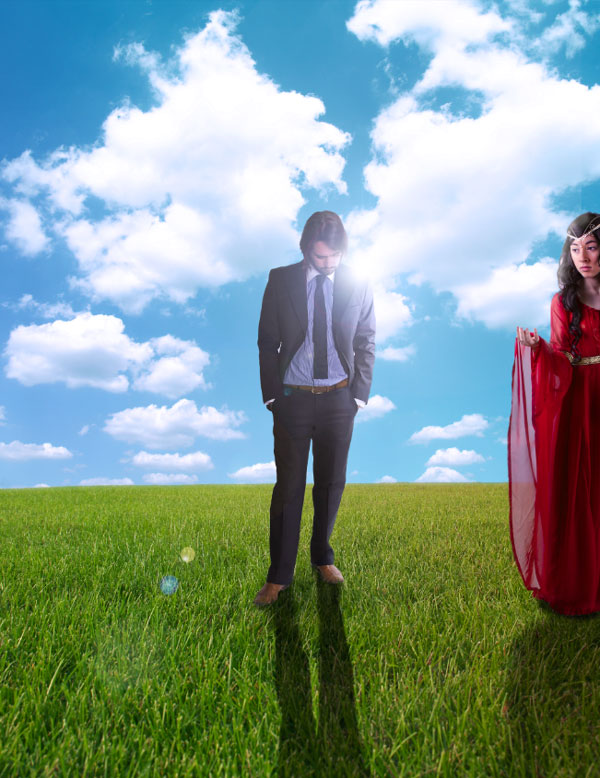
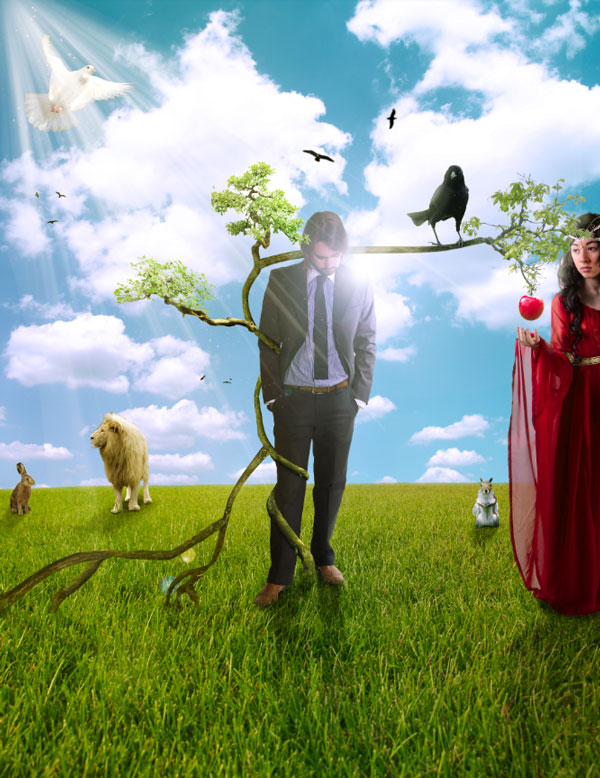
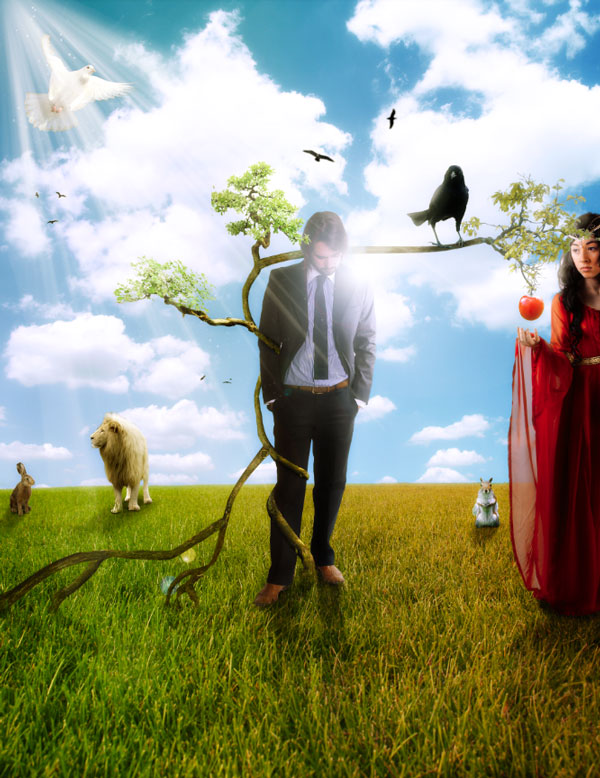
Final Image Preview

Resources
- Landscape
- White clouds in blue sky
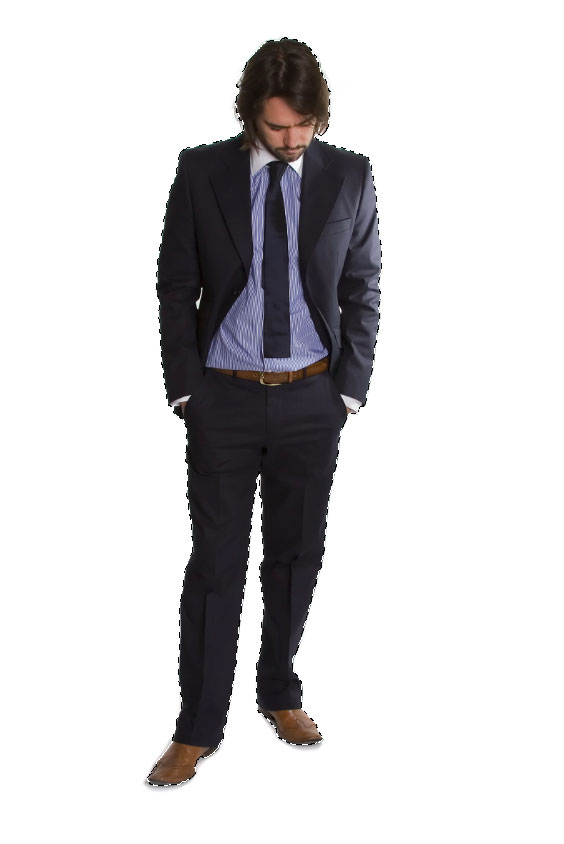
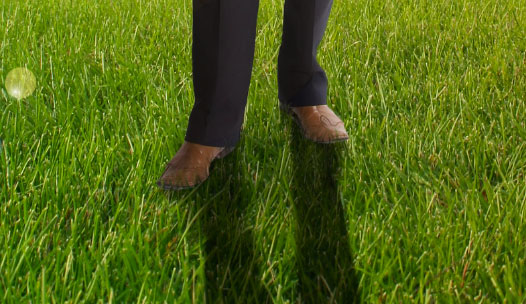
- Business Man
- Woman
- Hocking Hills
- Bonsai Garden 1
- Bonsai
- Bonsai pomegranate tree
- Perfect Plum
- struttin crow
- Birds Brushes
- Dove
- Light Brushes
- White lion 2
- mr fluffy…
- Hare
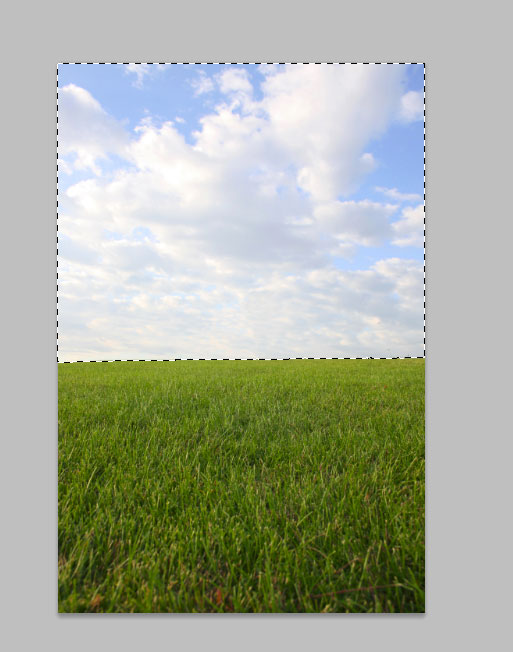
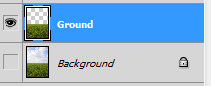
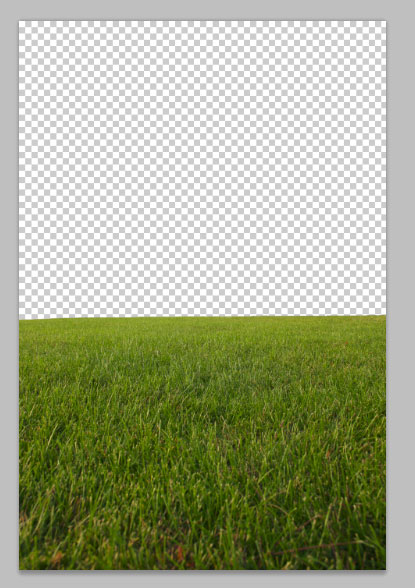
Step 1
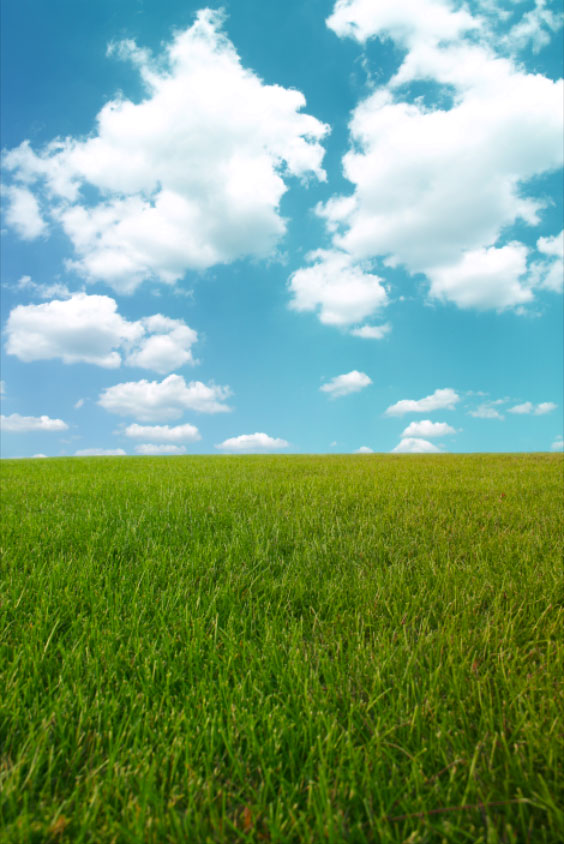
Open file “Field” and make a selection of the sky using the Quick Selection Tool (Q). Press Ctrl + Shift + I to invert the selection and Ctrl + J to make anew layer from the selection. Now we have the ground on a new layer so we can turn off the background layer.
Step 2
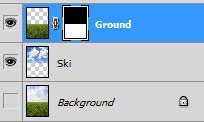
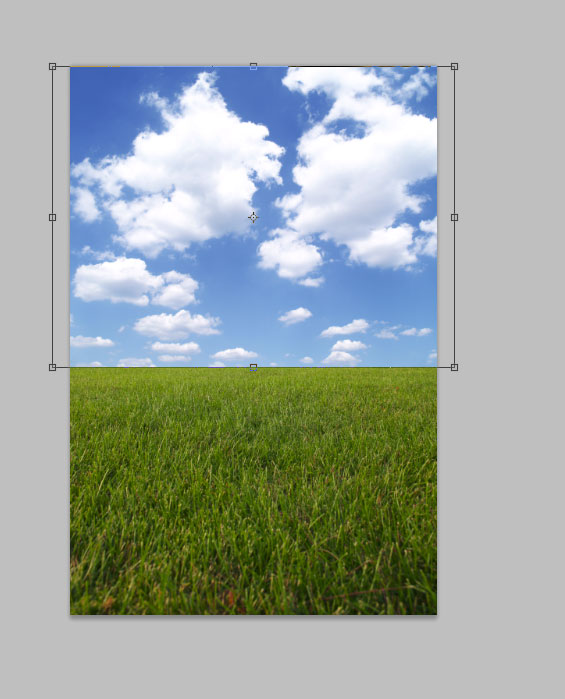
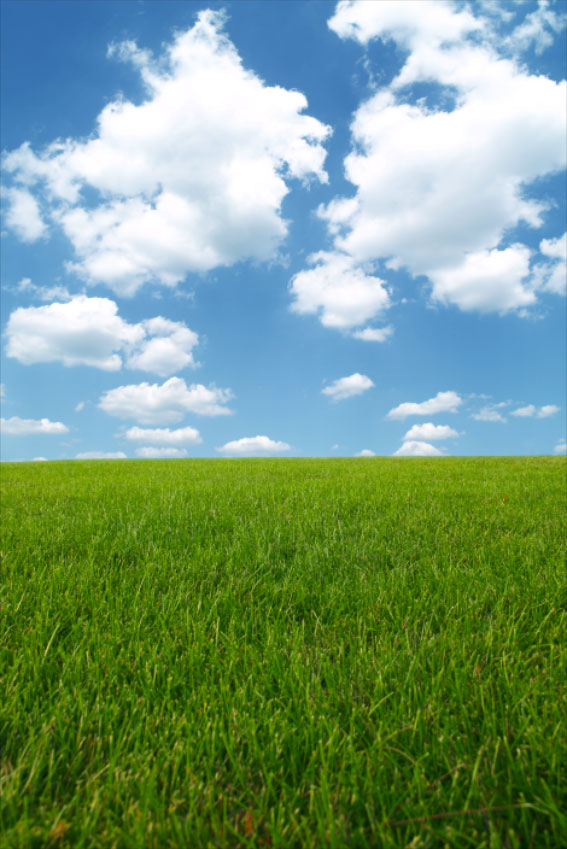
Open file “Sky” and press Ctrl + A to select all then Ctrl + C to copy. Paste into our document (Ctrl + V) and Free Transform (Ctrl + T) like shown below. Place this layer behind the ground layer. The horizon line looks very unrealistic because it is so well defined. We will have to blur it a little to make more genuine. To do this first add a layer mask to the “Ground” layer (Layer > Layer Mask > Hide All).
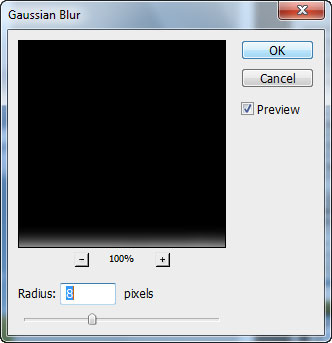
Now Ctrl-click the ground layer to make a selection of the current pixels and with the layer mask selected (simply click on it once) press D to set default colors and Alt + Backspace to fill the selection with white. To blur the horizon press Ctrl + D to deselect all and apply a 8px Gaussian Blur (Filter > Blur > Gaussian Blur).
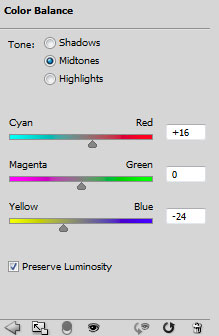
Step 3
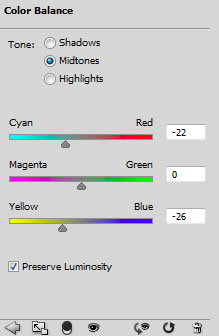
Add a Color Balance adjustment layer (Layer > New Adjustment Layer > Color Balance) and use the following settings. This will unify the colors of the sky and ground and will increase the saturation thus making the colors more vibrant.
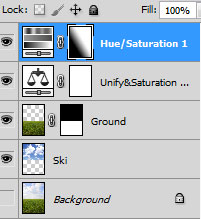
To make the composition more interesting let’s add a bit of hue variation. Add a Hue/Saturation adjustment layer (Layer > New Adjustment Layer > Hue/Saturation) and drag the hue slider a little to the left. Select the Linear Gradient tool and in the layer mask drag from the right upper corner towards the left lower corner. Release when you are in the middle.

Step 4
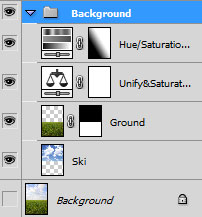
Select all the layers (Ctrl-click on each of them) and press Ctrl + G to group them. Name this group “Background”.
Step 5
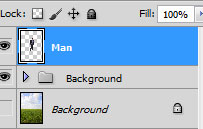
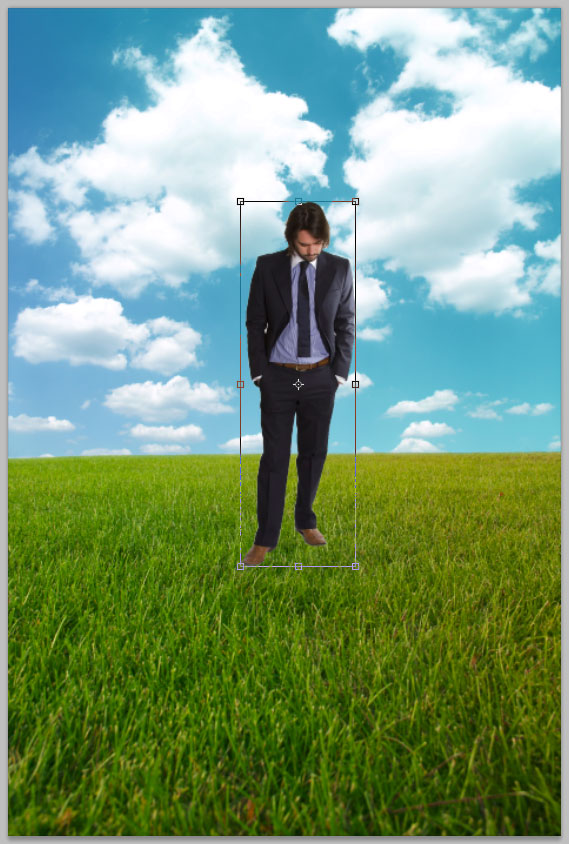
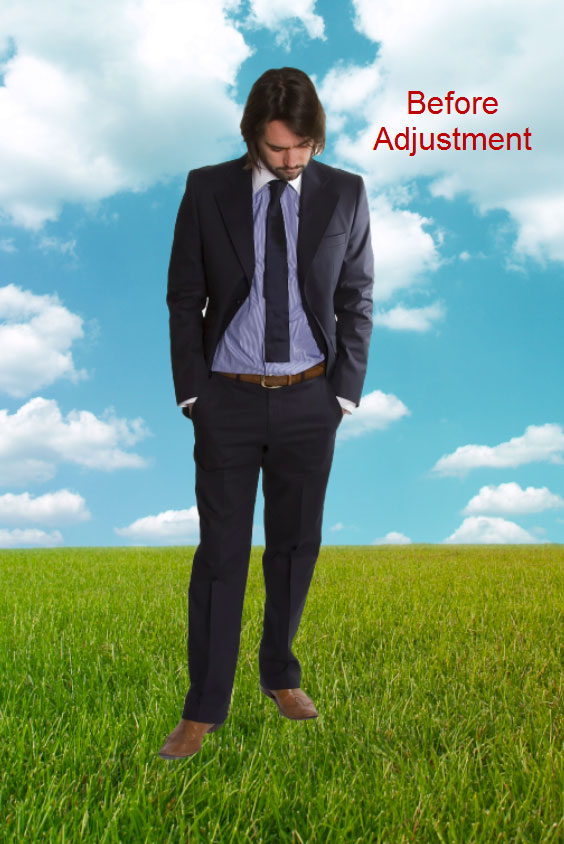
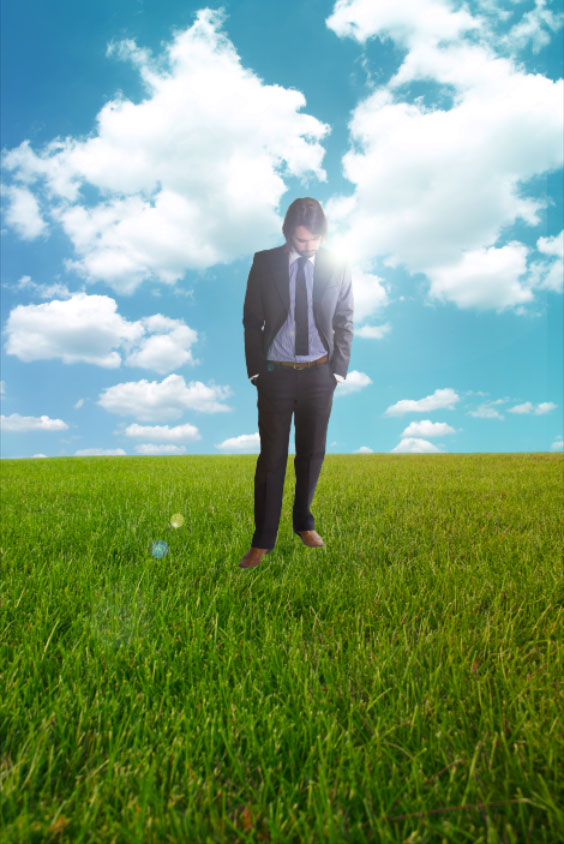
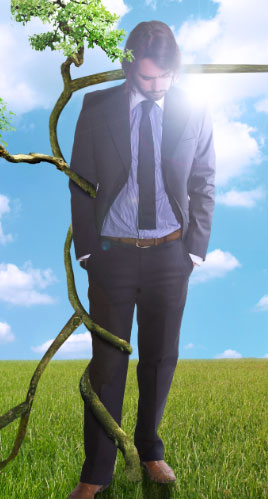
Open file “Man” and using the Quick Selection tool make a selection of the white background. It should be very easy because it is a uniform white. Press Ctrl + Shift + I to invert the selection and thus select the man and copy selection (Ctrl + C). Paste it into our document and Free Transform as shown below.
Ctrl-click this layer to load it as a selection and press Ctrl + Alt + R to open the Refine Selection window. Use the settings shown below and after you press OK delete the unselected layer and name the new layer “Man”.
Step 6
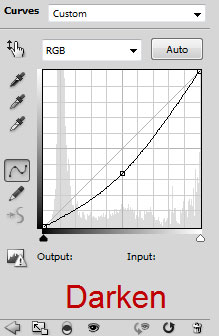
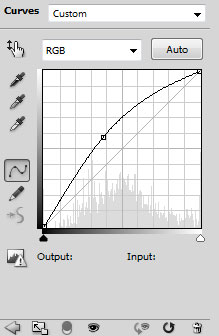
We know in advance that the light will be coming from above his right shoulder so let’s add a couple of curves layer to set up the proper lighting.
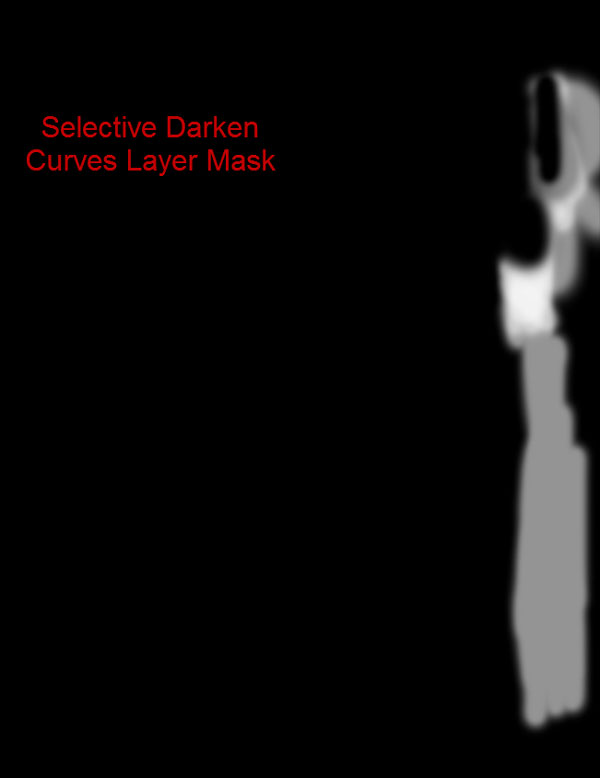
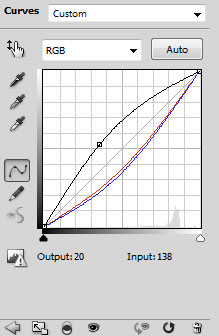
First add a Curves Adjustment Layer (Layer > New Adjustment Layer > Curves) and drag the curve downards to darken the scene. Clip this layer to the man layer (to clip an upper layer to a lower layer Alt-click in between the 2 layerl) and fill the layer mask with black (with black as foreground color press Alt + Backspace). Select a round soft brush and set it’s opacity to 50%. Carefully paint the right side of the man (imagine how the shadows would be if the light is coming from the upper right).
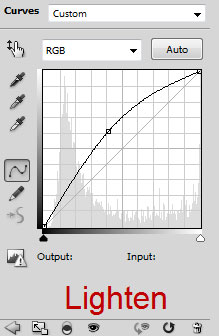
Add yet another Curves Adjustment Layer and clip it to the below curves layer (and consequentally to the man layer) but this time drag the curve upwards to lighten. Fill the layer mask with black and paint with the same round soft brush at 80% paint the right side of the man carefully.


Step 7
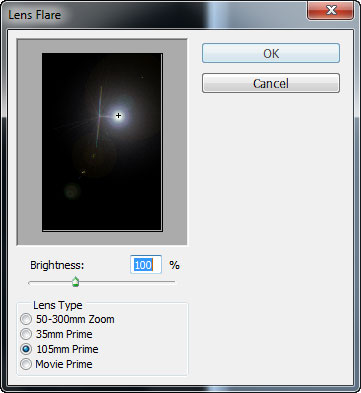
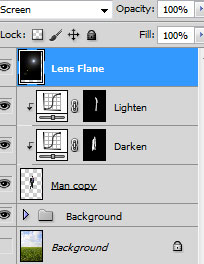
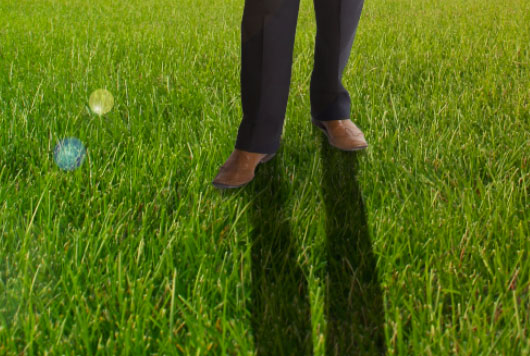
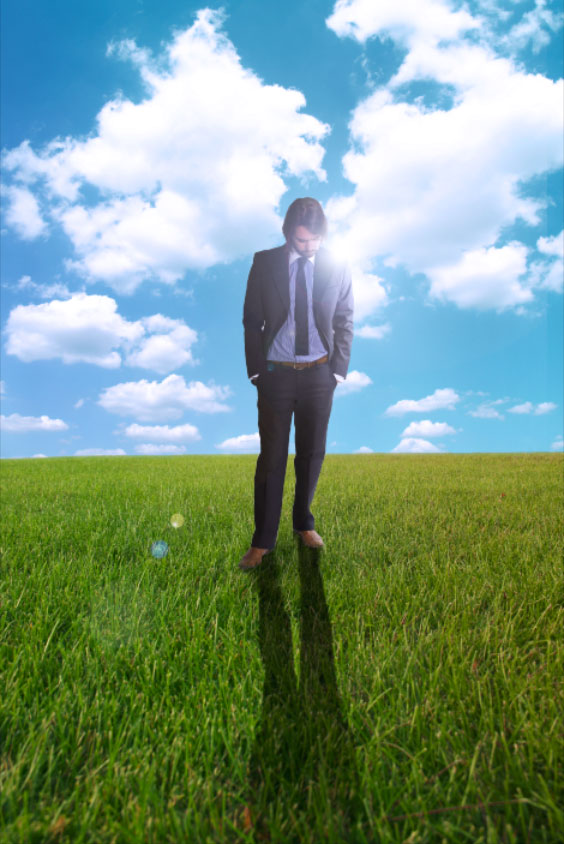
Time to add the light. In this step I will teach you a little trick to make a lens flare and move it freely on the screen. Make a new layer (Ctrl + Shift + Alt + N) and fill it with black (press Shift + F5 and select black from the drop down menu). Choose Filter > Render > Lens Flare and use the settings shown below.
Change the screen mode to Screen and voila, the black disappears, leaving you with a movable lens flare. Place the render flare just above the man’s right shoulder (from the viewer perspective).
Step 8
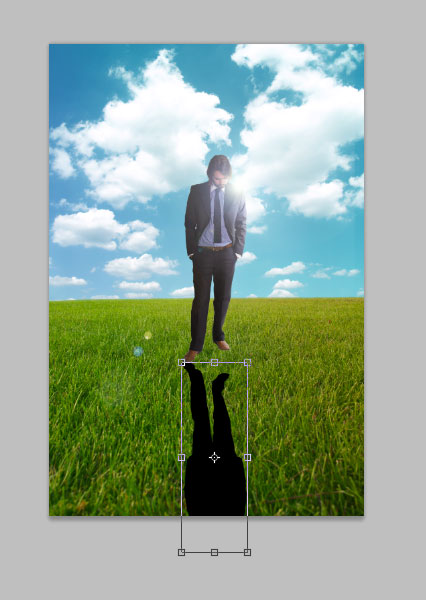
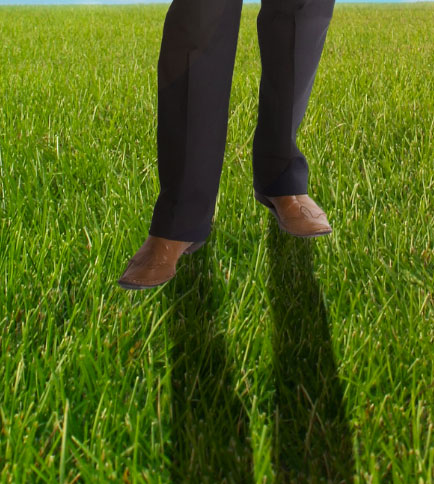
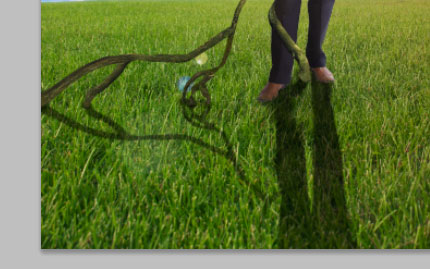
Notice how our man doesn’t seem to integrate into the scene, he seems like he’s floating above the ground. Let’s add some shadow to correct that.
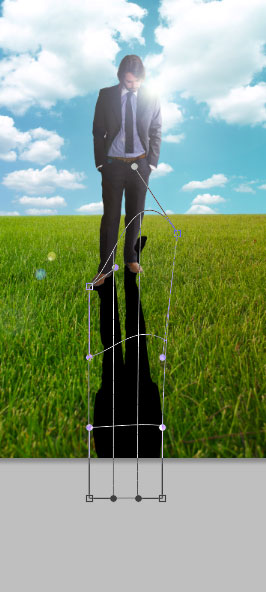
Make a new layer (Ctrl + Shift + Alt + N) and move it below the “Man” layer. Ctrl-click the man layer to load it as a selection and in the newly created layer press Alt + Backspace to fill the selection with black (make sure you have black as foreground color). Press Ctrl + T and transform the selection like in the image below. Right click on the shadow an select Warp. Adjust it like shown below to place the shadow properly on the ground and press Enter.
Step 9
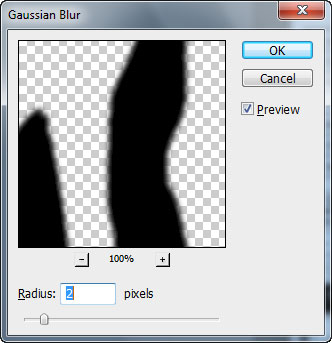
With the shadow layer selected choose Filter > Blur > Gaussian Blur to blur the shadow a little. When working with shadow layers always choose the Multiply blending mode to make the shadow integrate better into the environment. Let’s do that here. Change the blend mode to Multiply and lower the opacity to 60%. Now add a layer mask (Layer > Layer Mask > Reveall All) and with a round black soft brush erase the shadow behind the legs and reduce the amount of shadow below the shoes.
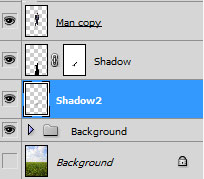
Make a new layer (Ctrl + Shift + Alt + N) and set it’s blend mode to Multiply with a 60% opacity (the same as the shadow layer). Move this layer below the shadow layer and name it “Shadow2”. With a black round soft brush at 100% paint carefuly below the shoes. Lower the opacity to 50% an increase the size to 300. Dab once on the ground, below the man.
Step 10
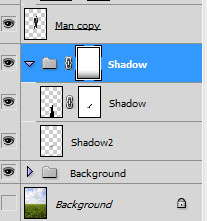
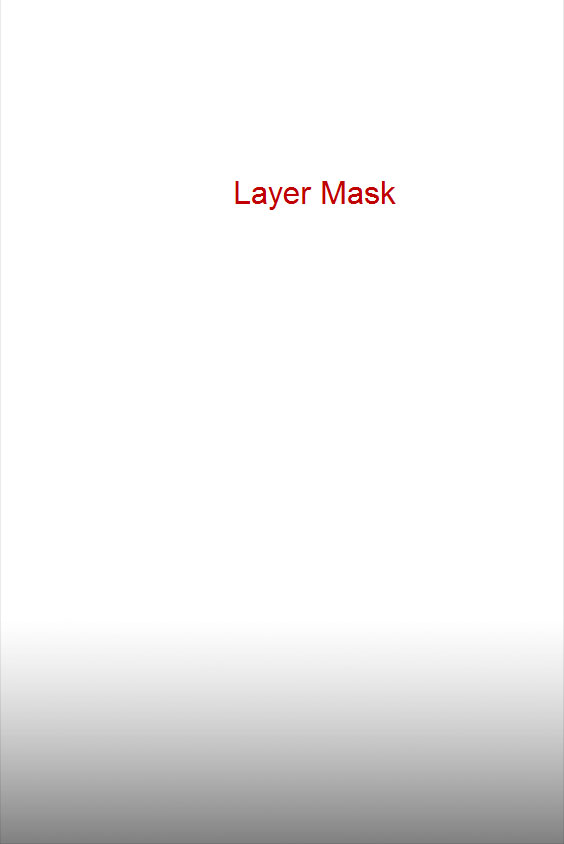
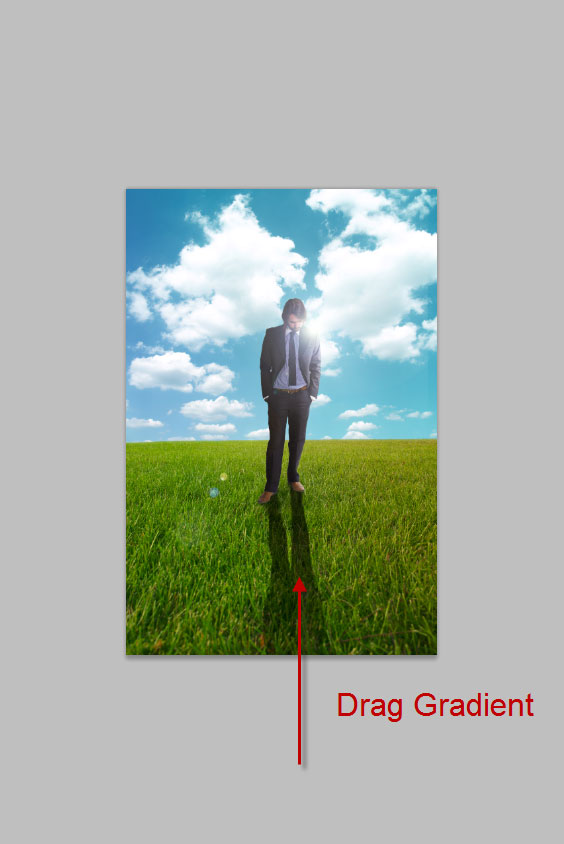
We are almost done with the shadow but still have to add a little detail. Shadows usually fade away as they are further from the subject. To accomplish this effect here first group the two shadow layers (Ctrl-click on each then Ctrl + G) and name this group “Shadow”.
Add a layer mask (Layer > Layer Mask > Reveall All) and select the Linear Gradient tool. With white as foreground color and black as background color drag from below the image until the middle of the shadow and release.
Step 11
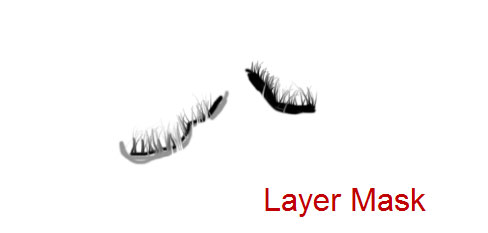
Take a close look at the shoes and notice how the shouse stand just above and not in the grass. We have to put some blades of grass in front of his shoes to achieve this effect. The trick I am going to show you works pretty well for all kinds of objects so you can use it in your further compositions.
First add a layer mask to the “Man” layer. With a round soft black brush paint closely around his shoes but do not overlap them. Select the Smudge tool and set it’s strength to 90%. In the layer mask drag from the black outline you just made towards his shoes. This is simpler to do than say so give it a shot, you’ll know what I mean.
Step 12
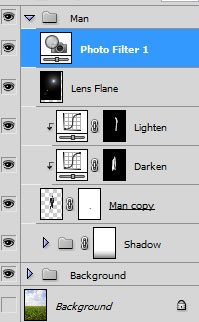
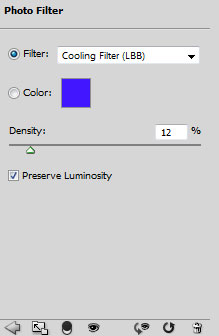
To integrate the man with the surrounding environment choose Layer > New Adjustment Layer > Photo Filter and select a cooling filter. Select all the layers and groups above the “Background” group and group them (Ctrl + G). Name this group “Man”.
Step 13
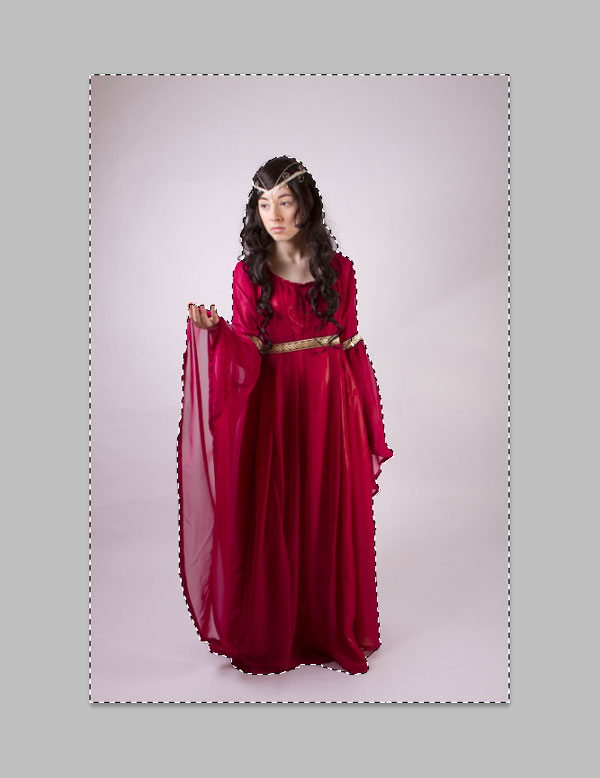
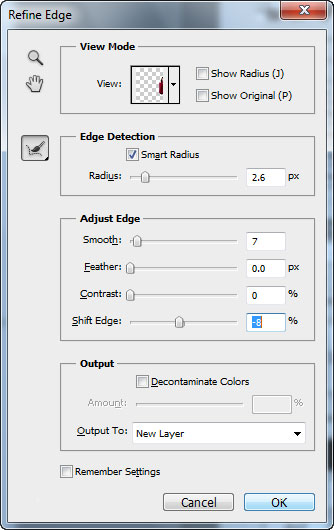
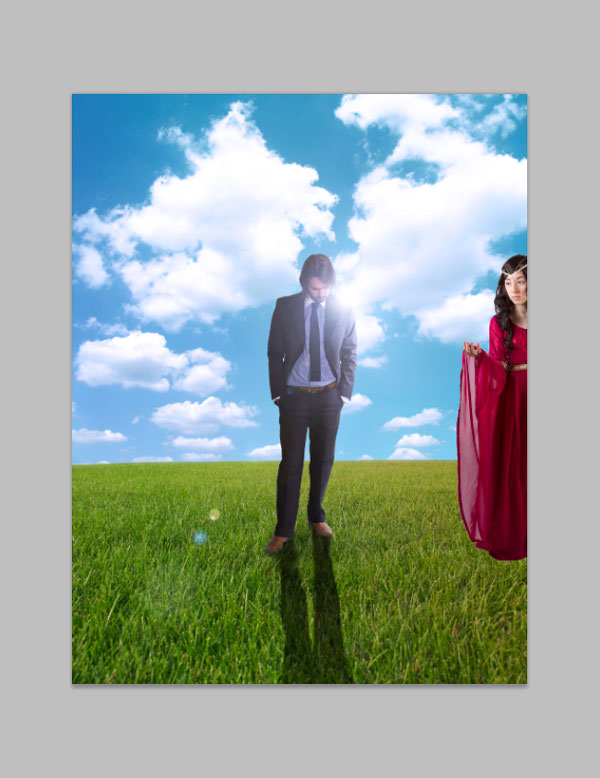
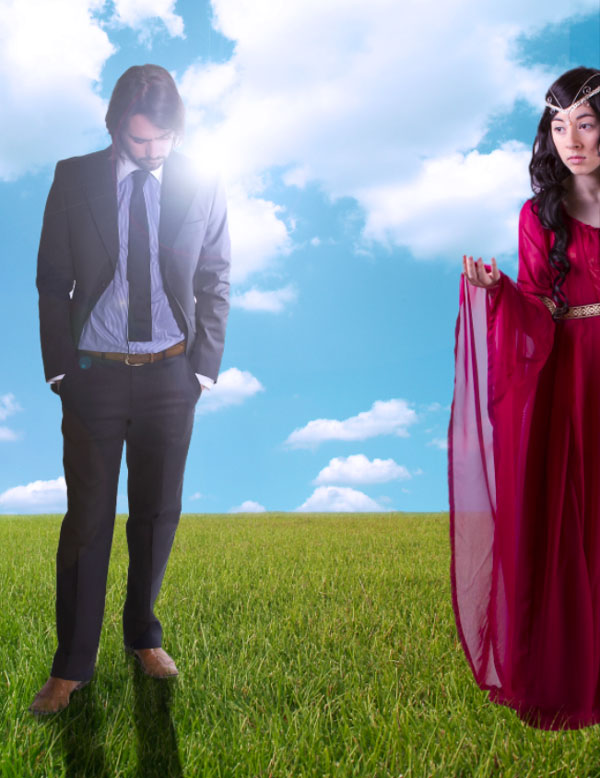
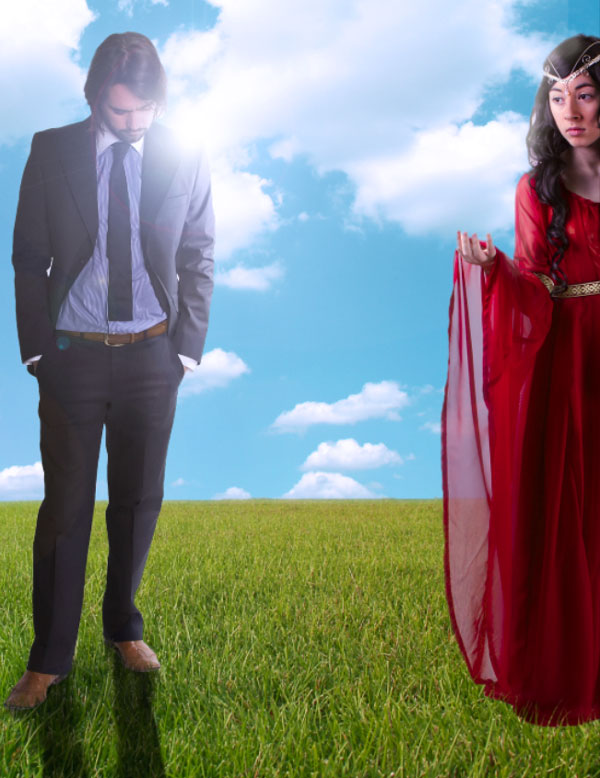
Open file “Woman” and select the background with the Quick Selection tool. Press Ctrl + Shift + I to invert the selection and Copy (Ctrl + C). Paste into our document (Ctrl + V) then position and resize the woman like in the image below. Ctrl-click on it to select the visible pixels. Press Ctrl + Alt + R to open the Refine Edge window and tweak the sliders until the visible edges dissappear. Delete the layer that is not visible and name this layer “Woman”.
Step 14
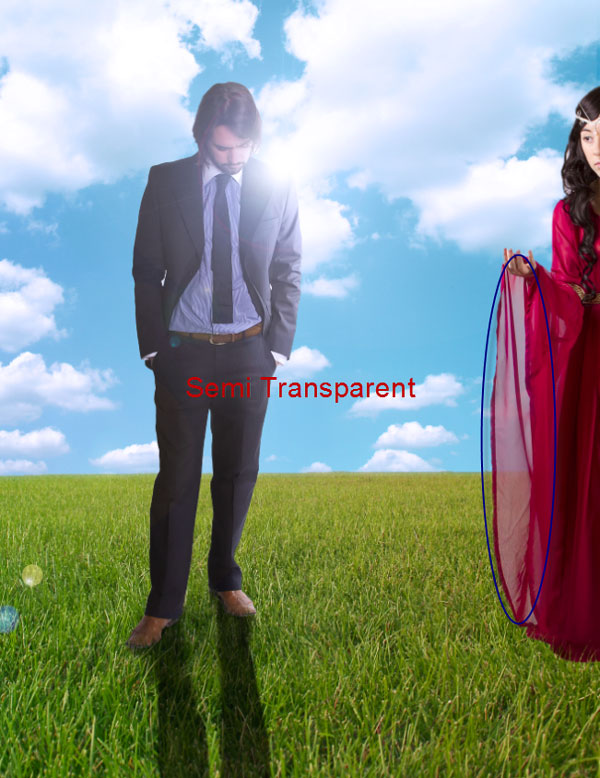
Add a layer mask (Layer > Layer Mask > Reveal All) and with a 10% round soft black brush paint over the semi-transparent part of her dress. Then repeat the trick we used at step 11 to add blades of grass (by drawing a black line around the edges and smudge).
Step 15
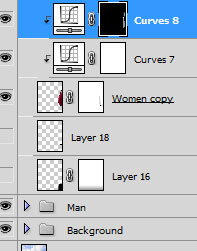
In the next steps we will be adding clipped layers to the layer “Woman” and I won’t repeat at each step. To clip a top layer to a bottom layer simply Alt-click in between the two layers.
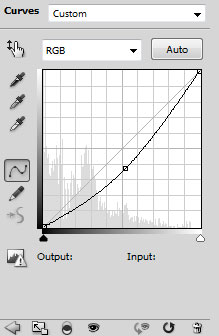
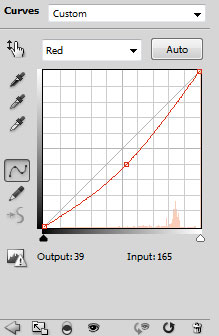
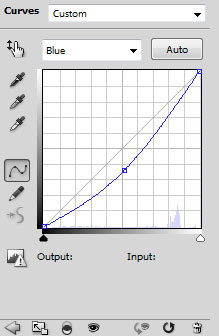
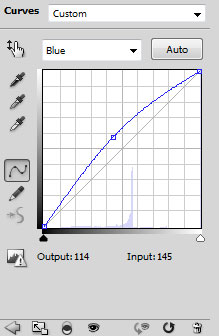
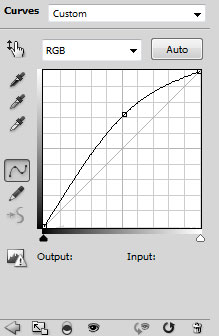
Add a Curves Adjustment Layer and in the Blue Channel drag the curve upwards to increase the blues in the light areas. Add another Curves Adjustment Layer but this time drag the RGB curve downards and fill the layer mask with black (if you don’t know how to fill a layer mask with black reffer to step 6). Because the light is coming from the left of the woman (we are using the viewer perspective) brush with a round soft white brush at 80% the right side.

Step 16
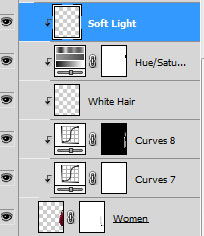
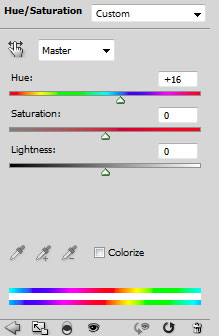
Make a new layer (Ctrl + Shift + Alt + N) and with a round soft white brush at 10 opacity gently brush the left side of the hair (remember, the light is coming from the left). Add a Hue/Saturation Adjustment Layer (Layer > New Adjustment Layer > Hue/Saturation) and drag the hue slider to the right to increase the redness.
In the layer mask use a soft round black brush to mask away the effect in her face. After that make a new layer (Ctrl + Shift + Alt + N) and and change the blend mode to Soft Light and with a round soft black brush at 20% Opacity paint the right side of the girl.
Step 17
Let’s add some shadow. Make a new layer (Ctrl + Shift + Alt + N) and move it below the “Woman” layer. Lower the opacity of the layer to 60% and change the blend mode to Multiply. With a round soft black brush paint some shadow (look at the image below for inspiration).
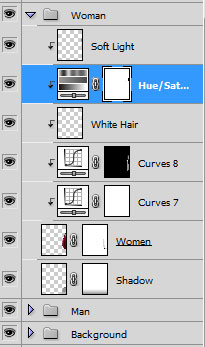
Add a layer mask and drag with the Linear Gradient tool to partially mask the further edge of the shadow. Group all the woman related layers and name the group “Woman”.

Step 18
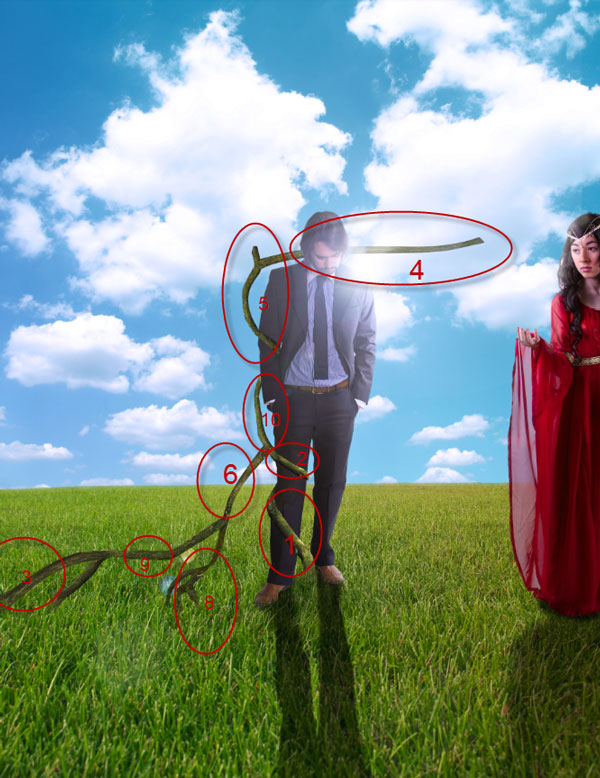
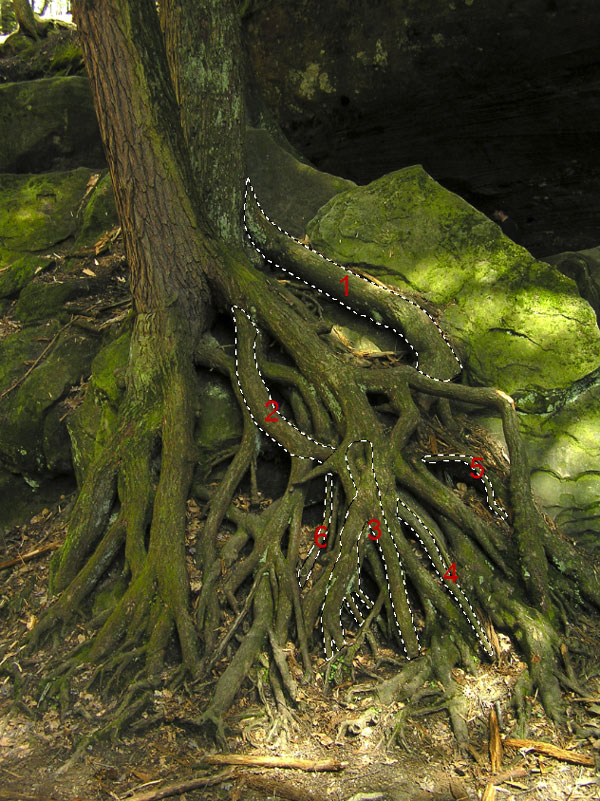
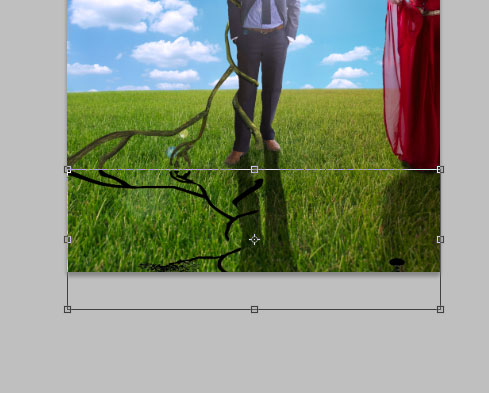
Now for the tedious part. To build the tree we will make selections of roots and place them into our document. If necessary apply a Free Transform and Warp to tweak the form and size. Some roots will be lighter so we will have to add clipped adjustment layers. Also, each root (or branch how I named my layers) will have a layer mask in which you should paint with a round soft black brush at 40-50% opacity in the places where the branches join each other to make the transition smoother.
I will not show you how to place each branch (there are 14 or so) but instead I will show you the numbered selections in the branch file and the same selections in our scene. It is up to you to Free Transform and if necessary to add an Adjustment Layer. But you should always add a layer mask to make the transition between branches smoother. I used the Pen Tool to make selections of branches and when I finished drawing my path I pressed Ctrl + Enter to transform path into selection. After that you now the workflow (Ctrl + C to to copy an Ctrl + V to paste it into our scene).
To replicate my exact moves will be very difficult so I recommend that you make your own roots selection and transform them how you see fit. After all, you should start doing this stuff on your own eventually so I don’t you start now?
Open the file “Roots” and make selections create the tree using my indications above.

Step 19
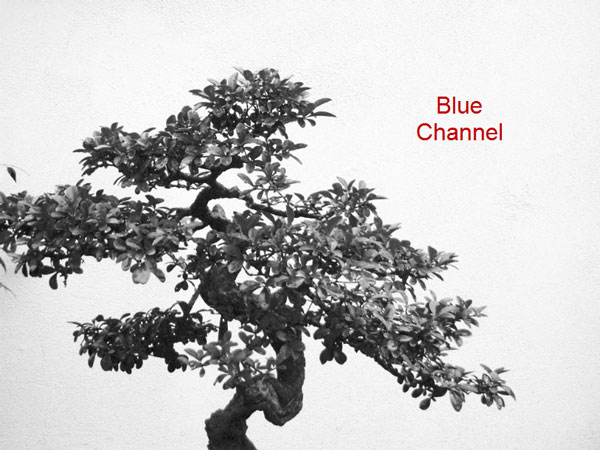
Now let’s add some branches with leaves on them. For this I use three different “Bonsai” images. Open image “Bonsai 1”. This one is pretty easy to select but still tedious with the usual selection tools (Quick Selection or Magic Wand). You could give it a shot or you can try the channels way – the good way. First let’s take a look at each channel and see which offers the greatest contrast between the subject (the bonsai in our case) and the background. I decided that the blue channel is my shot. The only trouble with this channel is that it needs more contrast because in a channel white is selected, black is deselected and gray it’s partially selected. Our channel it is mostly gray. So what we have to do it is to make our subject completely white and the background completely black (or inverse and after we’re done we will simply invert the selection by pressing Ctrl + I). First make a copy of the blue channel (by right-clicking and choosing Duplicate Channel). Next you should do:
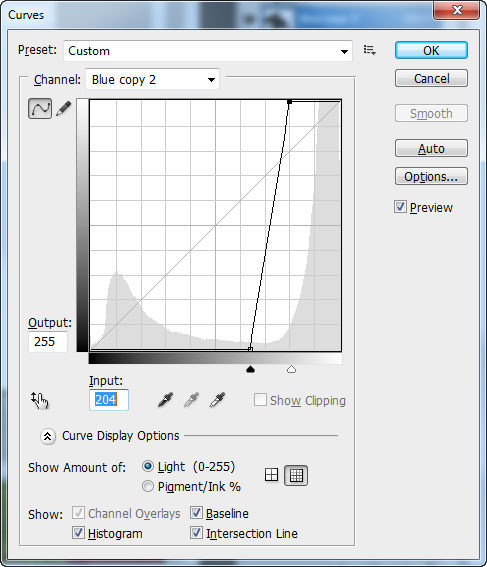
- Boost the overall contrast
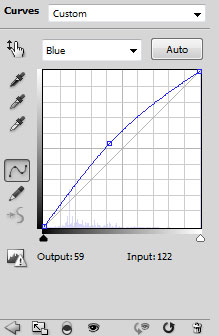
To do that we will use a Curves Adjustment (Image > Adjustments > Curves). First drag the left slider towards the middle until the bonsai it is as black as possible while the background remains as unchanged as possible. Next drag the right slider towards the middle until the background it is as white as possible and the bonsai remains as unchanged as possible. Below it is the Curve Adjustment I used to achieve my effect.
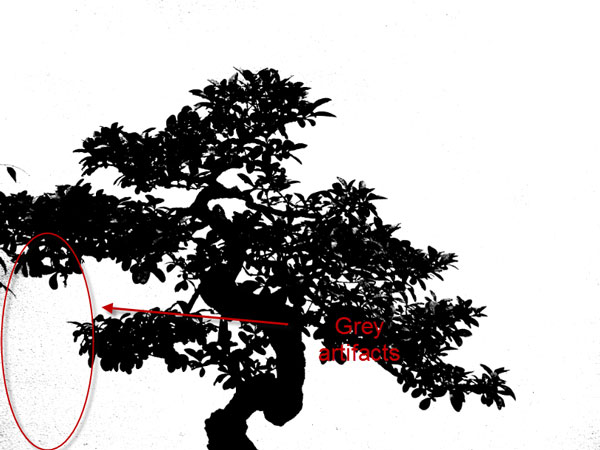
- Refine
The black and white contrast it is pretty good but you may notice some ugly gray artifacts in the left side of the image. To remove the gray artifacts we will use a well known trick in the channel selection world. First select a white round soft brush and change it’s blend mode to Overlay. Now brush carefully the grey artifacts and notice how the black areas remain unchanged. Altough this make brushing away the artifacts easier you should still be careful not to damage the black areas that contain the subject.You could also lower the amount of work you have to do by using the Lasso tool to create an approximate selection around you subject, press Ctrl + Shift + I to invert selection and fill the selection with white (or the opposite color of the subject).
After you’re done brushing away artifacts you may notice that some artifacts may still remain or that there is white color in the middle of your subject. If that’s the case you can do 2 things:
a)Brush with a white or black brush the areas you need but set the blend mode to Normal. This takes away the safety net the Overlay mode has provided but it will give you full control over the brushing. This may prove difficult because you may not now what parts of the subject need brushing (because you only see it in black and white)
b)Ctrl-click the blue channel copy you worked on until now to load it as a selection. Than change to composite view (Ctrl + 2) and enter the Quick Mask mode (Q). Now you can brush with black and white as you did in the channels. The only difference is that there is no black and white, but red for selected (you may have to change the default setting of the Quick Mask if you want this behavior. To do this double click the Quick Mask icon and choose Selected Area from the 2 available options) and transparent for deselected. The advantage here it is that you can see the actual image you’re working on.
I gave you the knowledge to make channel selections so go ahead and use it on “Bonsai2” and “Bonsai3” to select the bonsai’s.
Step 20
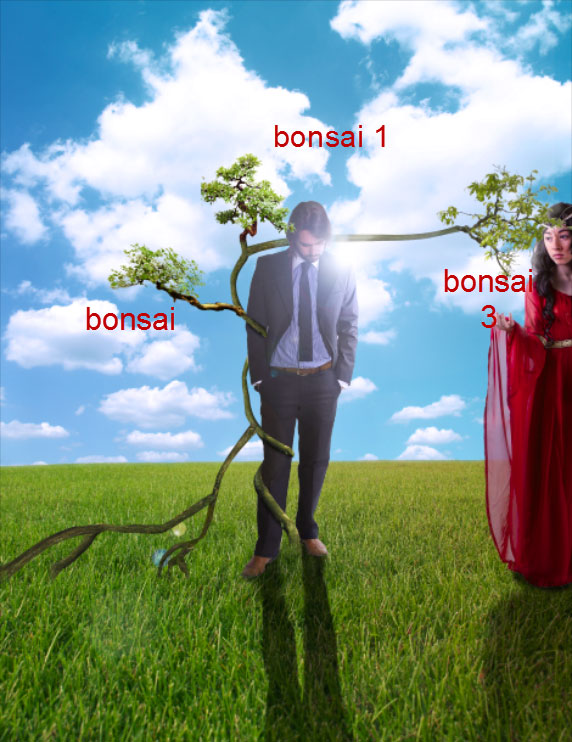
Place the bonsai trees as shown below. If necessary Free Transform and Warp. In the next steps we will adjust the saturation and the color of the bonsai trees to make them as similar to the branches as possible.
Step 21
Apply a clipped Curves adjustment layer and a clipped Hue/Saturation layer to the first bonsai as shown below.
Step 22
Apply a clipped Curves Adjustment layer to the second bonsai.
Step 23
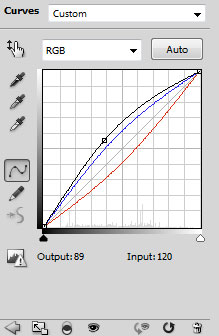
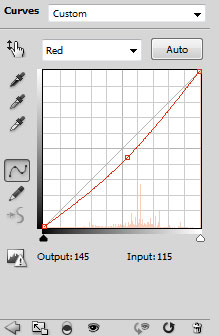
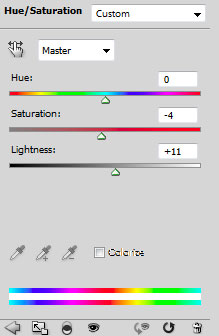
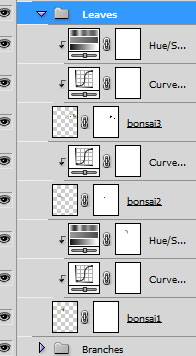
Apply a Curves Adjustment layer and a Hue/Saturation Adjustment layer to the third bonsai. I grouped all the bonsai related layers into a group called “Leaves”.
Step 24
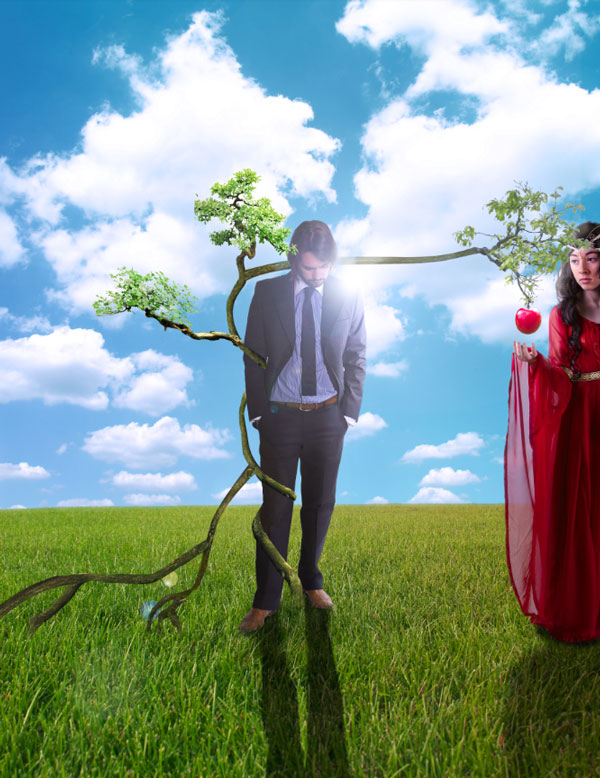
While we are at it let’s add the final element of our tree: the red apple. Open file “Apple” and using you favourite selection tool make a selection of the apple. Copy (Ctrl + C) and paste (Ctrl + V) into our document. Place the apple like shown below then add clipped Curves Adjustment layer with the settings shown below.
And by the way, I will say this at every step but if you have an object that it is not well selected and you want fix it the quick way simply add a Layer mask and do your hiding and showing there.
Step 25
Time to add the tree shadow. Make a new layer and place it below the “Branches” group. Lower the opacity of this layer to 57% and change the blend mode to Multiply. With a round soft brush paint on below the brushes on the man’s clothes, in the places you think shadow from the branches should be.
Step 26
Time to add put the shadow from the branches on the ground. The fastest way to do this is to group all the branches related layers into one group and name this group tree. Then turn of the visibility of all other groups and layers but leave the “Tree” visibility turned on.
Press Ctrl + Shift + Alt + E to make a new layer from all visible and Ctrl-click this newly created layer to load it as selection. Also name the layer “Shadow Branches”.
Fill the selection with black and change the visibility of all the other layers on so you can see were you’re putting your shadow. After you’ve turned one the visibility of all other layers on select the “Shadow Branches” layer and press Ctrl + T to free transform. Drag from the upward boundary towards bottom until you have flipped the layer upside down. You can also Warp the layer to finely tune it. Apply a 3-4px Gaussian blur and change the blend mode to Multiply with an opacity of 53%.
Add a layer mask and with the Linear Gradient tool mask away the bottom part of the shadow. You should add a couple of additional layers to paint some more shadow where it is needed. Take a look at the image below to see how I’ve done.
Step 27
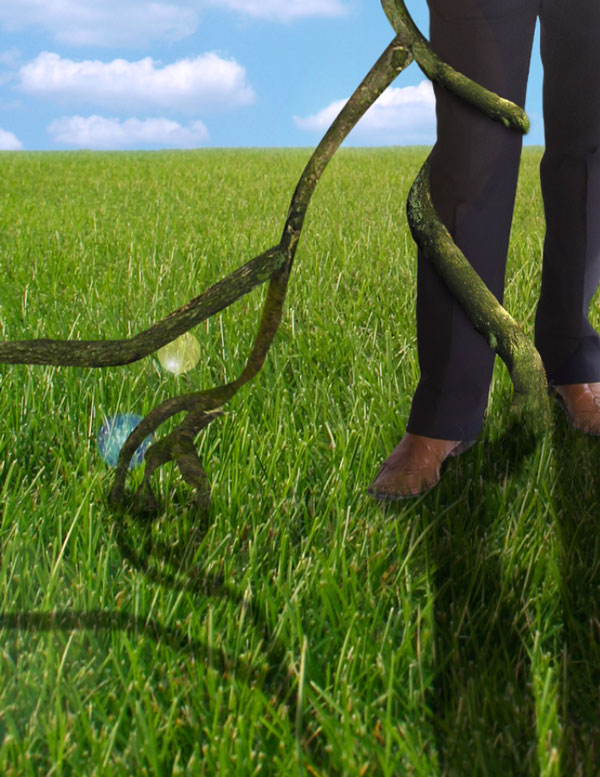
The final step regarding the tree it is to make some blades of grass showing at the base of our roots. Add a layer mask to the “Tree” group and apply the method from step 11 (black outline + smudge). And we’re done with the tree. We covered a lot of advanced techniques in the previous steps so you should be proud of yourself that you had the patience to work until now with me.

Step 28
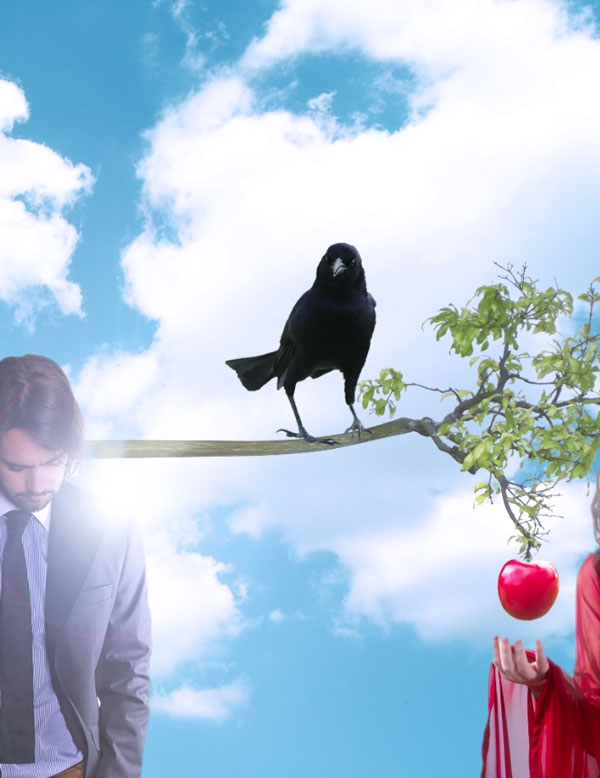
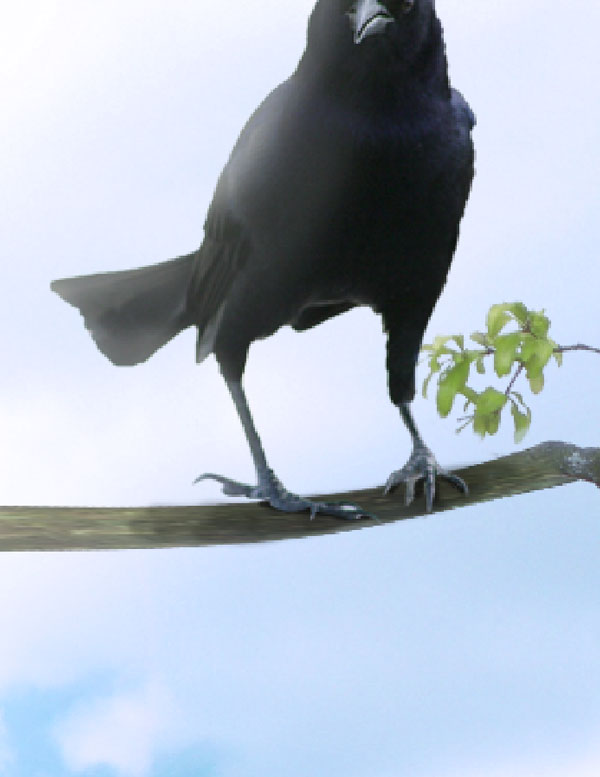
Time to add some extra elements. I am thinking that a black raven would fit just perfect on the right branch. Open file “Raven” and select the raven with your favourite selection tool. Copy the selection (Ctrl + C) and paste it into our document (Ctrl + V). Free Transform the raven and resize him until it is positioned like in the image below.
Step 29
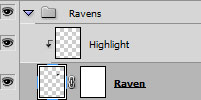
Make a new layer and clip it to the “Raven” layer. With a round soft white brush tool at 30-40% opacity paint the left side of the raven (that’s where the light is coming from). Lower the opacity to around 50-60% procent.
Step 30
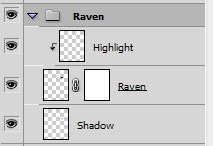
Make another new layer and place it below the “Raven” layer. Change the blend mode to Multiply an lower the opacity to 70%. With a round soft black brush paint some shadow below the raven.
Step 31
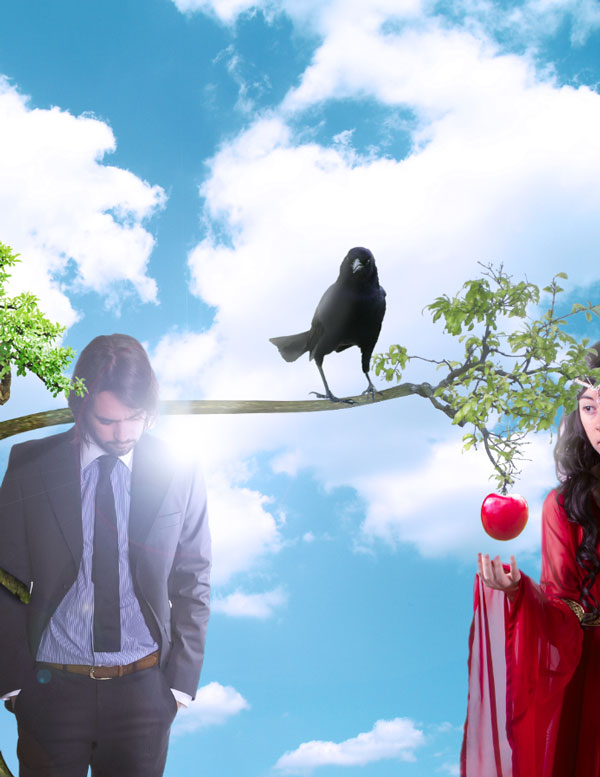
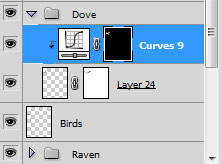
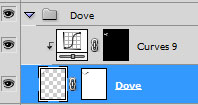
Make a new layer and paint some birds with black. Next open the file “Dove” and select the dove. Use the techniques you learned at step 19. Copy the dove and paste it into our document. Add a layer mask and with a round soft black brush at 10% opacity draw on the tail and wing feathers to make them a little transparent. This way some of the background will be visible through them thus making the dove fit better into the environment.
Add a clipped Curves Adjustment layer and drag the curve upwards to lighten. With a round soft white brush at 50% opacity paint the tail and the chest of the dove.
Step 32
Make a new layer and select beam-2-particles brush. With white as foreground color and 100% opacity click-once in the upper left part of the image.

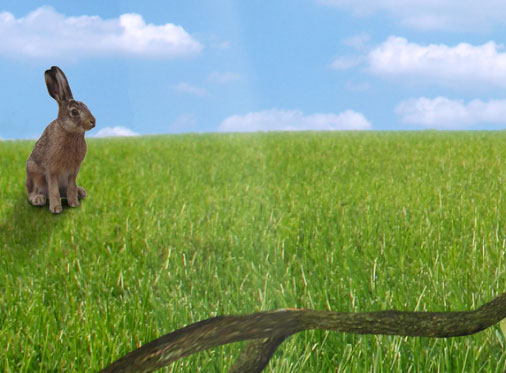
Step 33
Open file “Rabbit” and make a selection of the rabbit. Copy and paste into our scene. Free Transform like shown below than paint some shadow on a layer beneath this layer. Change the shadow layer blend mode to Multiply.
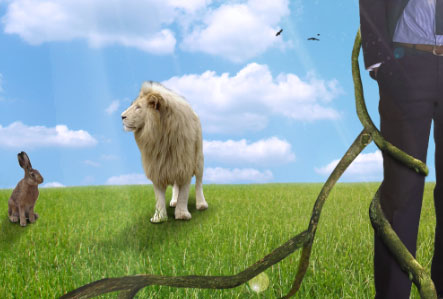
Step 34
Open file “Lion” and make a selection of the lion. Copy and paste into our scene. Free Transform like shown below than paint some shadow on a layer beneath this layer. Change the shadow layer blendmode to Multiply.
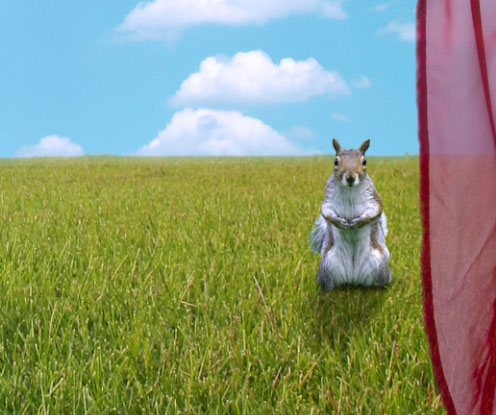
Step 35
Open file “Squirell” and make a selection of the squirell. Copy and paste into our scene. Free Transform like shown below than paint some shadow on a layer beneath this layer. Change the shadow layer blen mode to Multiply.
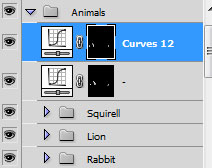
Step 36
Select all the animals (lion, squirell and rabbit) and press Ctrl + G to make a group. Change the blend mode to Normal and at the top of the layers, inside the group add a Curves Adjustment layer.
Drag the curves upwards to lighten than with a round soft white brush at 50% Opacity paint the right side of the rabbit and the lion. Then paint the left side of the squirell. Remember that left and right from our persepective.
Add another Curves Adjustment Layer and this time drag the curve downwards to darken. In the layer mask paint with the same brush you painted on the previous Curves Adjustment layer only this time on the opposite sides. This step will add some volume to the animals in conformity with the direction of light.

Step 37
Now that I look at the scene I find that the shadows are way too strong. Of course I could’ve modified the tutorial from the beginning to make the shadow just right but I didn’t for two reasons.
One reason is that I am writing this tutorial as I am creating my scene (you assist at the creative process in all it’s splendor :D) the amount of work required to redo all the steps and to create another set of screenshots would be too much for my patience (I am lazy, so?:D).
Secondly this is a valuable lesson in itself. If something doesn’t look right you shouldn’t leave like this, maybe thinking “It will work nevertheless”. Because if it looks wrong than it is probably wrong and it won’t work. So what you have to do it is to correct your mistake (ok, ok, my mistake) despite the reasons that made you make that mistake in the first place. In this particular case it seemed to me that the shadows were competing for attention with the main subjects making the whole composition unbalanced. Go ahead and select a soft round black brush at 50-80% opacity and mask away most of the shadows until you will have something like the image below.
Step 38
Time for some post-processing techniques to finish this scene. I decided to go light on this one, whitout too many “contrasty” effects. I want to achieve lots of warm colors an a sort of heavenly, godly feeling to it. Let’s see if I (we) succeed.
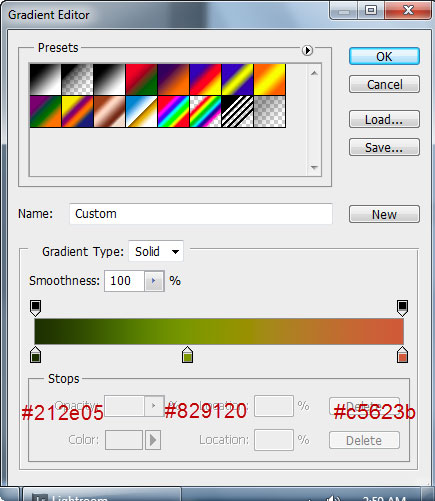
Add a Color Balance Adjustment layer and increase the Red and Yellow amount. In the layer mask use the Linear Gradient tool to limit the adjustments to the left side of the image. Next add a Gradient Map Adjustment layer and use the settings shown below. Change the blend mode to Soft Light and decrease the Opacity to 38%.
Step 39
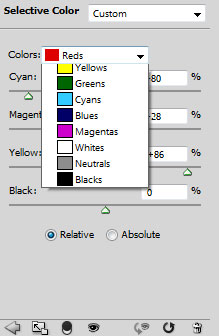
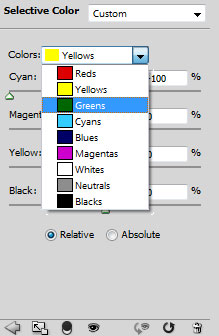
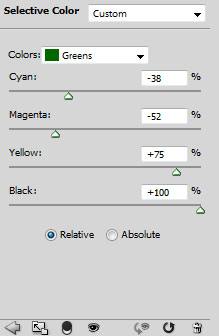
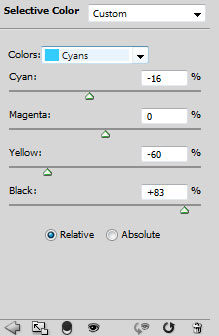
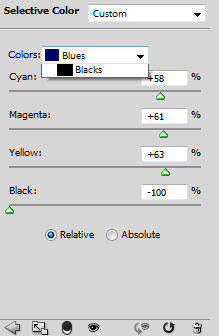
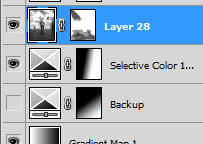
Now it’s time for a Selective Color Adjustment layer. Use the settings shown below (or try out the sliders yourselves) and in the layer mask drag with the Linear Gradient Tool to achieve something like in the image below.

Step 40
Press Ctrl + Shift + Alt + E to make a new layer from all visible and add a 20px Gaussian Blur. Desaturate (Ctrl + Shift + U) and add a layer mask. In the layer mask paint with black the “ray of god” light and the gras in front of the scene to protect them from bluring. Use a round soft brush black brush at 50% Opacity.
Now for the magic, change the blend mode to Soft Light. We have a nice, dreamy effect.
Step 41
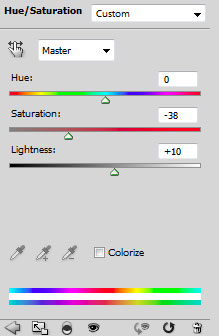
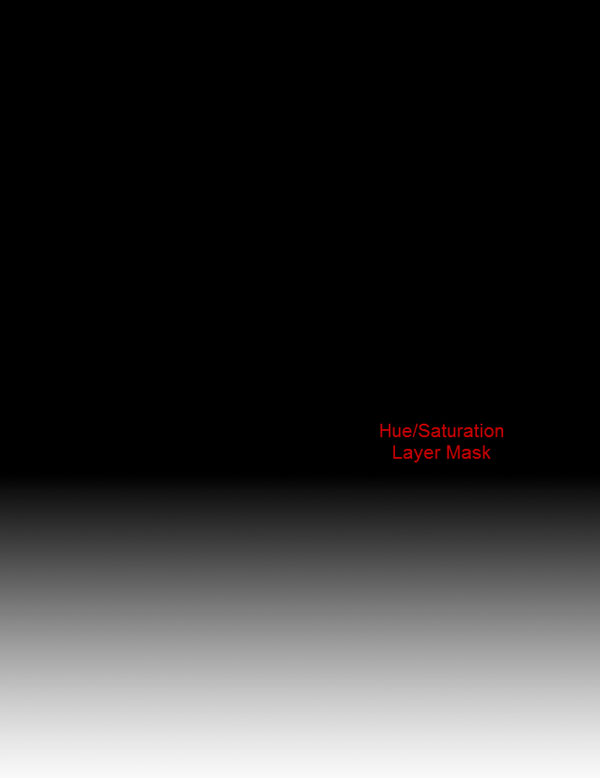
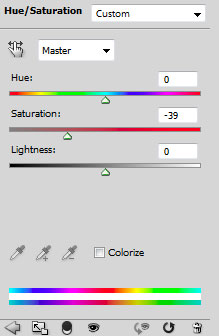
And now for the final step let’s lower the saturation of the grass in the front of the scene because we want our viewer’s attention on the main subjects and not on the boring grass. Add a Hue/Saturation Adjustment layer and drag the Saturation slider to the left to lower the saturation. In the layer mask use the Linear Gradient tool to apply this effect only to the bottom of our scene.
And that’s all.
Final Image