In this Photoshop tutorial we will create an abstract shape effect using the Pen Tool and layer effects.
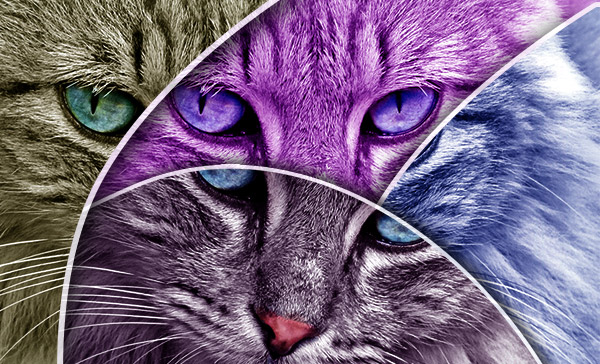
Final Image
As always, this is the final image that we’ll be creating:
Tutorial Details
- Program: Adobe Photoshop CS3
- Estimated Completion Time: 30 minutes
- Difficulty: Beginner-Intermediate
Resources
Step 1
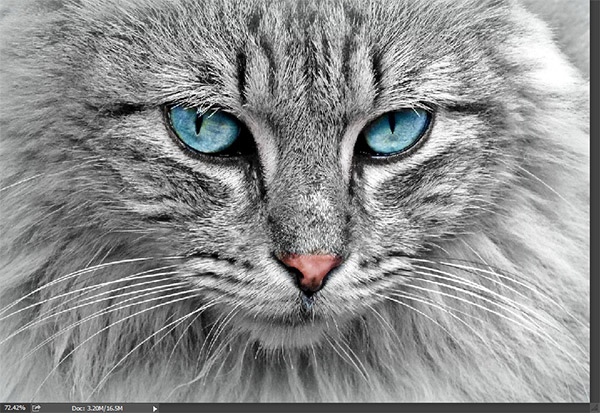
Open the file “Cat”. We will use this beautiful photo to create some abstract shapes with the help of the Pen tool and layer styles.
Step 2
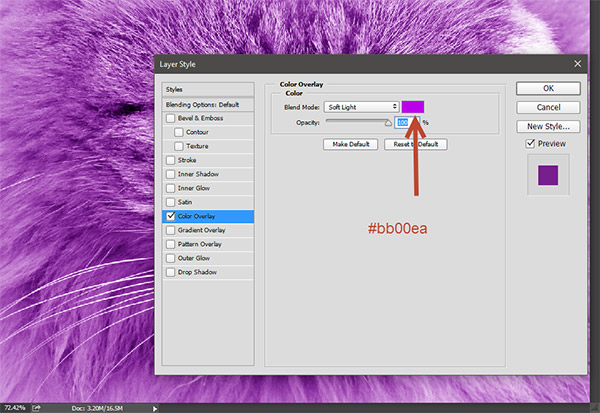
An abstract effect requires strong colors – let’s do that. First duplicate the background layer by selecting it in the layers palette and pressing Ctrl + J. Name the layer “Colored” and double click to open the layer styles window.
Add a color overlay effect and select a nice magenta color (#bb00ea). Change the blending mode to Soft Light and press ok to apply the effect.
Step 3
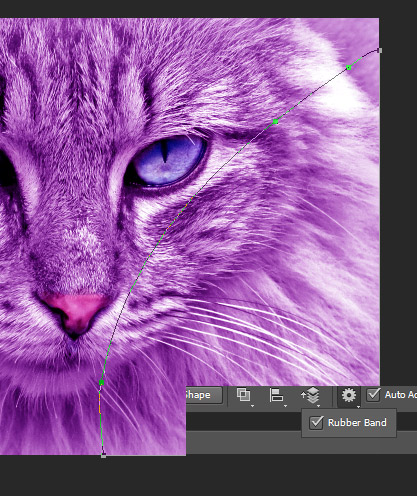
Select the Pen Tool (P) and create a path as shown below. In order to preview the path check the “Rubber Band” option in the tool options (in the top area just below the menu ).
Step 4
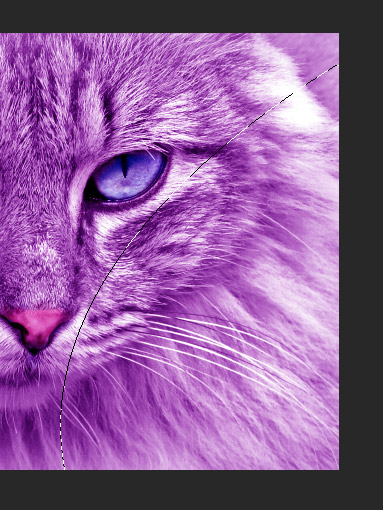
Once you’re done with making the path press Ctrl + Enter to transform the path into a selection. You should have something like below:
Step 5
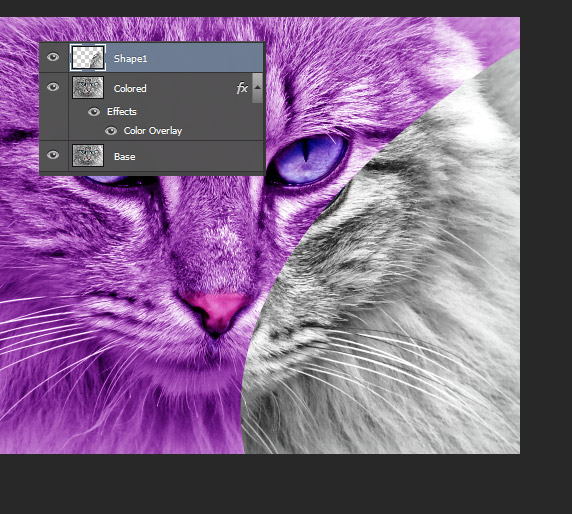
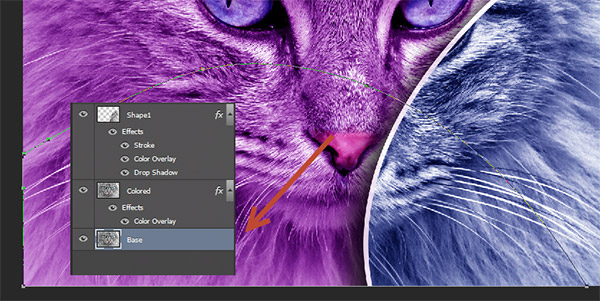
Click on the “Colored” layer in the layer palette to make it active and press Ctrl + J to create a new layer from the selection we made in step 4. You’ll notice that the new layer looks gray just like the background layer and not magenta. That is because we only duplicated the layer itself and not the layer styles attached to it. This is good because we will add our own special styles that are different from the styles applied to the “Colored “ layer. Name this layer “Shape1”.
Step 6
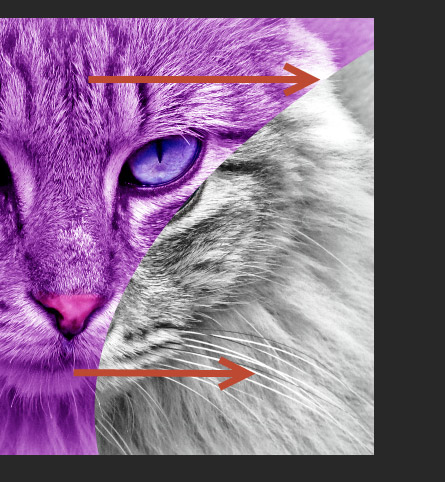
Before adding any styles though let’s move this new layer a bit to the left (switch to brush tool by pressing B and hold Ctrl key – you’ll notice that the pointer changes to a black arrow with a little cross shape below it. Click and hold the left mouse button and simply drag the layer where you want to – in this case a bit to the left).
Step 7
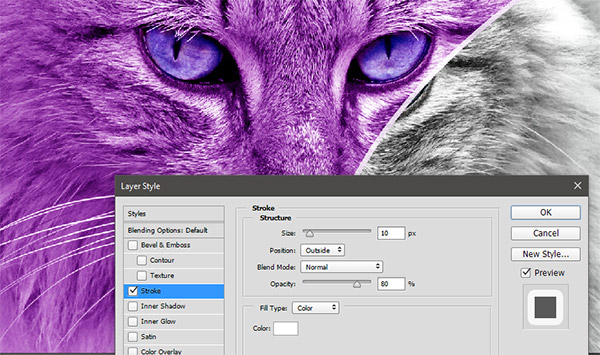
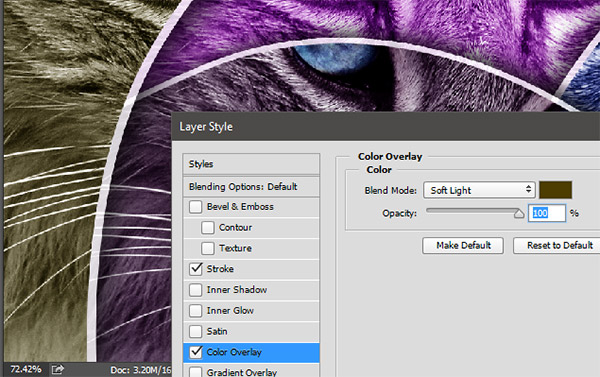
Now let’s add some layer styles to the duplicated layer. Double click “Shape1” layer to open the layer styles window and start adding the following effects:
First add a 10px white stroke with the settings shown below.
Step 8
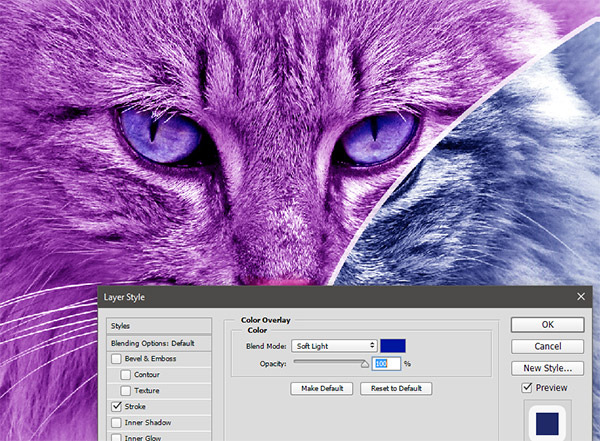
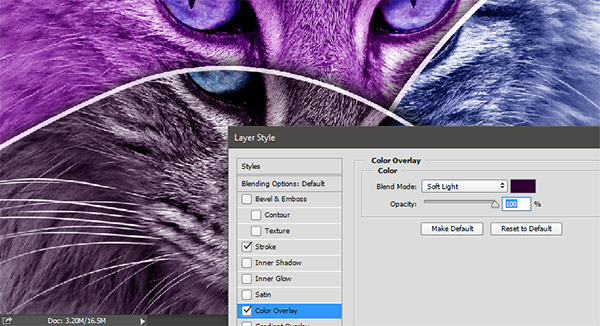
Now add a Color Overlay effect with the blending mode set to Soft Light. Choose a deep blue color (#00169f).
Step 9
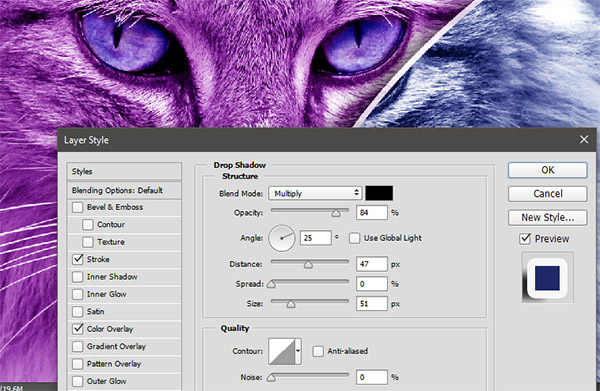
Also add a Drop Shadow effect with the settings shown below. We want our shapes to look like they’re just floating above the original photo.
Step 10
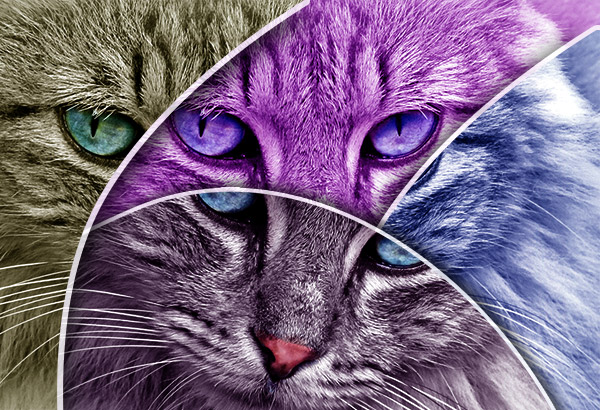
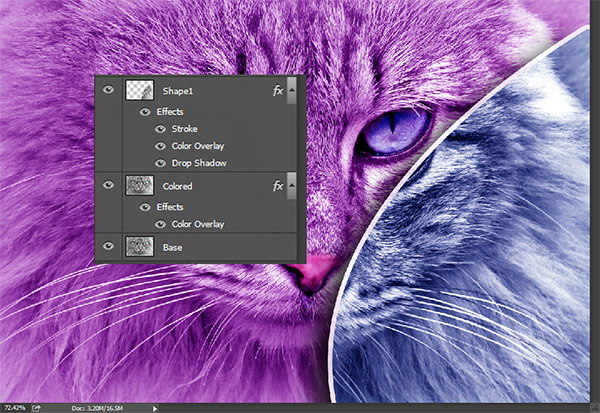
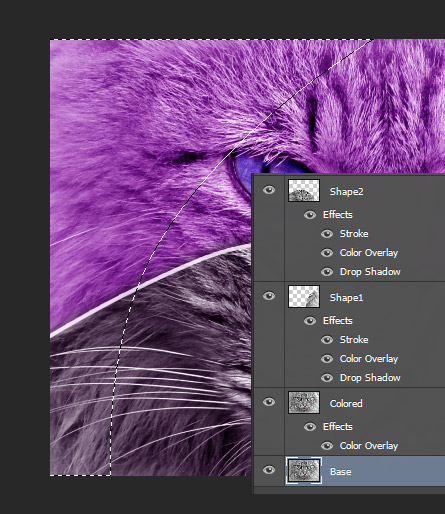
Click Ok and there you have it – your first colored shape.
Step 11
Now let’s create the second shape. Click again on the “Base” layer (the bottom most layer in the layers palette) to make it active and use the Pen Tool again to create a shape as shown below.
Step 12
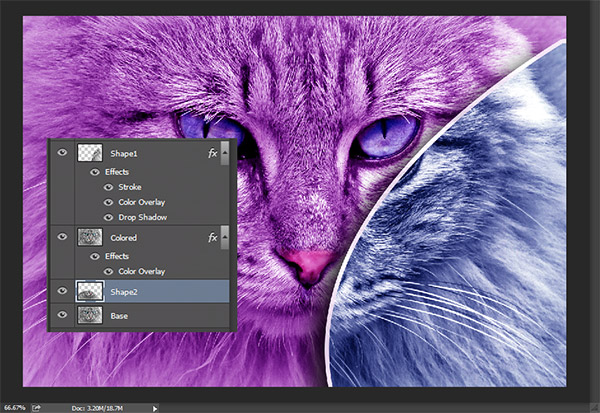
Press Ctrl + Enter to transform the path into a selection and Ctrl + J to create a new layer from the selection. Name this layer “Shape2” and move it down a bit (using the same technique as in step 6).
Step 13
Maybe you noticed that our new shape isn’t visible. That is because it is below the “Colored” layer in the layers palette and in Photoshop layers are displayed starting from top to bottom (top layer is visible first, than the second, and so on until the background layer). In order to display our layers we have to move it above all other layers in the layers palette. Simply click and drag the “Shape2” layer above the other layers in the layers palette and you’ll see our shape appear.

Step 14
Now let’s add some effects to the “Shape2” layer. Double click it to open the layer effects window and add the same effects as we did for “Shape1” layer in steps 7, 8 and 9. Only instead of using a light magenta color in Color Overlay we’ll use a dark magenta color (#310035).
Step 15
Let’s create the third and final shape. Click on the “Base” layer again in the layers palette and create another path. (remember that in order to create paths you have to select the Pen Tool first – P).
Once you’re done with the path press Ctrl + Enter to transform the path into a selection.
Step 16
Create a new layer from the selection by pressing Ctrl + J and name this layer “Shape 3”. Move this layer on top of all the other layers in the layers palette and also move it a bit to the left (or right) by using the technique explained in step 6.

Step 17
Double click the layer to open the layer effects window and add the same effects as for the first two layers (detailed in steps 7, 8 and 9) only instead of a dark magenta color use a muddy brown color (#4c3d00).
And We’re Done!