
In this easy, step-by-step tutorial I’m going to show you how to design an Olympic Games logo.
Firstly we’re going to make a nice background. Start by creating a new document in Photoshop. I used size of 1600×1200 for this tutorial. Then draw a white to blue (#d2efff) linear gradient similar to this:

Time to get a circle for Olympic Games logo. Start by making a selection with Elliptical Marquee Tool and fill in with the color of #0184c9 like on a picture below:

After that, contract your selection by about 15 pixels (Select > Modify > Contract) now you should be left with a selection like this:

And press Delete to clear area into the selection. Then press Ctrl+J four of times to duplicate layers and move these rings as on picture below:

Apply the next different colors (dark grey #515151, red #d04b09, yellow #dab900 and green #019627) for different rings:

Now to make relief effect use the Blending Options. Do this by first right-clicking the layer in the layer’s palette then going into the Blending Options. When you’re in the Blending Options, click and apply the following layer styles/settings:


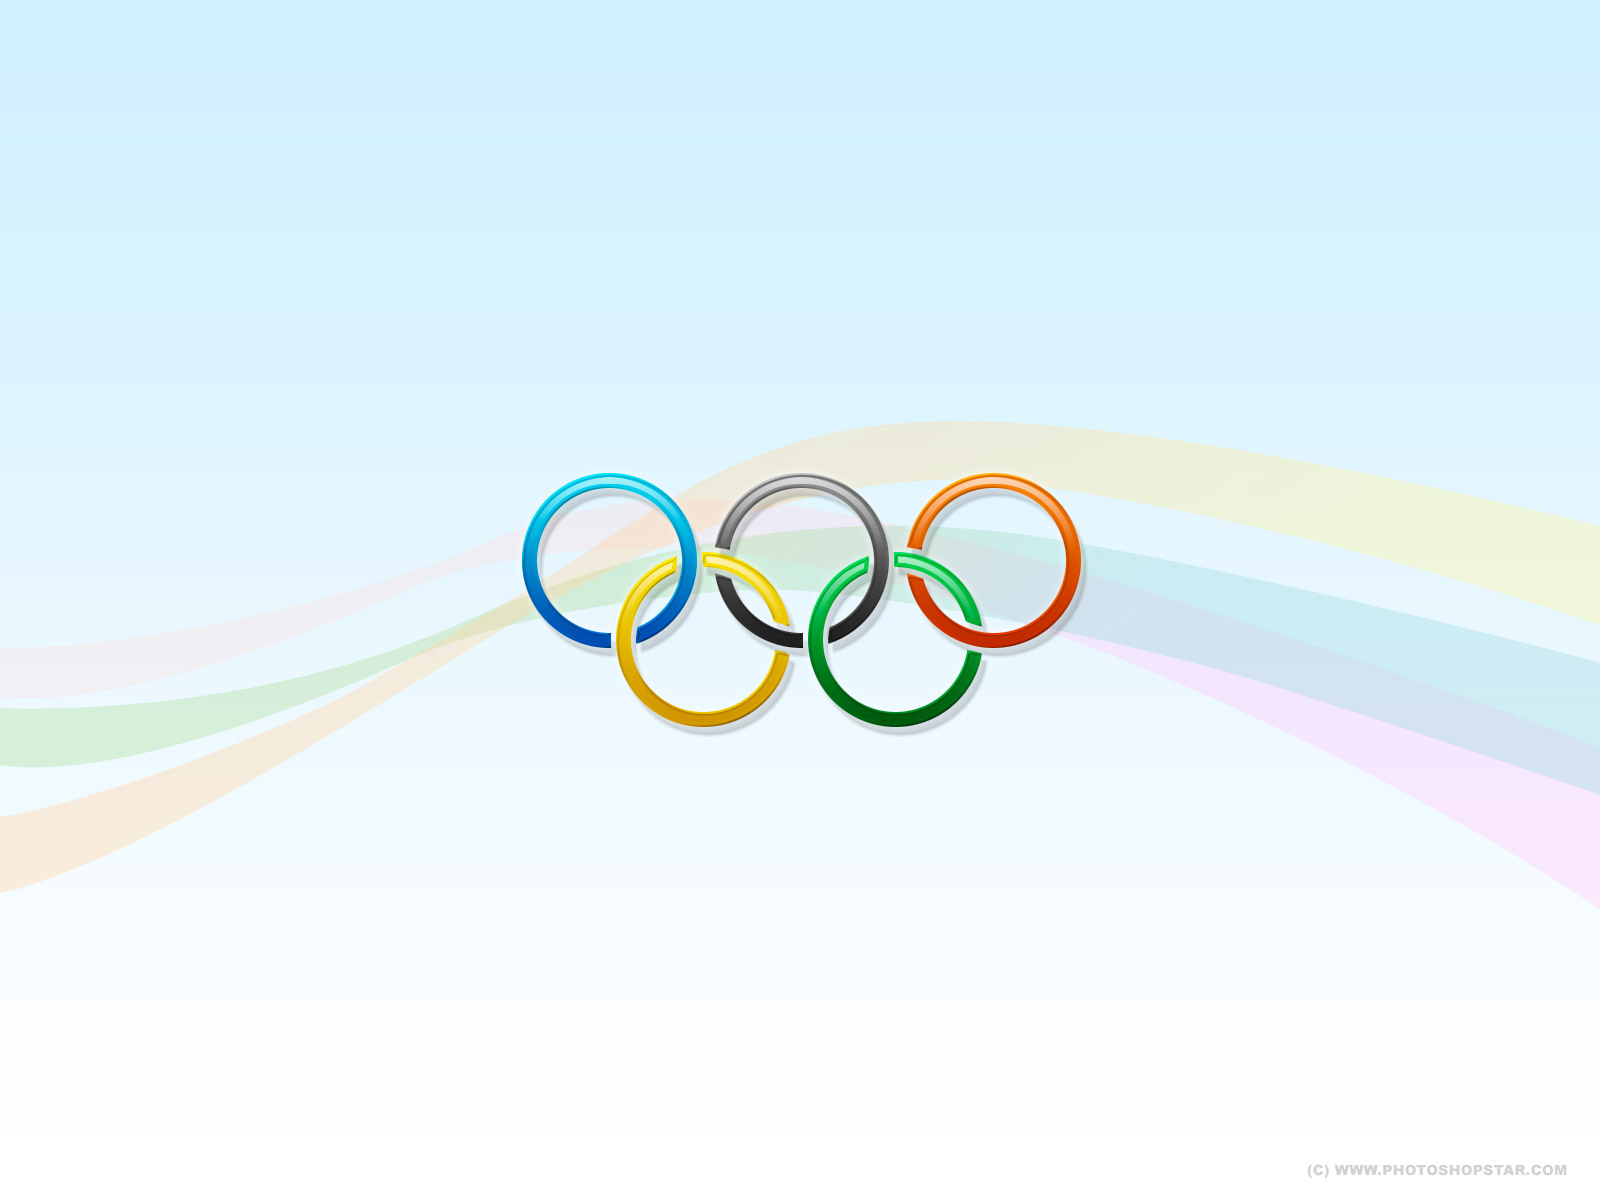
Apply these options for all of rings to get a picture like this:

Alright, time to intertwine rings between each other. For this effect go to layer with blue ring, make a selection around it (Select > Load Selection) then expand your selection by about 5 pixels (Select > Modify > Expand) now you should be left with a selection as on a picture below and apply Eraser Tool into the selected area like this:

Then press Ctrl+D to deselect object. Make the same things with other rings from logo.

After making intertwine I would like to add some smooth glare to all objects of logo for bringing reflective surface effect. Again go to layer with blue ring, make a selection around it (Select > Load Selection) then contract your selection by about 4 pixels (Select > Modify > Contract), then create a new layer and draw a white to transparent linear gradient, white at the top and transparent at the bottom into your selection, similar to this:

Then press Ctrl+D to deselect object. Make the same things with other rings from logo to get the next picture:

Now we need to cut away white glare out of rings on the logo. For this make selection around one of rings again (Select > Load Selection) then contract your selection by about 4 pixels (Select > Modify > Contract), press Ctrl+Shift+I to invert the selection and press Del to delete glare out the selection like on a picture below.

Ok, our logo is ready. Now we can add some multicolored lines to our background.
Do this by first finding and selecting the Pen Tool, and make a shape like on the screenshot below:

Then add two more of these lines and lower the layer opacity to 35% for each line. After that going into the Blending Options to change color of lines. When you’re in the Blending Options, click and apply the following settings:


That is it, our background with an Olympic Games logo are ready!
You can download our free background from here: