Advertisement
Would you like to make your own cool musical poster? This Photoshop tutorial will teach you how to do it.
Final Image Preview

Note: Original tutorial published on Photoshopstar.com had too many errors. Being one the most popular tutorials, tutorial was rewritten and now published.
Resources
Step 1
First we are going to create a new document in Photoshop with 1000×1000 pixels with all the default settings. Fill the background layer with black color.

Step 2
Select Horizontal Type Tool and place any text (white color, caps on) filling all background as you can see below. Only use one text layer.


Rotate text 45 degrees CW by going to Edit > Transform > Rotate.


Step 3
Open photo and copy it to our canvas over text layer. Go to Edit > Free Transform and resize photo to something similar to what I have.

Select text from text layer (Ctrl+left click on text layer thumbnail in layers). Press Ctrl+Shift+I to invert selection. With selection active, select photo layer and press Delete to clear selection contents.

Press Ctrl+D to deactivate selection.

Apply Image > Adjustments > Brightness/Contrast.


Step 4
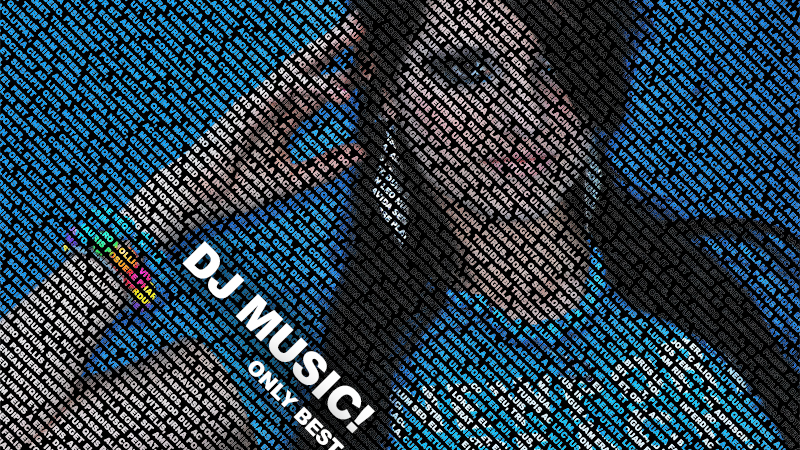
Create a new layer. Select Horizontal Tool (Arial, white color, 55px) and write something like “DJ Music!”. Create a second new layer and write “Only best hits!” (Arial, white color, 25px).

Rotate text 45 degrees CW by going to Edit > Transform > Rotate on both layers.

Apply Layer > Layer Style > Blending Options > Outer Glow to both layer to make it more readable.


Final Image

This tutorial is now finished and you got a great effect!
No related posts.

December 20th, 2011 in


easy to do, but very interesting and useful result.
thx a lot
Very Nice n beauty full…
Will definitely give it a go.
easy but nice!
Can anyone explain step 3:
Select text from text layer (Ctrl+left click on text layer thumbnail in layers). Press Ctrl+Shift+I to invert selection. With selection active, select photo layer and press Delete to clear selection contents.
I don’t understand what to do…
Thanks
how do you do the invert step on photoshop elements?
It’s great! thanks
hi . thnx too much . i done it
Do we use the same step for Adobe Photoshop elements 8.0 ? Because on step 3, when I press Ctrl+Shift+I it doesn’t do anything.
Please, Change your web for tutorial because it’s very also small…
do you have to put in every word
How do you get your words so crisp and clear when cutting them out of the picture?? When I do it its not like that. For example, the o’s are fully cut out, theres no hole in the center, one of the words in the picture was minimum and it just looked all pushed together. It does not look clean on mine. I am using Cs5.1, maybe it has something to do with selecting the text… I used the magic wand tool, and then inverted it… I used arial black for the font in 10 pt also, any help would be greatly appreciated…. I can send a pic also if you need it so you can see what im talking about
Dude, i don’t understand that with selecting those 2 layers and deleting it… damn!
I got it, it was my bad
. Sorry and thanks for this amazing tutorial
very good and nice
My words don;t come out as clear as in the example, why is that
I am surprised at how easy it is. Thanks
very smart this design. i like it very much……..
Anyone who made one of these can you help me out? I have previous comments on here, just reply to one if you can help me. Thanks