This is a pretty easy tutorial, or a walkthrough rather, on how to design a ‘Pizza Place Logo’, maybe you could design a logo for a local pizza joint after you’re finished with this tutorial! 😉

(this is what we’ll be designing)
1. New Document, Create Background
Alright, let’s start by creating a pattern for our background. Create a new document sized 40 x 40 pixels, fill the background with a yellowish kind of color, I used#fea120 – make a new layer and make a selection half the size of the document but the full height, fill the selection with a slightly different color, I used #ffb029. This is what I’ve come up with for my background:

To give your pattern a little bit more detail/texture, you can try applying a few filters to it – a good example would be Filter > Noise > Add Noise with a low amount. After finishing off your pattern, you need to make it into a proper Photoshop pattern, do this by going into the Photoshop menus: Edit > Define Pattern.
Again, create a new document, this time make it much larger (about 400 x 400 pixels will work, since we’re not working for print here) now after you’ve made your new document, fill the background with your newly made pattern. If you’re not sure where your pattern has gone, you’ll need to get out the Paint Bucket Tool and change the mode to Pattern (it’s in the top left)

2. Creating the Shape
Find and get out the Pen Tool –  and make a nice, curved selection similar to mine:
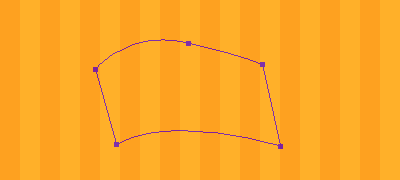
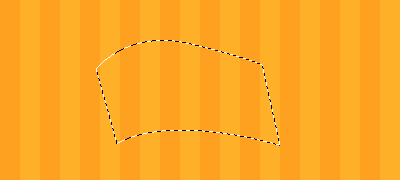
Turn your path into a selection by right-clicking the path and clicking Make Selection.
Get out the gradient tool and set up your settings similar to mine shown below:

Now drag a gradient inside of your selection, you can see how mine turned out below.

Right-click your layer and go into the Blending Options, apply the following layer styles:
- Drop Shadow
- Inner Shadow
- Inner Glow
- Pattern Overlay (Here is the pattern)
- Stroke
And now you should have a result pretty much like this one:

Looking good so far.
3. Adding Text/Logo
Now it’s time to add in the name of the pizza join. You’ll want to use an effect font, you can download the font that I used for free from here, use a decent size and a nice, moderate-dark red color.

In the above image I’ve used the color #ef2c0a and I also applied the following layer styles:
- Drop Shadow
- Inner Glow
- Gradient Overlay
- Pattern Overlay (Same pattern as before.)
- Stroke

Duplicate your text layer, change the color to something completely different, such as #34b500 and change the word to either the rest of the name or some sort of description.

4. Designing the Pizza
Alright, it’s time to make some pizza. Start by making an elliptical selection to the right of your logo, you can use any size, as long as it looks right!

Fill the selection with #f8ca68 and apply these layer styles:
- Drop Shadow
- Inner Glow
- Gradient Overlay
- Pattern Overlay (Same pattern as before.)

Now, make another, smaller selection inside of the main layer and fill it with #f03d11.

Now apply the following layer styles to your newest layer:

5. Adding Pizza Details
Let’s add some toppings to the pizza. Start by making a new layer and making some lobsided selections inside of your pizza.
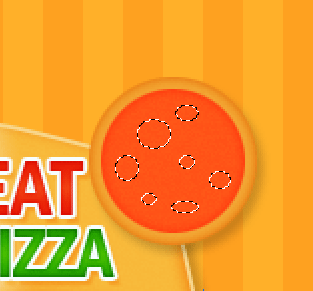
Right-click your selection and go into Stroke, use the following settings to make some onions:
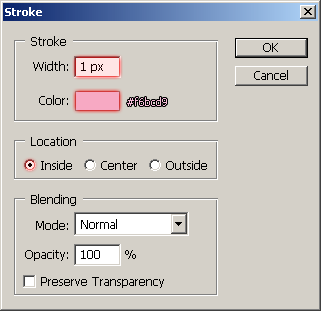
(using two pixels on the inner stroke might have been a little more effective)

Lower the opacity for your onion layers to about 25-40%.

You could call them onions, I guess.
Create another new layer – it’s time to make some pineapple. Using the Polygonal Lasso Tool, make some random-shaped selections, then fill them with yellow, like the ones I’ve shown below:
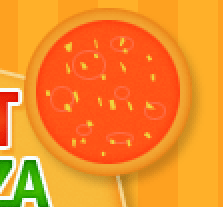
Now for capsicum – make another new layer and make some similar selections (as to the pineapple) fill the selections with a nice green (#42b801)

And some tomatoes (simply: chunks of dark red)

I can’t believe I actually forgot to add cheese! To add cheese, create a new layer above them all and draw some random yellow lines, similar to the ones I’ve done below:

Apply the distort filter: Filter > Distort > Wave with a random setting to come up with something like this:

Apply Filter > Blur > Gaussion Blur with a radius of about 1.0, then in the photoshop menu go to Edit > Fade and use about 25-50%.

Delete the cheese that’s hanging outside of the actual pizza layer, then set the layer mode to Soft Light and the layer opacity to around 60-80%, if you don’t like the look of it you should try some different layer modes, opacities, filters, layer styles, etc!

Well, it looks like we’re finished with this tutorial.
Anyway, I hope you enjoyed the tutorial and maybe learned something from it as well, take it easy!
