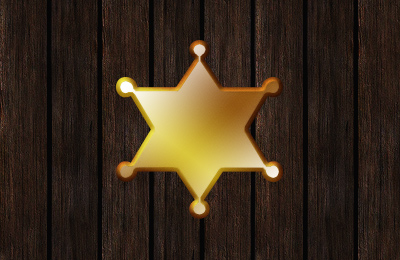
In this quick & easy tutorial you’ll be learning how to design an old-fashioned sherrif’s badge! Pretty much just by using layer styles you can come up with a nice badge like mine shown below.
![]()
1. Document
Start off by first creating a new document, then add in a background that will suit the badge. Here I used a small document size of 400 x 400 pixels and I also used an old wood texture I found on deviantART.
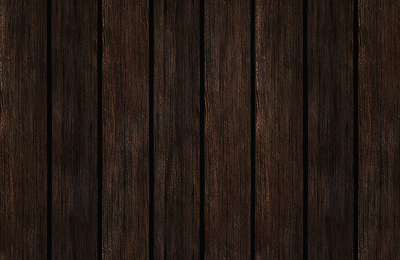
Please feel free to download the texture used above, but take note that I didn’t make it.
2. Creating Badge Shape
Find and get out the Custom Shape Tool, shown below.
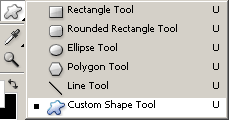
Change your Custom Shape Tool settings to as closely resemble mine shown below as possible.
![]()
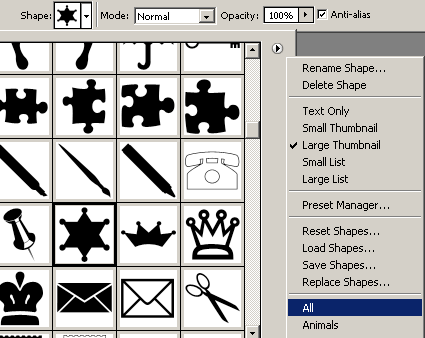
Next, find and select the sheriff’s badge shape in the custom shapes:
Create a new layer (Layer > New > Layer…) then change your foreground color to a dullish-yellow. (#bc982c)
Draw your shape onto the canvas, like mine shown below.
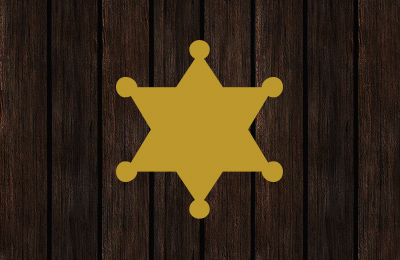
(note: hold shift down and drag your shape to keep it properly proportioned.)
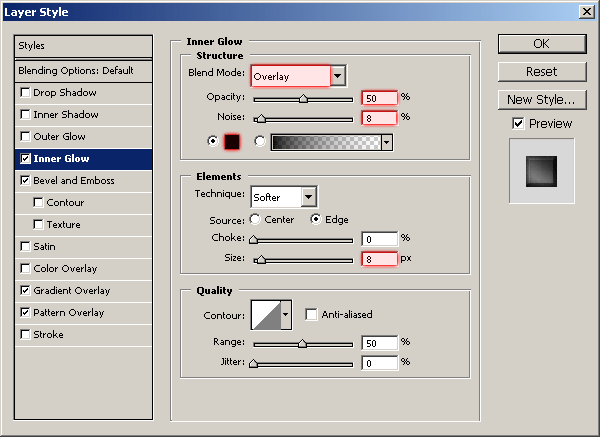
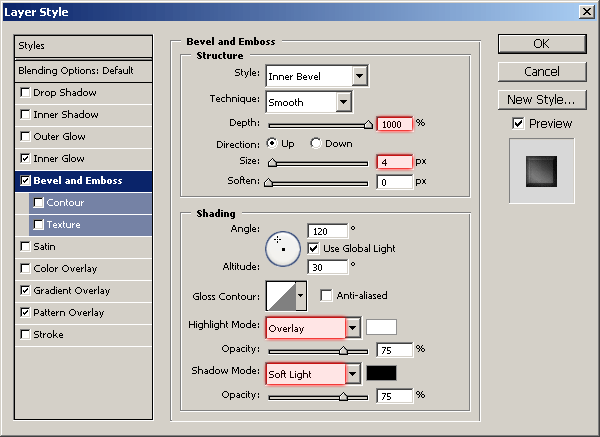
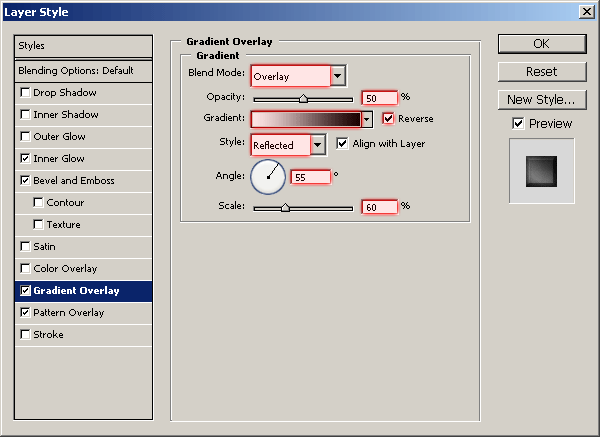
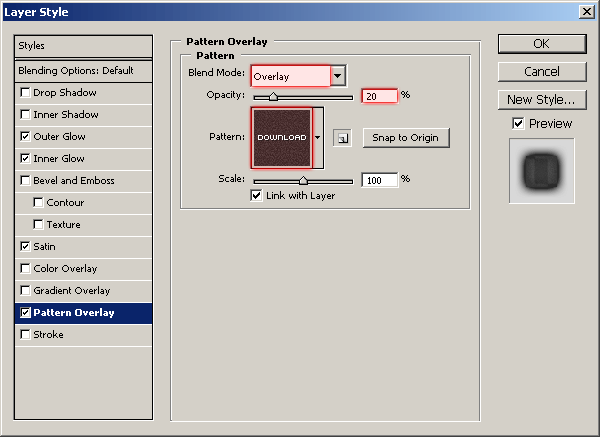
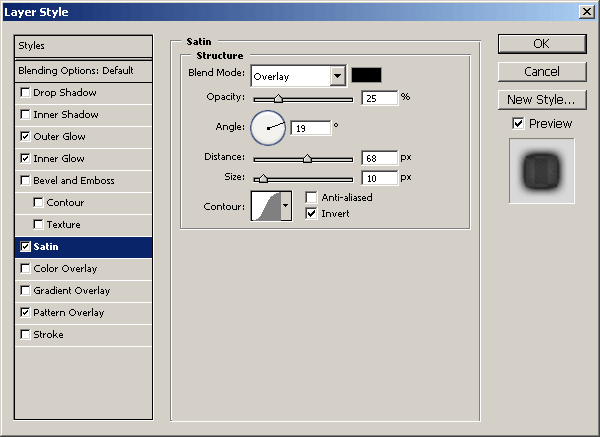
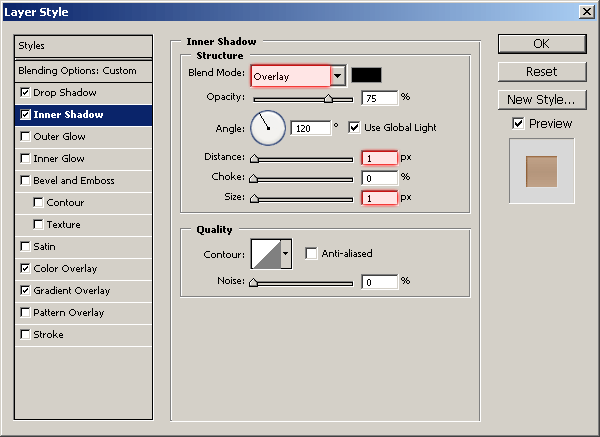
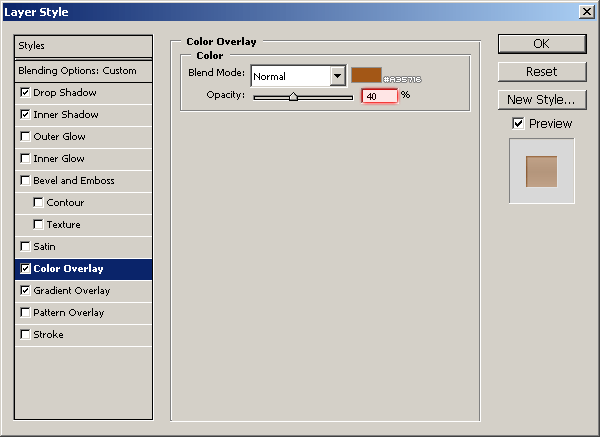
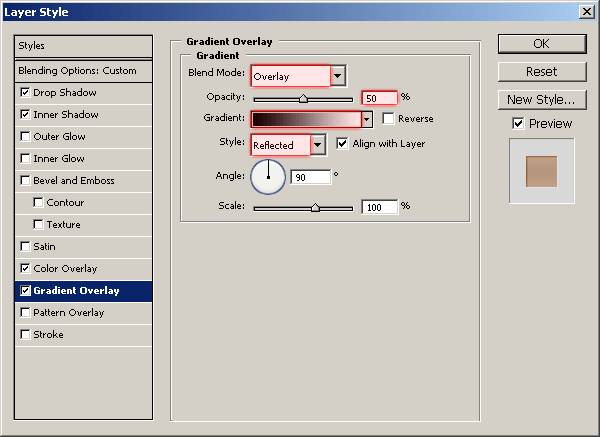
3. Applying Effects (Layer Styles)
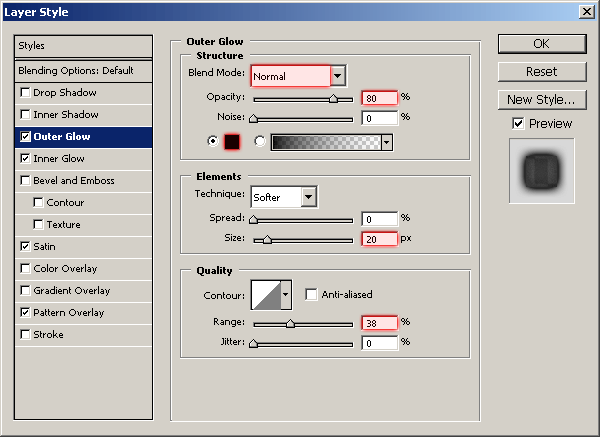
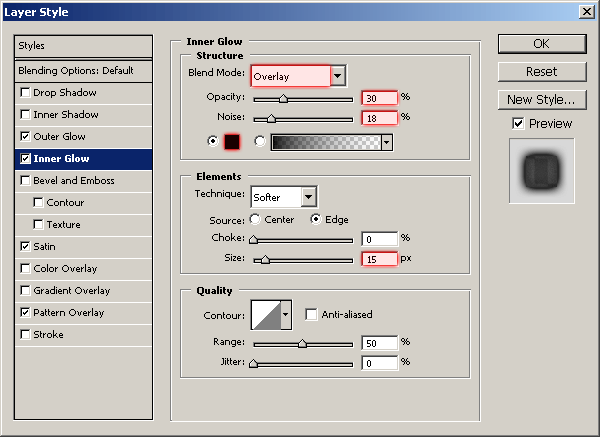
Time to add effect. Right-click your layer in the layer’s palette and go into the blending options, then apply the following layer styles:
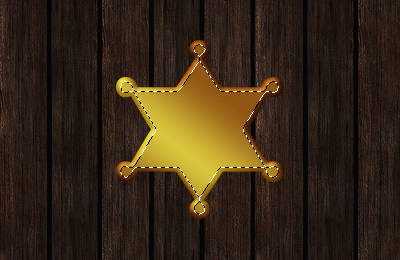
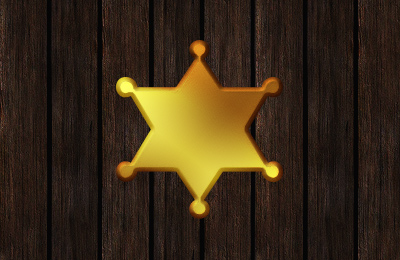
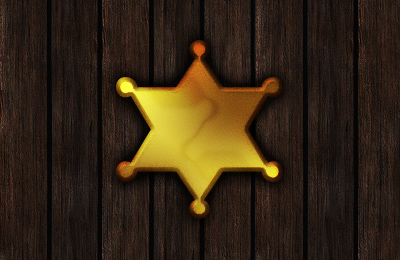
After applying all of these settings, you should now be left with a result very closely resembling this one shown below.

4. More Details
Well, it’s a little dull, so I think it needs a few more details!
Holding the ctrl key down on your keyboard, click the thumbnail for your badge layer, this will select the pixels. Contract your newly-made selection by about 4 pixels (Select > Modify > Contract) then create a new layer.
On the new layer, draw a white gradient from the top left corner to the around the middle, then the bottom right corner to the middle area again. This is the kind of look we want to achieve here with the gradients:
(note: you can also use the brush tool, if you want!)
Change the layer mode for this gradient layer to Overlay or Soft Light.
5. More Effect
Merge the two badge layers together. (main badge layer, and white gradient layer) After you’ve merged the layers together, apply the following layer styles to the remaining layer:
And now you get an effect like this:
Looking pretty sweet now!
6. Finishing
To finish off, we’ll add some text to the badge. This is the best I managed to come up with:

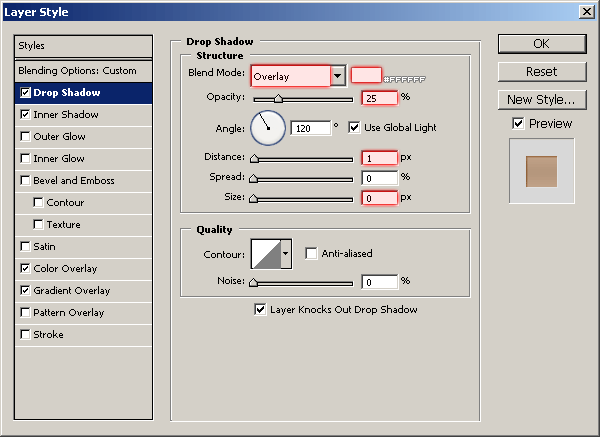
To achieve text that looks just like mine, write out your text on the badge using black as your text color, then apply the following layer styles to the text layer:
I also changed the layer mode for my text layer to Soft Light and lowered the opacity to 30%. Now you can finish this off you can apply a nice lighting effect, and maybe sharpen.
![]()
And that’s all for this tutorial! I hope you enjoyed it, even just a little bit 😀