You can see what we’ll be designing in this tutorial below, I call it a ‘cartoony cloud splash’, because I think it could be used effectively as a website splash page. This tutorial is really really easy, in case you’re new to Photoshop!

1. Create a New Document
First thing to do is start by making a new document in which you can make your clouds. For this tutorial I used a document size of around 400 x 400 pixels, with a Resolution of 72 (default)
Using the Gradient Tool, draw a nice, blue gradient on the background, it’s meant to resemble the sky! Colors used here: #6dbede to #2f82c0 and now you have a nice soft background.

2. Creating the Cloud Shape
![]()
Firstly create a new layer, now find and get out the Elliptical Marquee Tool, using similar settings to the ones below.
![]()
Now make a bunch of random circles, attempting to make a cartoon-shaped cloud.

Complete the cloud shape by filling up the selection in the middle of the cloud.

Make sure you’re on the new layer you created, then fill the layer with white – #ffffff.

Nice cloud shape, huh?!
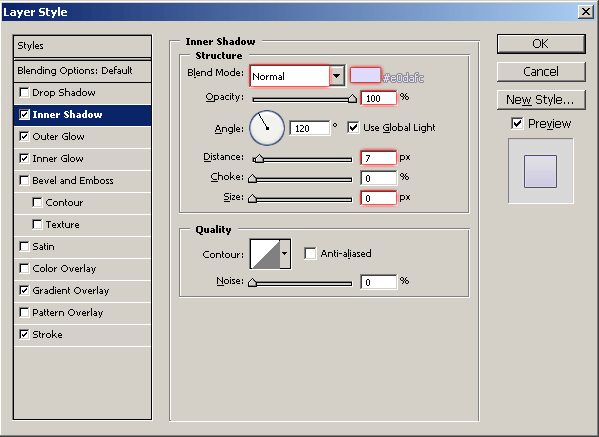
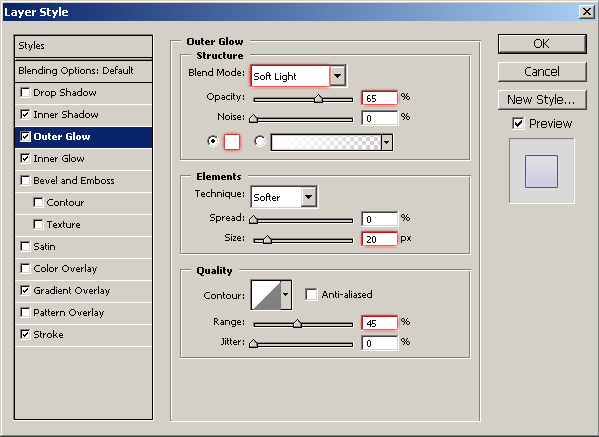
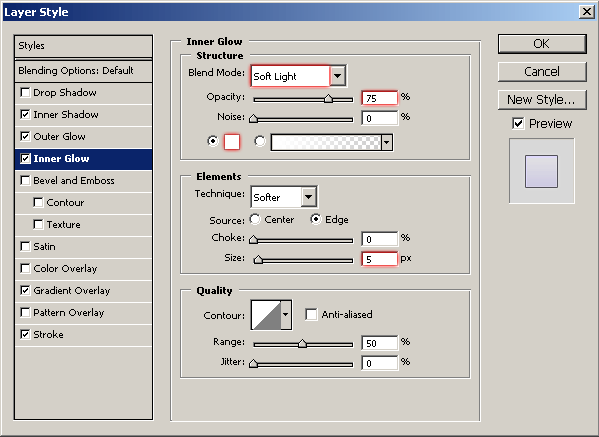
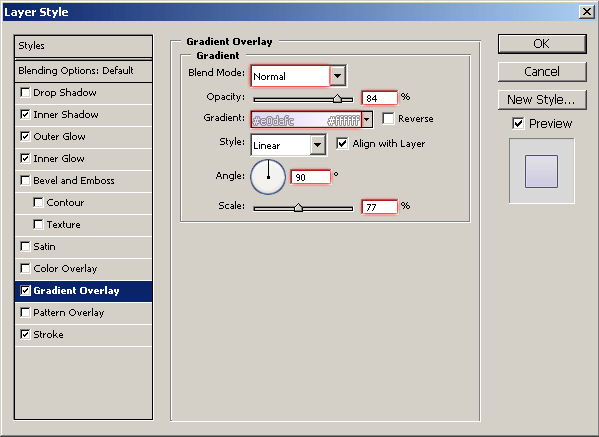
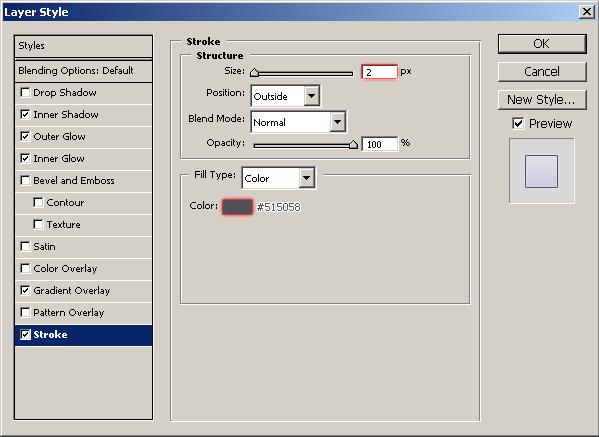
3. Adding Effects to the Cloud
The cloud looked quite nice already, but to give it some more detail, you might want to apply the following layer styles to your cloud layer:
Depending on what size you made your cloud, you may have to modify the layer styles just a little bit, feel free to do so. Your cloud should now look like this:

Looks pretty nice, in my opinion! And now add some text if you want, you can use it for a navigation system at the start of your website (splash page)
Fin
Thank you for reading the tutorial, everyone, I hope you enjoyed it!