In this Photoshop tutorial you’ll learn how to design a very cool-looking branding iron effect, using the type tool, a few shapes, and a fair few layer style effects.
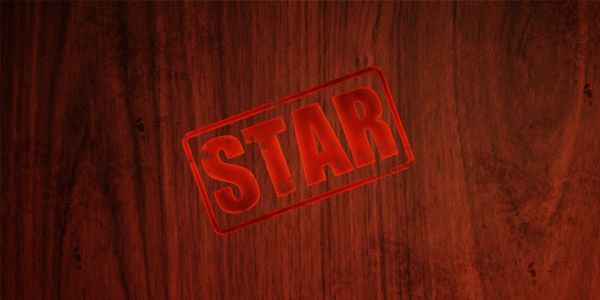
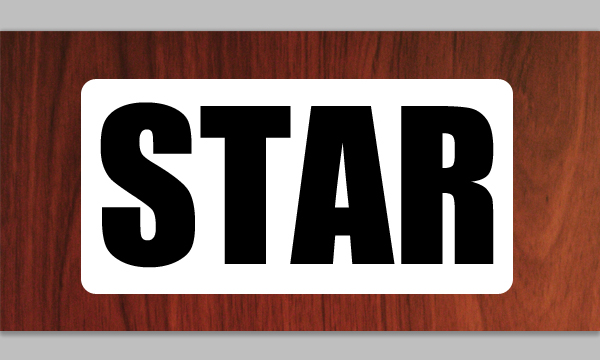
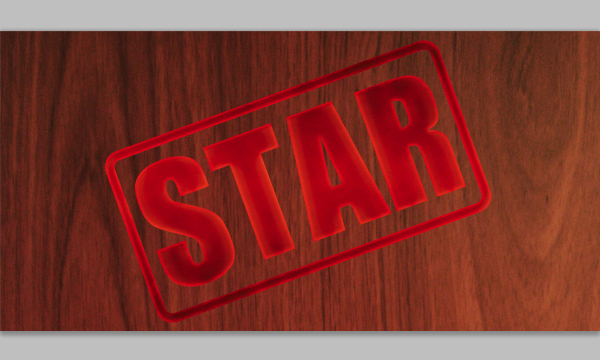
Final Image
Resources
Step 1
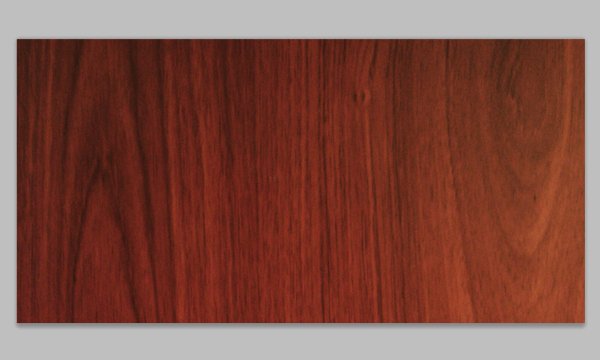
Start by creating a new document in Photoshop. Any size will do, but for this tutorial the size is 600 x 300 pixels, with the default resolution of 72. After this, you might want to choose a nice background for your canvas. The texture used here is Wood texture I by ResurgidaResources. Resize the texture till it fits in your document.
Step 2
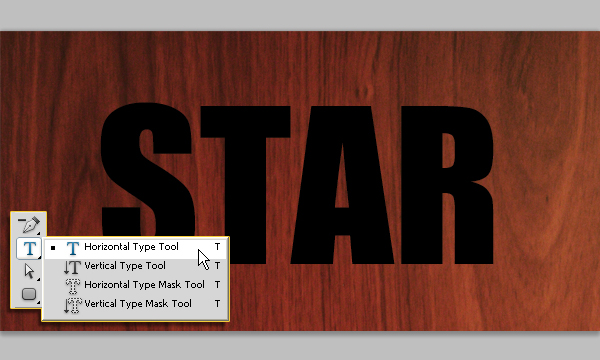
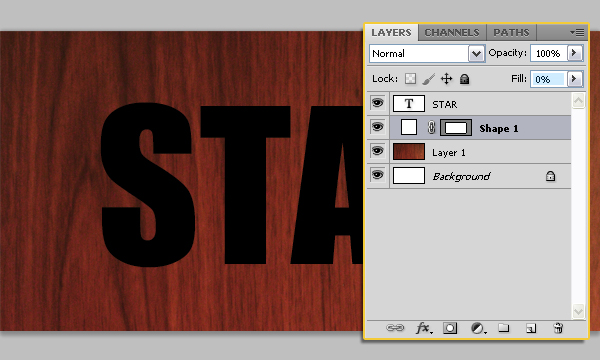
Get the Horizontal Type Tool out and write your desired text, preferably something short, if you can. The font used is called Impact, and the size is 200 pt. Also, you can feel free to use any color you want for the text at this stage.
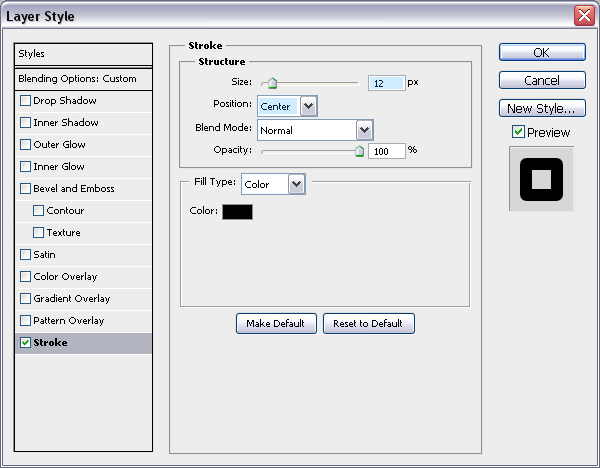
Next, the border for your shape. Find and get out the Rounded Rectangle Tool, then set up your settings as similar to the ones shown below as you can/want:
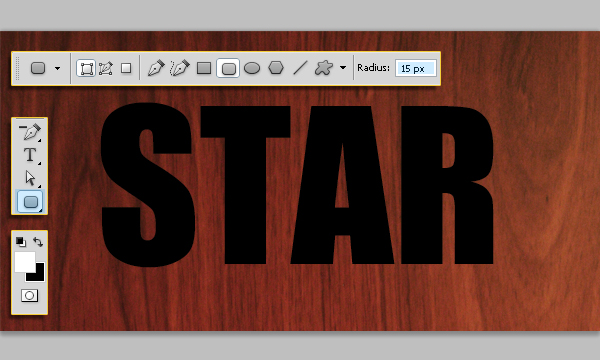
Now you’ve got your tool and settings set up, create a new layer (underneath your text layer), then draw a shape the suitable size, just so it hangs around the outside of your text.
Next, change the Fill value for this layer to 0%.
Then apply a Stroke layer style.
Now your shape should look like this:
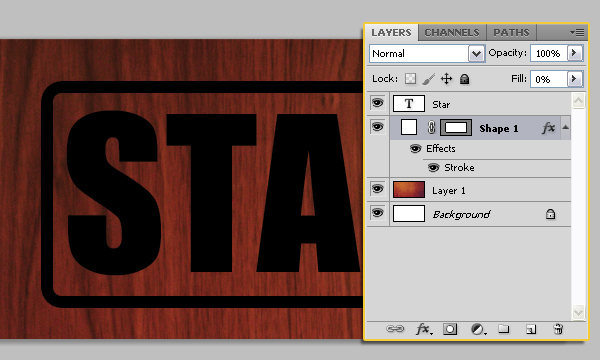
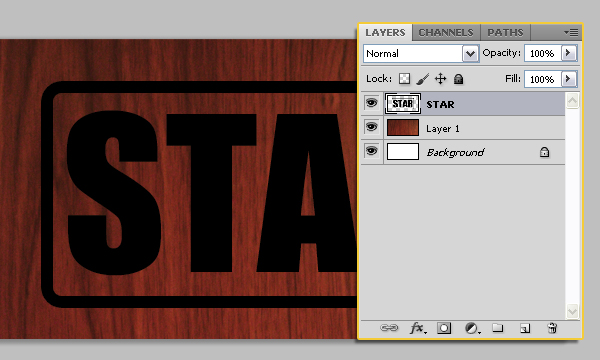
Finish off this step by merging your two layers together (the text and shape layers), so the whole shape is on one single layer. You can do this by selecting both layers, then going to Layer > Merge Layers.
Step 3
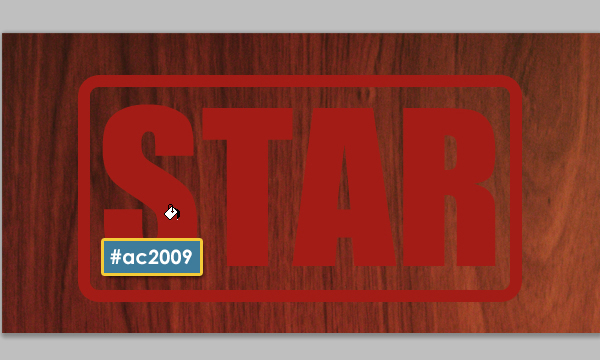
The shape still needs a few more changes before we finalize it. Start by filling your shape with a red color, do this by clicking the little icon near the top of your layer’s palette that locks the transparent pixels.
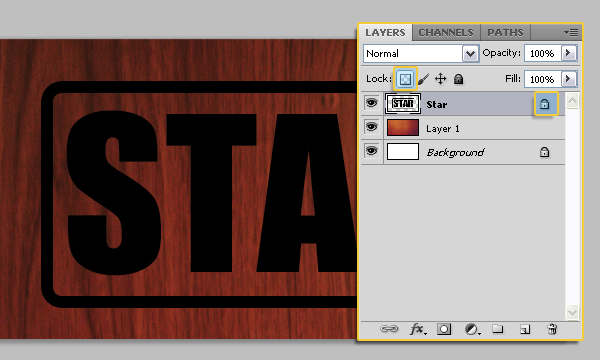
After you’ve locked the transparent pixels, fill your shape with a red color, the color used here is #ac2009.
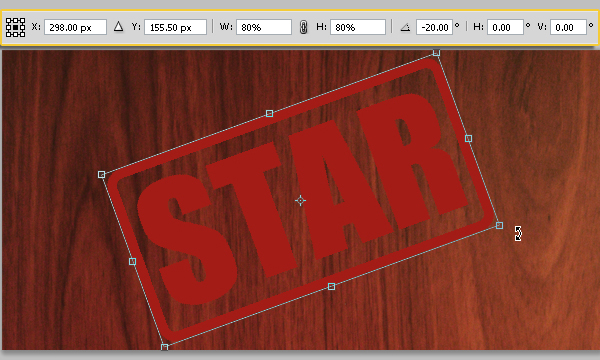
Finish off this step by rotating and maybe resizing your shape slightly. Press Ctrl + T to go into the Transform Mode, and hit Enter when you’re done to get out of it.
Step 4
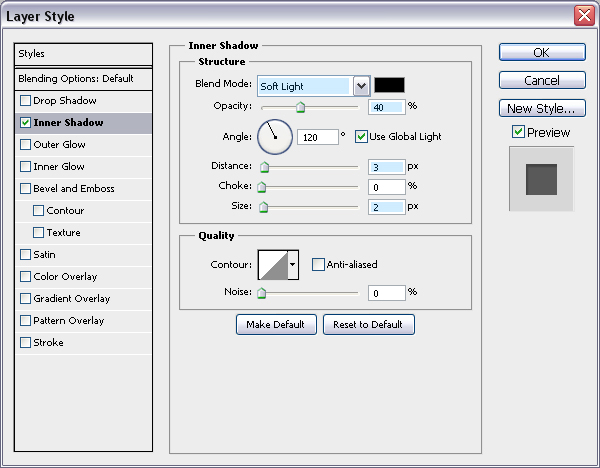
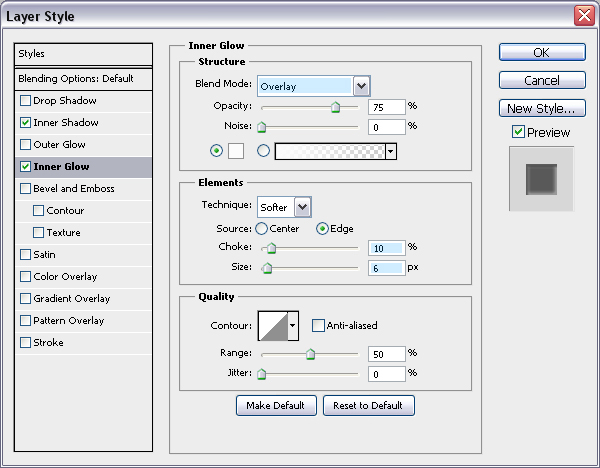
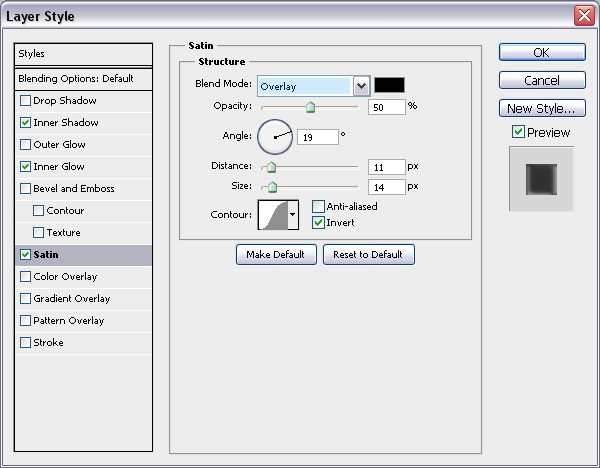
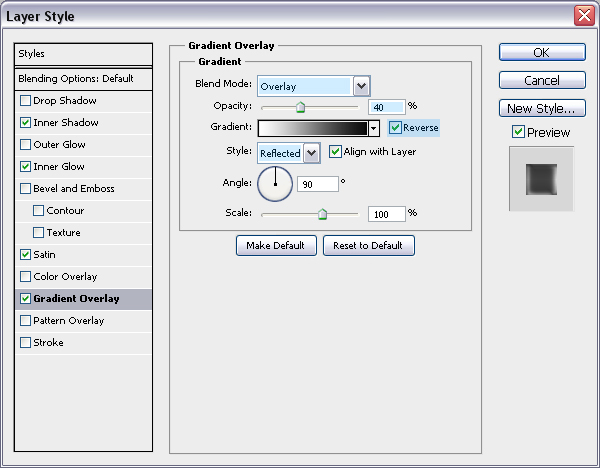
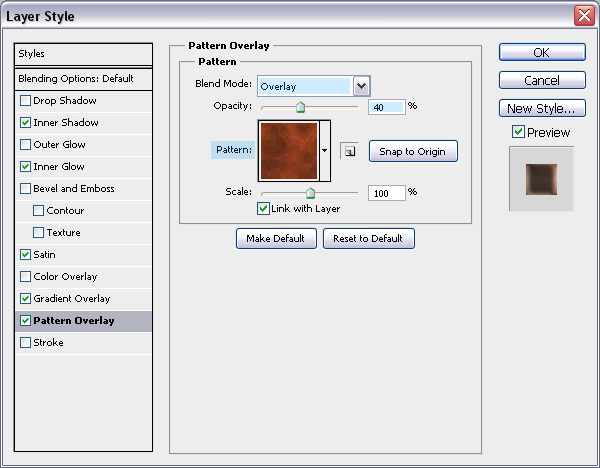
Now we’re finished with the shape, let’s add some effects. Right-click your layer in the layer’s palette and go to the Blending Options. Click and apply the following layer styles/settings:
– Inner Shadow: Change the Blend Mode to Soft Light, the Opacity to 40%, the Distance to 3, and the Size to 2.
– Inner Glow: Change the Blend Mode to Overlay, the Choke to 10, and the Size to 6.
– Satin: Change the Blend Mode to Overlay.
– Gradient Overlay: Change the Blend Mode to Overlay, the Opacity to 40%, check the Reverse box, and set the Style to Reflected.
– Pattern Overlay: Change the Blend Mode to Overlay, the Opacity to 40%, and set the Pattern to Rusted Metal.
Now your shape should look pretty much like this:
Step 5
Looking good so far! This step is optional, in which we’ll erase away a bit of the shape to give a bit more of an interesting effect. Start by creating a new layer, then merging your shape and blank layer together, this is basically applying the layer styles to the pixels, so they’re not really there anymore.
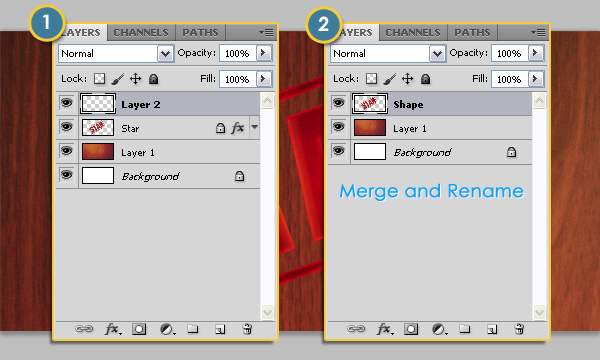
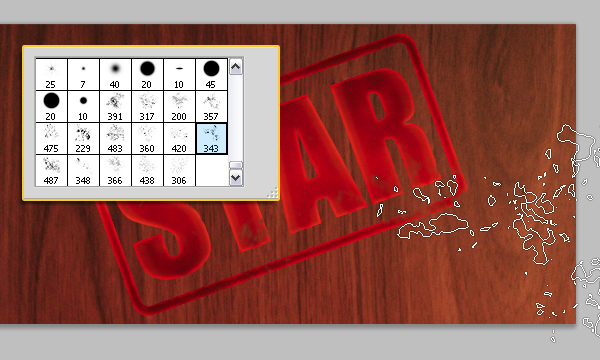
After doing this, get out your eraser tool and select a grungy brush. Erase away a bit of your shape like so.
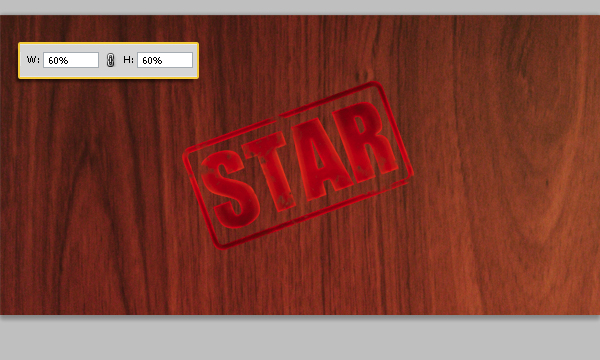
Step 6
When you’re pretty much all finished with your shape, go into the Transform Mode (Ctrl + T), and size your shape down to about 60.0% of it’s original size. This is what the shape should look like:
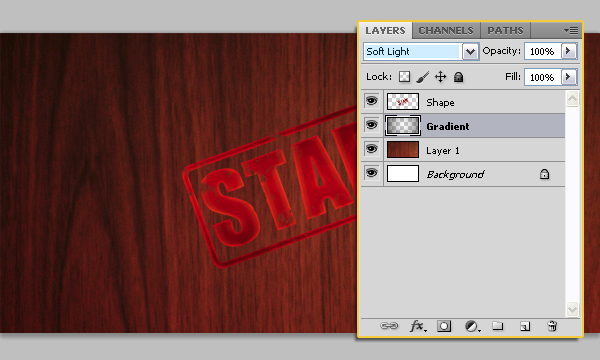
You can as well go ahead and create a new layer right beneath the Shape layer, then, create a Radial Gradient that goes from Transparent at the center of the document to Black at the corners, and change the layer’s Blend Mode to Soft Light.
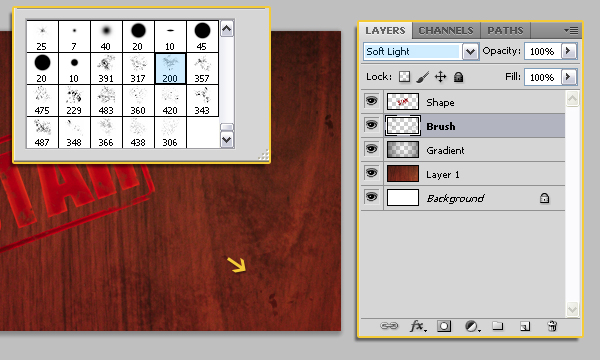
Finally, you can add some Black grungy strokes as shown below:
Final Image
And now we’re pretty much finished with this tutorial, I hope it was sufficient for you all! I also hope you enjoyed this tutorial, I know I did!