
In this not so difficult step-by-step tutorial I will show you how to create really sharp-looking glowing woman silhouette. Actually, in this way you can create glowing silhouette of any object.
First of all you’ll have to start by making a new document; in my case 500×500 pixels, 72 dpi. Drag a linear gradient with colors of #112b05 and #23590a as shown on a picture below.

Apply Filter > Sketch > Water Paper with similar settings to these:

Now we have something like this:

Ok, now we need to find most suitable picture to duplicate silhouette. For this you might want to go to Google and search for a good-quality picture or use this one. Bring it to the middle of canvas as on a picture below:
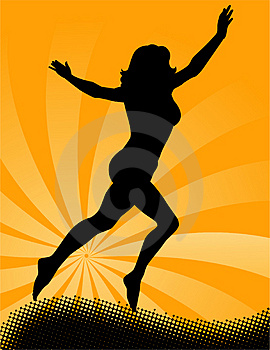

Set opacity to 7% up for this layer. Now before we can start making glow parts of silhouette, I would like to note you that you need to get out the Brush Tool before and set up with the following settings:

Also set foreground color to #c0ff00. After that select the Pen Tool (you need to make sure that you’re working with Paths instead of Shape Layers). Draw out your line using paths:

Then right-click and select Stroke Path.

A little dialog box will appear as in the screenshot. Choose Brush and make sure there is a tick next to Simulate Pressure. This is important as it will give your curve tapered ends which will make it rock!

The picture use to look as mine:

Next right click again and select Delete Path. Make the same thing a couple of times:


The finish picture should look similar to these:

After that go to the layer with a picture and delete it. We don’t need it more. Then apply Drop Shadow and Outer Glow layer styles to each layer of silhouette parts.


Now we have a picture like this:

Ok, to finish off with silhouette I think we should add some bright element to it. Set foreground color to #ff3c00, then get out the Brush Tool before and set up with the following settings:

Select the Pen Tool with the same presets again and draw out your line using paths:

Then right-click and select Stroke Path. Choose Brush and make sure there is a tick next to Simulate Pressure again.

After that select Horizontal Type Tool and click on your path, this will put your text on the path you’ve just made and write out something like ‘SUPER FIGURE’. I used Myraid Pro font (14 pt, Semibold Consended). Actually, this font is commercial. Feel free to try a different font, or you know, buy or ‘get’ a nice font from somewhere.

Move the text I little bit down.

Go back to the layer with orange line an apply Drop Shadow and Outer Glow layer styles to it:


You should now have something like the above.

Looks cool! Enjoy this tutorial! Good luck!