In this Photoshop tutorial I’ll show you how to create a beautiful field scene featuring an emotional girl.
You’ll learn how to combine different stock images using adjustment layers, masking and brushes. You’ll also learn how to adjust color, enhance the atmosphere and create lighting effects.
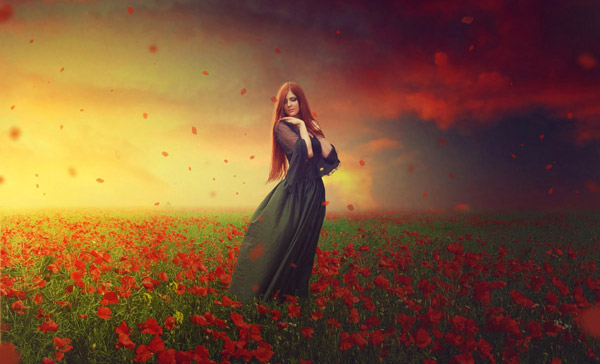
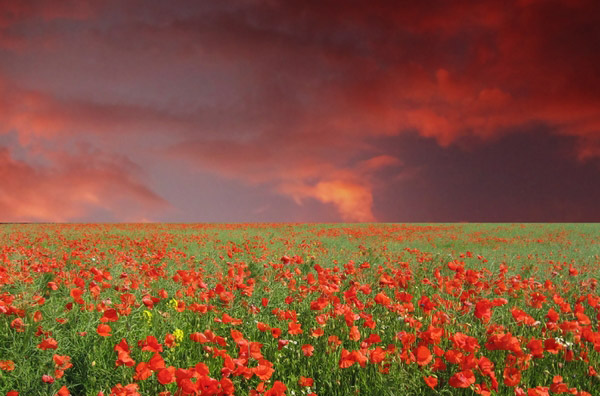
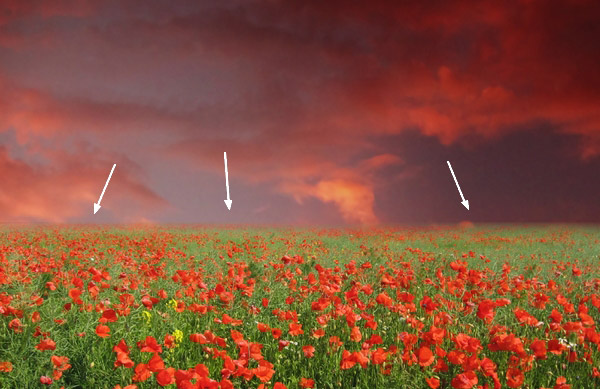
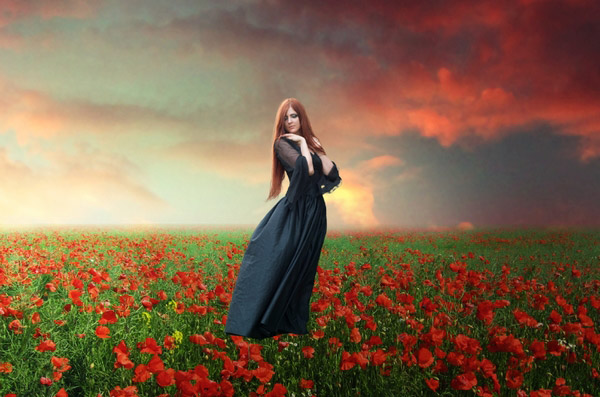
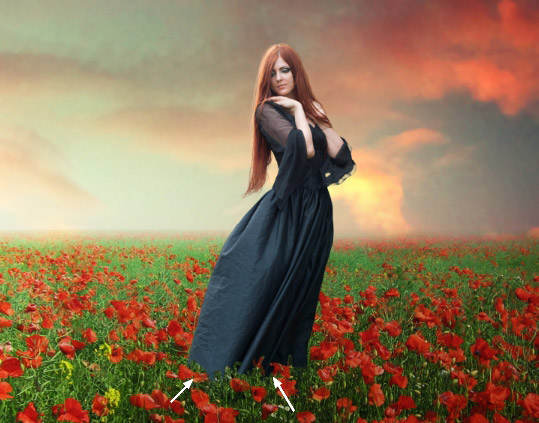
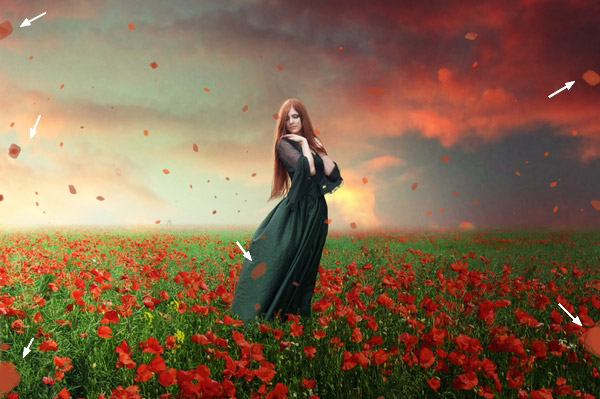
Final Image
Tutorial Details
- Program : Photoshop CS3+
- Estimated Completion Time : 90 minutes
- Difficulty : Intermediate
Resources
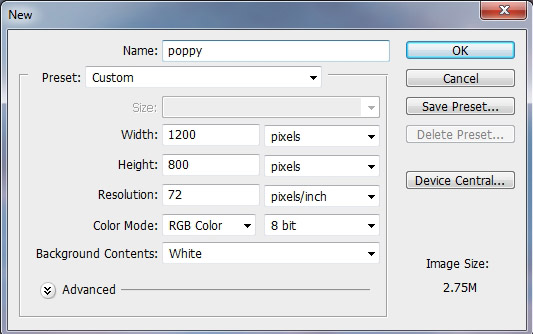
Step 1
Create a new 1200×800 px document in Photoshop with the settings shown below:
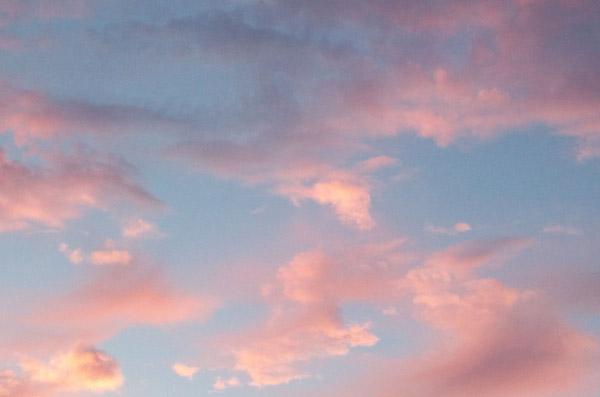
Step 2
Open the sky image. Drag this image into the white canvas using the Move Tool (V) :
Step 3
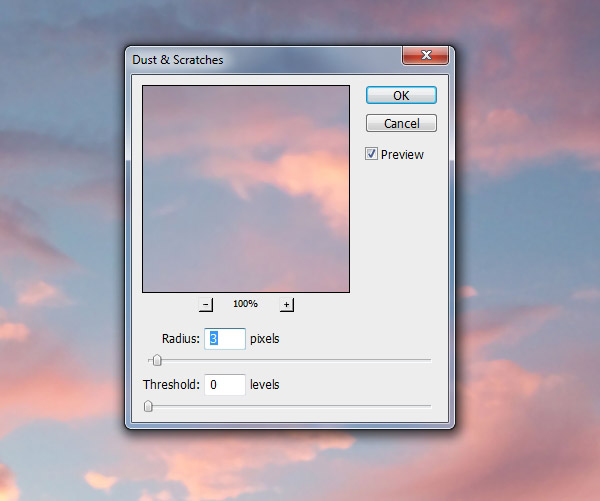
To reduce the noise in the sky, go to Filter > Noise > Dust & Scratches :
Step 4
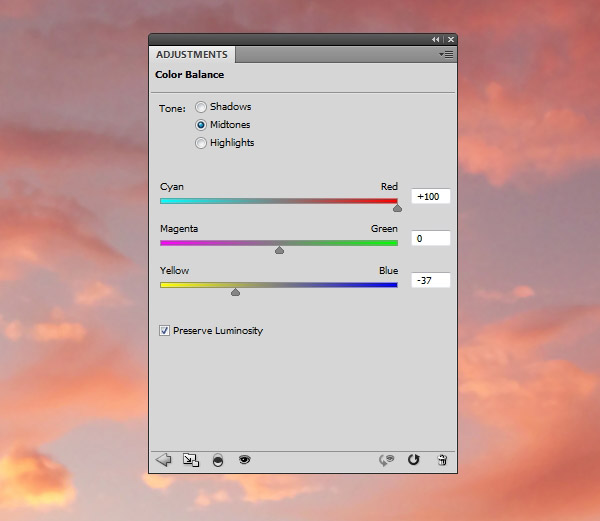
Go to Layer > New Adjustment Layer > Color Balance (set it as Clipping Mask ) and change the Midtones settings:
Step 5
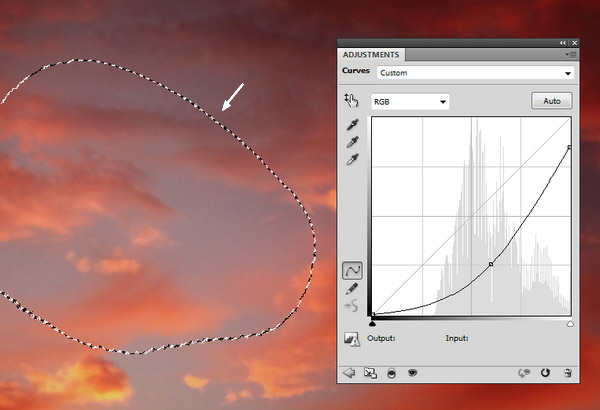
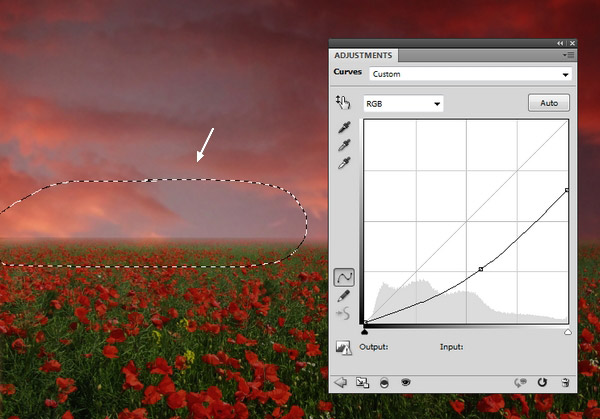
Make a Curves adjustment layer and decrease the lightness. On this layer mask, select a soft black brush to erase the middle left to reduce the effect there:
Step 6
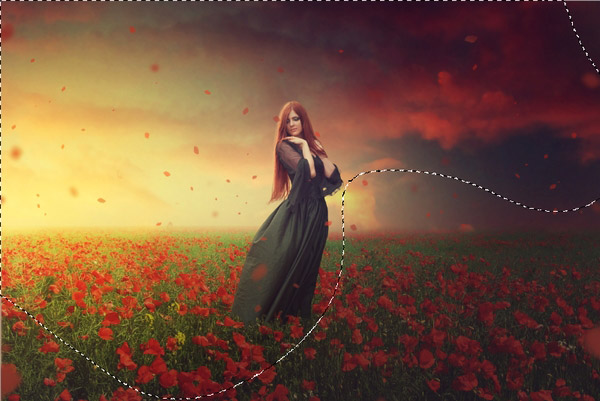
Open the field image. Use the Retangular Marquee Tool (M) to select the field only and place it in the lower half of the main document as shown below:
Click the second icon at the bottom of the Layers panel to add a mask to this layer. Use a soft black brush to soften the edge in the horizon area:
Step 7
Use a Curves adjustment layer (set as Clipping Mask ) to darken the field. On this layer mask, use a soft black brush with a low opacity (about 10-15% ) to erase the left corner as we aim to add light there.
Step 8
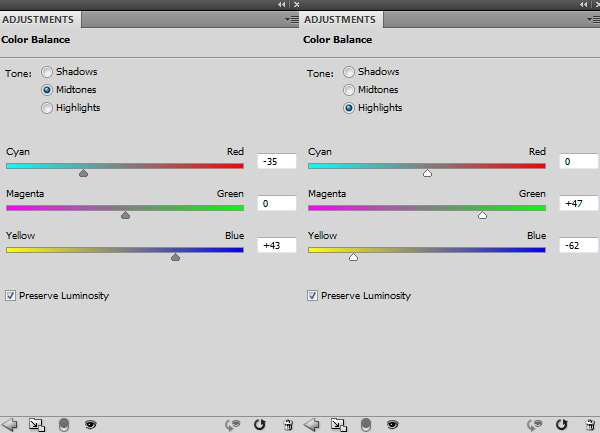
Make a Color Balance adjustment layer on top of the layers and change the Midtones and Highlights settings:
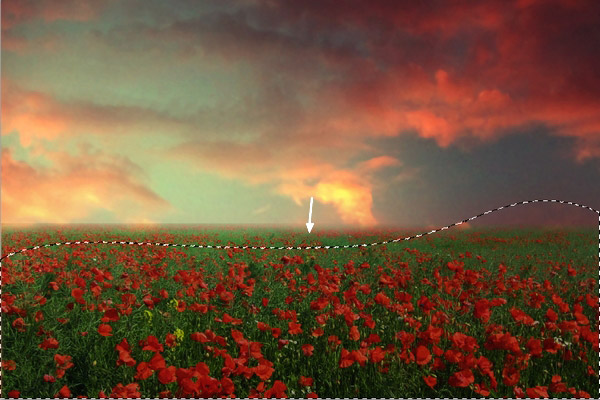
On this layer mask, use a soft black brush to erase the field area as I don’t want it to be affected by this adjustment layer:
Step 9
Create a Curves adjustment layer to brighten the scene. On this layer mask, select a soft black brush and paint over the right side to make the light visible on the left:

Step 10
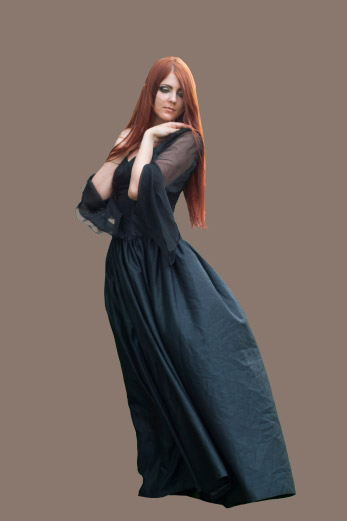
Open the model image. First isolate her from the background using your own method:
Step 11
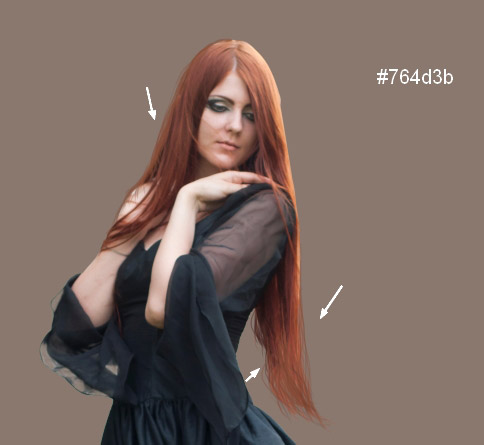
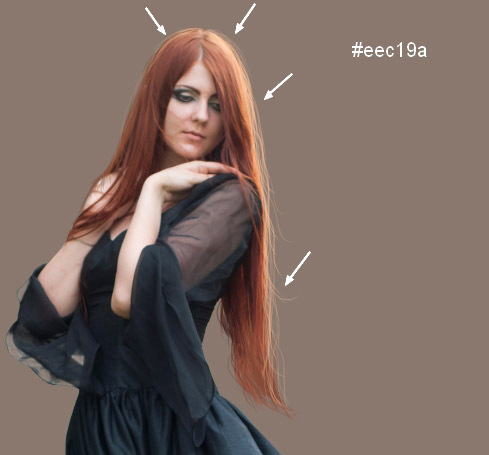
Make two new layers and use a hard brush with two colors #764d3b and #eec19a to paint more hair for the model:
Step 12
Merge all the hair layers and the model layer by pressing Ctrl+Shift+Alt+E while turning off the background and the fill layer below the extracted model layer.
Move her into our field scene and place her in the middle of the ground and flip her bright side to the left (Edit > Transform > Flip Horizontal):
Step 13
Add a mask to this layer and use a hard black brush to trim the bottom of the model’s dress and make her look like she’s standing between the grass blades:
Step 14
Use a Hue/Saturation adjustment layer to change the model’s dress color to make it fit the grass:

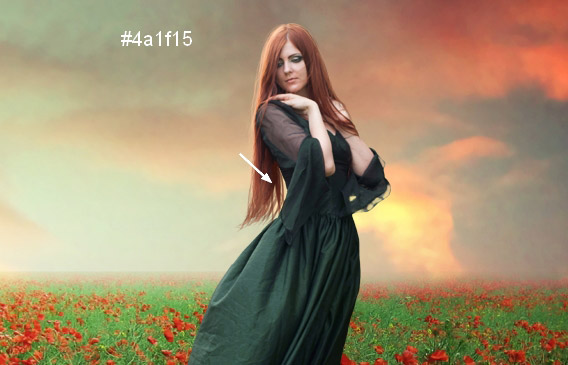
Step 15
On a separate layer, use a hard brush with the color #4a1f15 to paint more hair for the model.
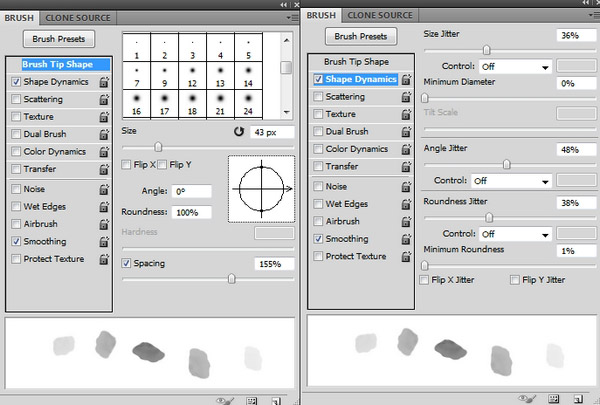
Step 16
Make a new layer on the top. Change the brush kind to the petal ones and select the one you like. Press F5 to change the settings of this brush:
Paint random, flying petals over the picture:
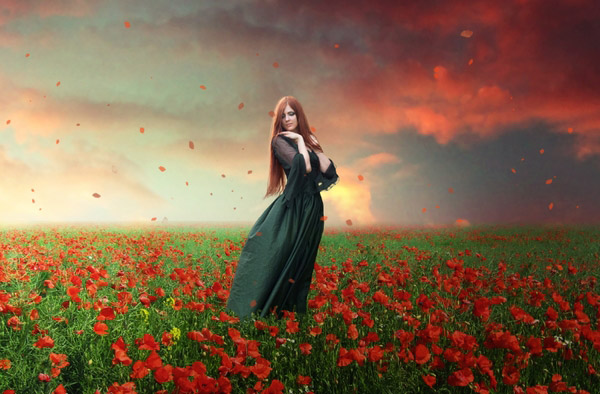
Step 17
Paint some bigger petals on the edges of the scene as shown below:
Step 18
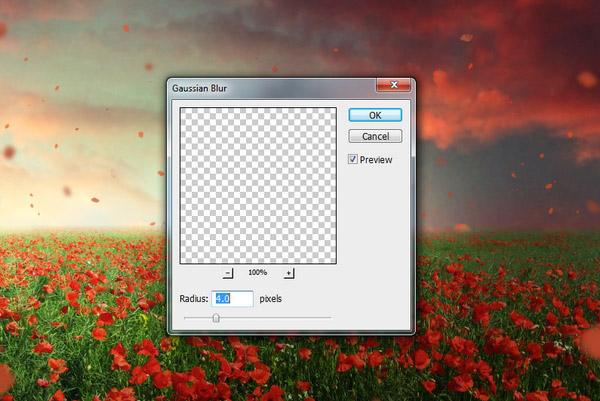
Go to Filter > Blur > Gaussian Blur and set the radius to 4px. This step is to add some depth to the scene.
Step 19
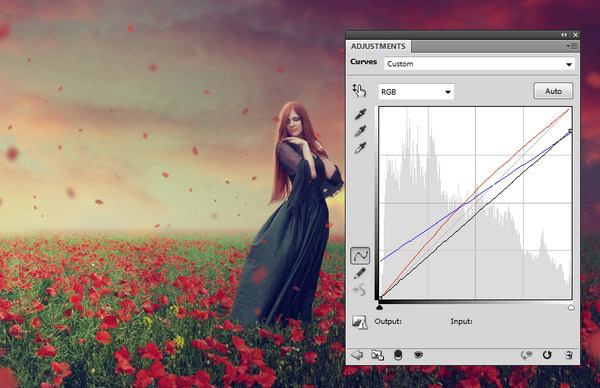
Create a Curves adjustment layer on top of the layers:
Step 20
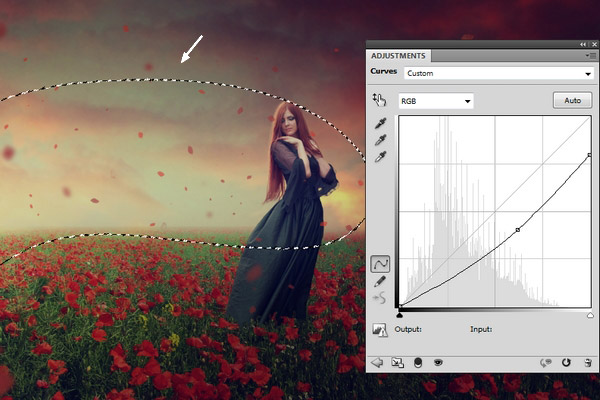
Use another Curves adjustment layer and reduce the lightness. Paint on the layer mask on the left side to maintain the lightness there:
Step 21
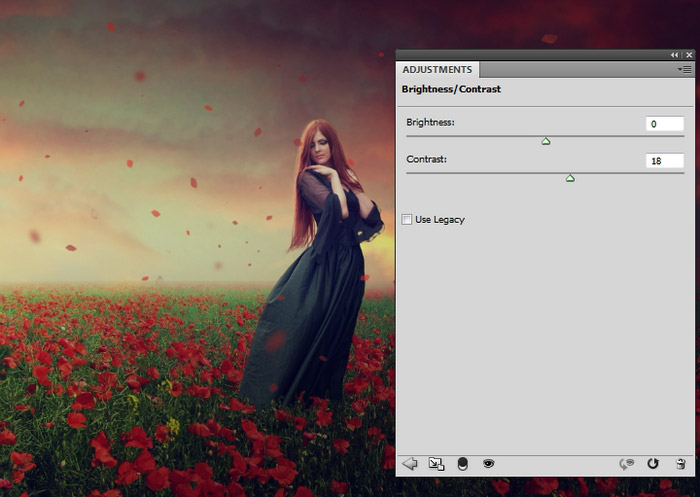
Make a Brightness/Contrast adjustment layer and increase the Contrast value to 18:
Step 22
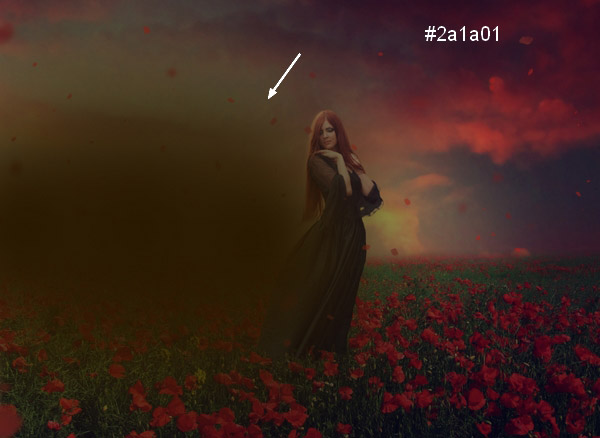
To add light to the scene, create a new layer and paint on the left side with the color #2a1a01. Change the layer mode to Linear Dodge 100%:
Step 23
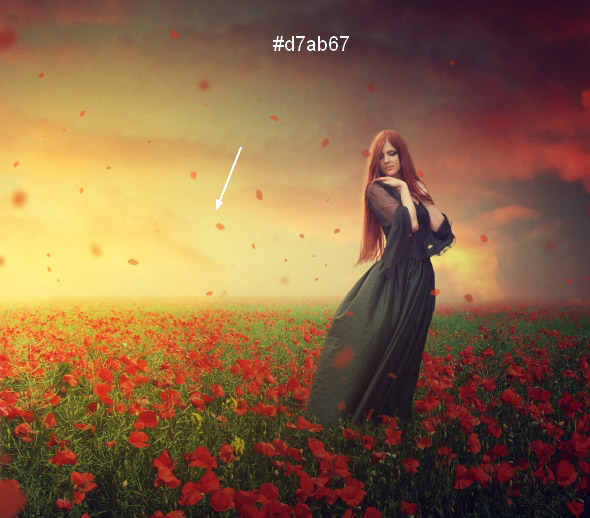
Make a new layer and change the mode to Overlay 100%. Use a soft brush with the color #d7ab67 to make the light stronger:
Step 24
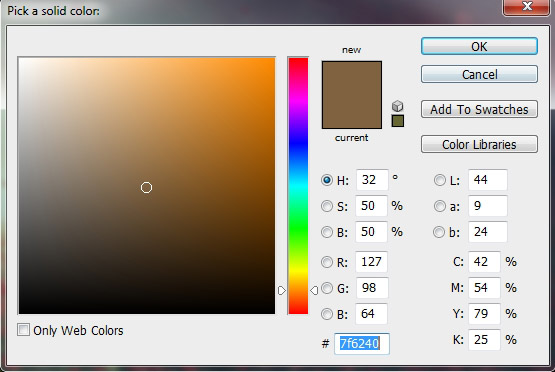
Go to Layer > New Fill Layer > Solid Color and pick the color #7f6240. Lower the opacity of this layer to 20% and use a soft black brush on the layer mask to remove the effect on the sky part and the left side:
Step 25
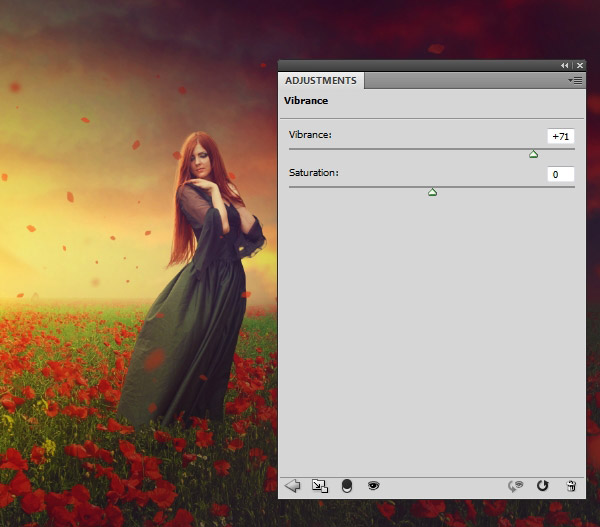
Use a Vibrance adjustment layer to enhance the final effect:
And We’re Done!
I hope that you’ve enjoyed the tutorial.