In this Photoshop tutorial I’ll show you how to create an emotional autumn scene. You’ll learn how to blend all stocks together to make a cohesive scene as well as retouch the model, create rain, work with groups and more.
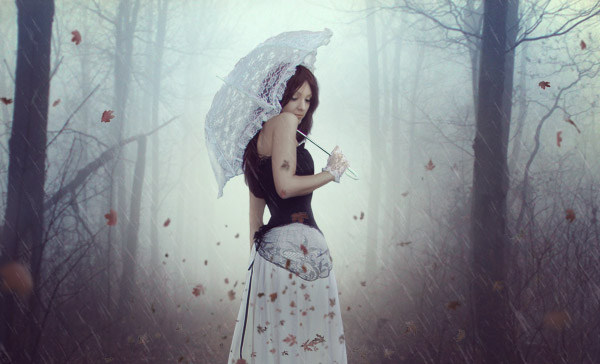
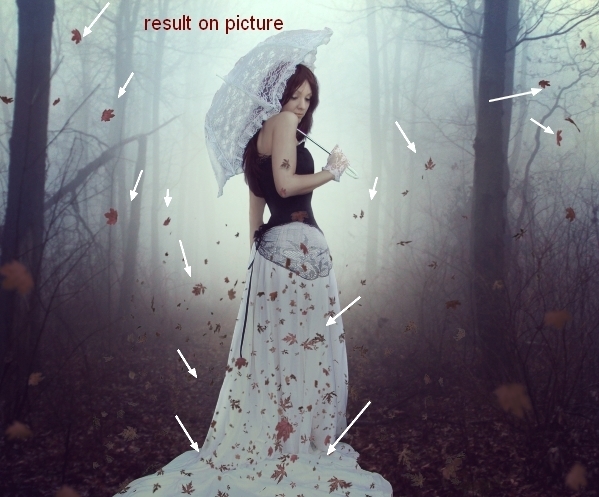
Final Image
Tutorial Details
- Program: Adobe Photoshop CS5 (CS3+ versions will work as well)
- Estimated Completion Time: 90 minutes
- Difficulty: Intermediate
Resources
Step 1
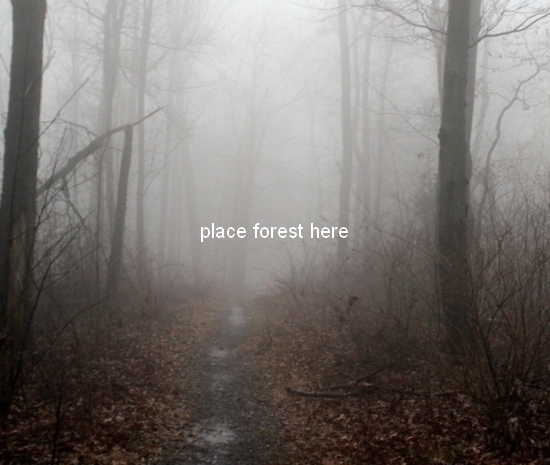
Create a new document at a size of 1200×1000 px and fill it with white (you can use your own size and color). Use the Move Tool (V) to drag the forest stock into your white canvas as shown below:
Step 2
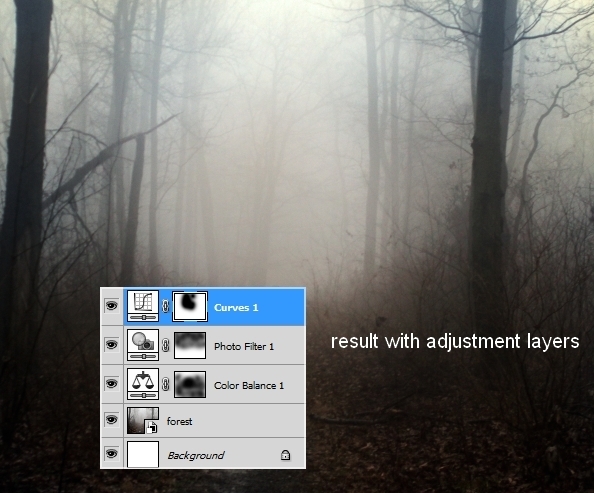
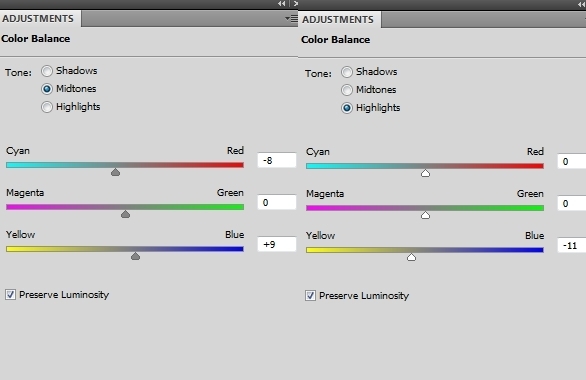
I used some adjustment layers to change the color of the forest. Go to Layer>New Adjustment layer>Color Balance:
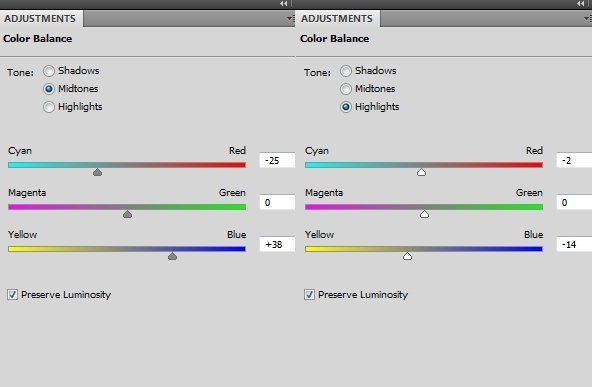
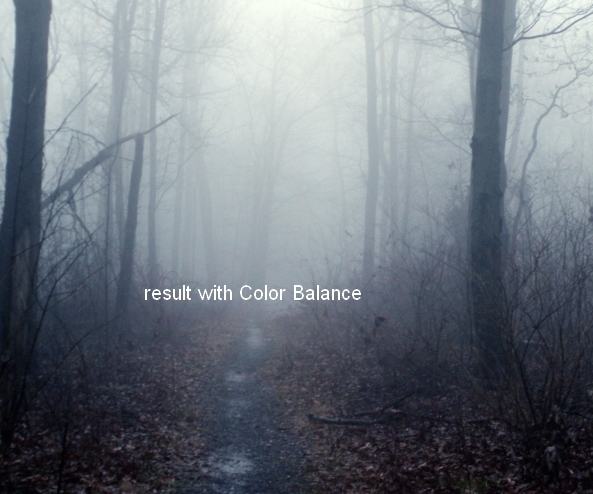
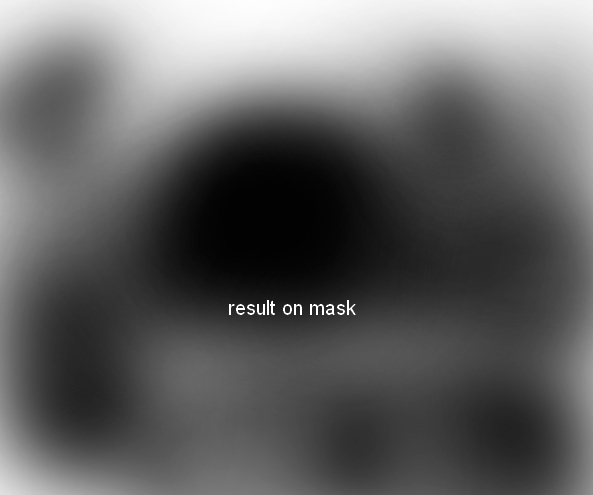
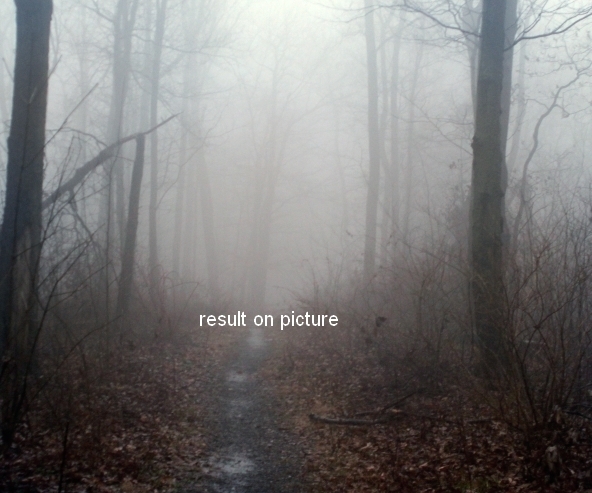
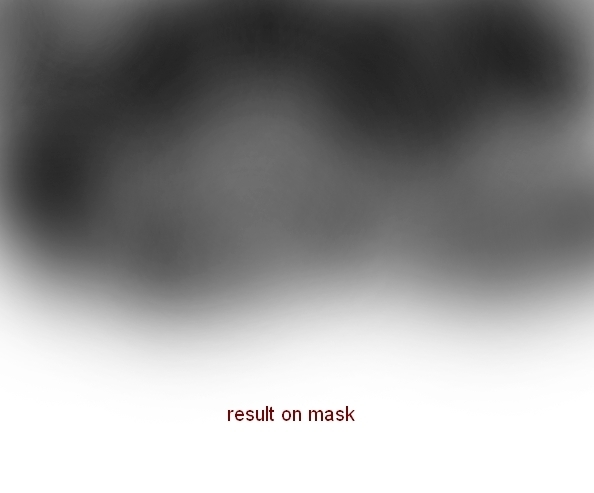
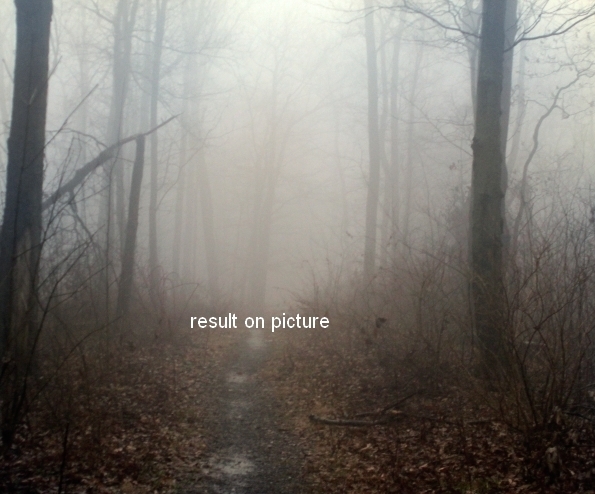
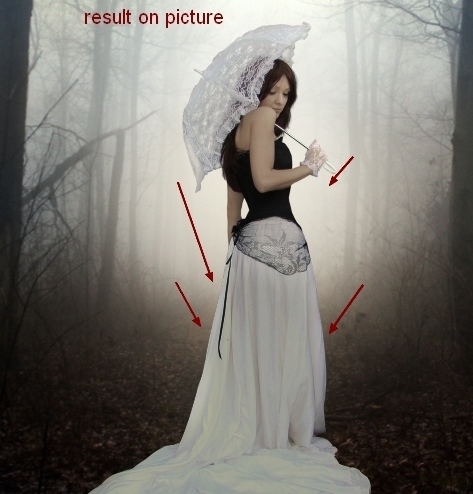
On the Color Balance layer mask, use a soft black brush with opacity from 40-90% to paint over the forest to reveal some parts of it. You can see how I did it on layer mask and the result on the picture:
Step 3
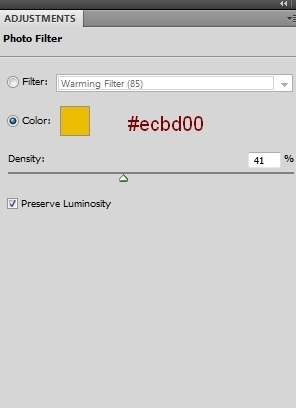
I used a Photo Filter layer to add some light yellow to the picture:
I applied brush masking on the Photo Filter layer mask on the foggy part:
Step 4
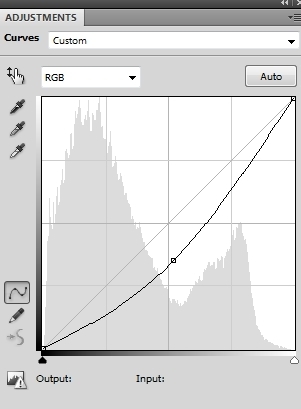
To increase the contrast of the picture, I used a Curves layer:
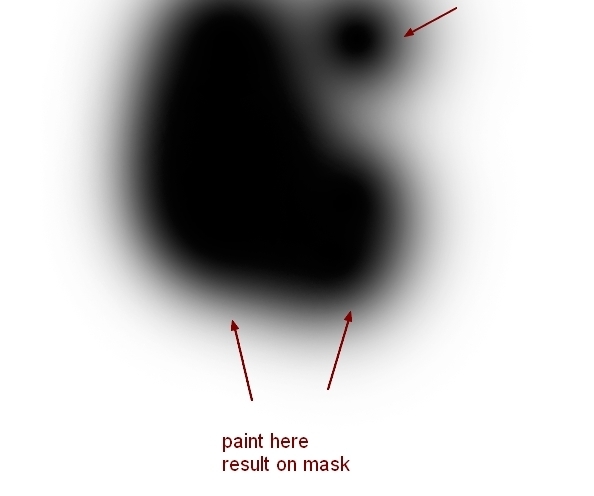
I used the brush to paint on the middle part of the forest:
Step 5
Open the model stock. First use your familiar method to extract the model from the background (we’ll fix the hair later). Copy the extracted model onto a new layer (I called it “layer 1”). Create a new layer between this layer and the background (the layer that contains the original photo) and fill with a warm yellow color (just use any colors you like) (layer 2).

Step 6
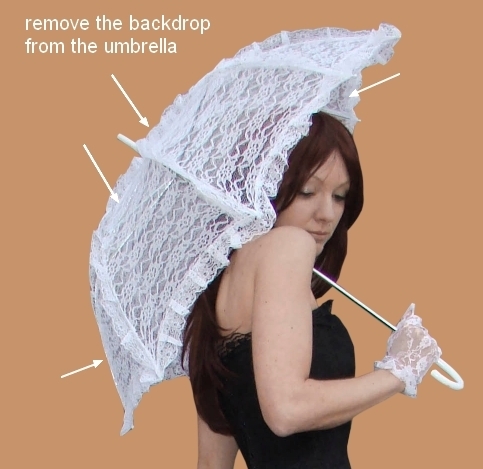
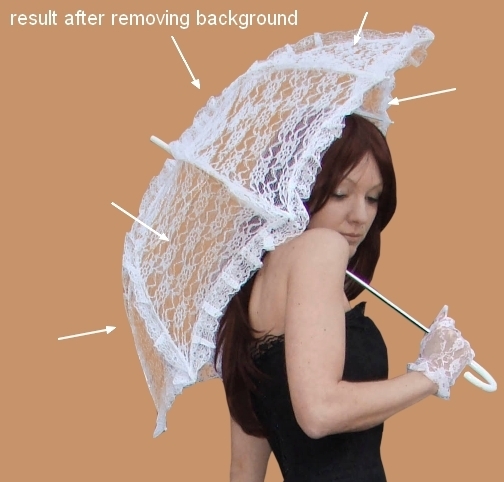
In this step we’ll be removing the backdrop from the umbrella of the model.
To do this, choose Select>Color Range:
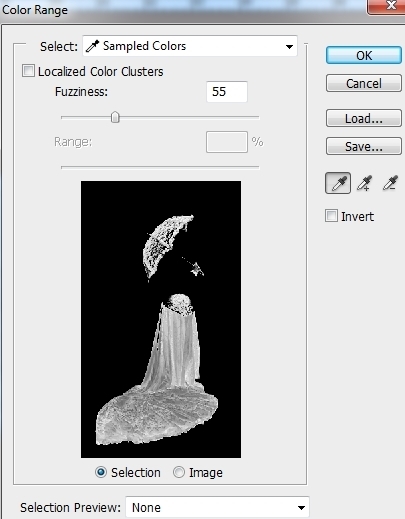
We have a selection for bright parts of the picture:
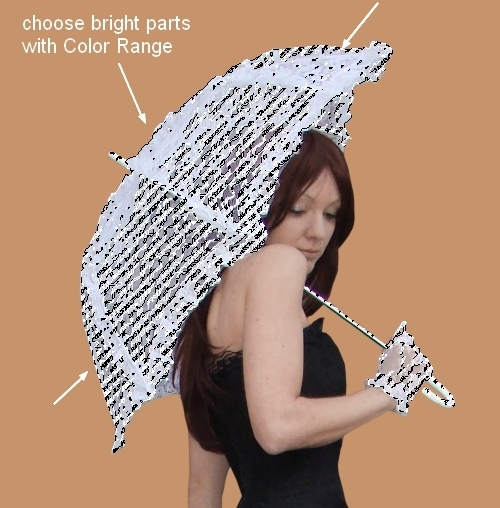
Press Cmd/Ctrl+J to copy the selection onto a new layer (layer 3). On layer 1, click the second button at the bottom of the Layers Palette to add a mask to this layer.
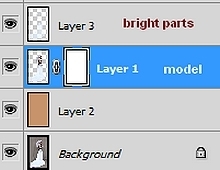
On the mask of layer 1, hold Cmd/Ctrl while clicking layer 3 thumbnail to load its selection (bright parts):
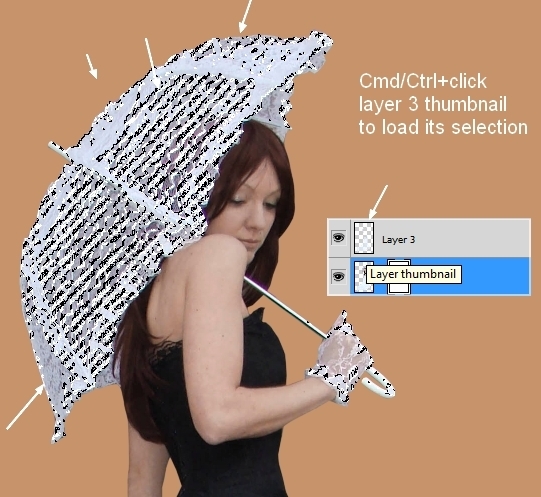
Use a black brush with opacity about 60-70% to paint inside this selection (umbrella only) to remove the background avoiding the hair part. You should have a similar result to mine:
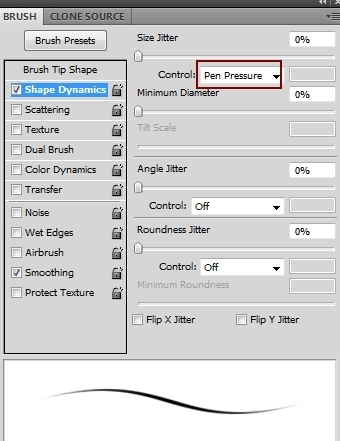
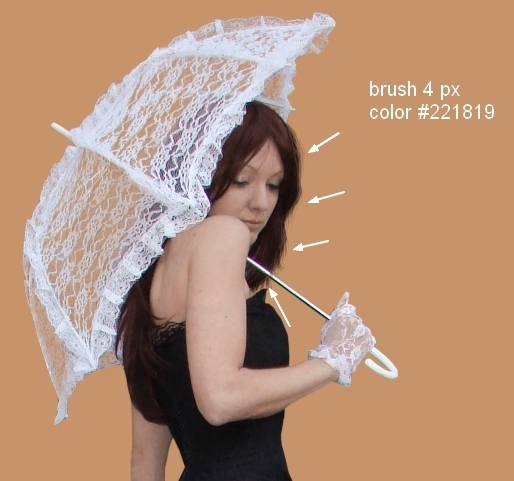
Step 7
Make a new layer on the top. Change brush size to 4 px and color to #221819. Press F5 to change the settings of this brush (remember these settings only work if you’re using a tablet pen):
Use this brush to draw tiny hair strands for the part near the face:
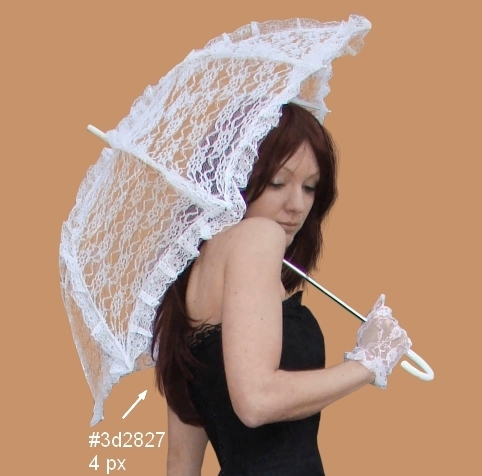
On another layer select color #3d2827 to paint the lower hairs on the model’s back:
If you don’t want to paint hair, you can use hair brushes instead.
Step 8
Turn off the background and layer 2. Make the top layer active, press Cmd/Ctrl+Option/Alt+Shift+E to merge all transparent layers (layer 1, layer 3 and hair ones).
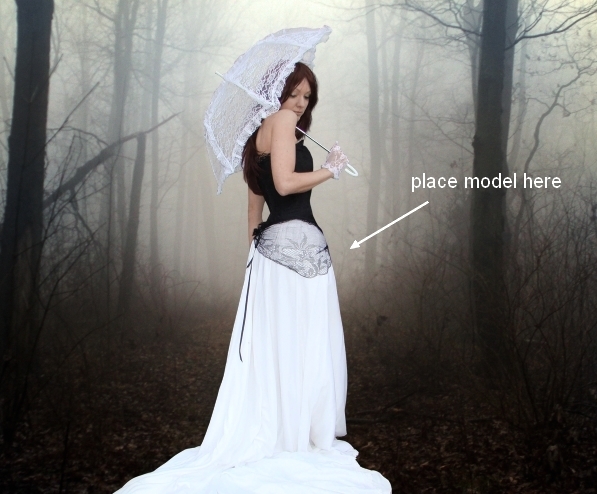
Move the merged model into our main picture, place her on the road:
Step 9
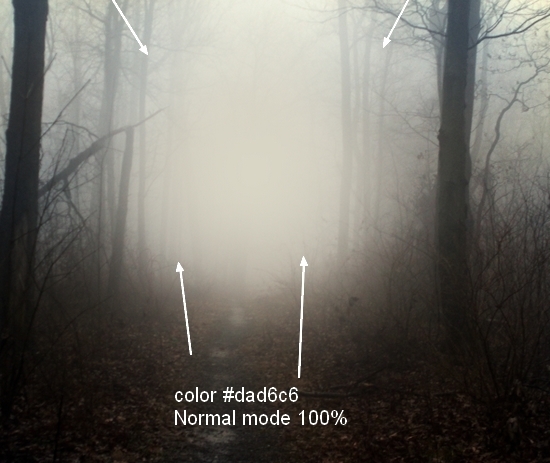
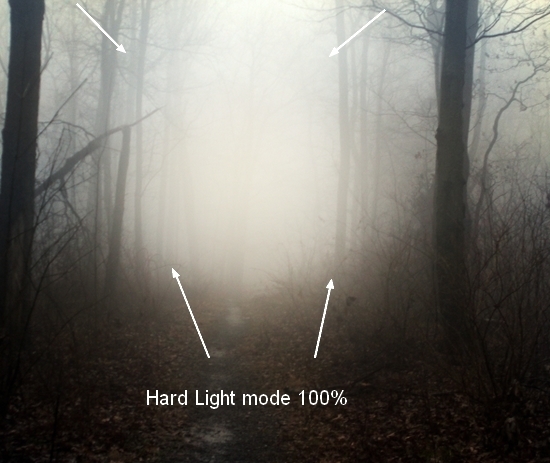
Make a new layer under the model layer. Use a soft brush with color #dad6c6 to paint on the center section of the picture (foggy part) to create a stronger light effect for this. Change the mode to Hard Light 100% (I turned off the model layer to let you see more obviously):
Step 10
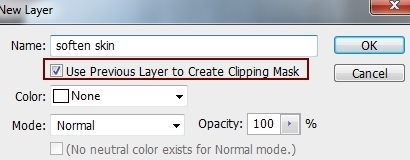
Restore visibility to the model layer. Make a new layer above the model layer and apply a Clipping Mask:
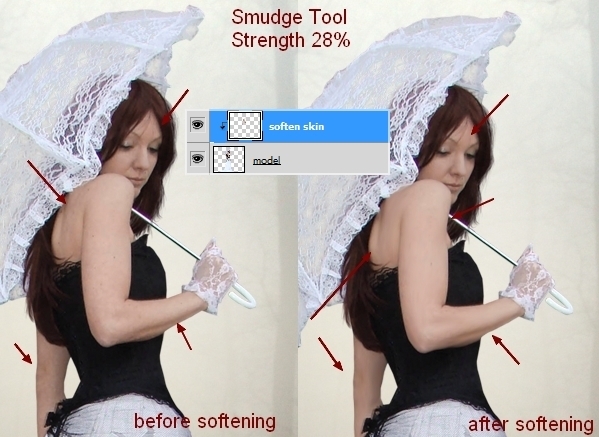
Choose the Smudge Tool with Strength about 28% to brush along the face, shoulder, arms, back avoiding the contours.
Step 11
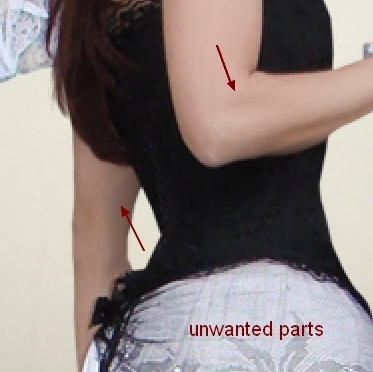
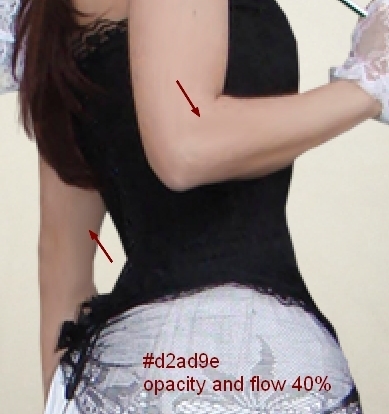
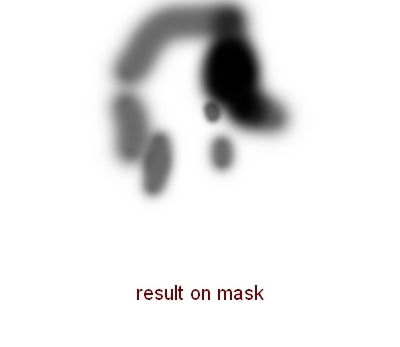
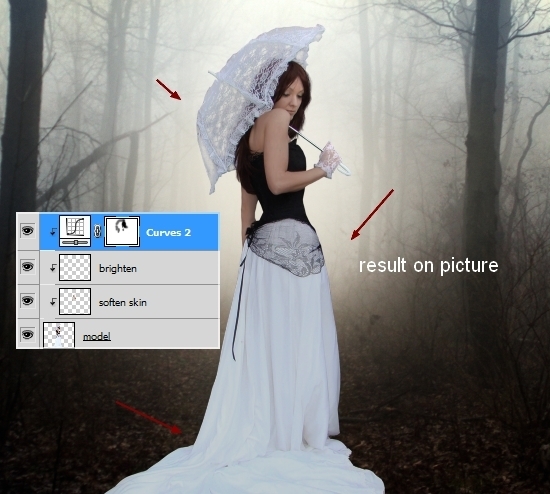
Create a new layer (Clipping Mask) and use a brush with color #d2ad9e, opacity and flow about 40% to brighten some unwanted dark parts on the model’s arms:
Step 12
Use a Curves layer (Clipping Mask) to darken the model:

Use a soft brush on the Curves layer mask to remove the dark effect around the model’s head and body:
Step 13
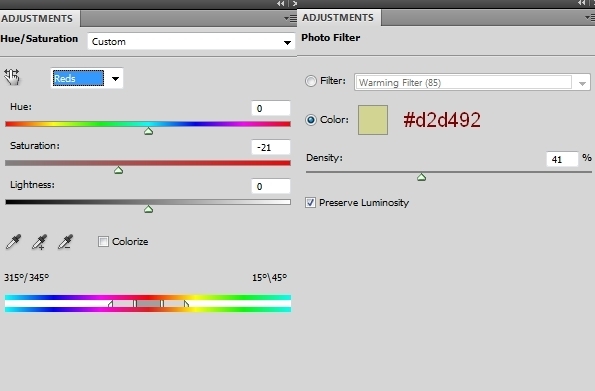
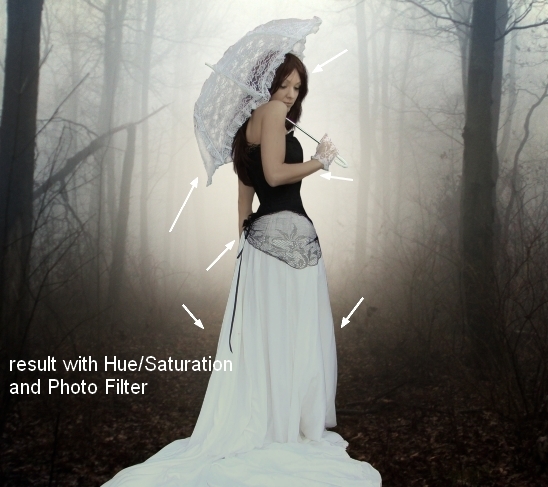
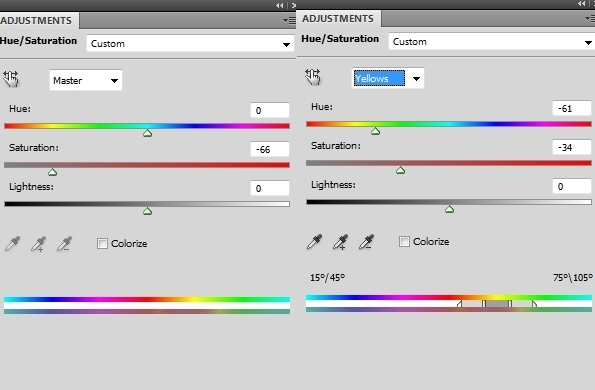
Use Hue/Saturation and Photo Filter layers to reduce red and add some greenish/yellowish color to the model:
Step 14
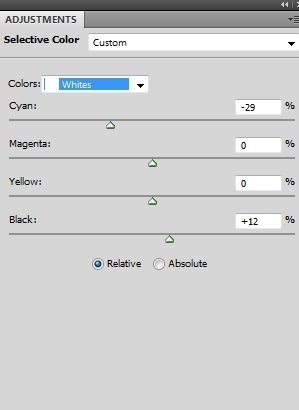
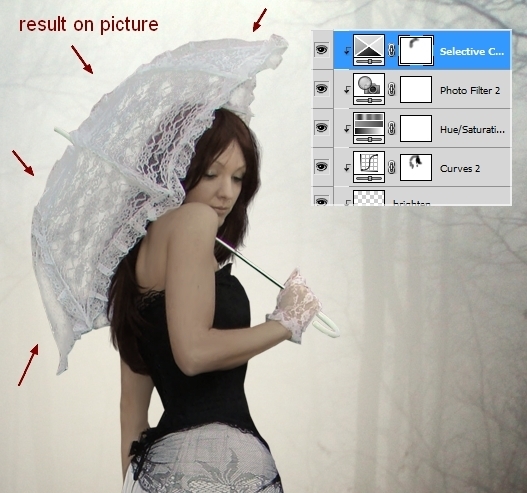
Use Selective Color to change the color of the umbrella a little:
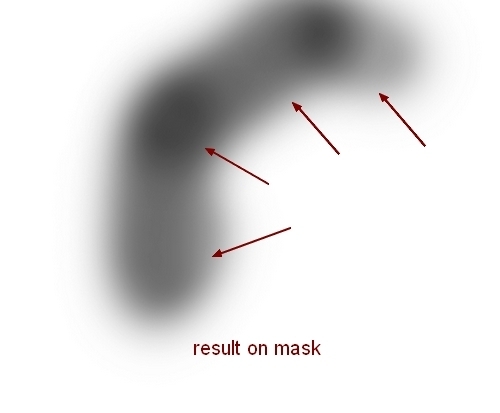
On the Selective Color layer mask use a brush with opacity about 30-40% to erase around the sides of the umbrella :
Step 15
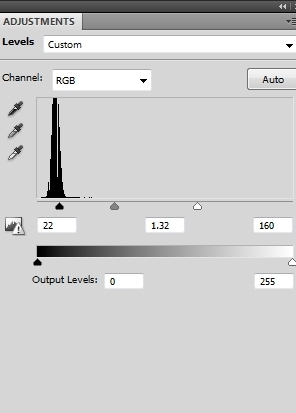
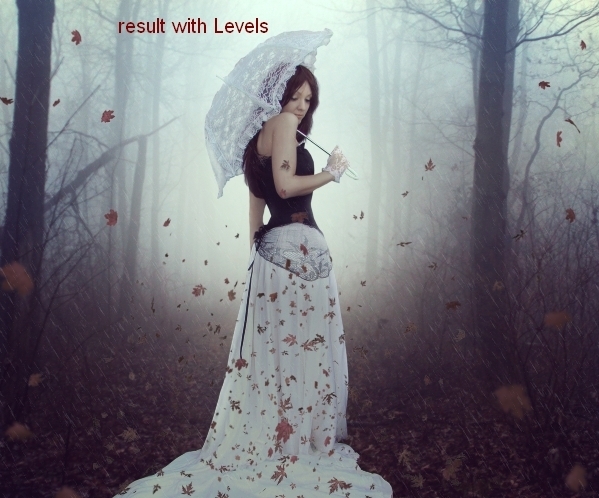
To darken the dress more use a Levels layer:
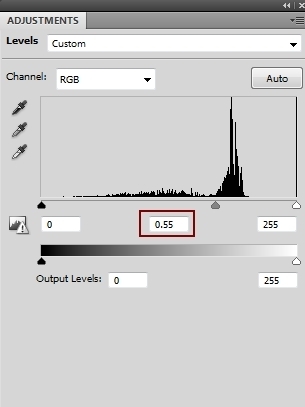
On the Levels layer mask erase the model’s head, her upper body and the contour of the dress as they should not be too dark:

Step 16
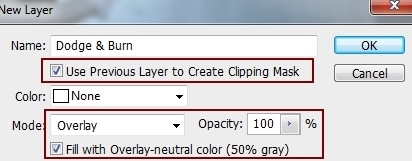
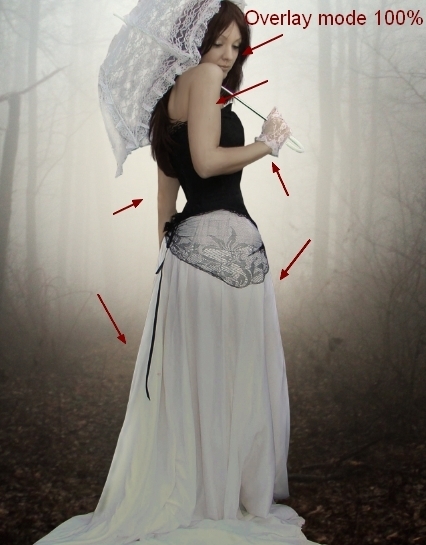
Make a new layer (Clipping Mask), change the mode to Overlay 100% and fill with 50% gray:
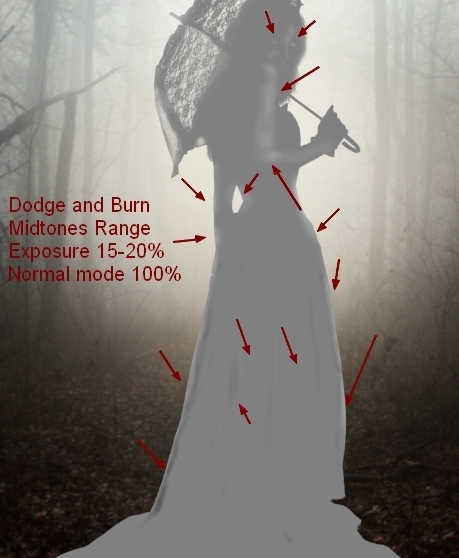
Use the Dodge and Burn Tool (O) with Midtones Range and Exposure about 15-20% to create more details for the model’s skin, brighten eyelids and dress. You can see how I applied this tool in Normal mode and result in Overlay mode:
Step 17
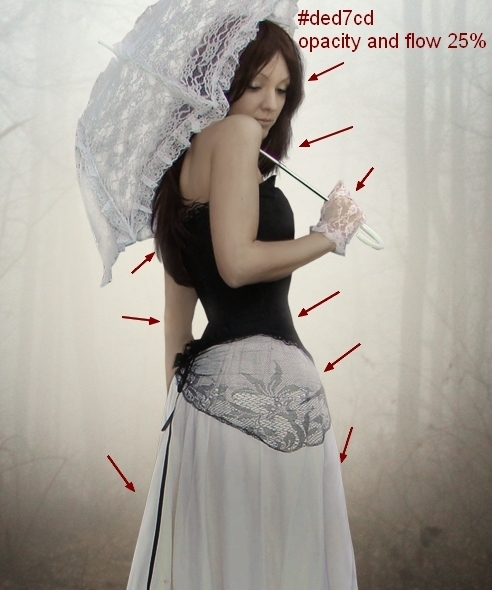
To make more light for the model, create a new layer (Clipping Mask), use a brush with color #ded7cd, opacity and flow about 25% to paint along the model’s contour (which is illuminated from the background):
Step 18
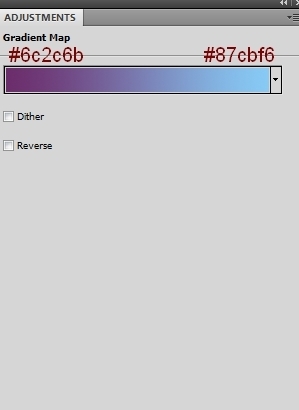
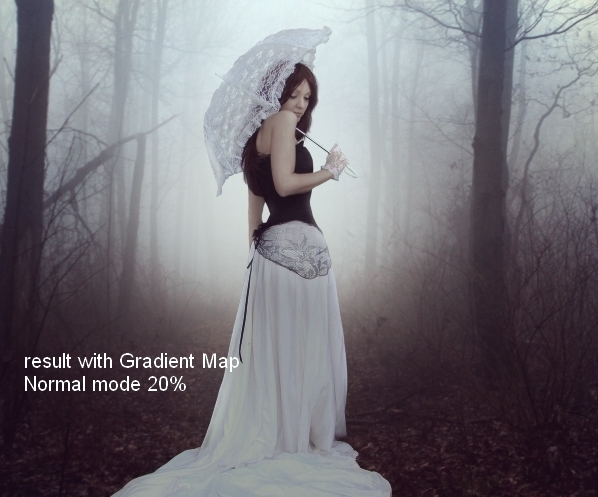
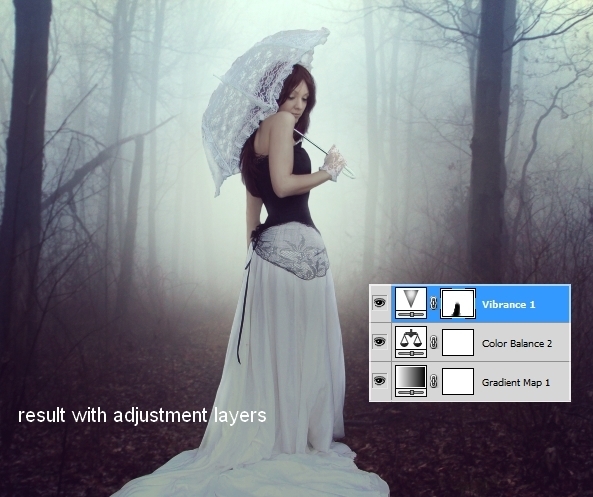
Make a Gradient Map layer on the top:
Lower the opacity of this Gradient Map layer to 20%:
Step 19
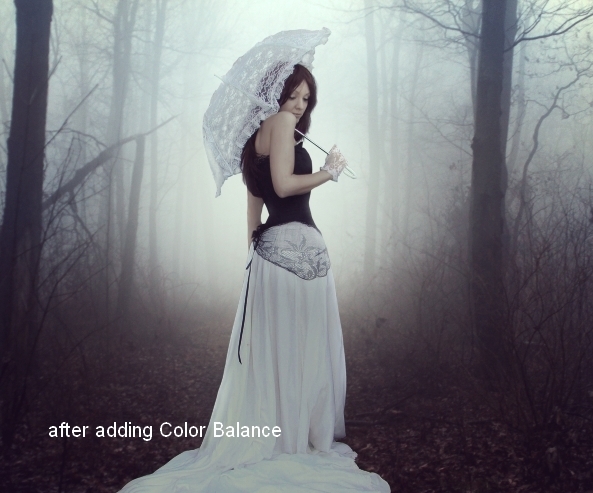
Use a Color Balance layer to change the color of the whole picture:
Step 20
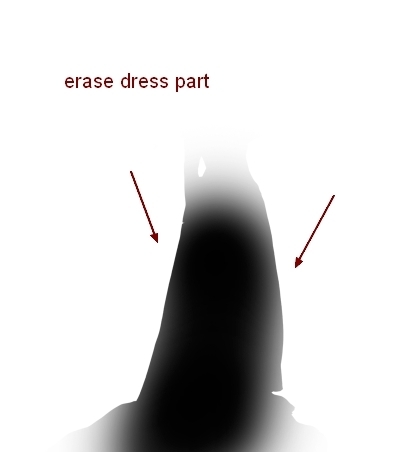
Add a Vibrance layer above all the layers:
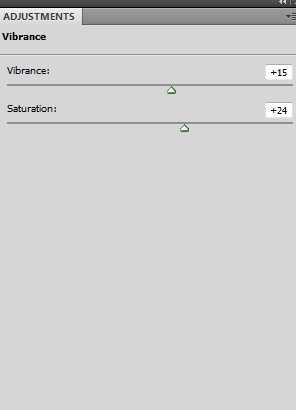
On this Vibrance layer mask use a brush to erase the dress part:
Step 21
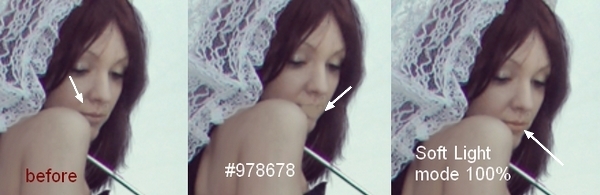
The model’s lips don’t look good so we can fix that. Make a new layer and use a brush with color #978678 to paint on this part.
Step 22
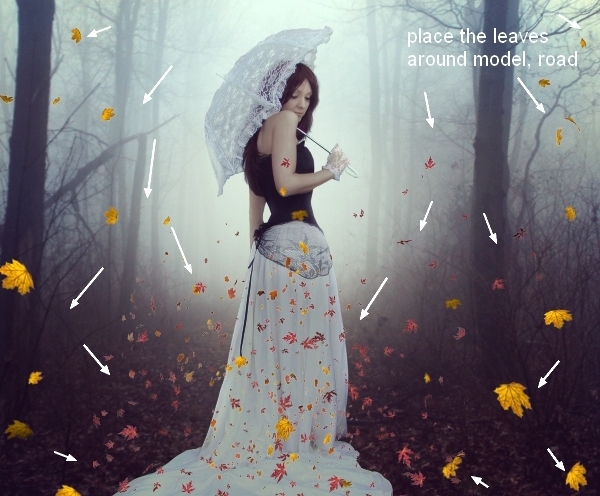
Open the leaves pack. Choose some parts and separate leaves to put around the model and on the road, use transform tools (Cmd/Ctrl+T, Skew, Warp…) and layer mask if needed to achieve a random effect. I used 35 layers for this effect. Place some bigger leaves near the foreground:
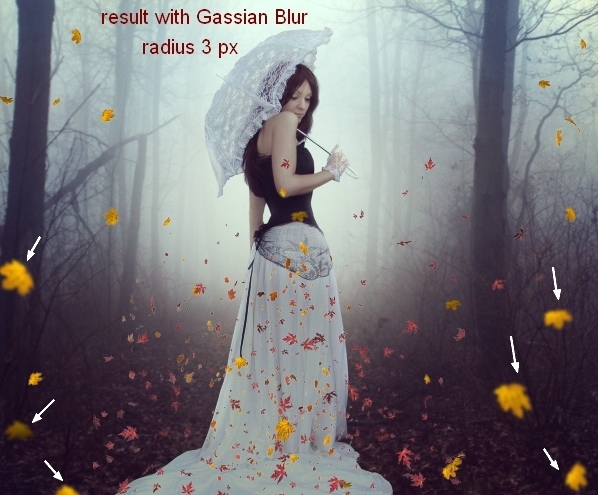
Step 23
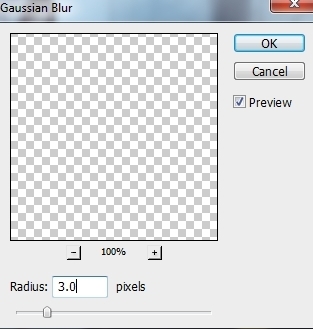
With the bigger leaves apply a Gaussian Blur to them to create some depth for the picture. On those layers, go to Filter>Blur>Gaussian Blur and choose a radius of 3 px:
Step 24
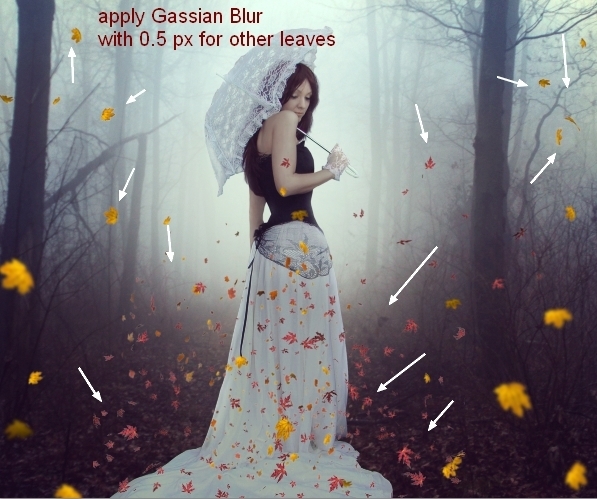
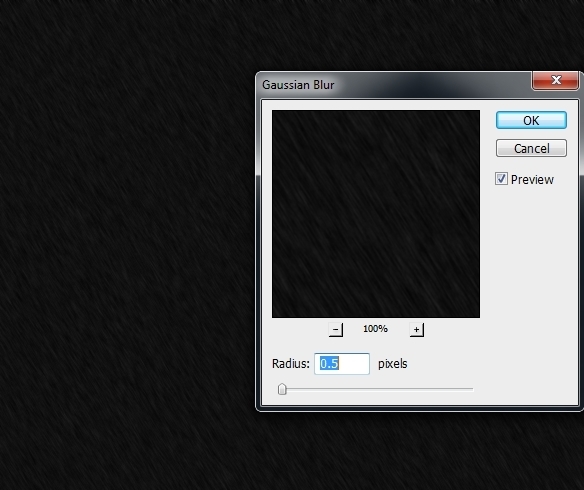
Apply a Gaussian Blur of 0.5 px to some of the other leaves if they look too sharp (we’re in a foggy scene!).
Step 25
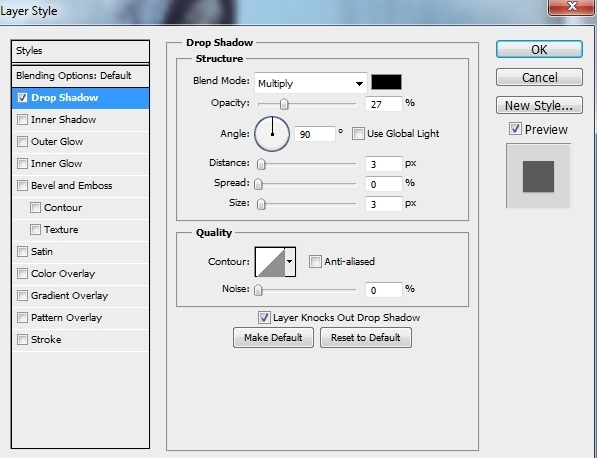
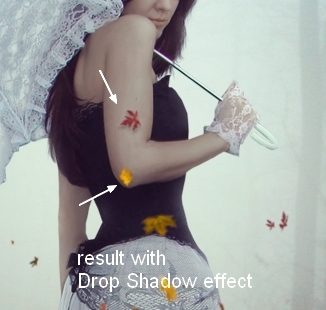
To make a shadow for the leaves on the model’s arm, we will use a Drop Shadow effect. Double click these layers, choose Blending Options:
Step 26
To change the color of all the leaves together, select all of these layers then hit Cmd/Ctrl+G to create a group for them. I named them from 1 to 35. Change the mode of this group from Pass Through (default group mode) to Normal 100%. On layer 35, go to Layer>New Adjustment Layer>Hue/Saturation:

Step 27
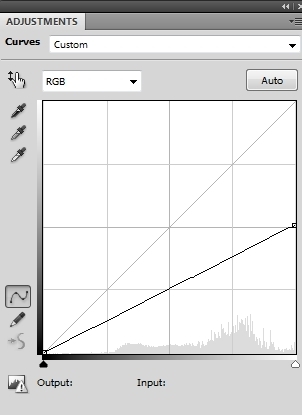
Use Curves to darken the leaves:
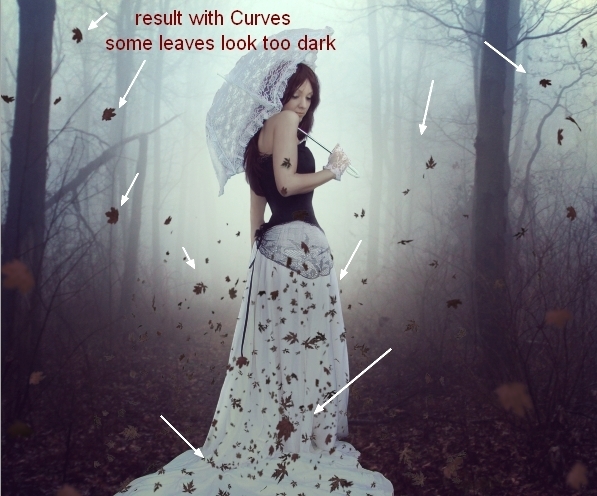
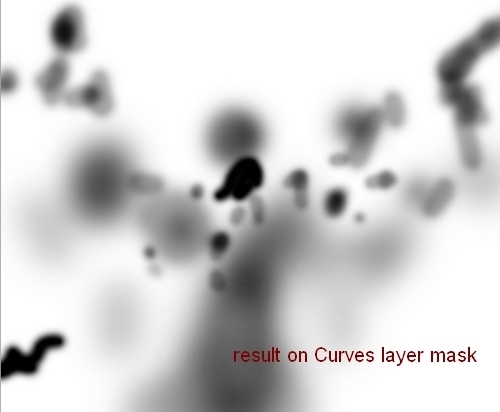
On the Curves layer mask use a brush to erase some leaves as they look too dark after this step:
Step 28
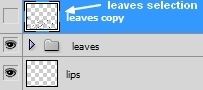
Right click the leaves group, choose Duplicate Group. Then right click again, choose Merge Group. Now we have a leaves selection that will be useful in next steps (remember to turn off the visibility of this layer).
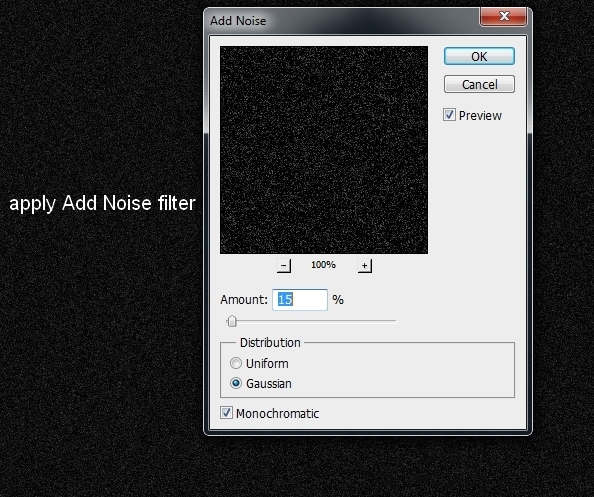
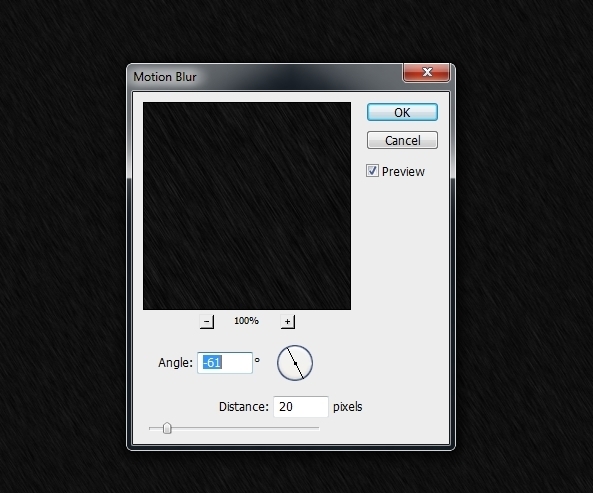
Step 29
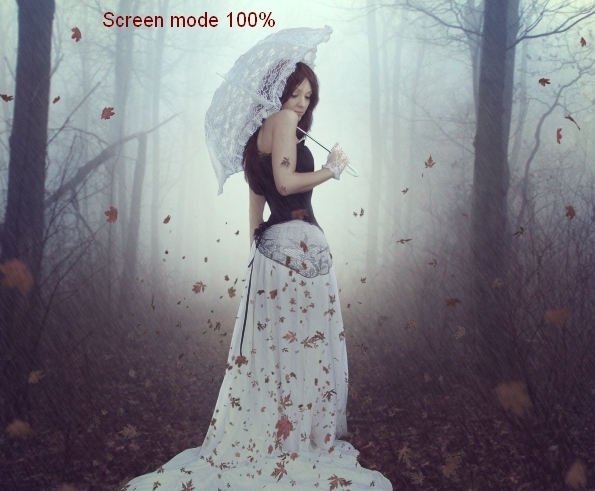
Make a new layer on the top and fill it with black (Shift+F5). Right click it and choose Convert to Smart Object. Go to Filter>Noise>Add Noise:
Filter>Blur?Motion Blur:
Filter>Blur>Gassian Blur:
Change the mode to Screen 100%:
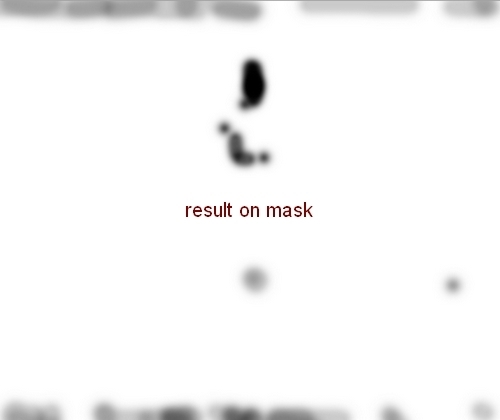
Use a layer mask to reduce the rain intensity on some parts as shown below:

Step 30
Duplicate this layer and apply a layer mask again:


Step 31
Make a group for the rain layers and change the mode of this group to Screen 100% (it’s very important to keep the effect the same as before grouping). Use a Levels layer within this group to enhance the rain effect:
Step 32
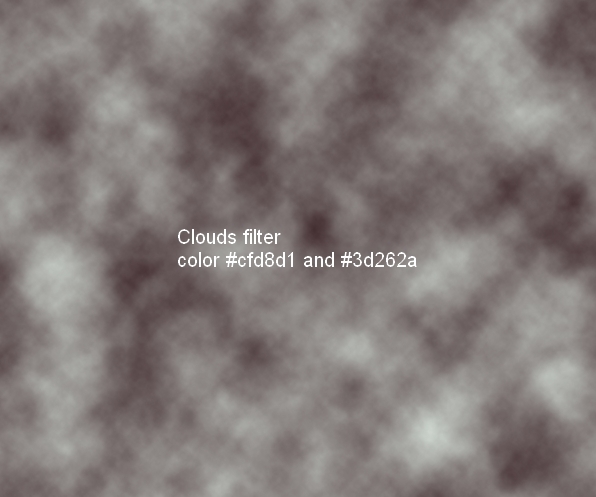
In this step we’ll be adding a dreamy effect to the foreground. Make a new layer on the top. Change the foreground and background colors to #cfd8d1 and #3d262a. Go to Filter>Render>Clouds:
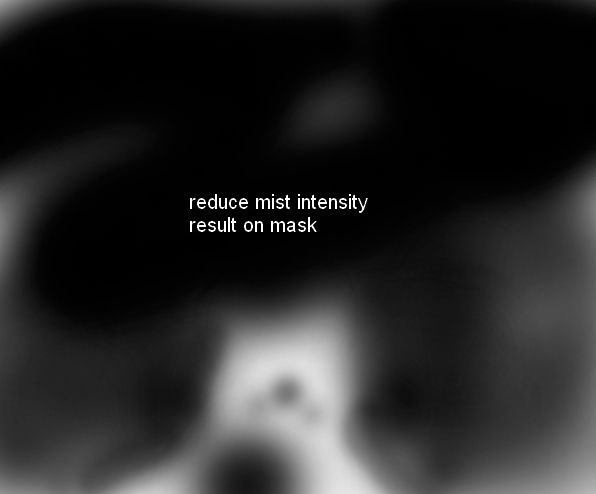
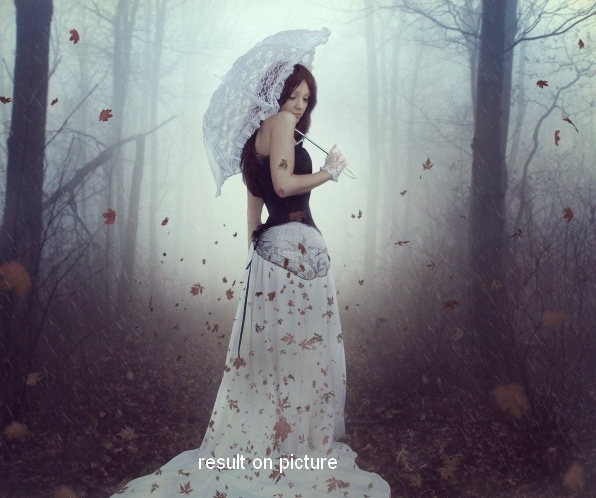
Lower the opacity to 50% and use a layer mask to remove and reduce the mist intensity as shown below:
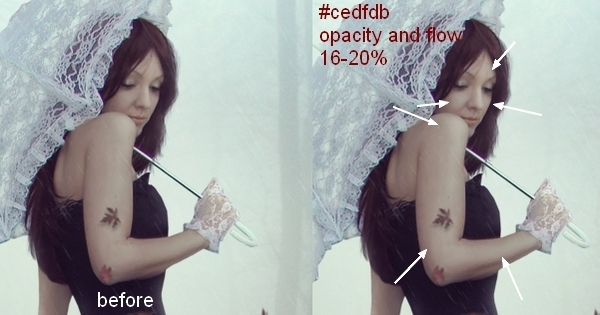
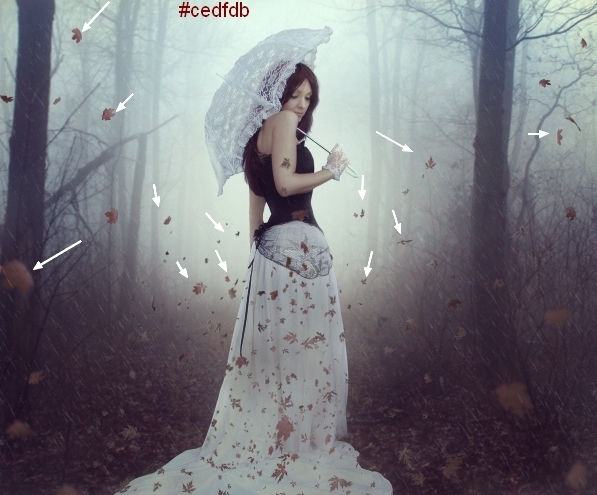
Step 33
Make another layer on the top. Use a brush with color #cedfdb, opacity and flow 16-20% to paint on the model’s face and arm to create some light for these areas:
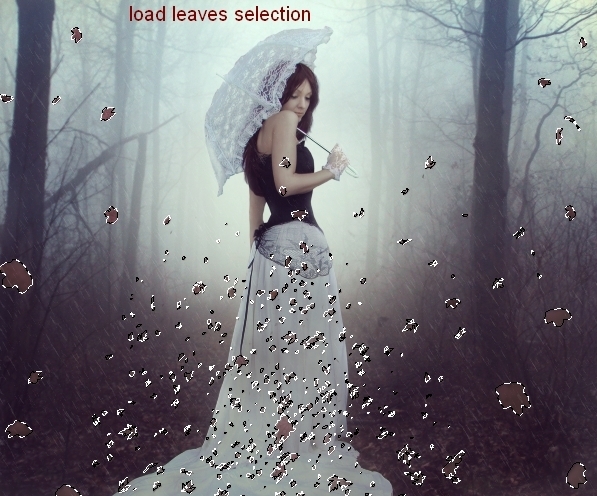
Step 34
Create a new layer again, load the leaves selection (leaves copy layer). Look at step 6 if you forget how to do it and use the same brush to blend the leaves (they need light from the background). You should vary the brush opacity to get a more natural result:
And We’re Done!
I hope that you enjoyed the tutorial.