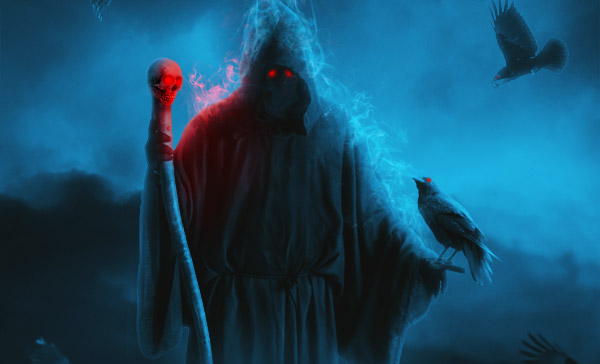
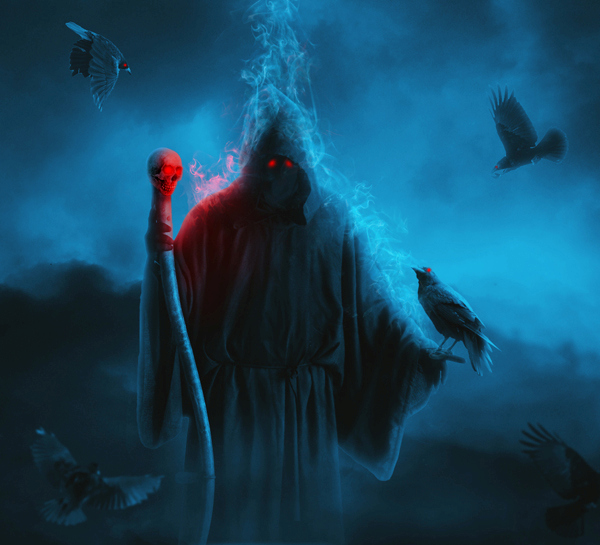
In this tutorial I’ll show you how to create a dark grim reaper scene. We’ll be using different manipulation techniques to blend many stock images together into a cohesive scene, doing advanced masking, adjusting colors, working with groups, creating lighting effects and much more.
Final Image
Resources
Step 1
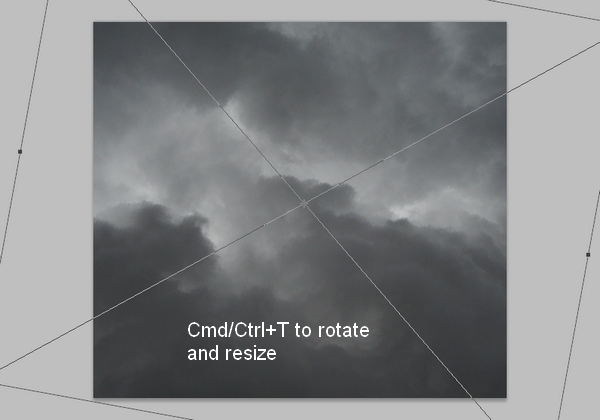
Create a new document with a size of 1100×1000 px and fill it with any color you like (feel free to use any size as you want). Open sky 1 stock. Use Move Tool (V) to drag it into our white canvas then use Cmd/Ctrl+T to rotate and resize it :
Step 2
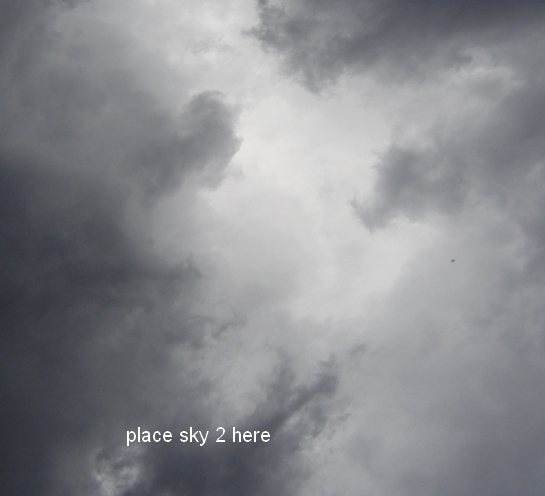
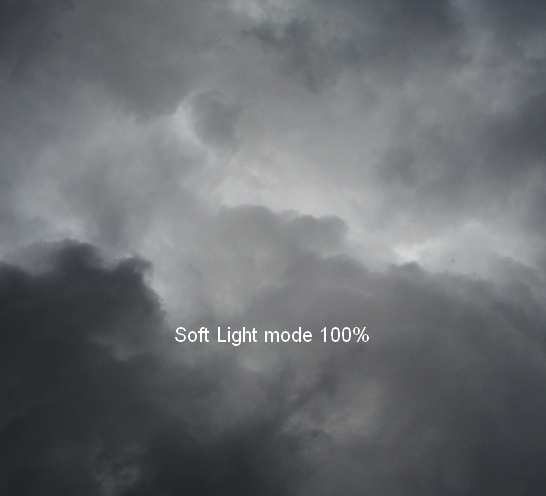
Move sky 2 stock into our document, transform it using Cmd/Ctrl+T to get the look below and change the mode of this layer to Soft Light 100%:
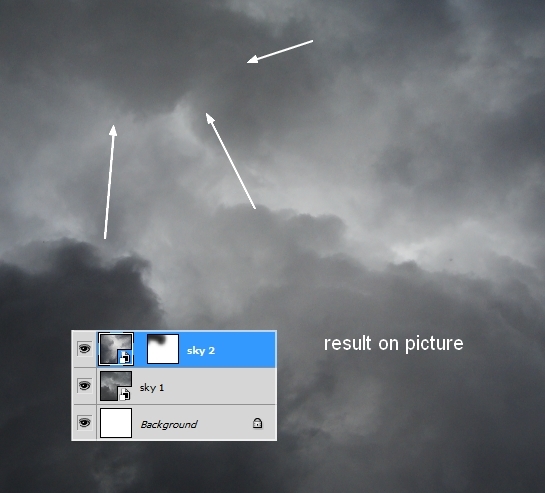
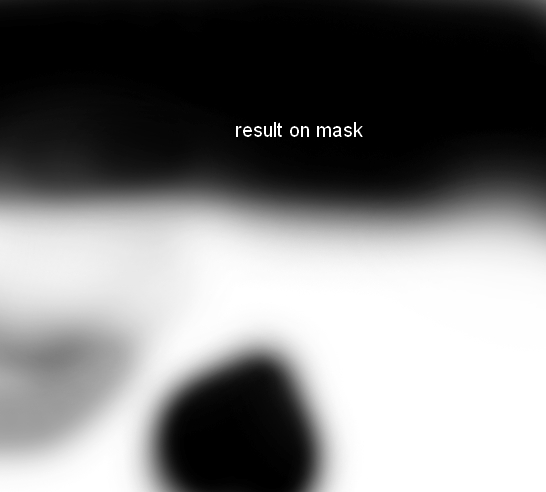
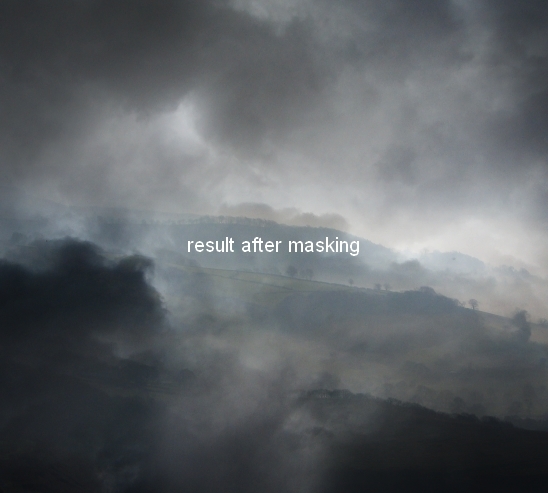
Click the second button at the bottom of Layers Palette to add a mask to this layer. Use a soft black brush to erase the top left of this image. You can see how I did it on the mask and the result on the following images:

Step 3
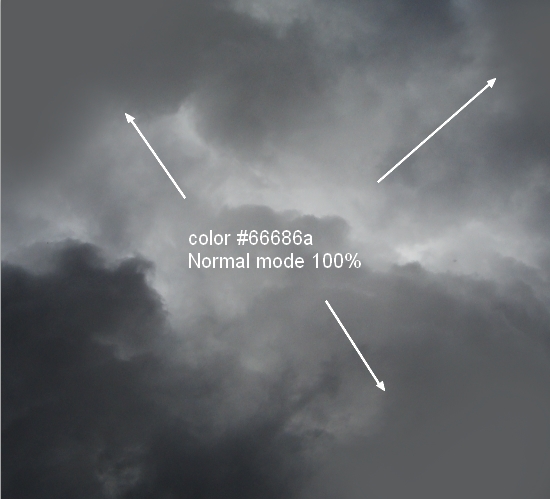
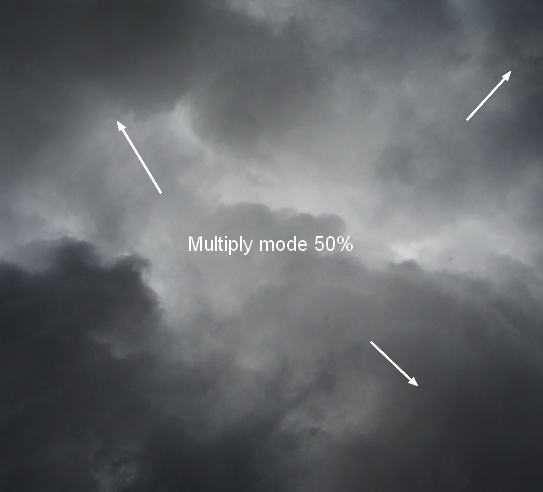
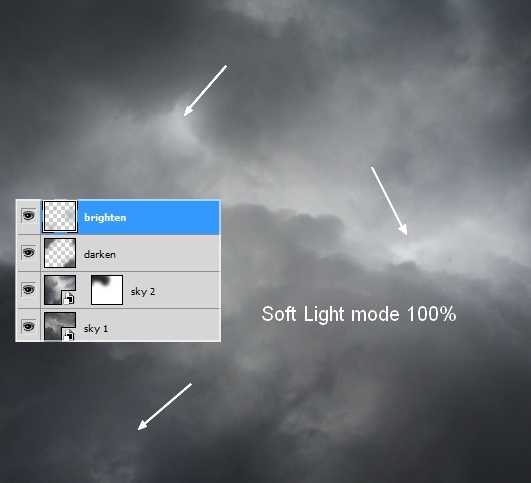
Press Cmd/Ctrl+Shift+N to make a new layer. Use a soft brush with color #66686a to paint on the edges of the image to darken these areas. I changed the mode of this layer to Multiply 50%:
Step 4
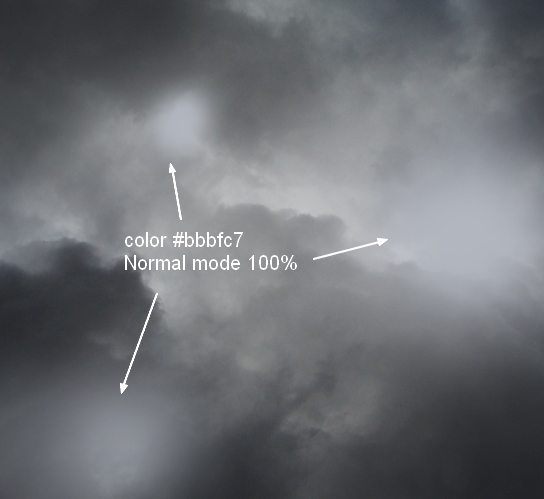
Create a new layer and use a soft brush with color #bbbfc7 to brighten some parts of the sky. Set the mode to Soft Light 100%:
Step 5
Move the landscape stock into your image and change the mode to Soft Light 100%:
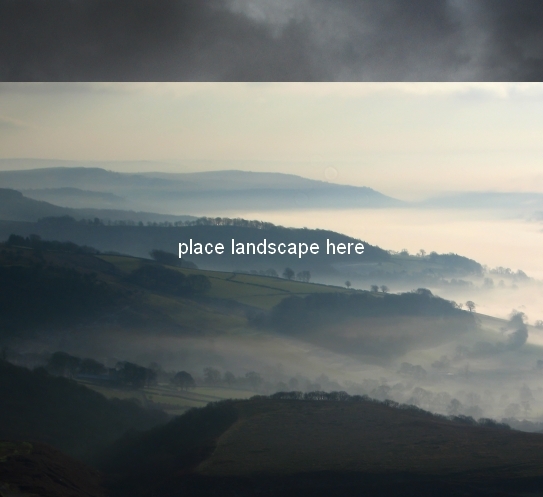
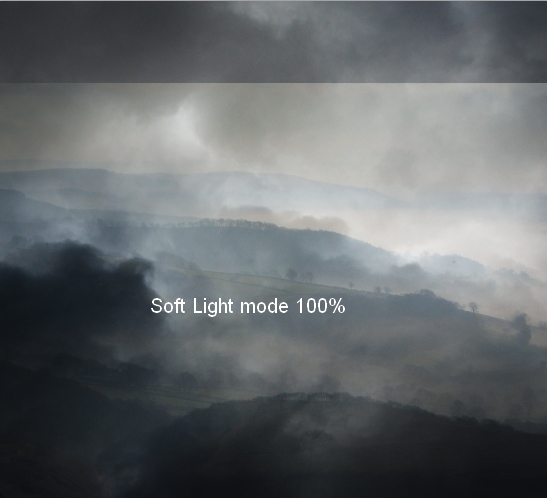
Use a layer mask to remove hard edges and blend the landscape with the background:
Step 6
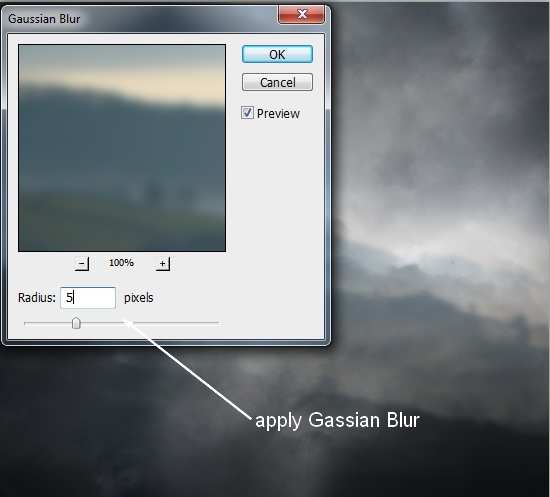
To create some depth we’ll blur the landscape. On the landscape layer, go to Filter-Blur-Gassian Blur and fill radius with 5 px:
Step 7
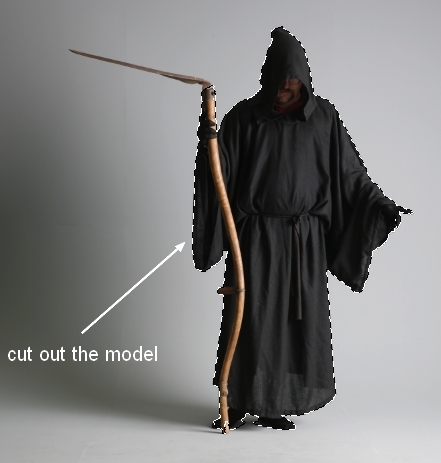
Extract the model and position him in the center of your image. You may notice that I don’t include all of the scythe:
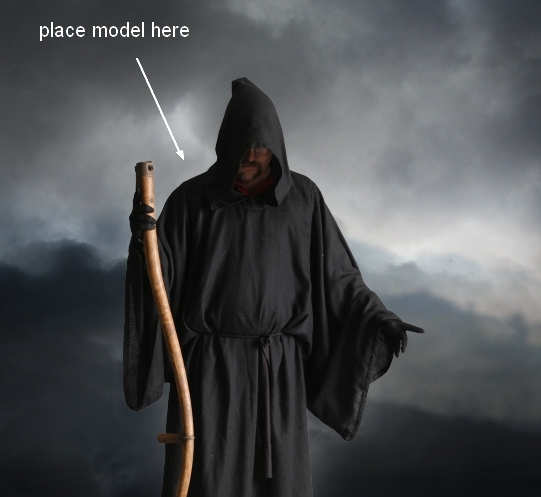
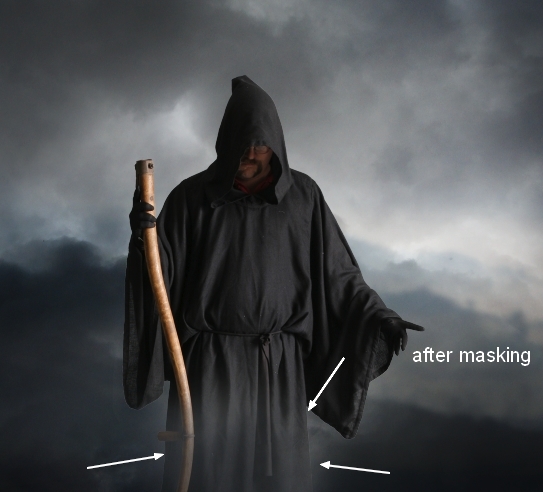
Step 8
Use a layer mask with a brush about 30-40% to blend the bottom of the model with the background:
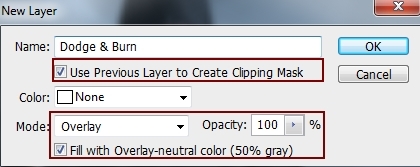
Step 9
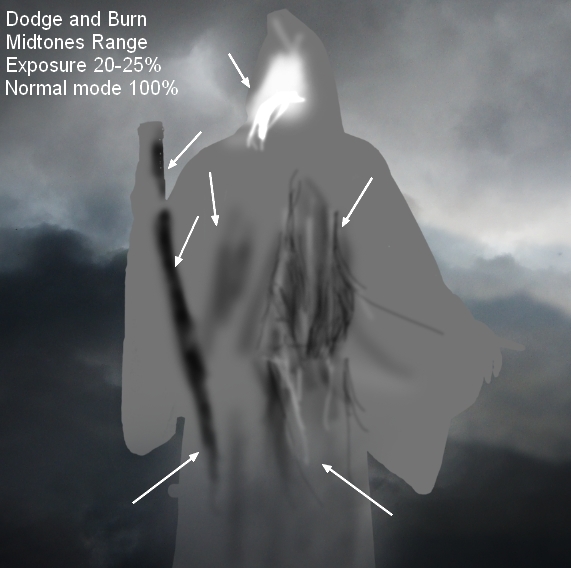
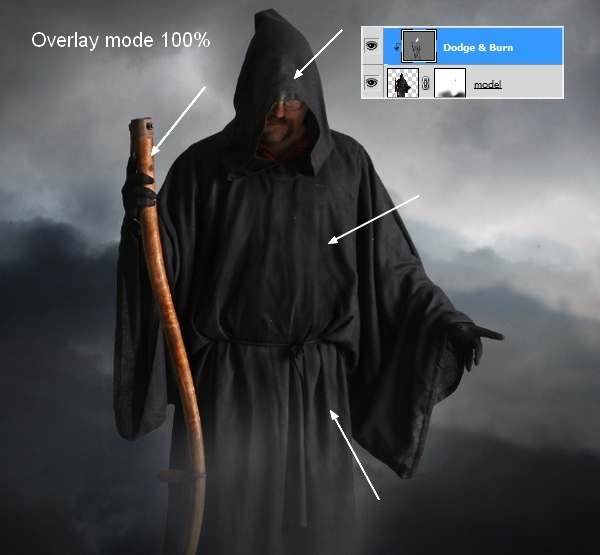
I want to give the model a little retouch. Make a new layer with Clipping Mask, change the mode to Overlay 100% and fill with 50% gray:
Take the Dodge and Burn Tools with Midtones Range and Exposure about 20-25% to darken the scythe and brighten the hood. Also I used this tool to refine the details on the clothes of the model. You can see how I applied this tool with Normal mode and the result with Overlay mode:
Step 10
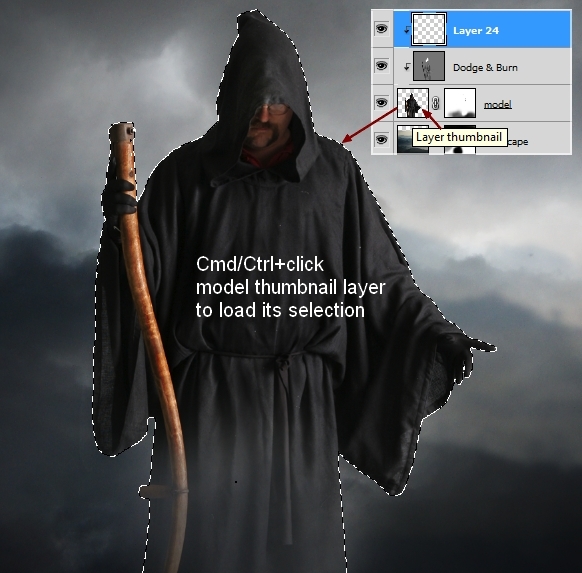
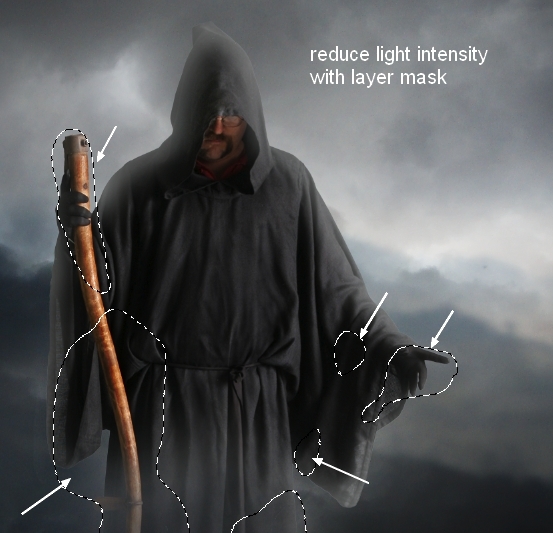
In this step we’ll add light to the model. Make a new layer with Clipping Mask. Hold Cmd/Ctrl while clicking on the thumbnail of the model layer to load its selection:
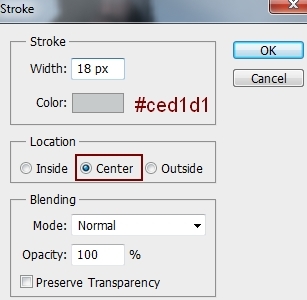
Go to Edit-Stroke and pick color #ced1d1 with brush size of 18 px:
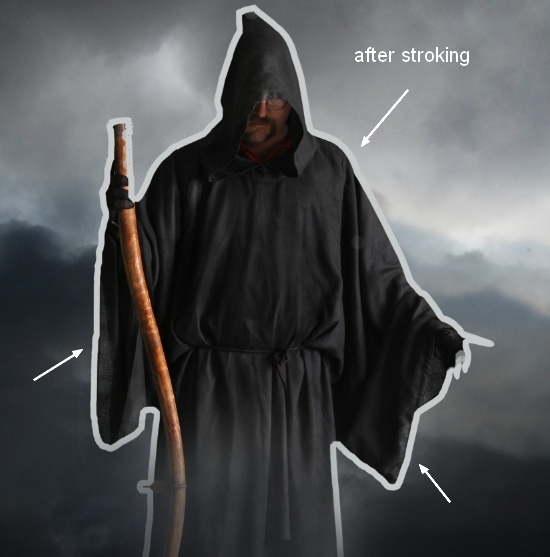
Apply Gassian Blur of 20 px:

I used a layer mask to reduce the light intensity:
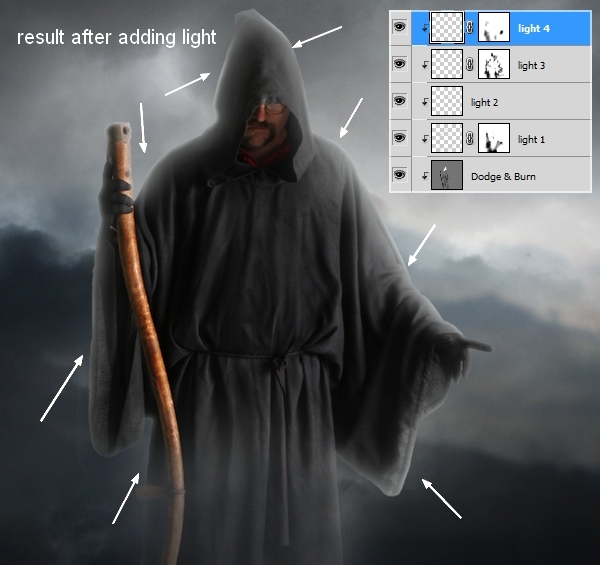
Step 11
On a new layer and I used this brush again with opacity and flow about 50 -55% to paint over the shoulder and right arm to make them brighter:

Step 12
Create another new layer and repeat step 10 but choose brush size of 5 px and apply Gassian Blur of 3 px:
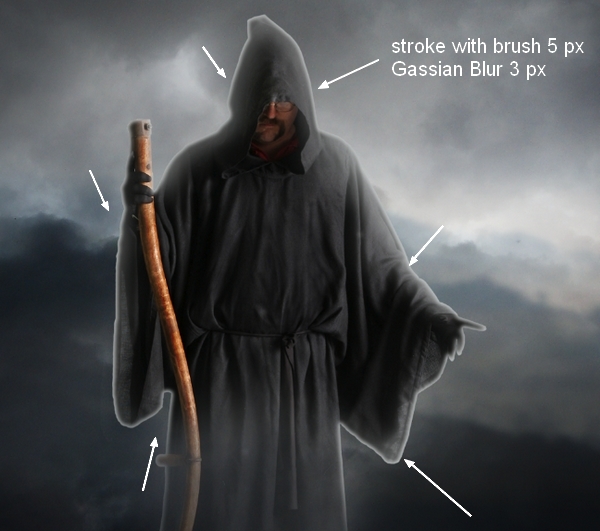
Use a layer mask to erase or reduce light intensity to create a more natural look:
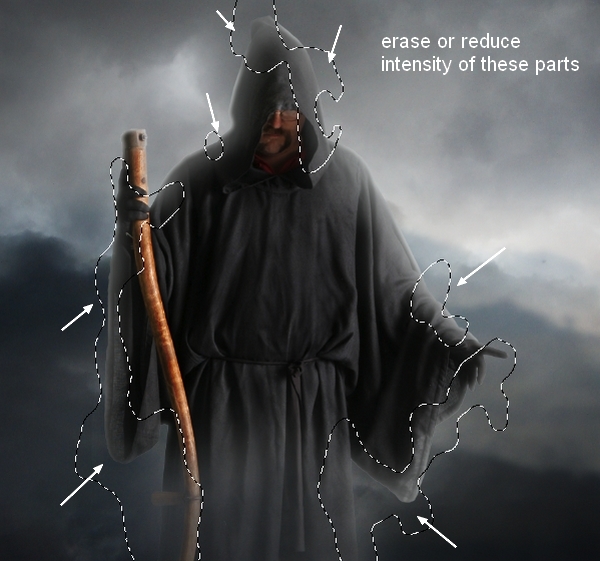
Do the same with a new layer but lower the brush size to 3 px to create a stronger highlight:
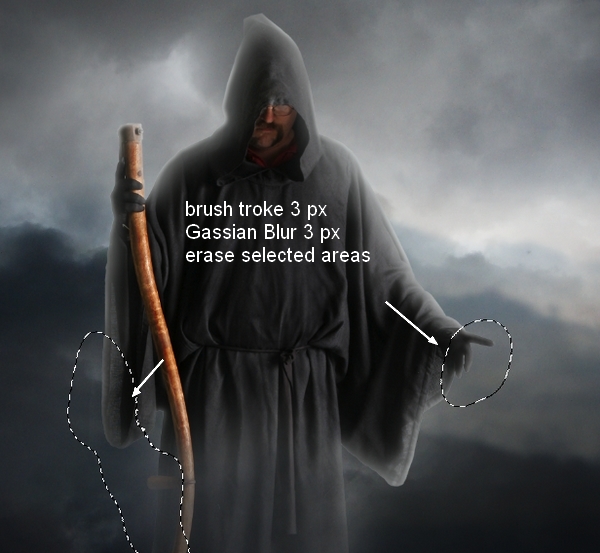
I named 4 these layers from “light 1” to “light 4”:
Step 13
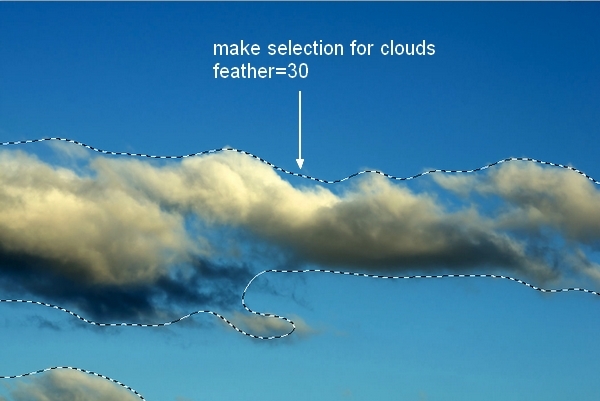
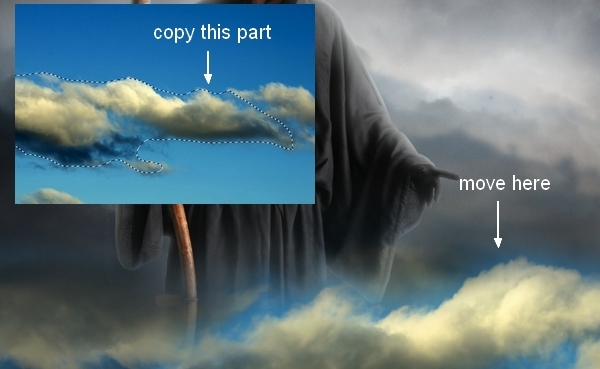
In this step we’ll add some cloudy effects to the image. Open the cloud stock. Use the Magic Wand Tool (W) to make a selection around the cloud part and set the feather for it to 30:
Press Cmd/Ctrl+J to duplicate this selection. Move this part into your main document and transform it using Cmd/Ctrl+T:
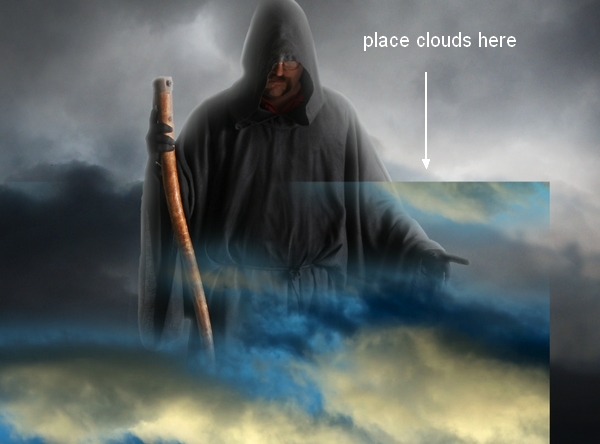
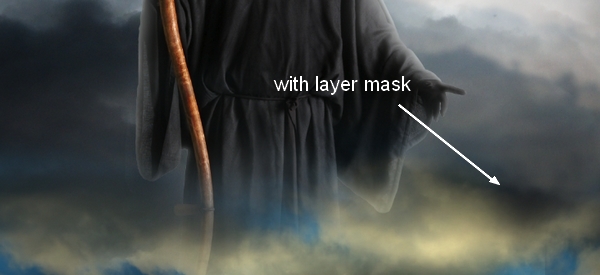
Use a layer mask to blend the hard edges with the rest:
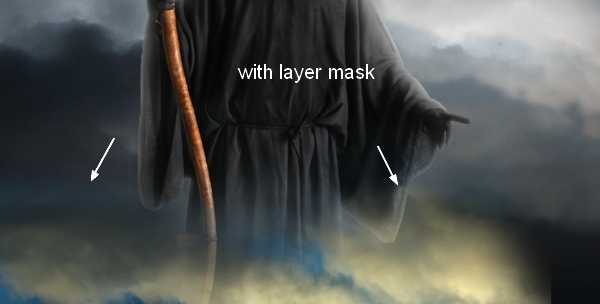
Copy a smaller part of the clouds and place it at the right edge of the image, and mask it to get the result shown below:
Step 14
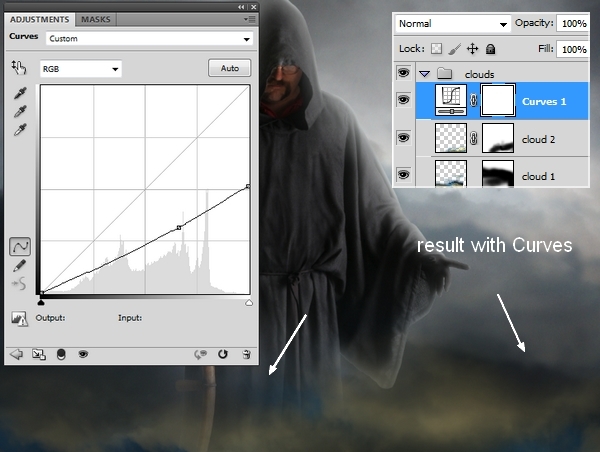
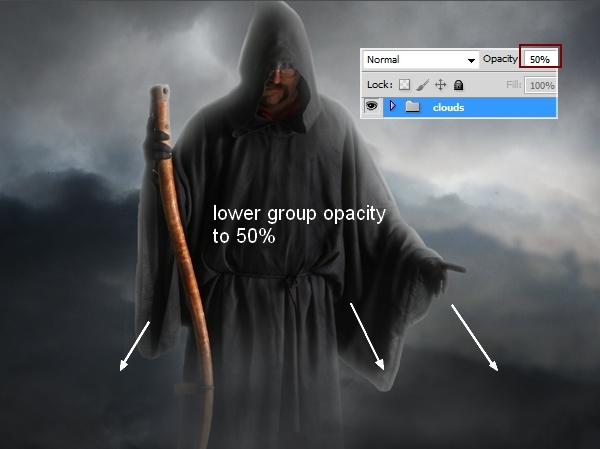
To edit all clouds layers together, select all these layers then hit Cmd/Ctrl +G to create a group. Change the mode of this group from Pass Through (default group mode) to Normal 100%. I named these layers “clouds 1” and “clouds 2”. On clouds 2 layer, choose Layer-New Adjustment Layer-Curves:
I used a Hue/Saturation adjustment layer to reduce the saturation of the clouds:
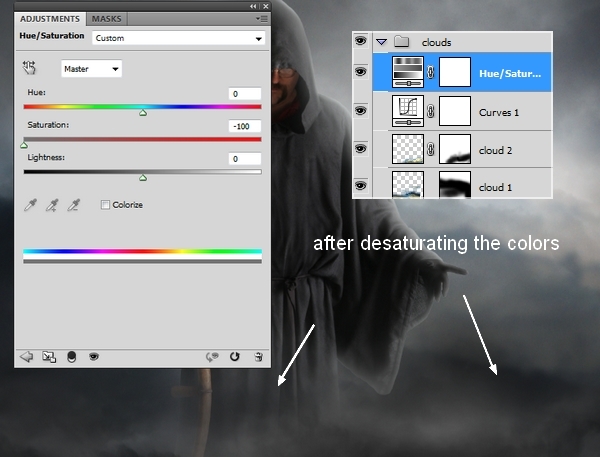
Because the mode of this group changed from Pass Through to Normal, these adjustment layers only affect the layers within this group (clouds ones).
To get a subtle effect, I lowered the opacity of this group to 50%:
Step 15
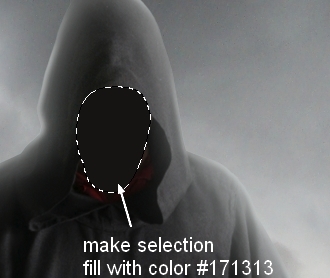
In this step we’ll create a black face for the reaper. Make a new layer above all other layers. Use the Lasso Tool (L) to make a selection of the model’s face and fill it with color #171313:
Use a layer mask to blend this “face”:

Step 16
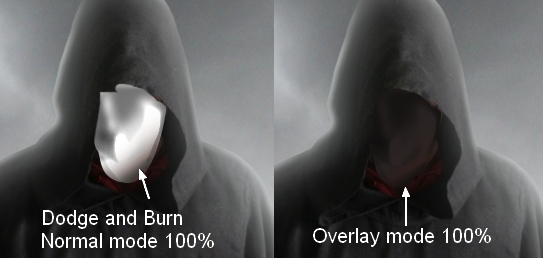
Make a new layer with Clipping Mask and the same settings as in step 9. Use Dodge and Burn to create some details on the face:
Step 17
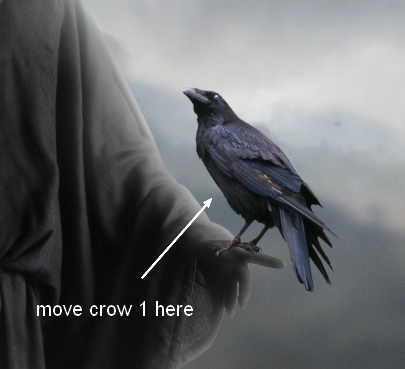
Cut out crow 1 and place him above the hand of the reaper:
Step 18
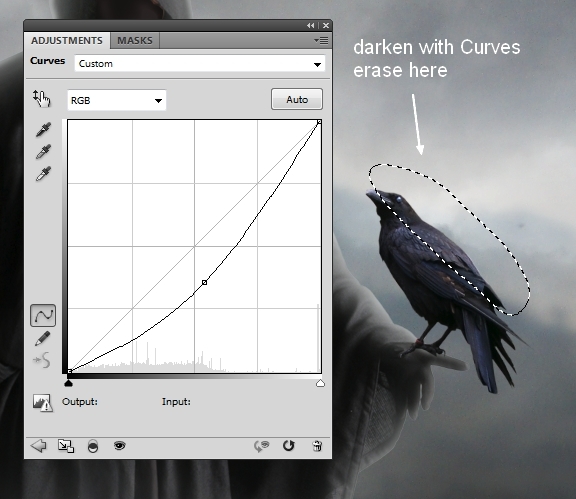
I used a Curves layer (Clipping Mask) to darken the crow a little, then use a soft black brush (on Curves layer mask) to remove the dark effect on the right of the crow as it’s the part illuminated by the background:
Step 19
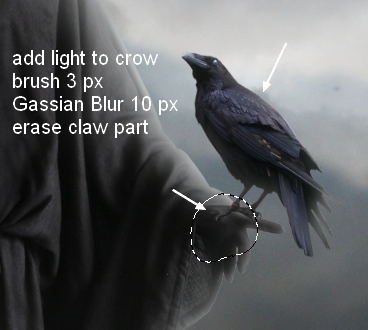
Use the same techniques as in step 10 to add light to the crow, choose brush stroke 3 px and apply a Gaussian Blur of 10 px. Erase part of crow’s claws:
Step 20
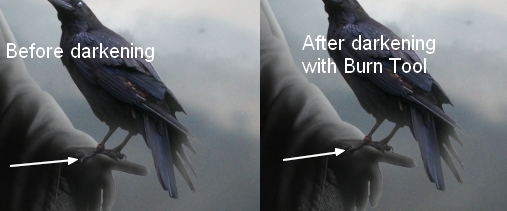
Make a new layer using settings as in step 9. Use the Burn Tool to darken the claws more:
Step 21
I want to add more light to the crow, so double click crow layer, choose Blending Options:
Step 22
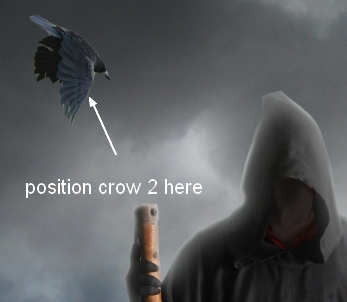
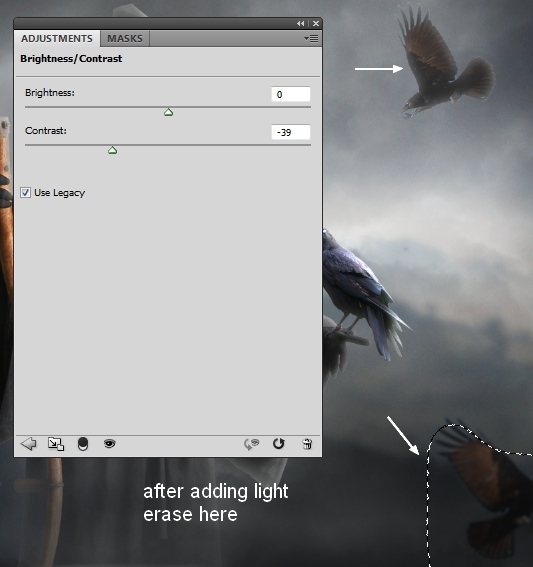
Isolate crow 2 and position him at the top left of your picture:
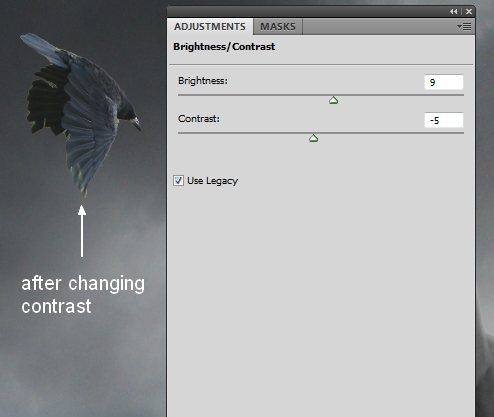
I used a Brightness/Contrast layer to change the contrast of the crow a little:
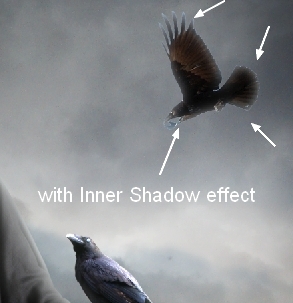
Step 23
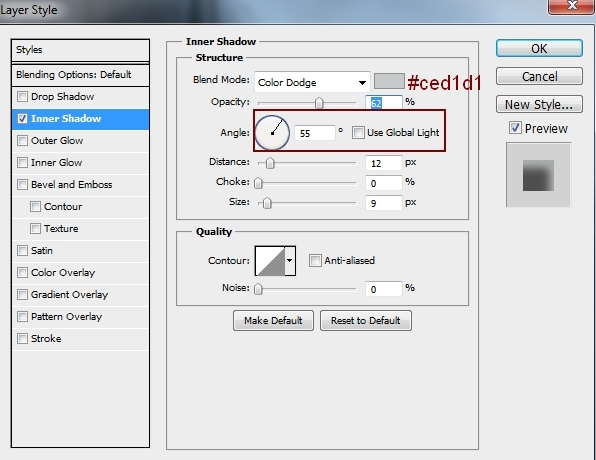
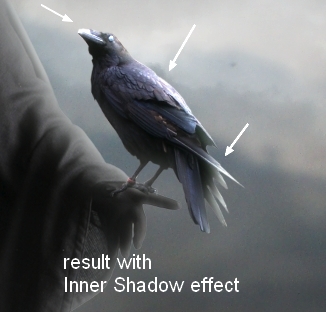
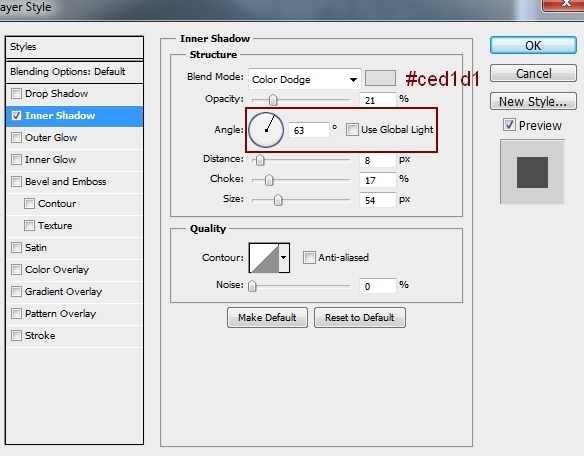
Apply Inner Shadow effect to add light to this crow:

Step 24
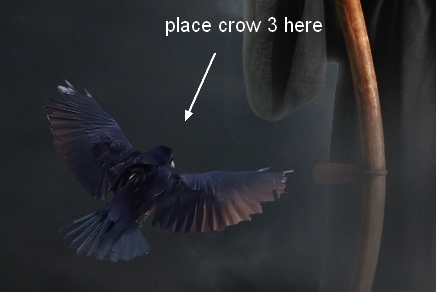
Extract crow 3 and move him to the bottom left of the image:
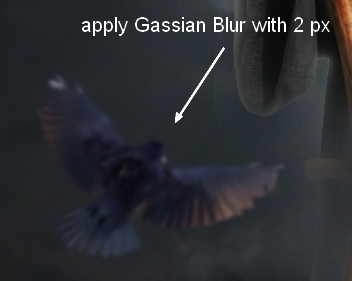
Apply a Gaussian Blur of 2 px for this crow to add depth to your picture:
Step 25
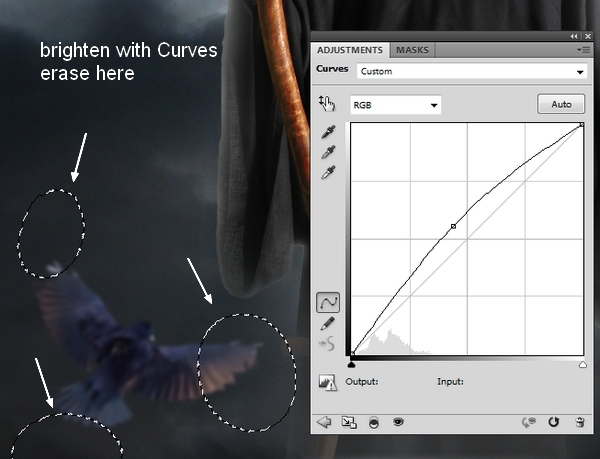
I used Curves to brighten this crow a bit. Then use a soft black brush with opacity about 30-40% to erase the wings, tail (on Curves layer mask):
Step 26
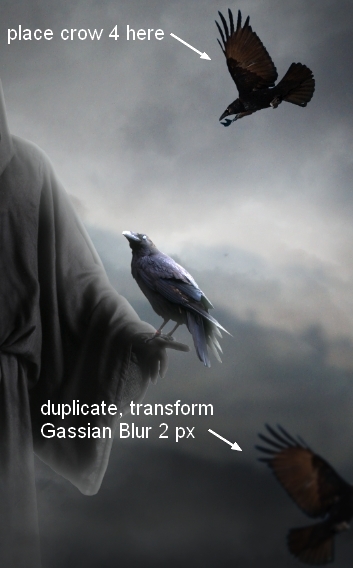
Place crow 4 at the top right of the pic. Duplicate it and transform him, move him to the bottom right, apply a Gaussian Blur of 2 px:
Step 27
Use Inner Shadow effect for the crow on the top:

Step 28
Group the crow layers (crow 4) as we did with the clouds. I used a Brightness/Contrast layer within this group to add a light effect to them, and use a soft brush to blur this effect on the crow at the bottom (erase on Brightness/Contrast layer mask):
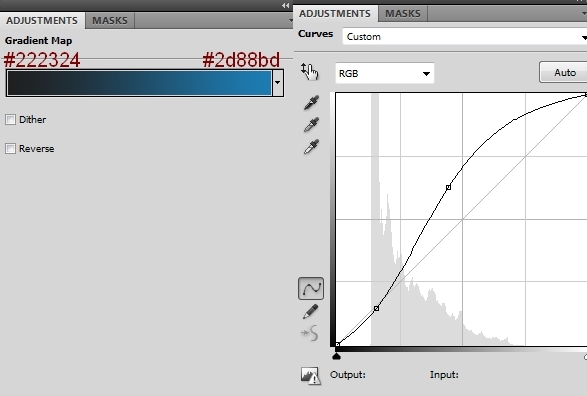
Step 29
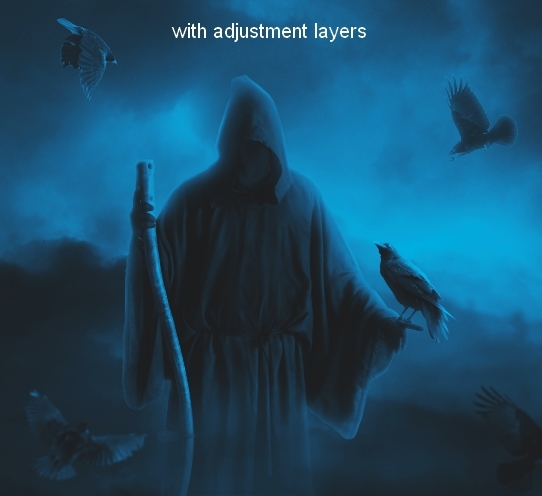
Create some adjustment layers on the top to change the color of the whole picture (Gradient Map and Curves):
This is the result:
Step 30
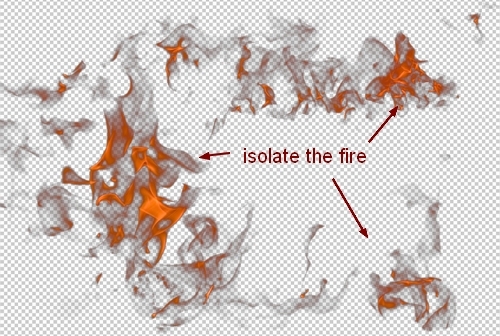
Open the fire stock. Isolate the fire from the background (no need to be precise):
Take a fire part and place it on the right hand of the reaper, change the mode to Screen 100%:
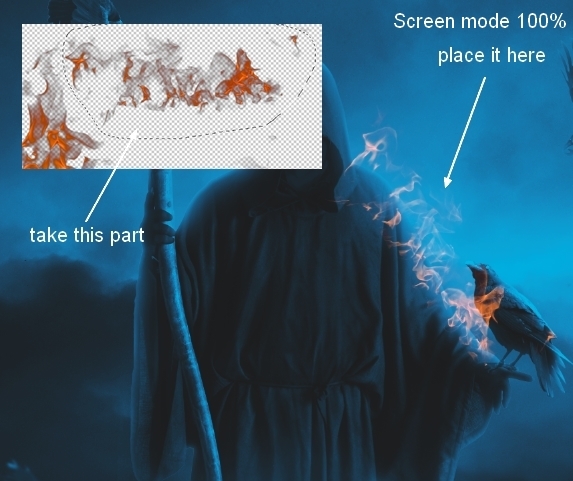
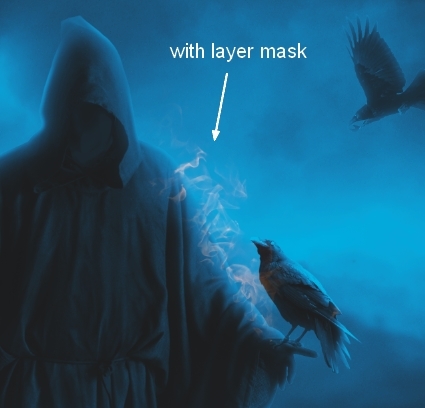
Use a layer mask to remove hard edges:
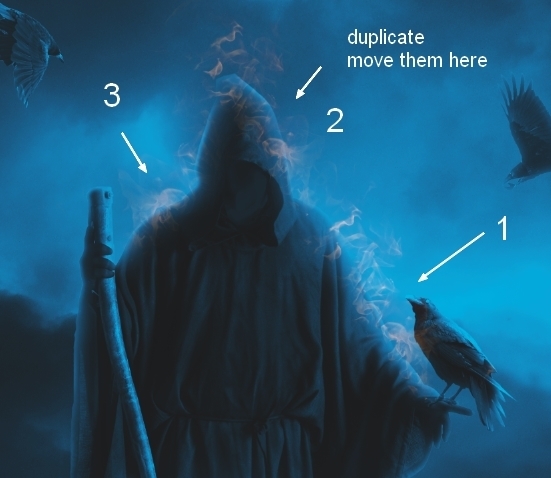
Duplicate it twice and position them as the screenshot below shows. I also named them as 1, 2, 3:
Step 31
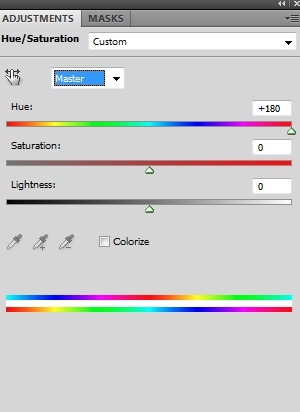
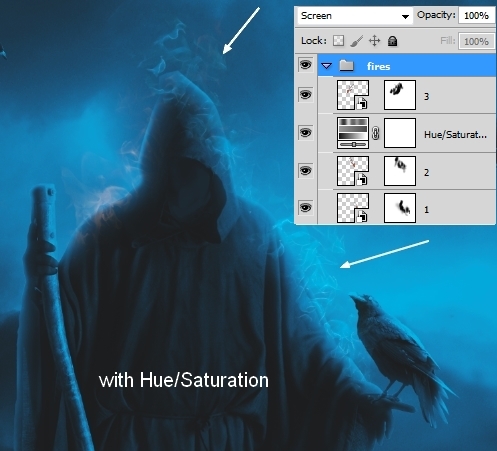
Group the fire layers and remember to change the group mode to Screen 100% (it’s very important to keep the effect the same as before grouping). On 2 layer, go to Layer-New Adjustment Layer-Hue/Saturation:
Step 32
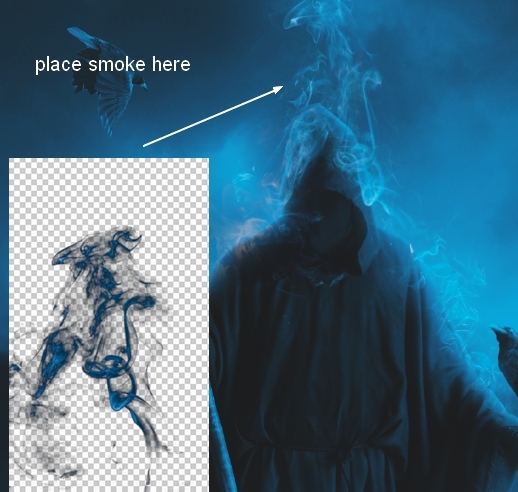
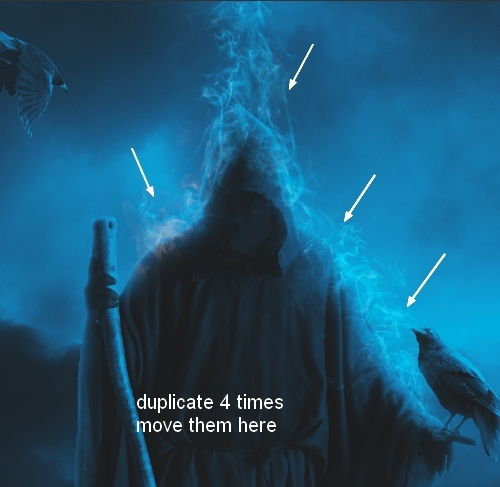
Isolate the smoke and move it onto the reaper’s head, change the mode to Screen 100%:
Use a layer mask to remove or blur unwanted parts:
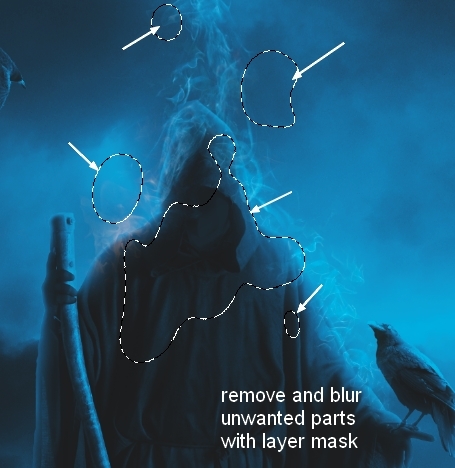
Duplicate this layer four times, transform and move them around the head, shoulder and arm, use a layer mask if needed:
Step 33
Cut out the skull and place it on top of the scythe:
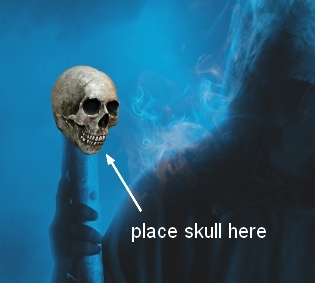
Make a new layer under the skull. Use a soft black brush with opacity and flow 30-40% to paint under the skull to make a shadow for it:
Step 34
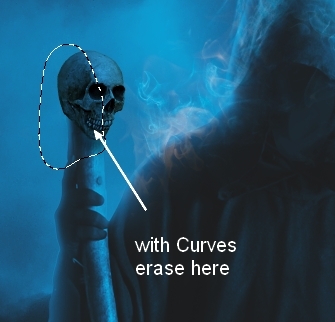
I use two Curves layers to add color and change the brightness of the skull so it fits with the rest:
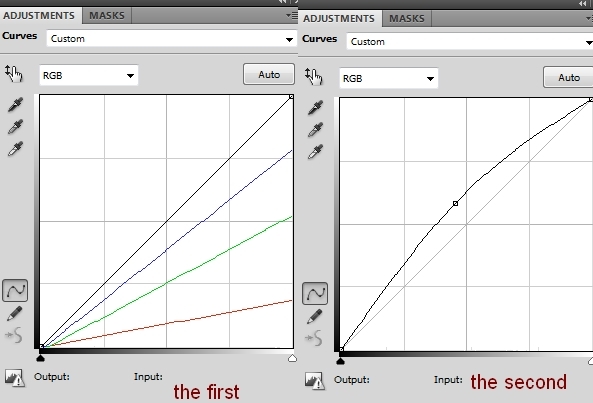
On the second Curves layer mask, erase the left side of the skull to create a nice contrast:
Step 35
Add light to the skull with the same techniques as in step 10 but with a brush size of 12 px, color #36aff4 and apply a Gaussian Blur of 14 px. Also use a layer mask to erase the left as this part should be darker than the rest:
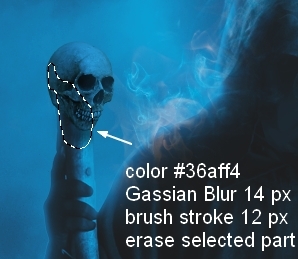
Repeat this technique on a new layer, but lower the brush size to 6 px and Gaussian Blur 3,5 px:
Step 36
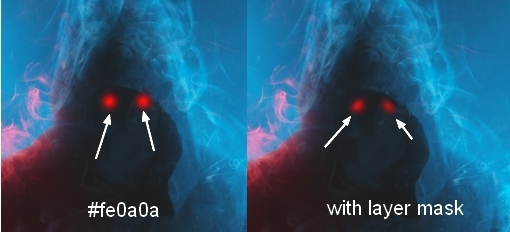
Make a new layer on the top. Use a soft brush with color #fe0a0a to add a spot inside a skull eye. Duplicate it and transform it to fit the position of another eye:
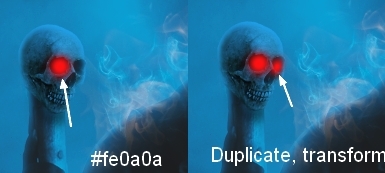
I named these layers “eye 1”, “eye 2”.
Step 37
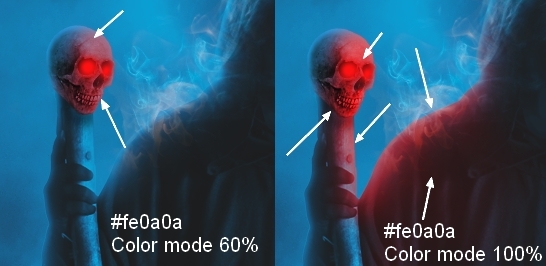
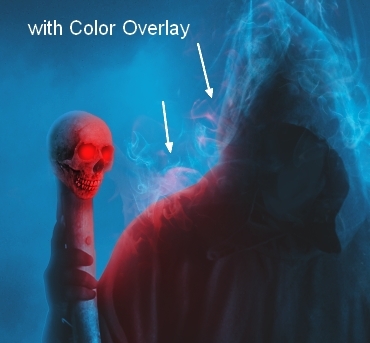
Make two new layers under the eye ones. Use the same brush color to paint around the skull, the shoulder, the hood that are absorbed in red light from the skull eyes. I changed the first layer mode to Color 100% and the second to Color 100%:
Step 38
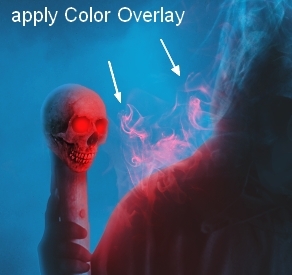
Now we need to change the color of the fire/smoke nearest to the red light to help the effect look realistic. Double click 3 layer in the fires group, choose Blending Options:
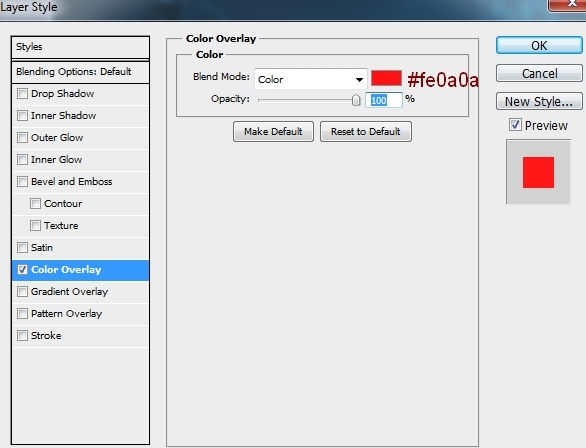
Do the same with the smoke layer on the left shoulder:
Step 39
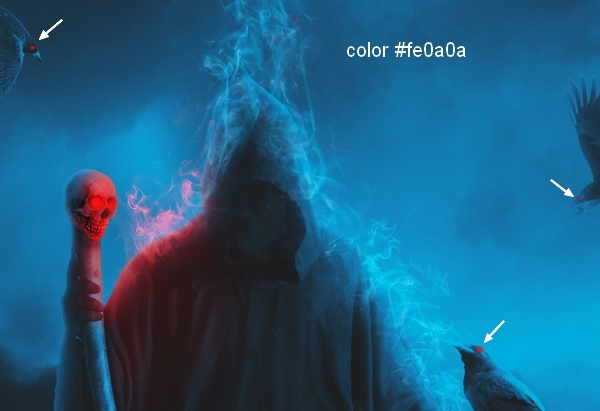
On a new layer on the top, use a brush with color #fe0a0a to paint a spot on the eyes of the crows to get an evil look:
On another new layer use the same brush to add a spot inside the black face to gain the creepy effect. Then use a layer mask to erase the eyes a little as a part of them is covered by the hood:
Step 40
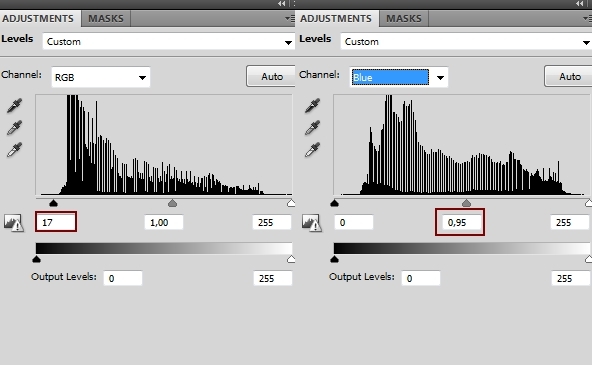
Final step: I used a Levels layer on the top to increase the contrast of the whole picture:
And We’re Done!
I hope that you enjoyed the tutorial.