In this tutorial I’ll show you how to create a beautiful sunrise landscape photo manipulation in Photoshop. You’ll learn how to combine different stocks to make a cohesive scene, blend and adjust color, work with lighting effects and more.
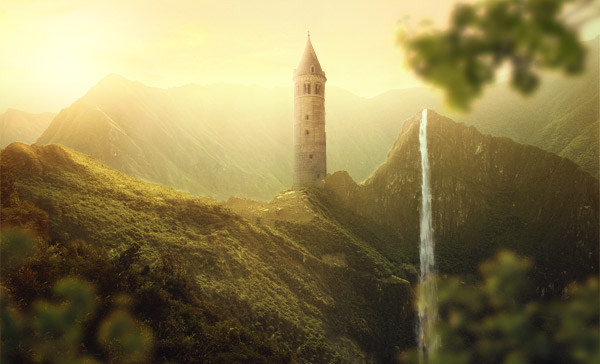
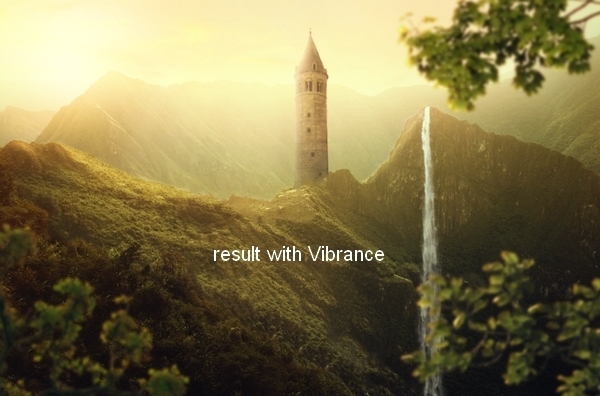
Final Image
Tutorial Details
- Program: Photoshop CS5 +
- Estimated Completion Time: 90 minutes
- Difficulty: Intermediate
Resources
Step 1
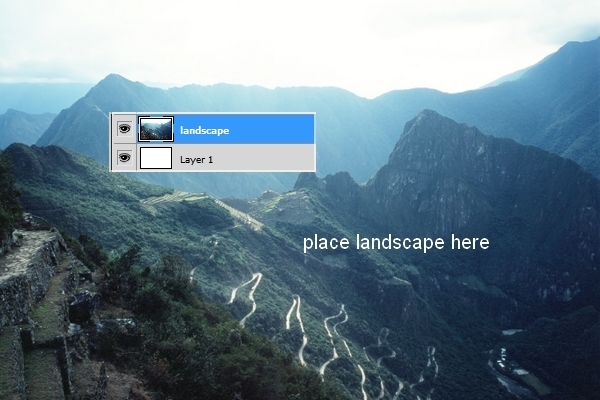
Create a new document with size of 1791×1188 px and fill it with white. Open landscape stock. Use Move Tool (V) to drag the landscape into our white canvas:
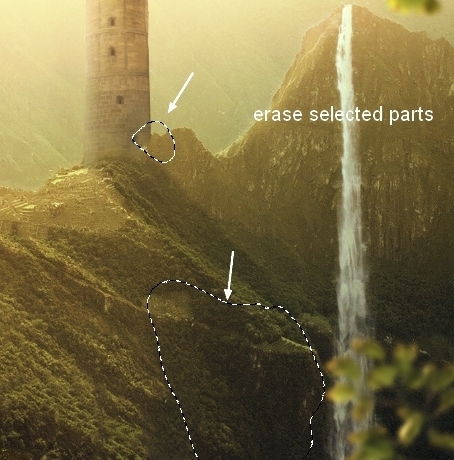
Step 2
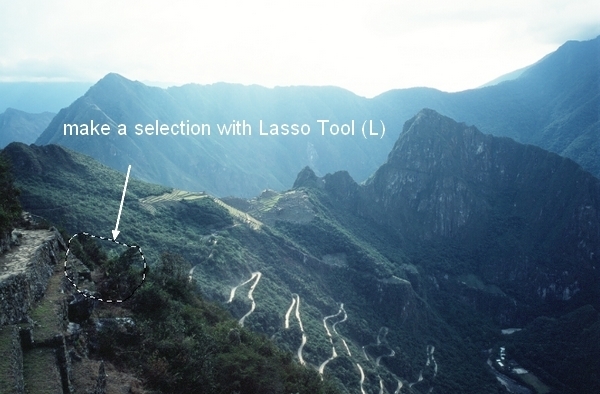
In this step we’ll remove some details of the landscape at foreground and lower areas. On this layer, use Lasso Tool to make a selection for one of indicated areas as shown below:
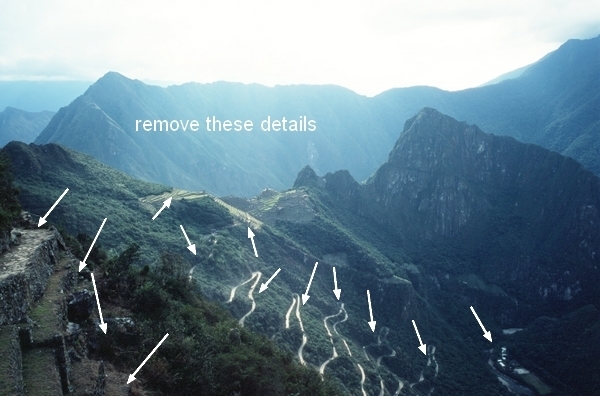
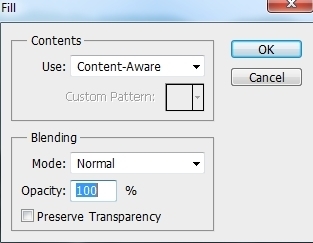
Go to Edit > Fill > Content-Aware:
Step 3
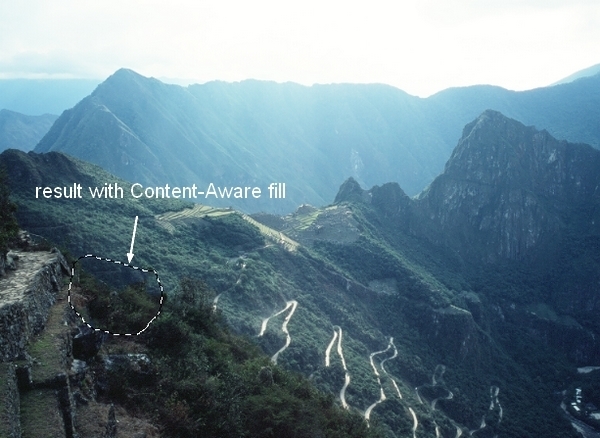
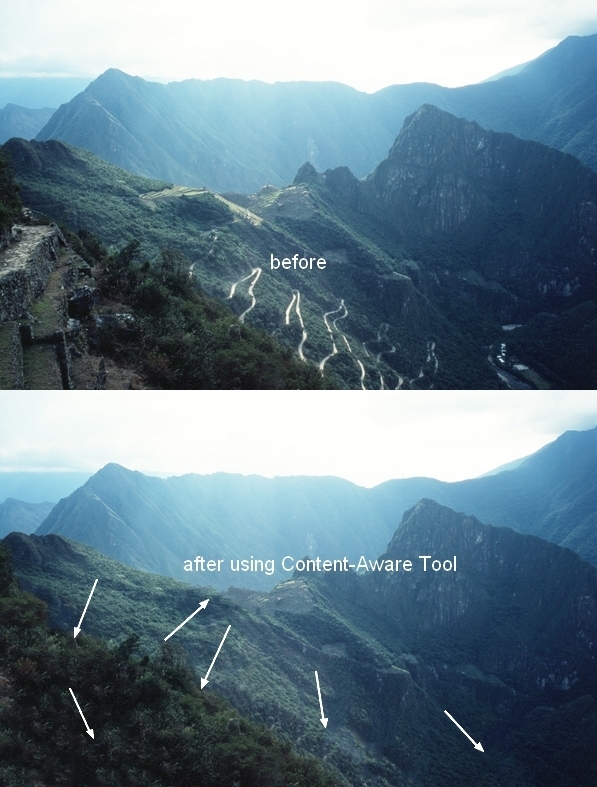
Continue to make selections for other areas and apply this tool. The tip for it is to use small selection (don’t choose a large area, you might get a result of unwanted details). Here is my result:
Step 4
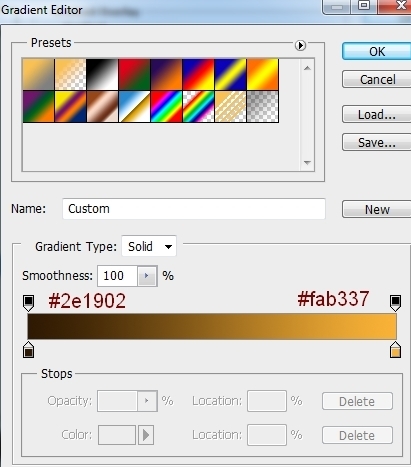
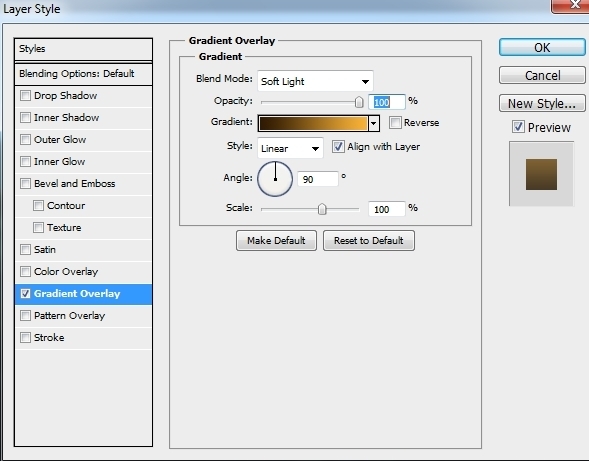
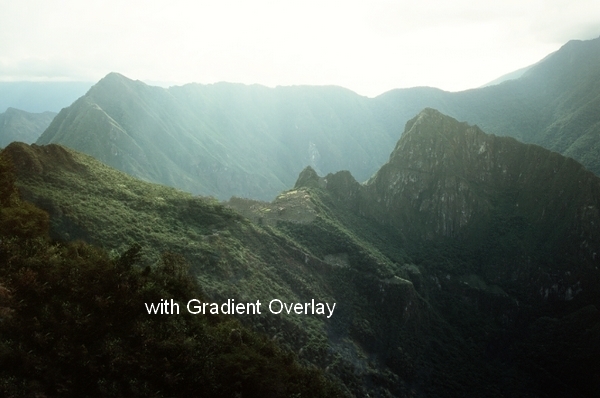
To change the contrast and color of the landscape, I used Gradient Overlay effect. Double click landscape layer, choose Gradient Overlay:
Step 5
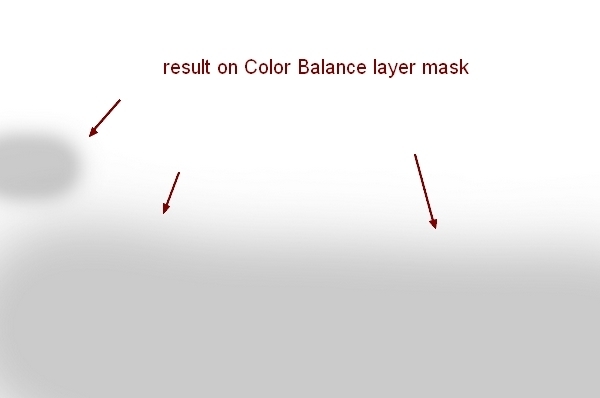
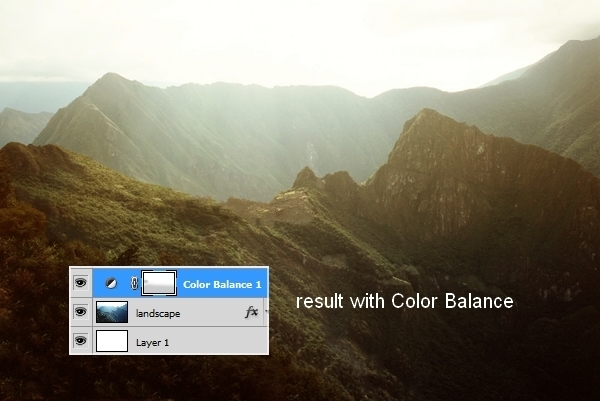
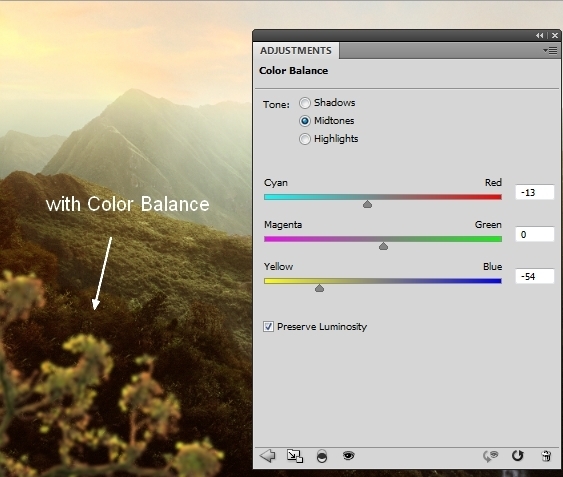
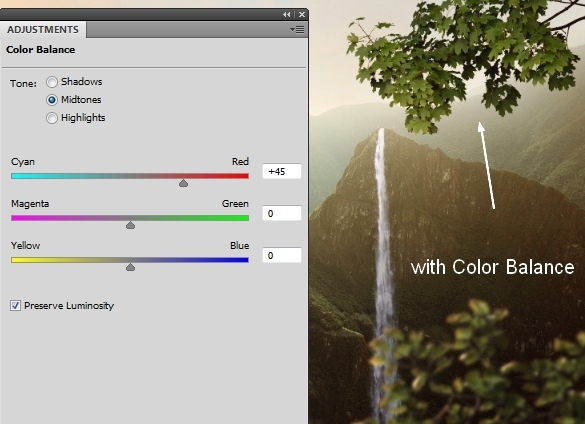
I used an adjustment layer to add some red to the scene. On landscape layer, go to Layer > New Adjustment Layer > Color Balance:

Active Brush Tool (B). On Color Balance layer mask use soft black brush with very low opacity (10-15%) to erase lower part and small part at the left of the scene. You can see how I did it on layer mask and result on picture:
Step 6
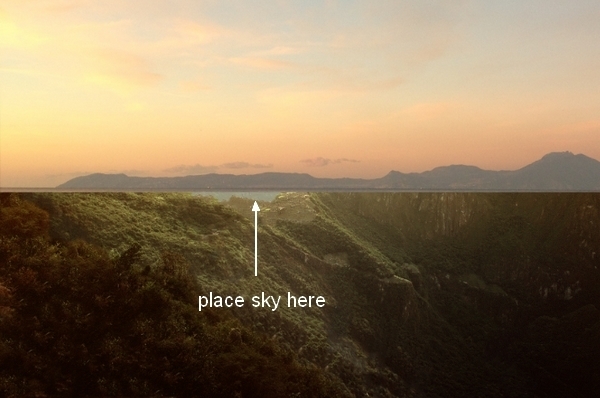
Open sky stock. Use Retangular Marquee Tool to choose sky part then place it at the top of our main picture. Go to Edit > Transform > Flip Horizontal:

Step 7
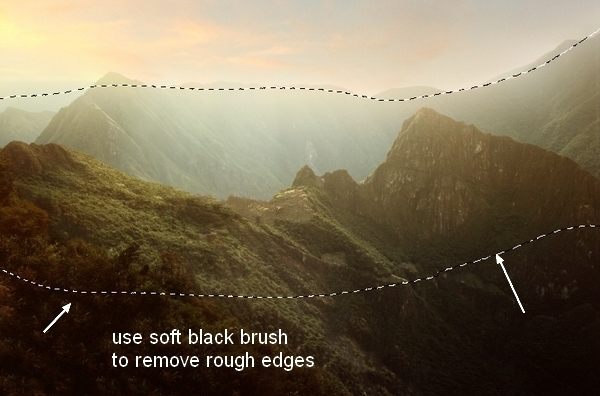
Click the second button at the bottom of Layer Pallete to add mask to this layer. Use soft black brush to remove rough edges of the sky and blend it with the scene:
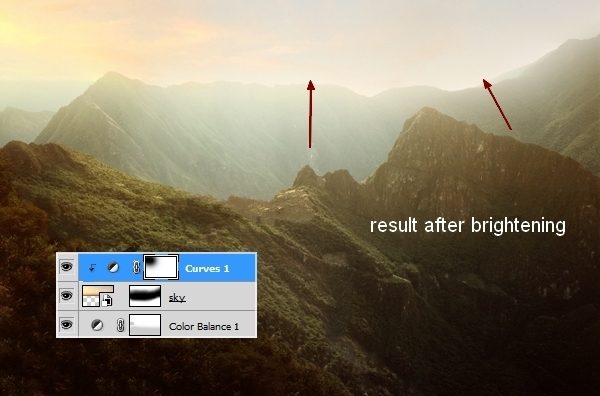
Step 8
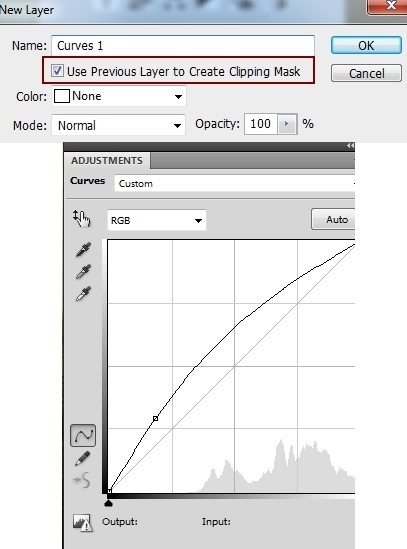
I used an adjustment layer with Clipping Mask to brighten the sky. Go to Layer > New Adjustment Layer > Curves:
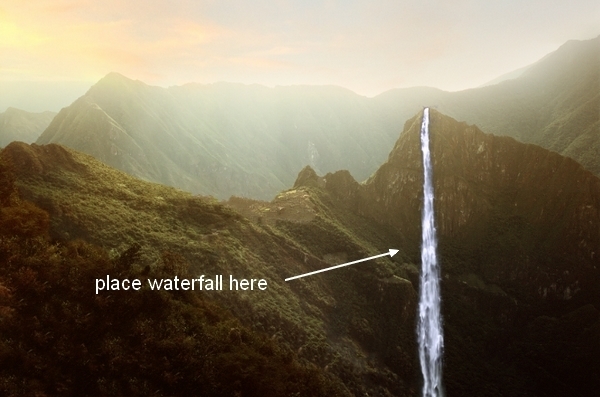
Step 9
Extract waterfall from original stock and position it at the top of the right mountain:
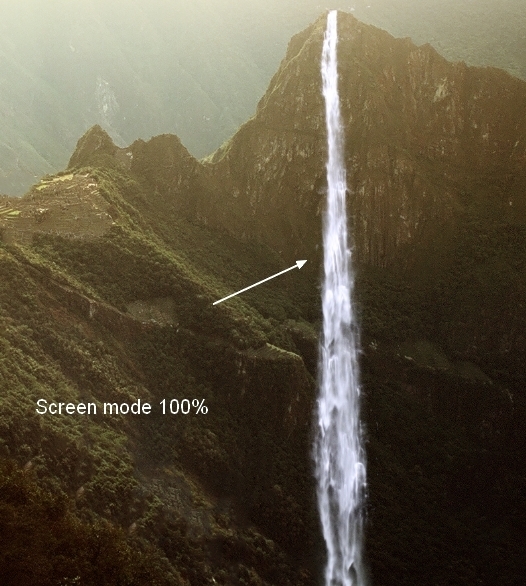
Change the mode to Screen 100%:
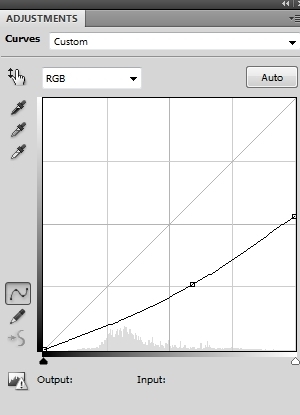
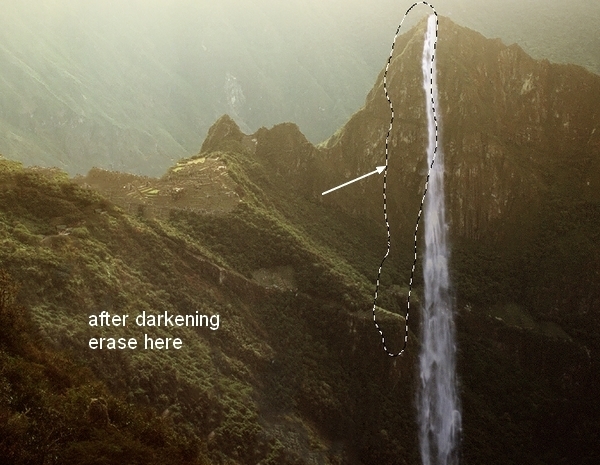
Step 10
I used a Curves layer (Clipping Mask) to darken the waterfall:
On Curves layer mask use soft black brush to erase the top left of the waterfall to match the lightness with the scene:
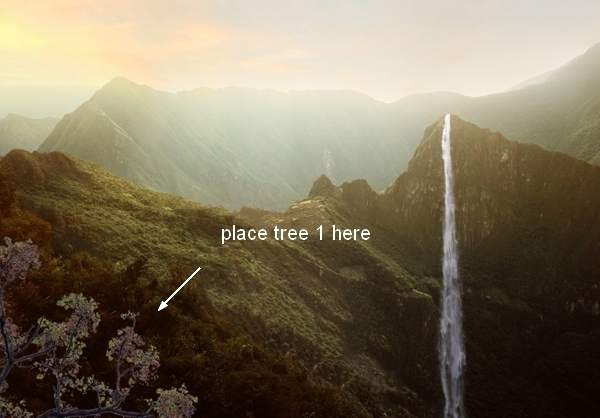
Step 11
Cut out the branches 1 and place it at the bottom left of the pic:
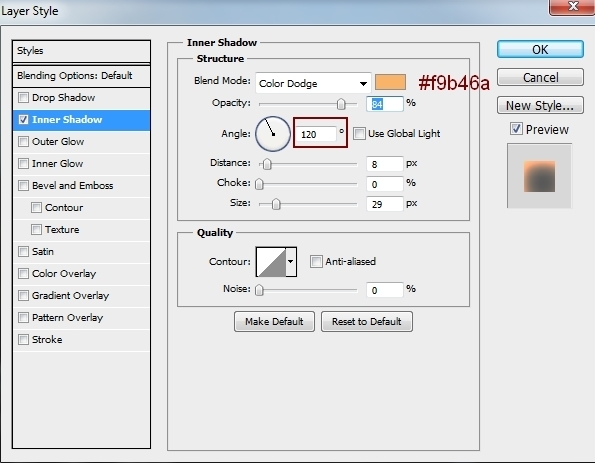
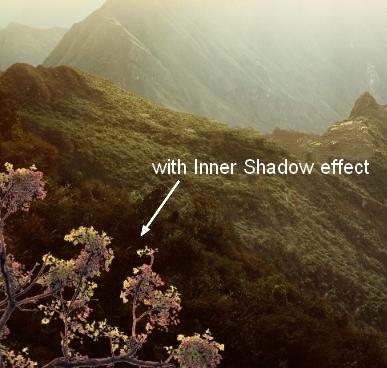
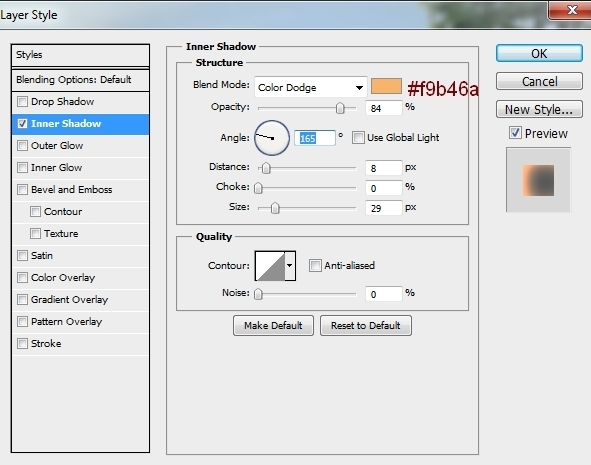
Step 12
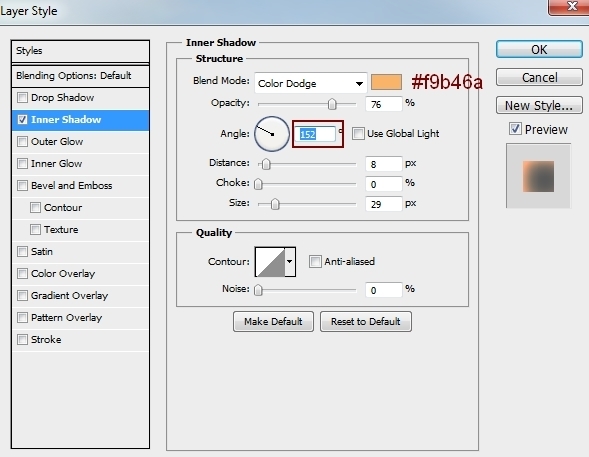
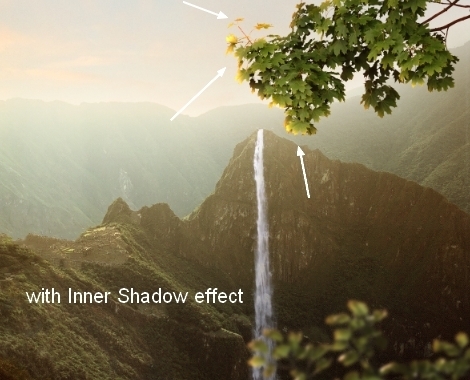
To add light to the branches, I used Inner Shadow effect. Double click this layer, choose Blending Options:
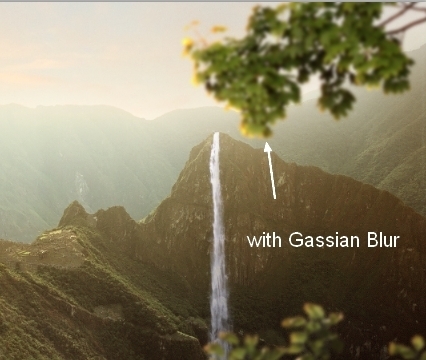
Step 13
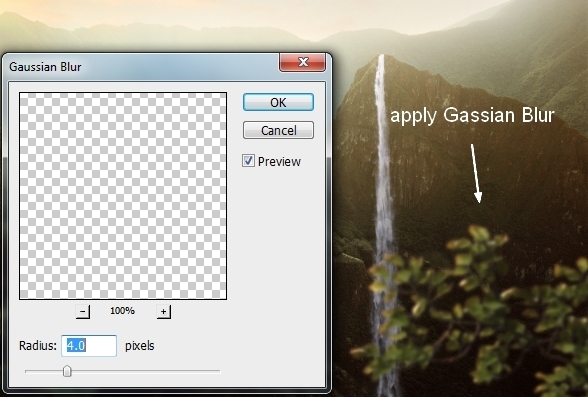
Go to Filter > Blur > Gassian Blur and pick radius as 4 px:
This step is too add depth to the scene.
Step 14
I used a Color Balance layer (Clipping Mask) to change color of the branches:
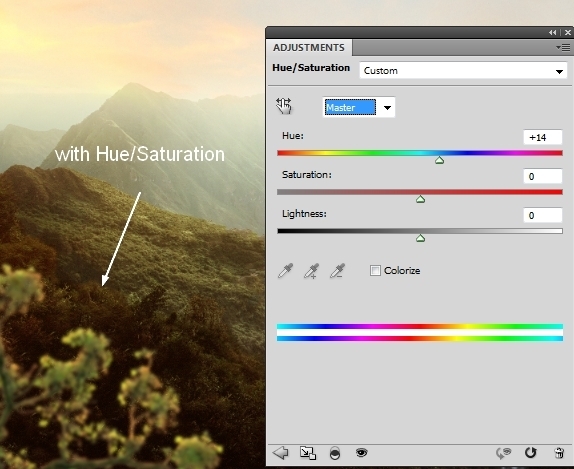
Step 15
Add a Hue/Saturation layer to this one:
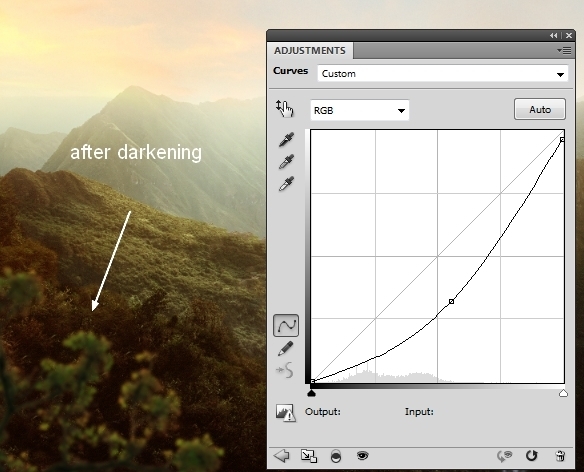
Step 16
I made a Curves layer to darken the branches:
Step 17
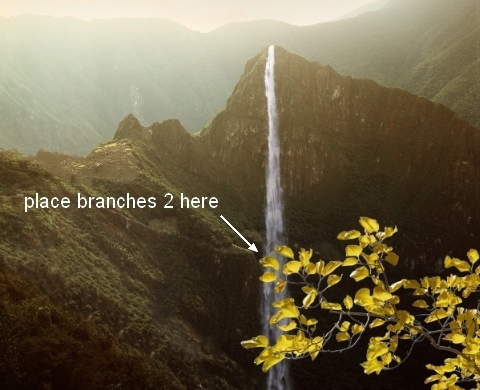
Isolate branches 2 and place it at the bottom right of the pic:
Step 18
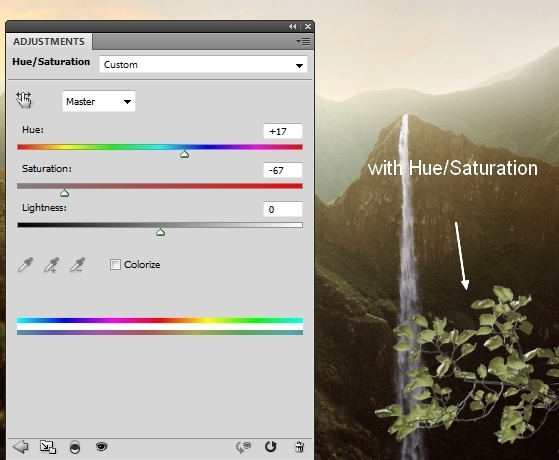
I used Hue/Saturation to reduce the saturation of the branches:
Step 19
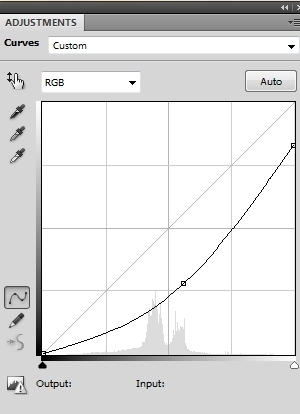
Add a Curves layer to darken the branches:
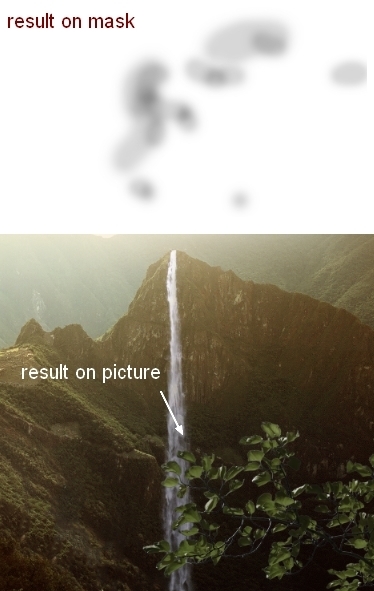
On Curves layer mask use brush to reduce the dark on some leaves:
Step 20
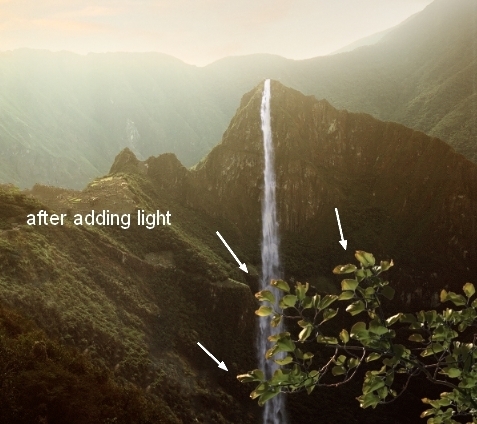
Use Inner Shadow effect to add yellow light to the branches:
Here is result:
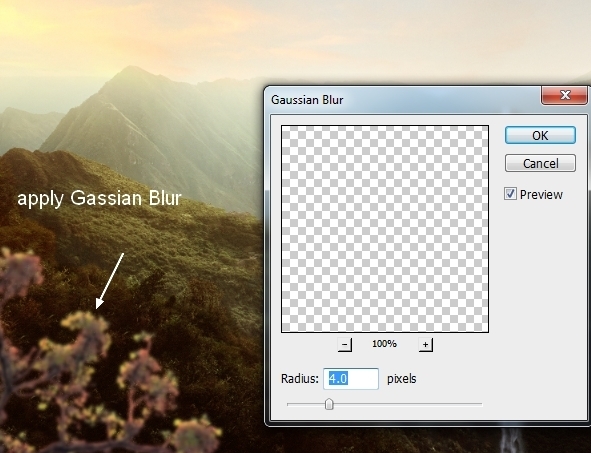
Step 21
Apply Gassian Blur with 4 px for this layer:
Step 22
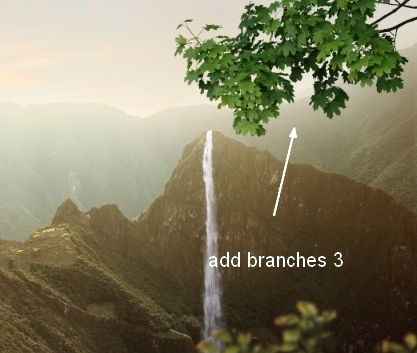
Add branches 3 to the top right of the pic:
Step 23
I used Color Balance for these branches:
Step 24
Apply Inner Shadow effect for branches 3 layer:
Step 25
Apply Gassian Blur with 4 px for these branches:
Step 26
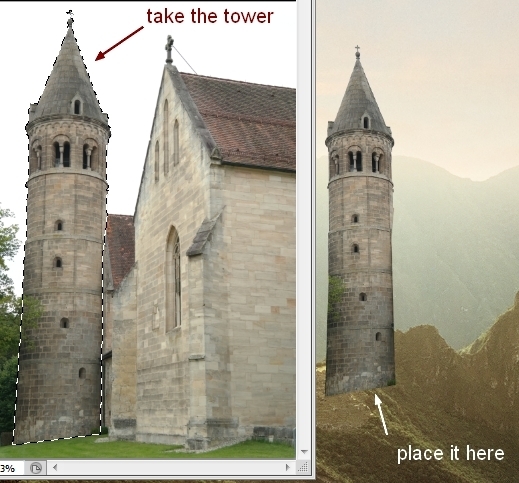
Take the tower and place it at the center section of the pic:
Go to Edit > Puppet Warp to edit the tower a little:
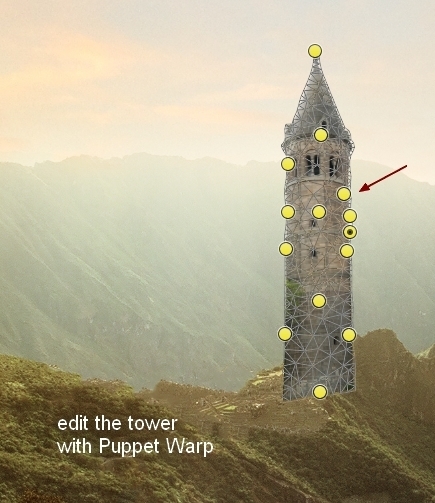
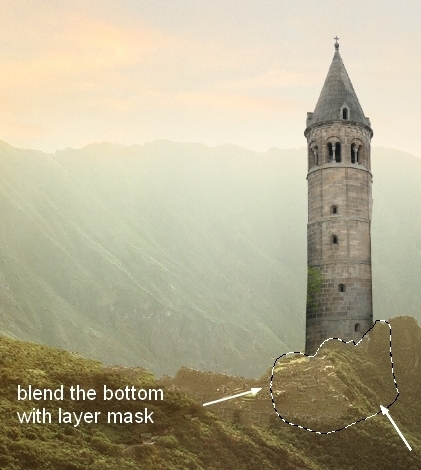
Add layer mask to this layer and use brush to blend the bottom of the tower with the ground:
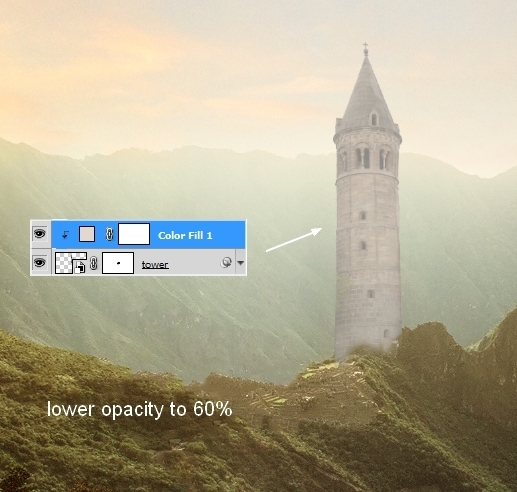
Step 27
To add mist effect to the tower (we’ve placed it at a misty background), go to Layer > New Fill Layer > Solid Color:
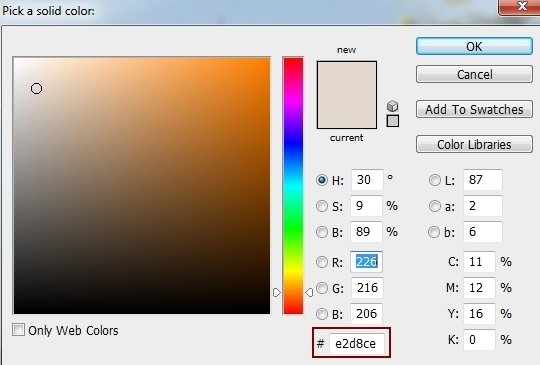
Lower opacity of this fill layer to 60%:
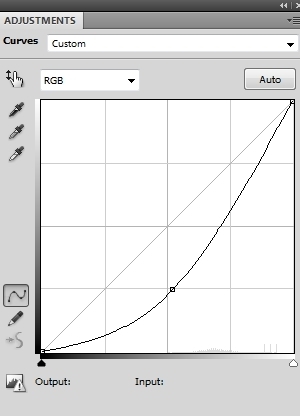
Step 28
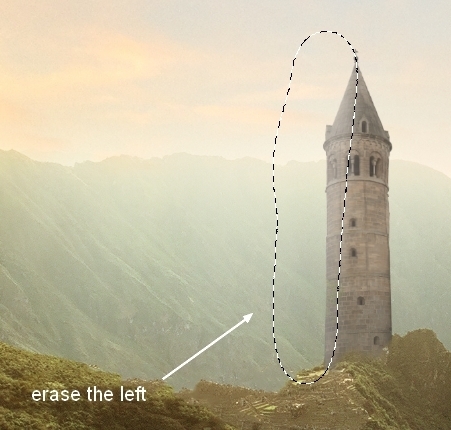
Use Curves to add some contrast to this tower:
On Curves layer mask erase the left of the tower:
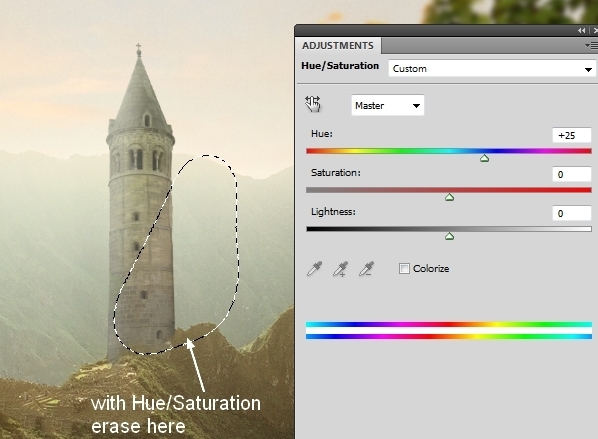
Step 29
I used Hue/Saturation to change color of the tower. On Hue/Saturation layer mask erase the lower part of it:
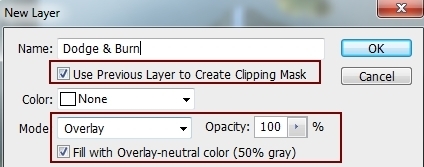
Step 30
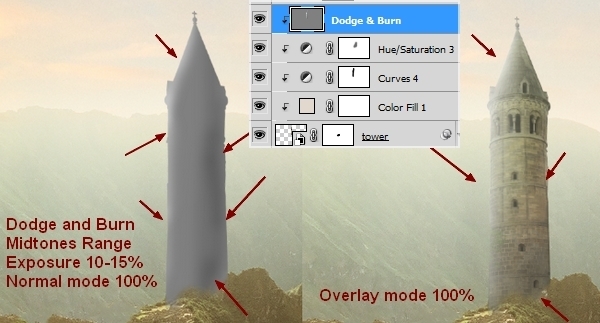
Make a new layer, change the mode to Overlay 100% and fill with 50% gray:
Take Dodge and Burn Tool with Midtones Range, Exposure about 10-15% to retouch light and shadow of the tower. You can see how I did it on layer mask and result on picture:
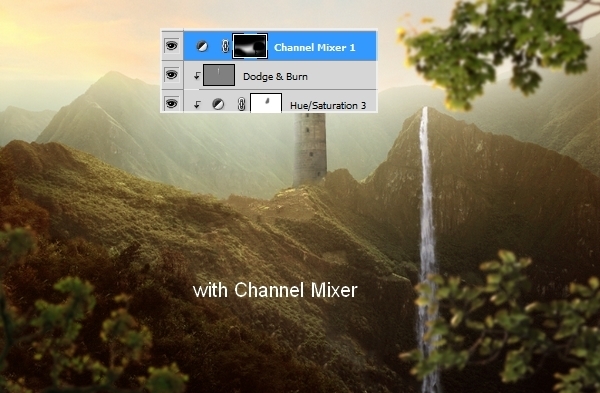
Step 31
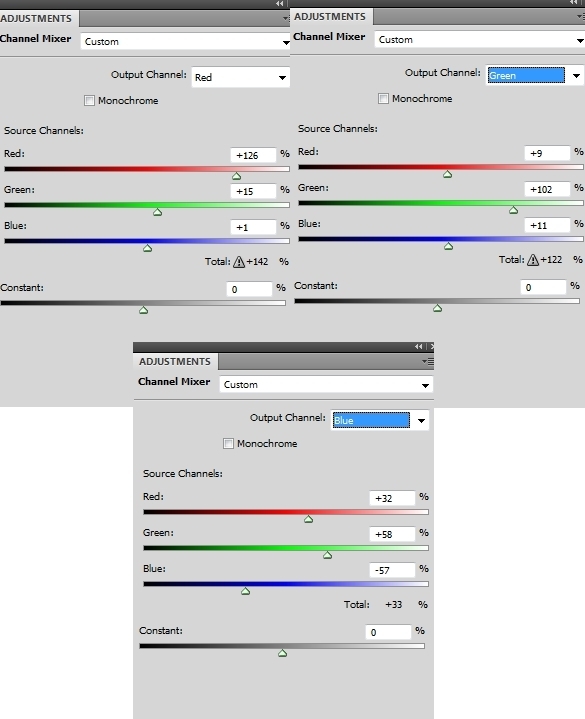
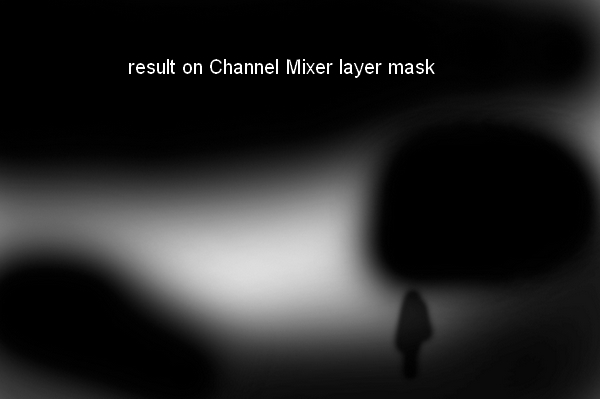
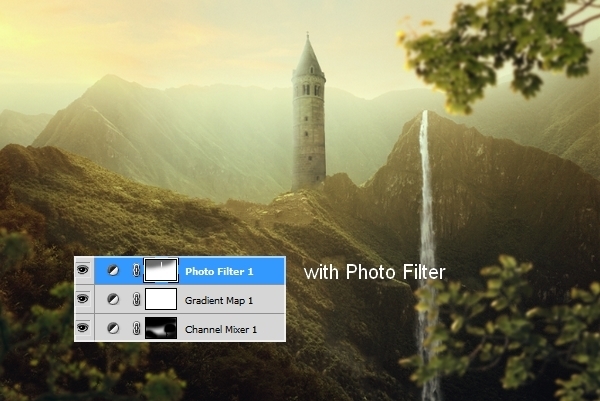
Make a Channel Mixer layer on the top:
Use brush to erase the parts shown on layer mask below:
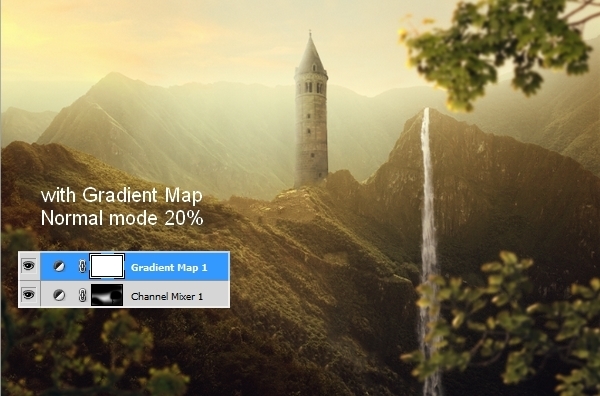
Step 32
Add a Gradient Map layer to the top of layers:
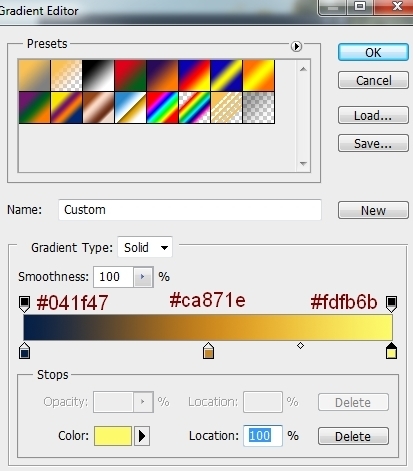
Lower opacity of this Gradient Map layer to 20%:
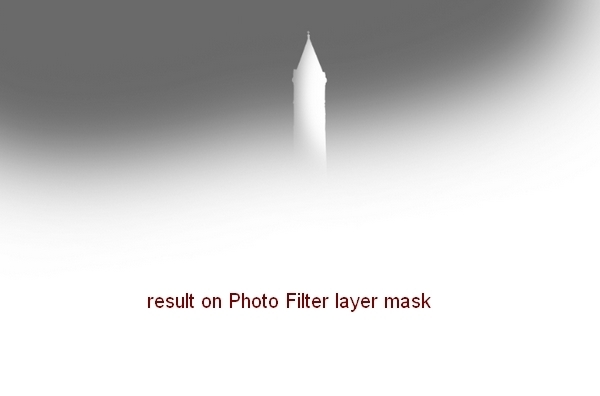
Step 33
Make a Photo Filter layer to add some green to the scene:
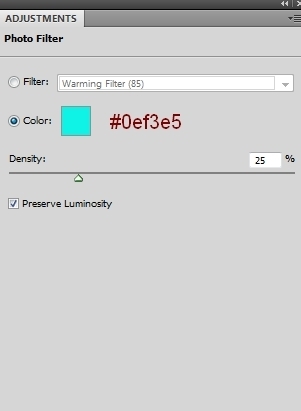
Apply brush masking on Photo Filter layer mask:
Step 34
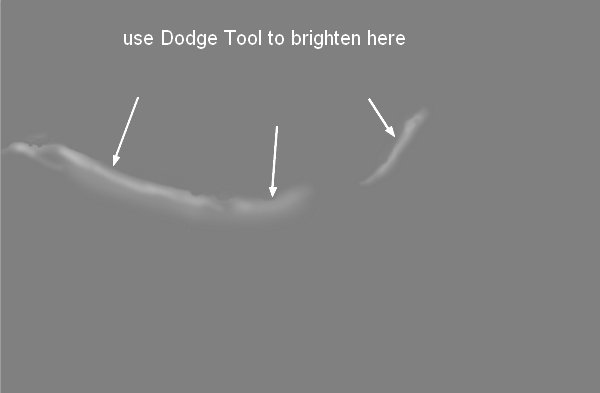
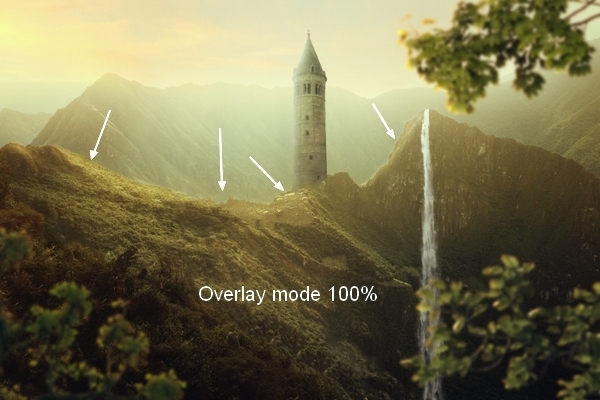
Create a new layer with same settings in step 30 but uncheck Clipping Mask option. Use Dodge Tool to make some stronger light for the grass ground and the mountain:
Step 35
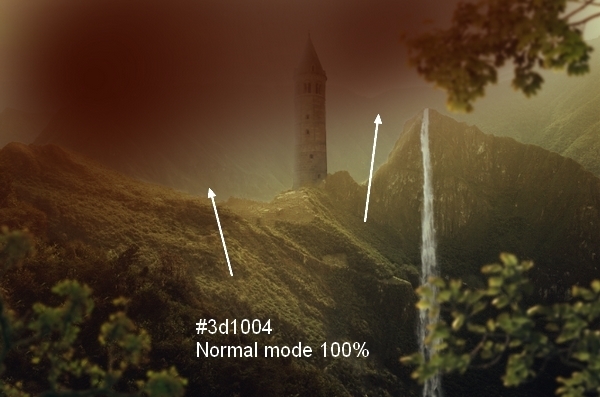
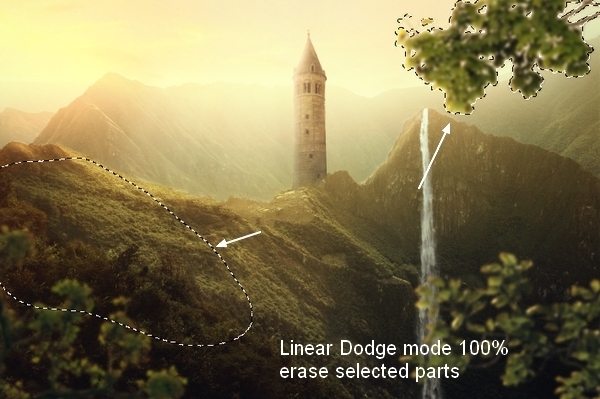
I created a new layer on the top, use brush with color #3d1004 to paint on the top of the pic. Then I changed the mode to Linear Dodge mode 100% and used layer mask to remove this effect on the top leaves and ground:
Step 36
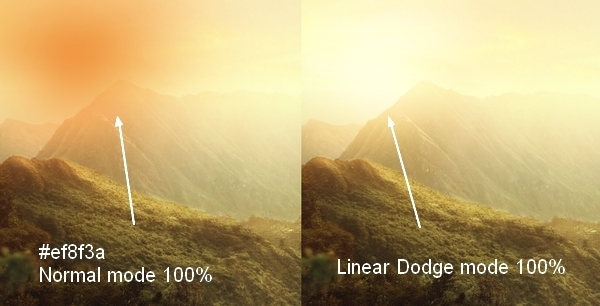
Make a new layer and I used brush with color #ef8f3a to paint on the top left of the pic (sun part). Set the mode to Linear Dodge 100%:
Step 37
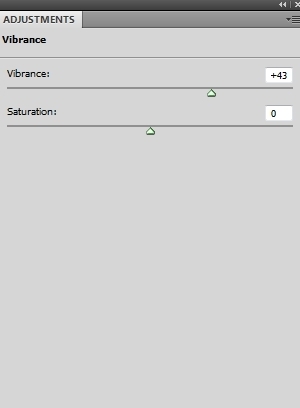
Add a Vibrance layer to enhance the colors and brightness of the pic:
Step 38
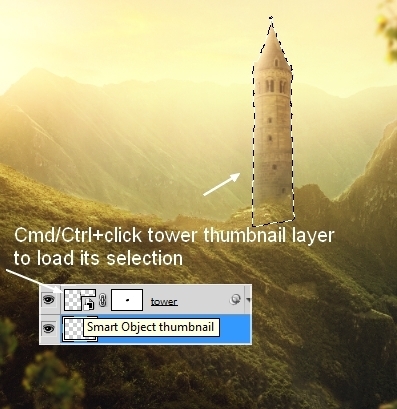
Final step: Make a new layer under the tower one. Hold Cmd/Ctrl and click the tower thumbnail layer to load its selection:
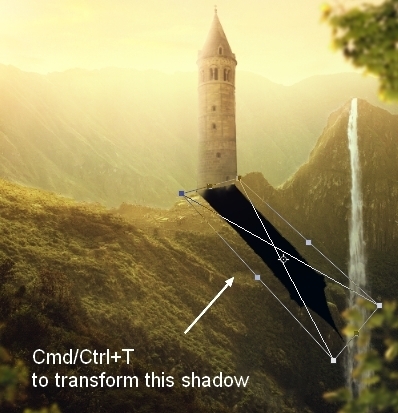
Fill this selection with black (Edit >Fill or Shift+F5). Flip this shadow vertically (Edit > Transform > Flip Vertical) and place it under the tower bottom. Use Cmd/Ctrl+T to transform this shadow as shown below:
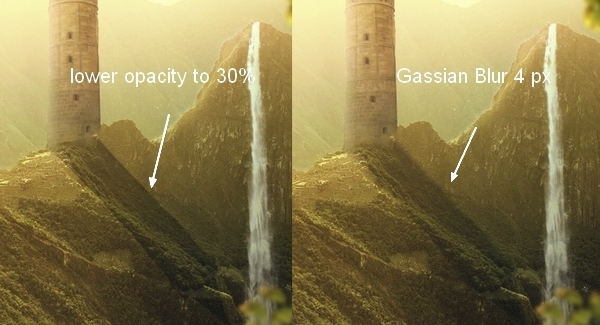
Lower opacity to 30% and apply Gassian Blur with 4 px for it:
Add layer mask to this layer and erase the top and bottom of this shadow:
And We’re Done!
I hope that you enjoyed the tutorial.