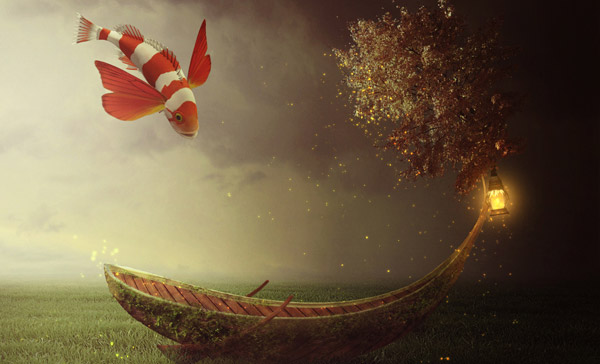
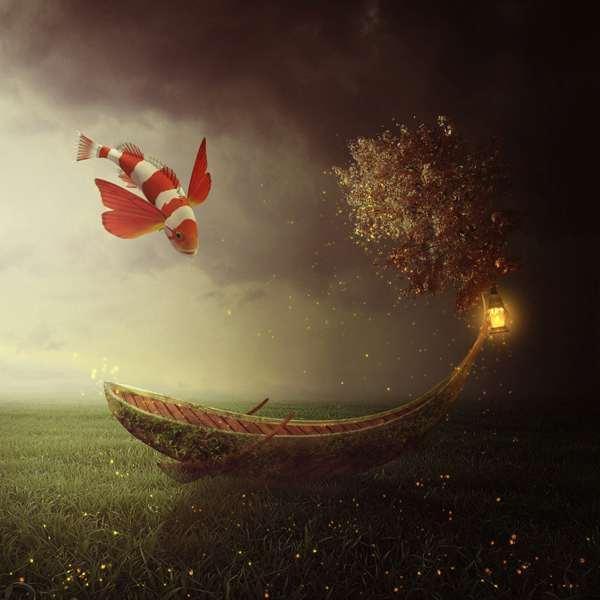
In this Photoshop tutorial I’ll show you how to create a dreamy grass scene featuring a fantasy boat. You’ll learn different manipulating techniques, blending, masking, creating lighting effects, working with groups and more.
Final Image
Resources
Step 1
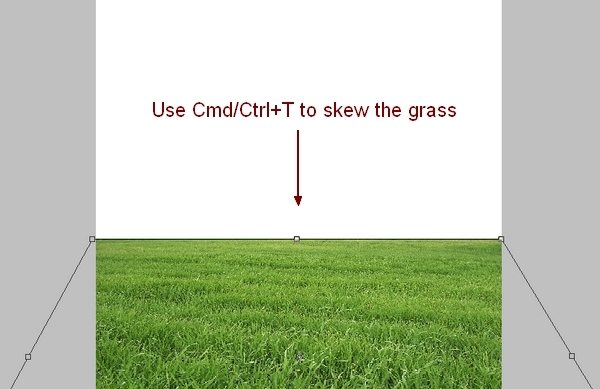
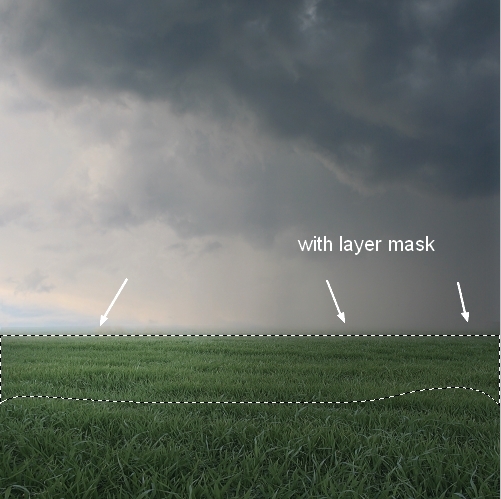
Create a new document, size 1000×1000 px and fill it with white (you can use your own size and color). Open the grass stock. Use the Move Tool (V) to drag it onto our white canvas, use Free Transform Tool (Cmd/Ctrl+T) to resize and skew it to get the look below:
Step 2
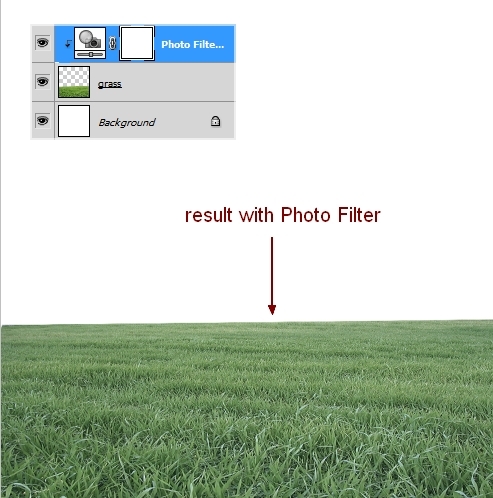
To change the color and contrast of the grass, I used some adjustment layers with Clipping Mask. On the grass layer, go to Layer-New Adjustment Layer-Photo Filter:

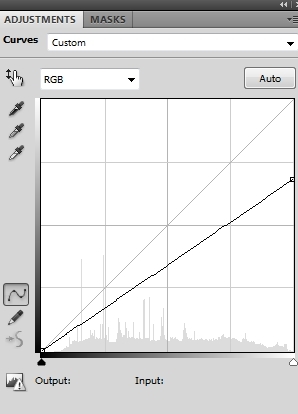
Curves and Levels:
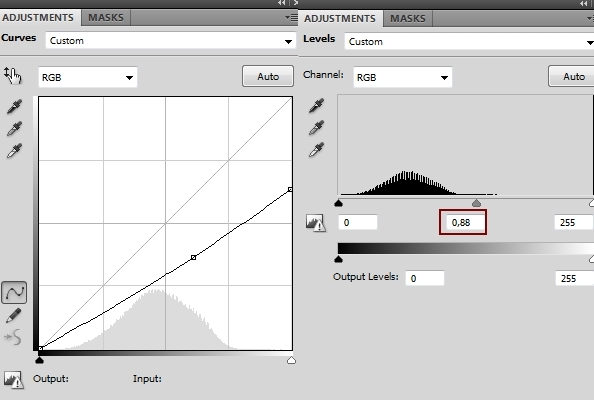
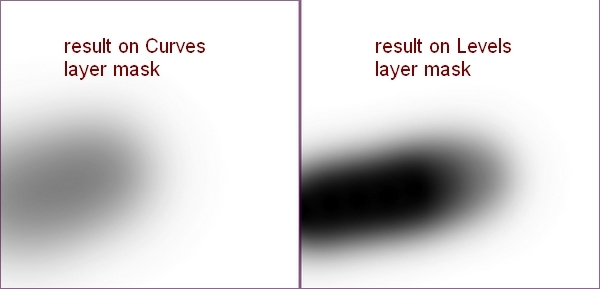
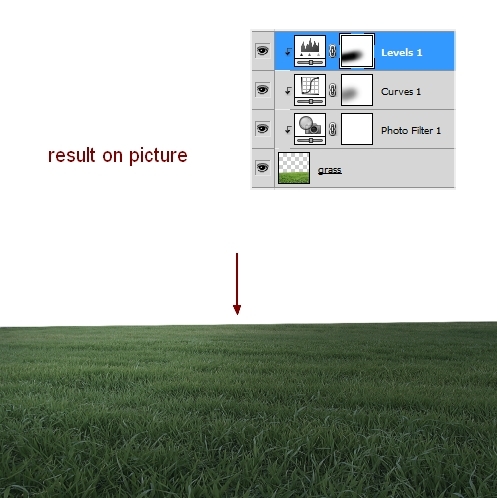
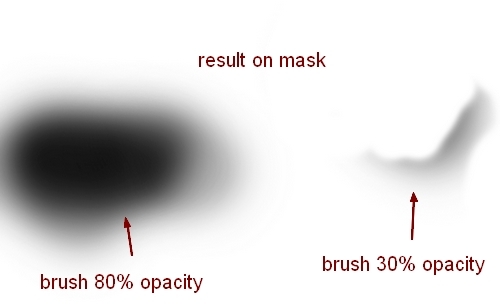
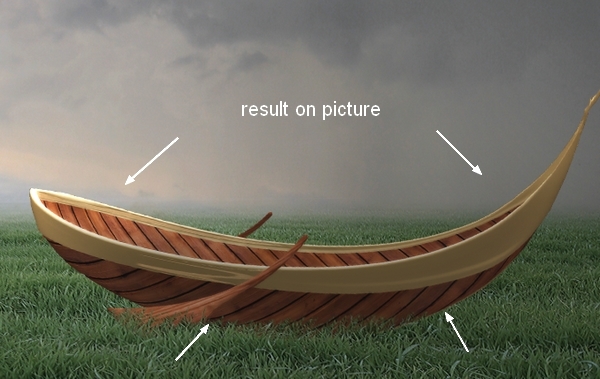
On the Curves and Levels layer mask, use a soft black brush with opacity about 30-35% (Curves) and 70-90% (Levels) to erase the left side nearest the horizon. You can see how I did it on the masks and result on picture:
Step 3
Open the sky stock. Use the Retangular Marquee Tool to make a selection on the sky part and move it onto the upper part of our main document:

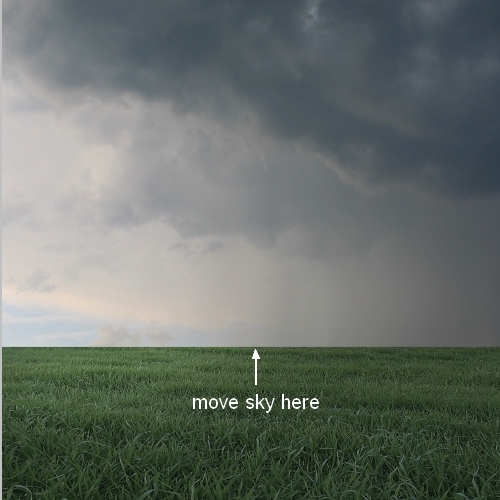
Click the second button at the bottom of Layer Pallete to add mask to sky one. Use soft black brush to remove hard edge and blend the sky with the grass:
Step 4
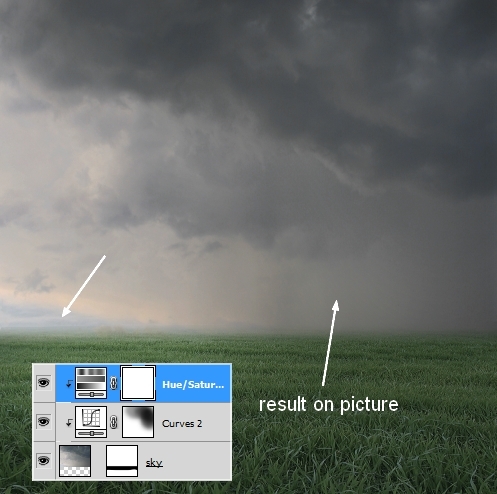
I used some adjustment layers (Curves and Hue/Saturation) with Clipping Mask to darken and change the color of the sky a little:
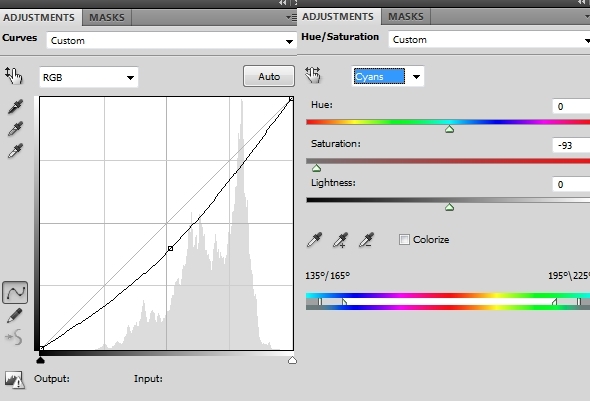
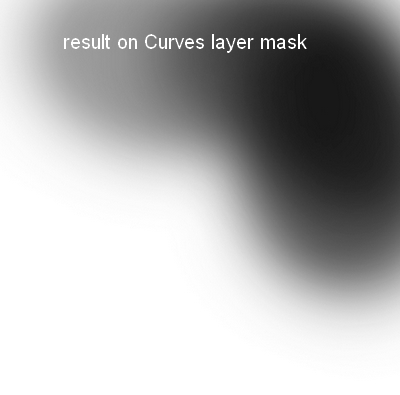
On the Curves layer mask I used a black brush with opacity from 30-50% to brush over the right side of the sky as I don’t want it too dark:
Step 5
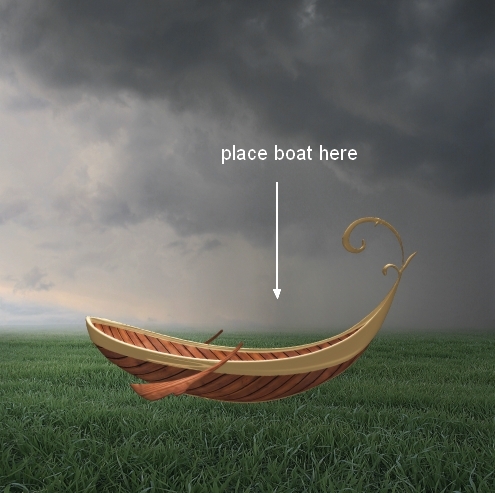
Choose the boat and place it in the center section of our image.
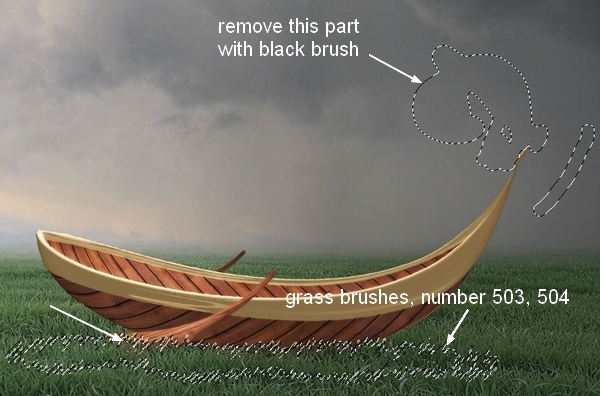
Add a layer mask to the boat layer. Use a black brush to remove the top right of the boat and then change brush to grasses. I chose number 503 and 504 to blend the edge of the boat into the grass:
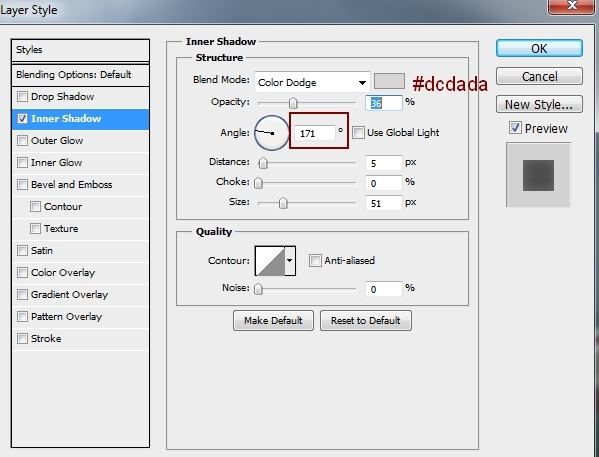
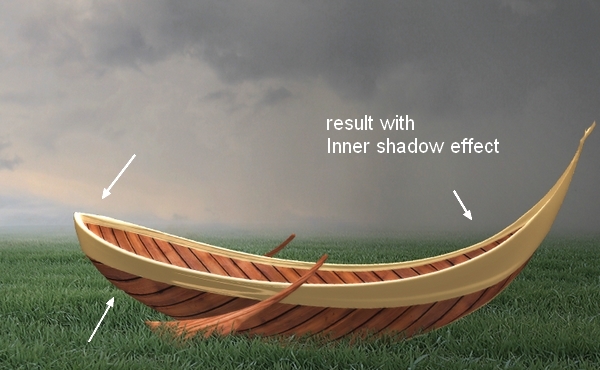
Step 6
To make the left part of the boat (that gets more light from the sky horizon) brighter, I used Inner Shadow effect. Double click the boat layer, choose Blending Options:
Step 7
To darken and reduce the light on unwanted parts I used a Curves layer with Clipping Mask:
On the Curves layer mask I used a brush with opacity varied from 30 to 80% to reduce the darkness on the sides of the boat.
Step 8
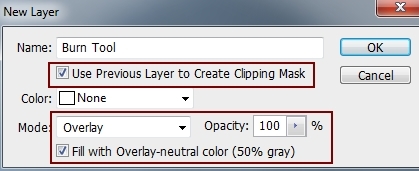
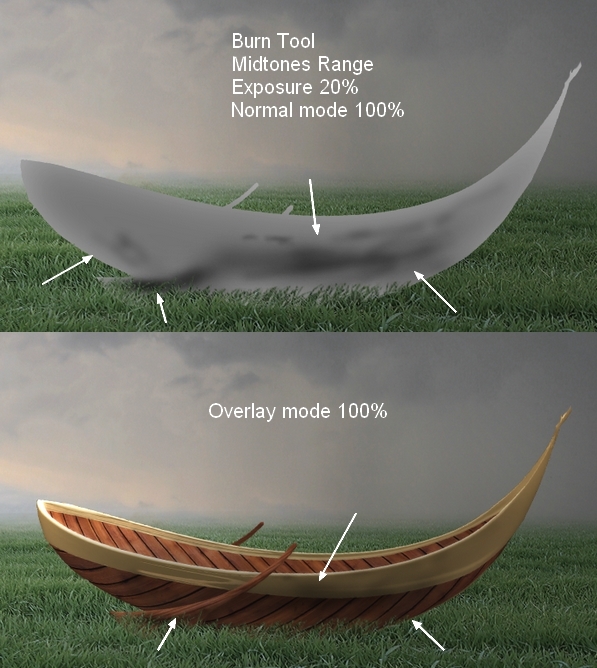
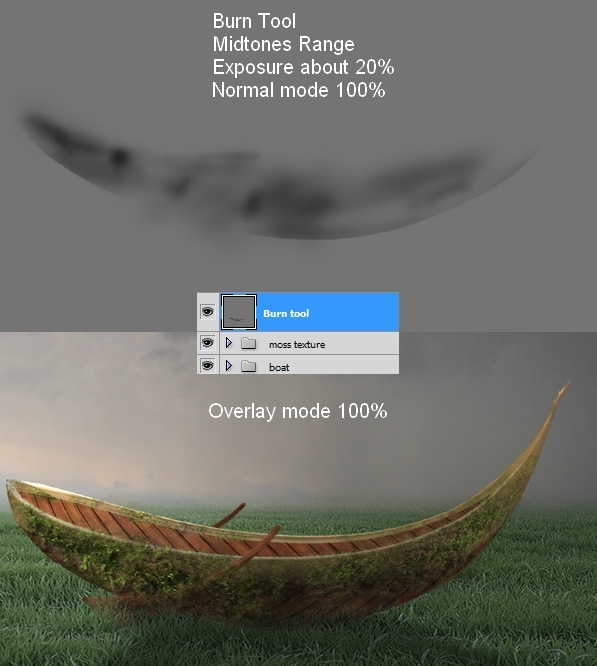
Make a new layer (Clipping Mask), change the mode to Overlay 100% and fill with 50% gray:
Use the Burn Tool (O) with Midtones Range, Exposure about 20% to darken the boat more. You can see how I applied this tool in Normal mode and the result in Overlay mode:
Step 9
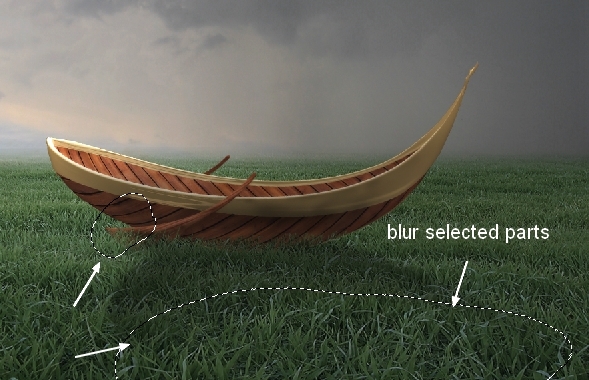
To make the shadow for the boat on the grass, make a new layer under the boat layer. Hold Cmd/Ctrl while clicking the boat thumbnail layer to load its selection:
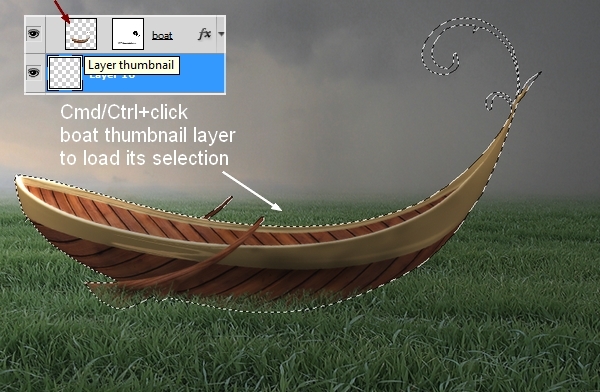
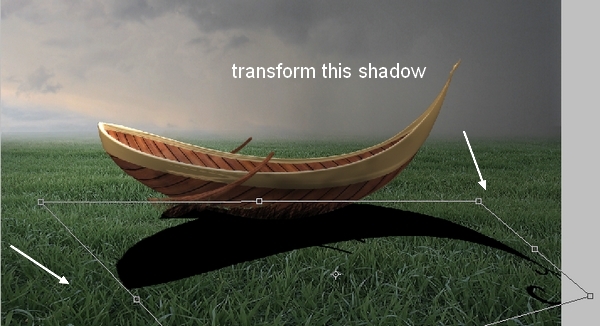
Fill this selection with black (Shift+F5). Choose Edit-Transform-Flip Vertical, then move it under the boat. Use Cmd/Ctrl+T to transform it as shown below:
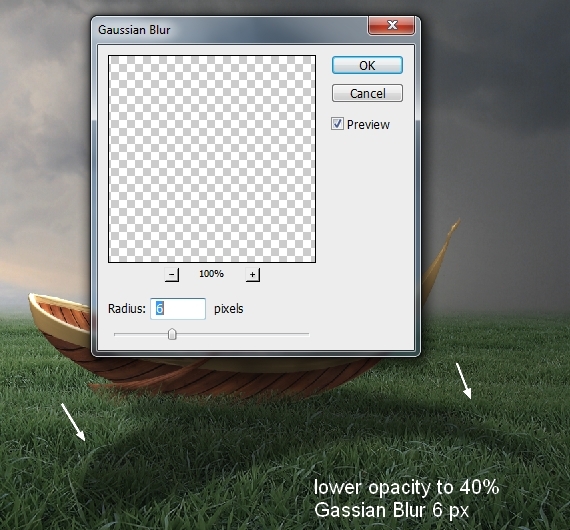
Lower the opacity to 40% and go to Filter-Blur-Gassian Blur and choose radius of 6 px:
Add a layer mask to the shadow layer. Use a brush to reduce the shadow intensity to get a subtle faded effect:
Step 10
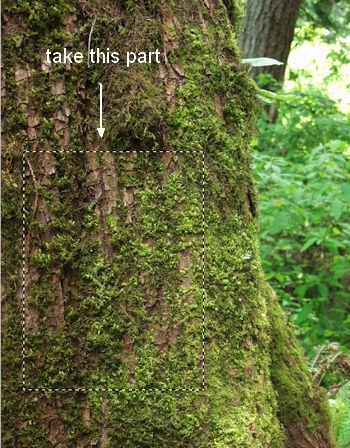
Open the moss stock. Use the Retangular Marquee Tool to make a selection of the moss and position it on the boat, use the Warp Tool (Edit-Transform-Warp) to bend it:
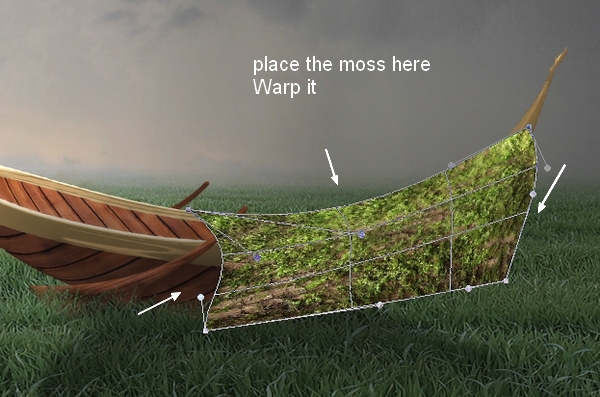
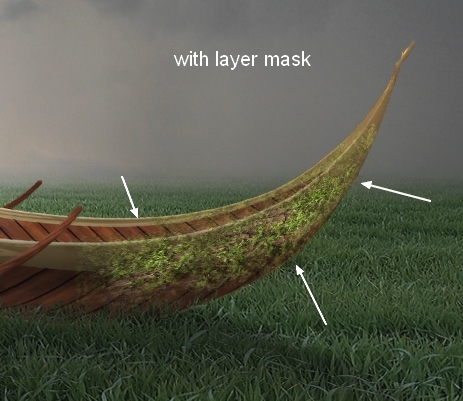
Add a layer mask to the moss layer. Use grass brush, number 199 to trim the hard edges and blend the moss with the boat, lower the opacity of the brush while masking if needed to get a more natural result:
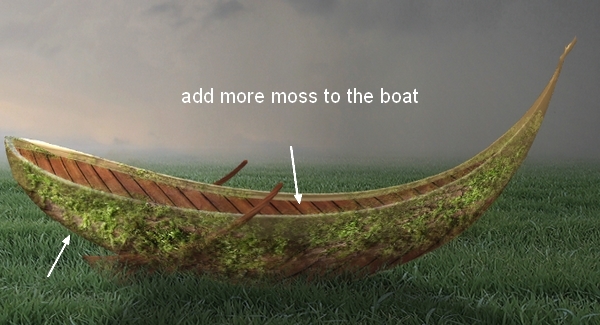
Step 11
Use the same method to “decorate” the boat with moss:
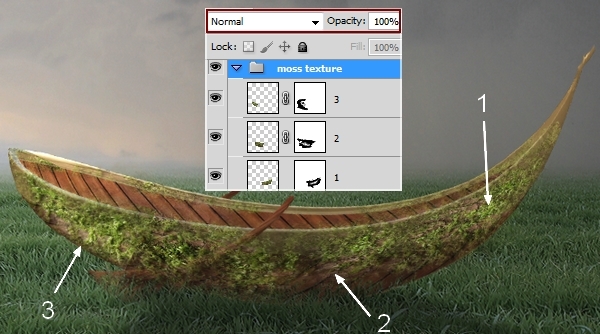
Step 12
To edit all the moss layers together, select them all then hit Cmd/Ctrl+G to create a group. Change the mode of this group from Pass Through (default group mode) to Normal 100%. I named the moss layers from 1 to 3.
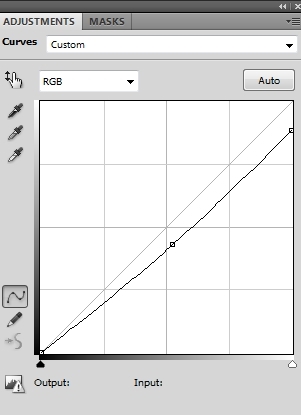
I made a Curves layer above the moss ones to darken them:
Step 13
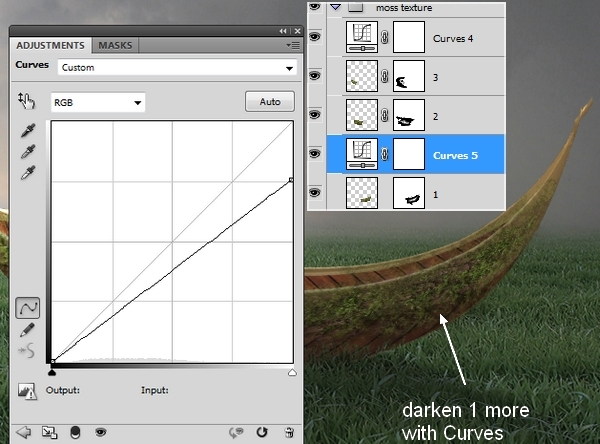
I think “1” should be darker so I made a Curves layer above this layer:
Step 14
Make a new layer on the top using the same settings as in step 8. Use the Burn Tool to darken the boat more and give it a good contrast:
Step 15
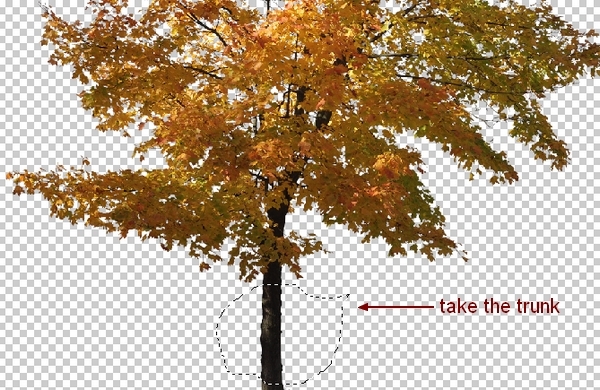
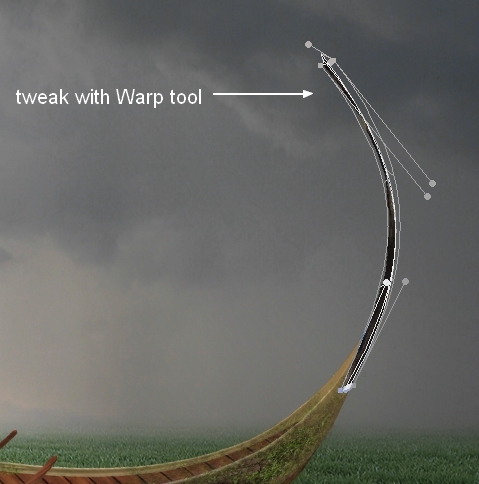
Open the tree stock. Use the Lasso Tool (L) to copy the trunk part and place it above the top right of the boat and tweak it with the Warp Tool:
Use a layer mask to blend this trunk with the boat:
Step 16
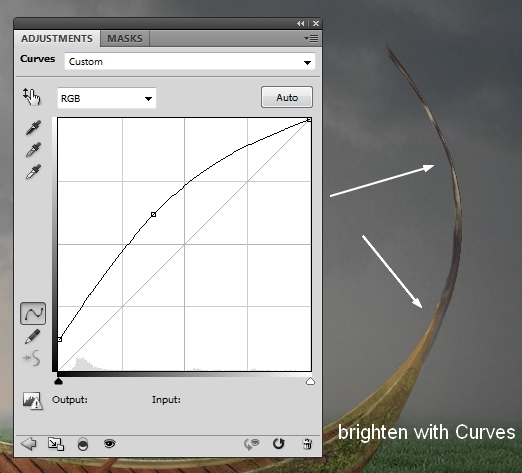
The trunk looks too dark compared with the boat so I used Curves to brighten it:
Step 17
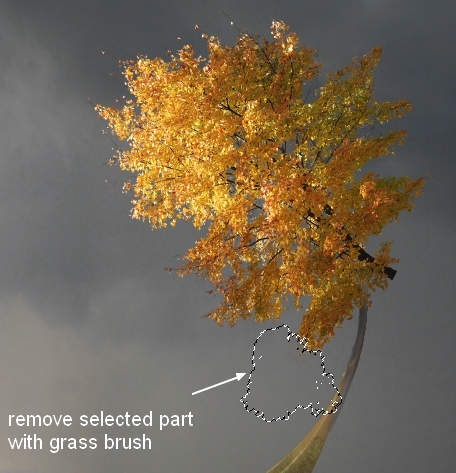
Copy the leaves part and place it above the trunk, rotate them to get the look below:


Add layer mask to the leaves layer. Use grass brush, number 199 to remove some unwanted leaves at the bottom:
Step 18
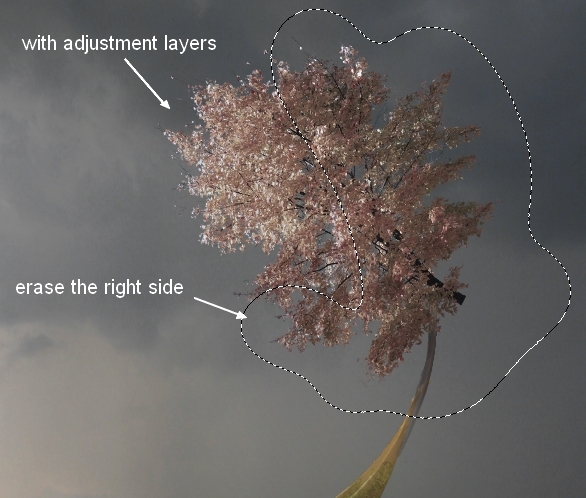
I used Photo Filter, Hue/Saturation and Curves (Clipping Mask) to change the color and contrast of the leaves:
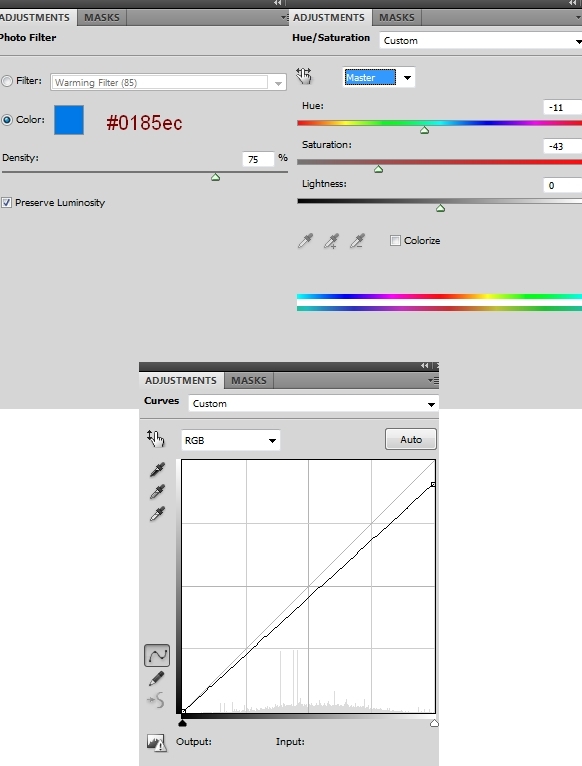
On the Curves layer mask I erased the right side as I don’t want it too dark:
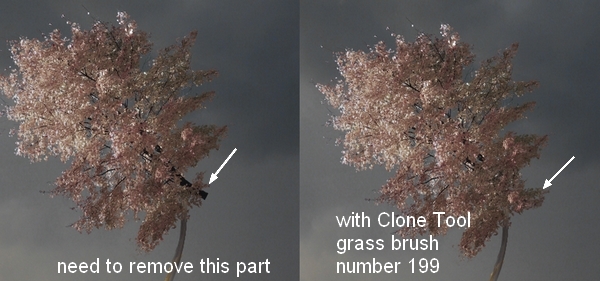
Step 19
To remove the unwanted trunk part on the leaves, I made a new layer on the top and active Clone Tool (S). Change the brush to grass number 199 to clone over the indicated trunk:
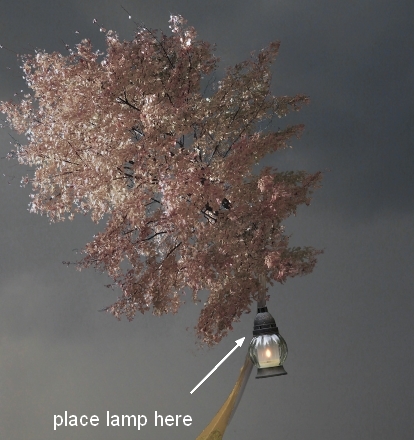
Step 20
Isolate the the lamp and place it under the leaves:
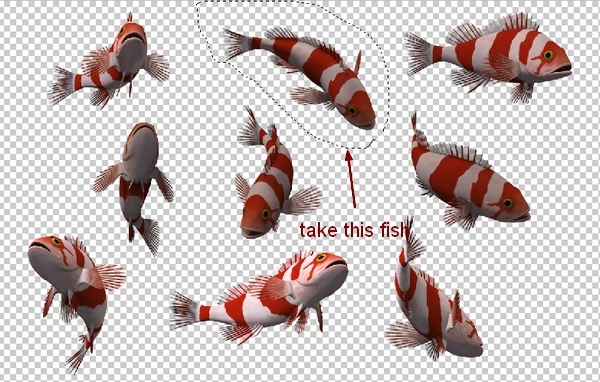
Step 21
Open the fish stock. Choose the one you like and place him at the left of the picture, rotate him a little:

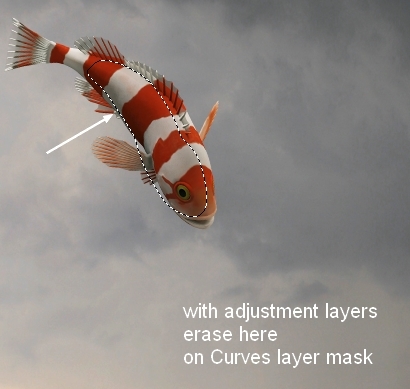
Step 22
I used Color Balance and Curves to change the color and brighten the fish:

On the Curves layer mask I erased selected parts a little to keep them a bit darker than the rest:
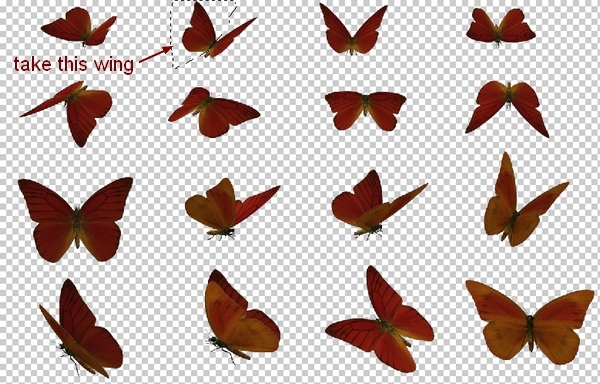
Step 23
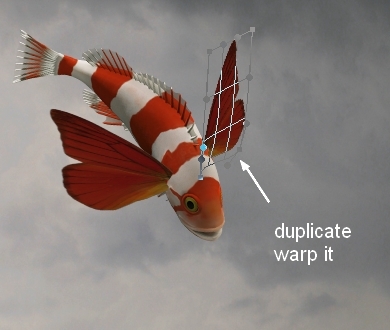
Open the butterfly image. I copied a wing and positioned it beside the fish:

Duplicate this wing layer and move to the the other side, and transform it to fit the movement of the fish:
Step 24
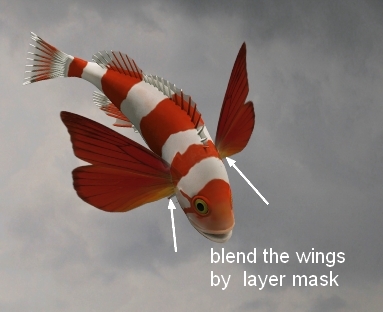
I used a layer mask to blend the wings with the fish:
Step 25
Make a group for the wings as we did with the moss texture layers.
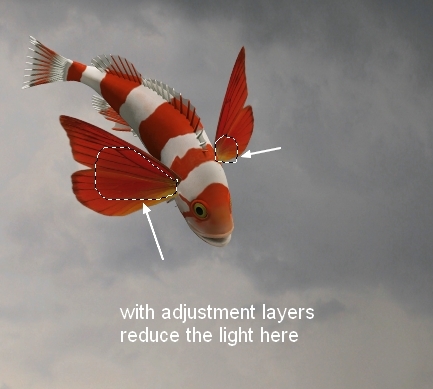
Add a Curves layer within this group to change the color and brighten the wings a little:

On the Curves layer mask I reduced the light on selected parts:
Step 26
Make some adjustment layers on the top:
Gradient Map 1 and 2:
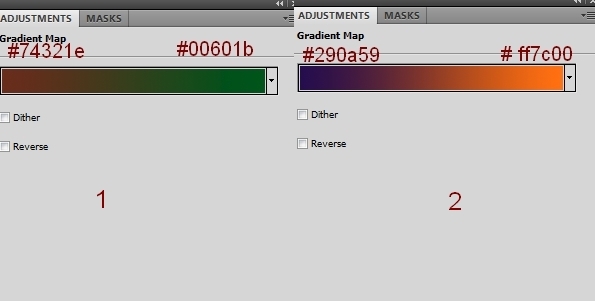
Lower the opacity of Gradient Map 1 to 30% and Gradient Map 2 to 20%:
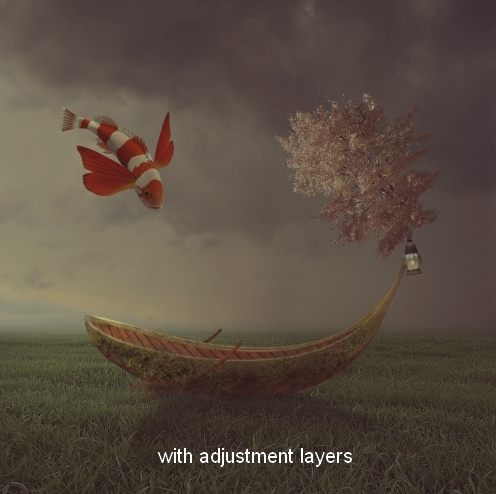
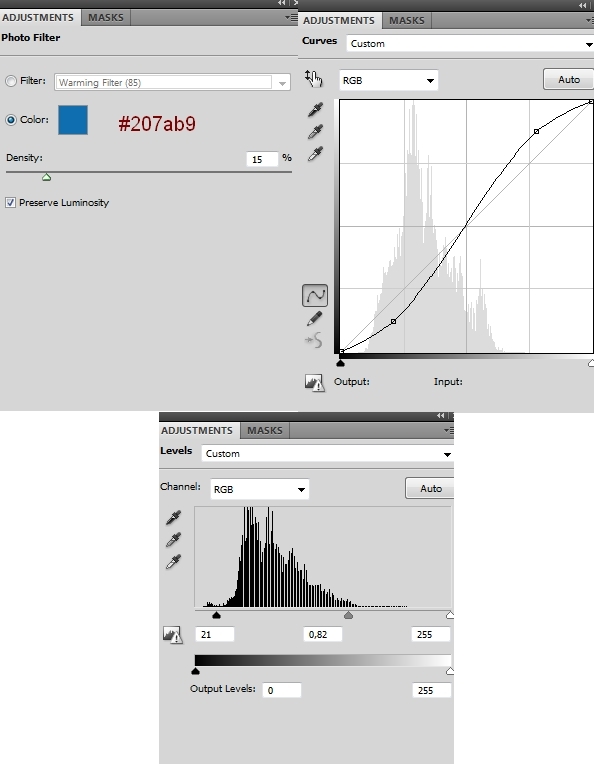
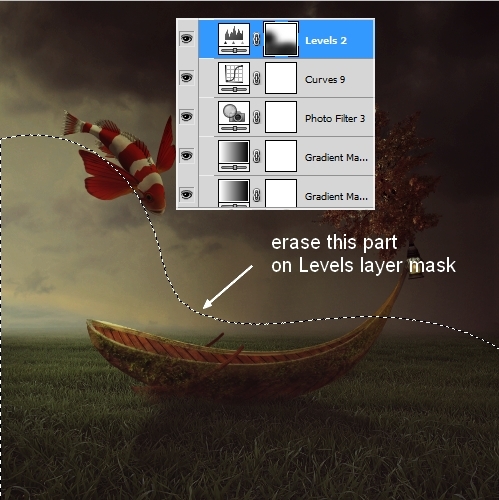
Photo Filter, Curves and Levels:
On the Levels layer mask I used the brush to reduce and remove the dark effect on the parts shown on the screenshot below:
Step 27
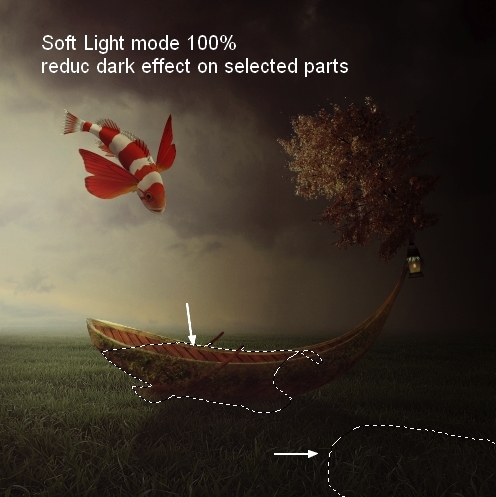
To create a nice contrast for the picture, I made a new layer above all other layers. Activate the Gradient Tool (G) and choose Radial Gradient with default colors (black and white). Drag a line from the top left to bottom right:

Change the mode to Soft Light 100% and use a layer mask to reduce the dark effect on the boat and bottom right of the picture:
Step 28
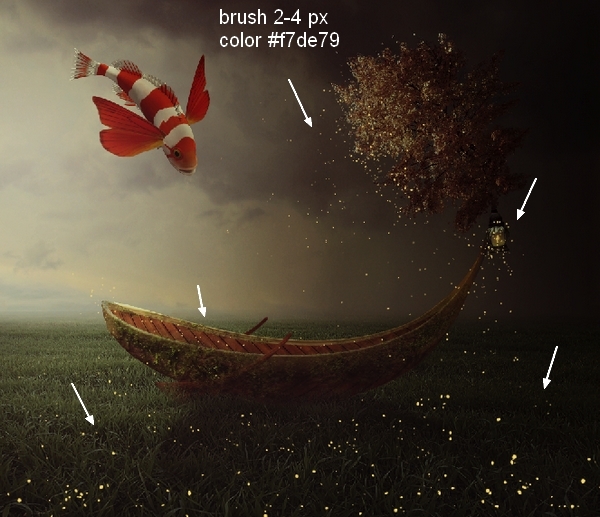
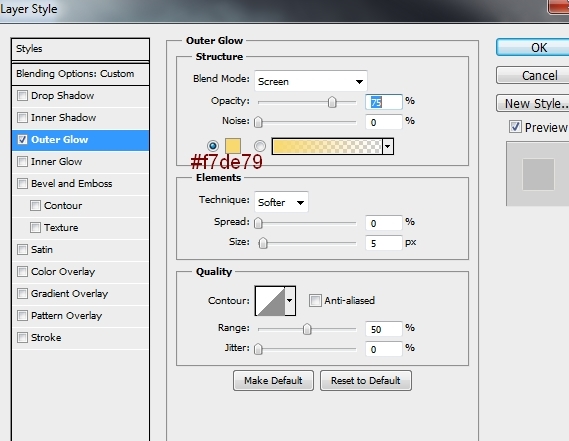
In this step we’ll make some magic sparkles for the picture. Create a new layer on the top. Change the brush color to #f7de79 and size to 2-4 px. Press F5 to change the settings of this brush:
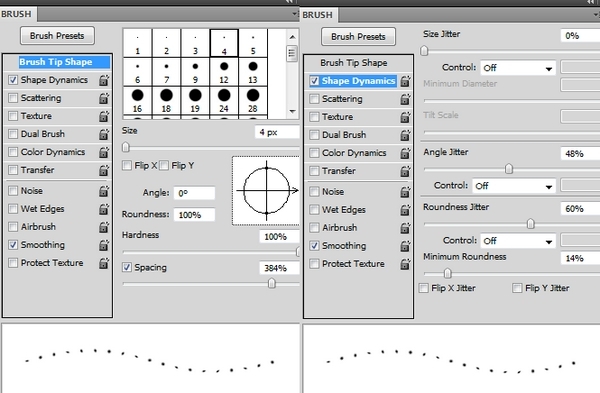
Paint spots around the tree, boat, lamp, grass:
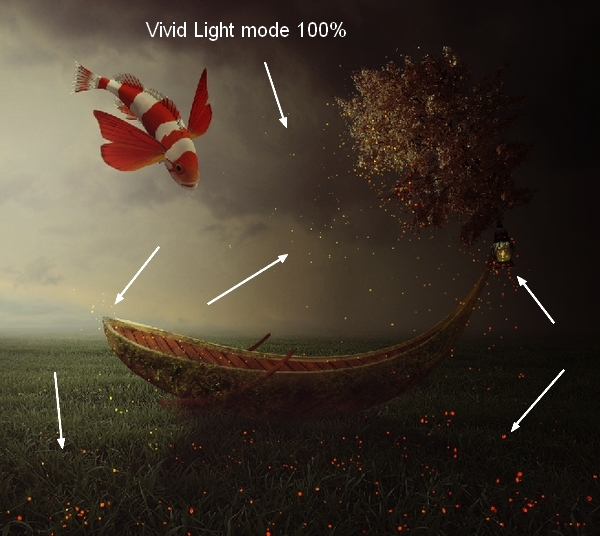
Change the mode to Vivid Light 100%:
Step 29
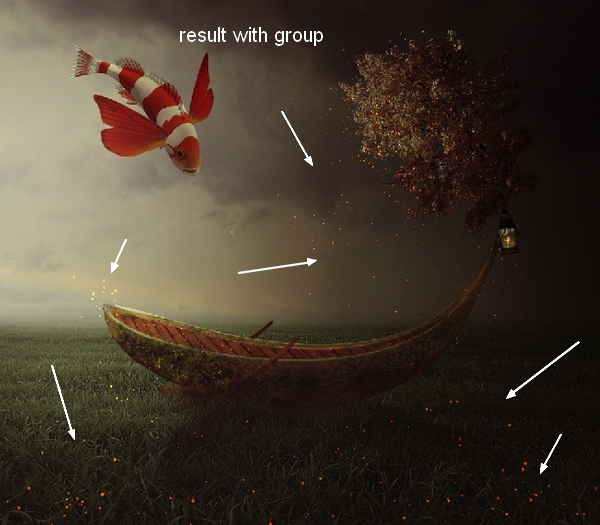
On the sparkle layer, press Cmd/Ctrl+G to make group for it. Change the mode of this group to Vivid Light 100% and here is the result:
Step 30
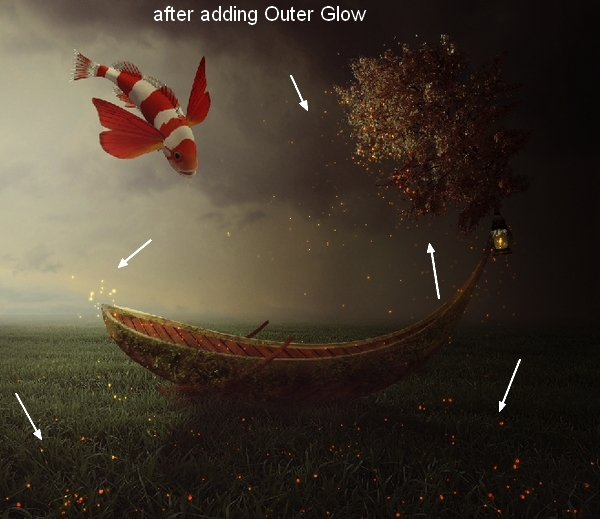
Add a Layer Style to the sparkle layer:
Step 31
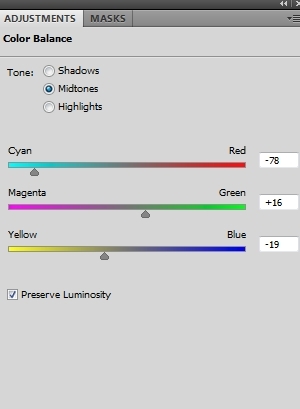
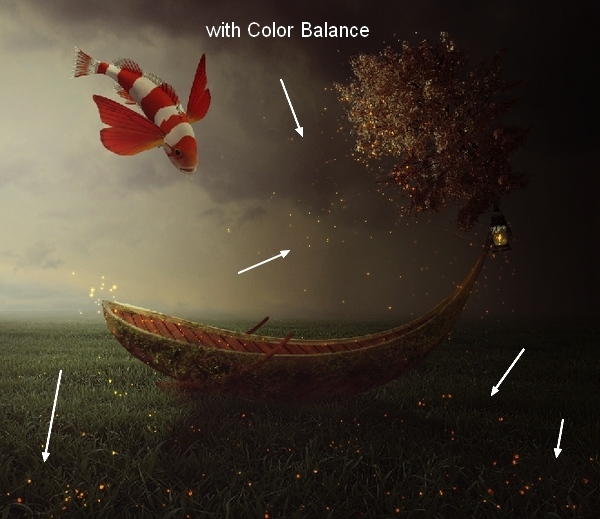
I added a Color Balance layer within this group to reduce the red tone a little:
Step 32
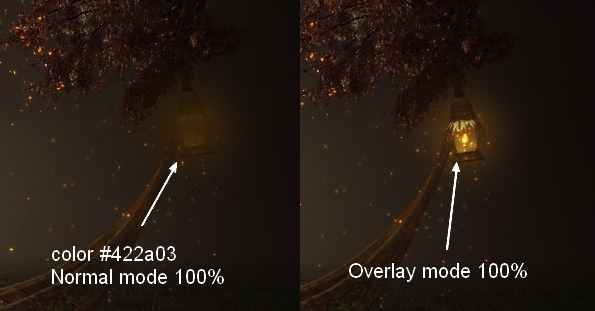
To create the glowing light from the lamp I made a layer on the top. Used a soft brush with color #422a03 to paint on the lamp and changed the mode to Linear Dodge 100%:
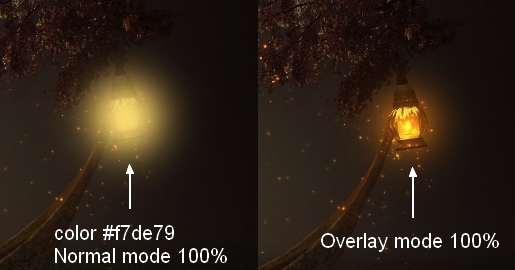
Create a new layer and use the brush with color #f7de79 to make the light effect stronger. Set the mode to Overlay 100%:
Step 33
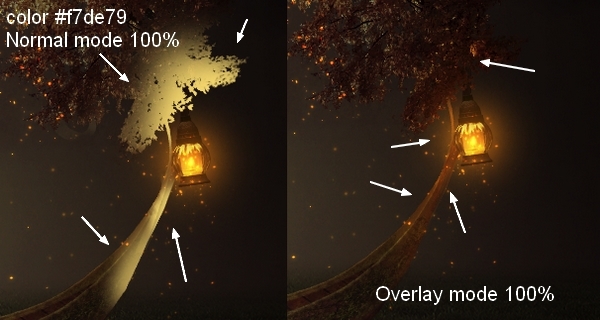
On a new layer use the same brush to make reflected light from the lamp. Set the mode to Overlay 100%:
Step 34
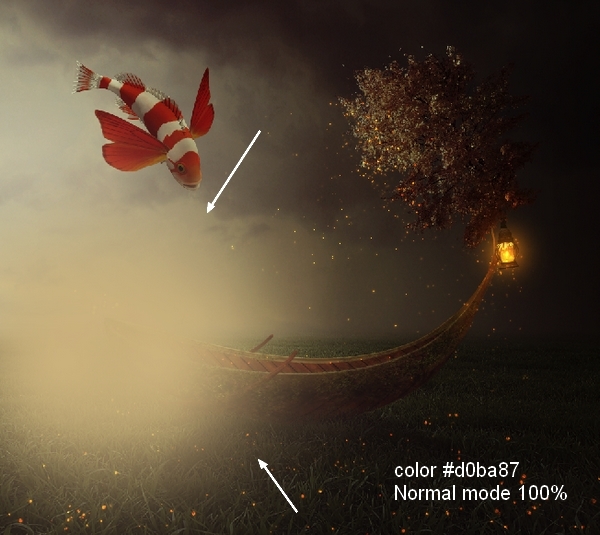
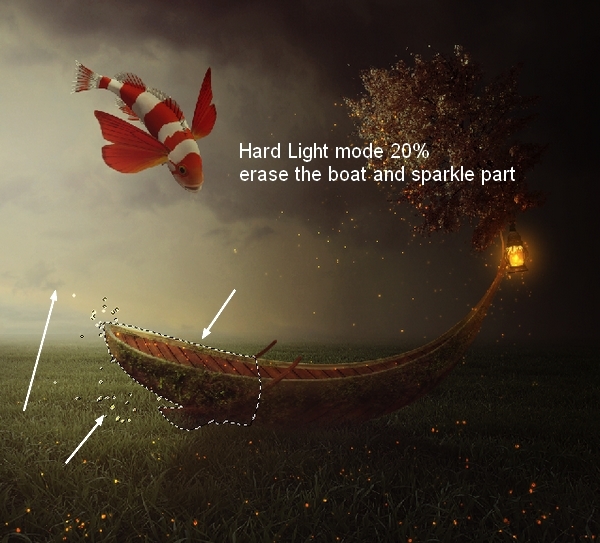
To create more light for the picture create a new layer and select the brush with color #d0ba87 to paint over the horizon. Change the mode to Hard Light 20% and use a layer mask to remove the effect on the boat and sparkle:
Step 35
I used two color fill layers to change the color of the whole picture ( Layer-New Fill Layer-Solid Color):
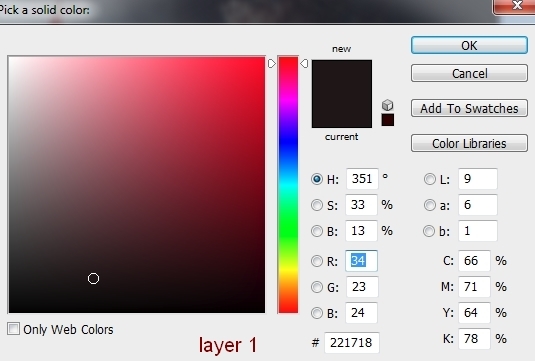
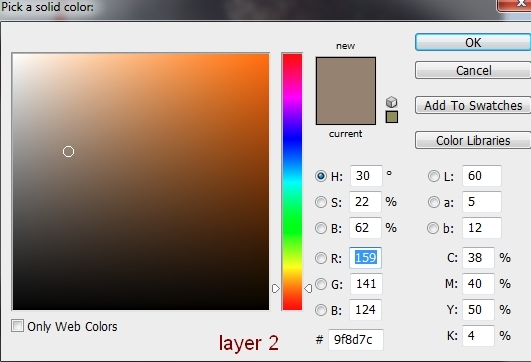
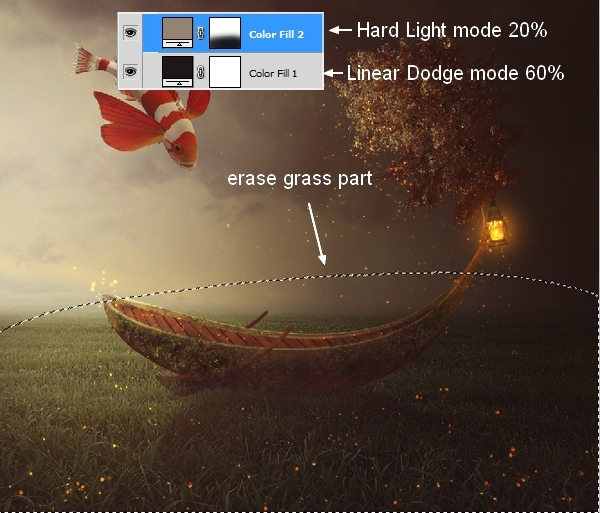
Change the mode of this Color Fill Layer 1 to Linear Dodge 60%, Layer 2 to Hard Light 20%.
On the mask of layer 2 use the brush to erase the grass part:
Step 36
I used some adjustment layers to add more contrast and vibrance to the picture (Black & White, Hue/Saturation, Vibrance):
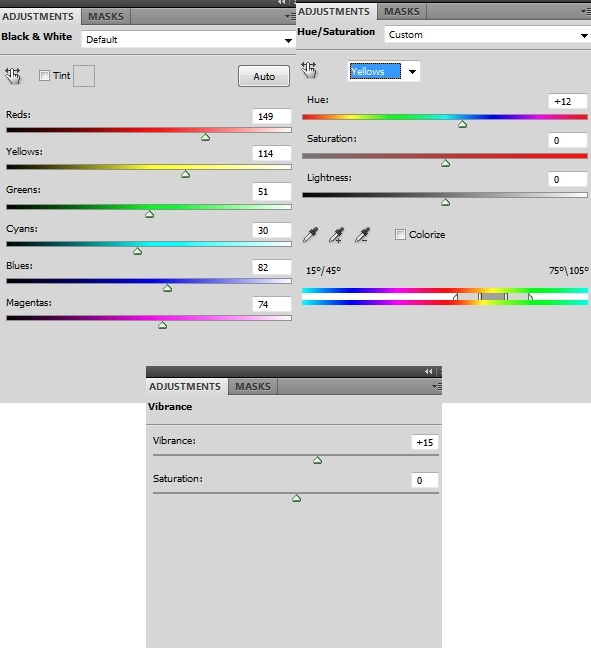
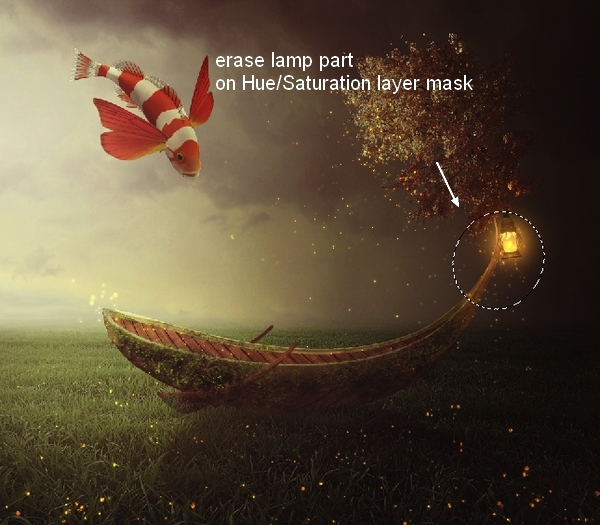
Change the mode of the Black & White layer to Soft Light 100%. On the Black & White layer mask erase the horizon part and sparkle and on the Hue/Saturation layer mask erase the lamp part:

And We’re Done!
I hope that you enjoyed the tutorial.