In this Photoshop tutorial I’ll show you how to create an emotional, abstract photo manipulation. You’ll learn how to combine abstract elements, work with groups, create depth of field and more.
Final Image
Tutorial Details
- Program: Photoshop CS3+
- Estimated Completion Time: 90 minutes
- Difficulty: Intermediate
Resources
Step 1
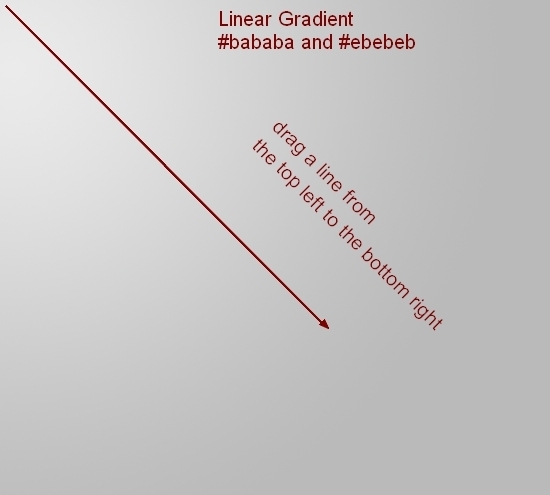
Create a new document (1100×1000 px) and fill it with white. Press Cmd/Ctrl+Shift+N to make a new layer. Hit G to active Gradient Tool. Choose Linear Gradient with color #bababa and #ebebeb. Drag a line from the top left to the bottom right to get the result shown below:
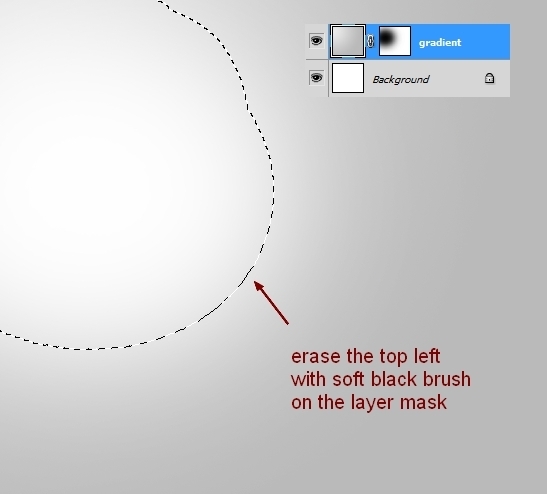
 Click the second button at the bottom of the Layers Panel to add a mask to this layer. Use a soft black brush to erase the top left of the canvas:
Step 2
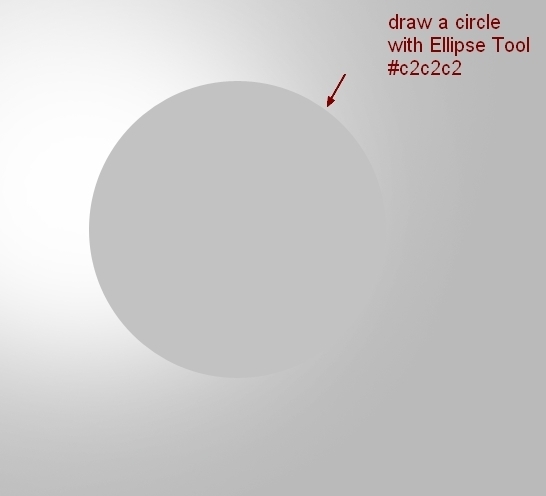
Make a new layer and press U to active the Ellipse Tool. Hold down the Shift key and draw a circle with color #c2c2c2:
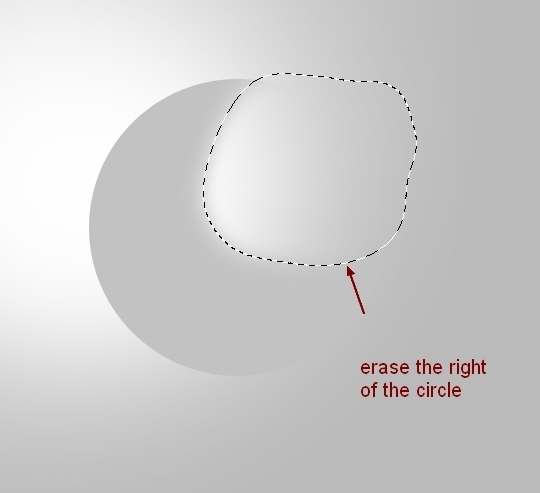
Use layer mask to erase the right side of this circle:
Step 3
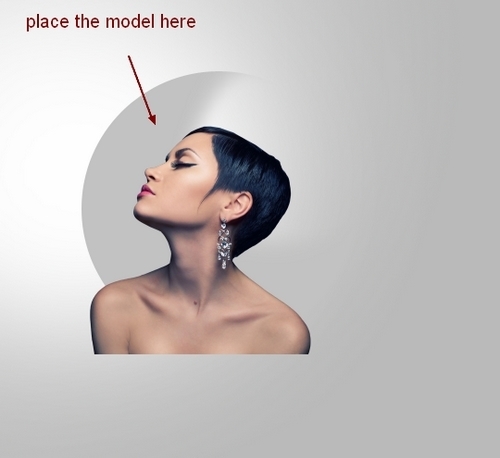
Cut out the model and drag her into our canvas using the Move Tool (V):
Step 4
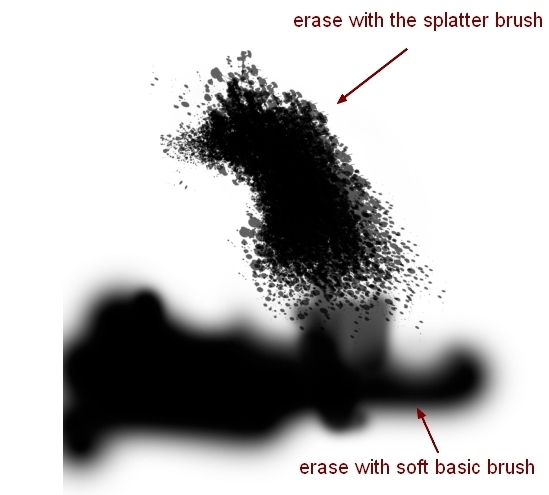
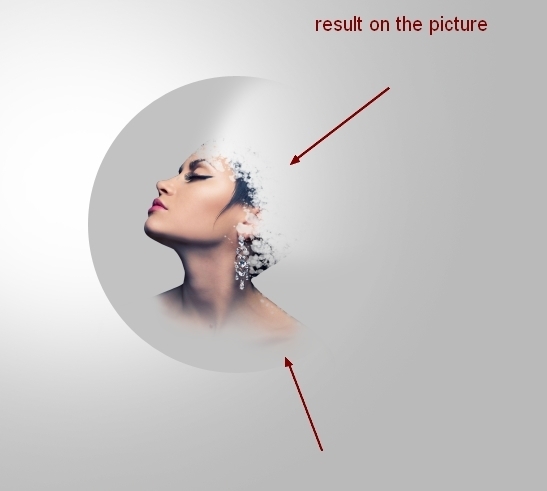
Add a mask to the model layer. Change the brushes to the splatter ones and choose number 353. Press F5 to change the settings of this brush:

Use this brush to erase the model’s head, then use a soft basic brush to remove the hard edge of the model’s body. You can see how I did it on the layer mask and the result on the picture:
Step 5
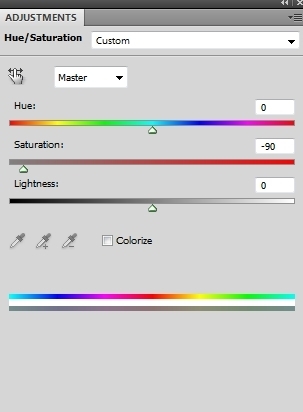
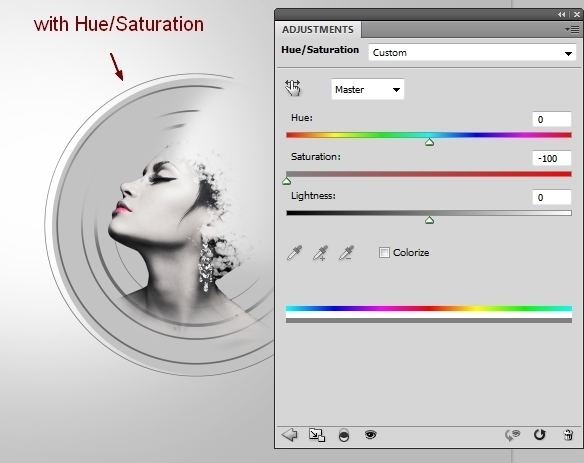
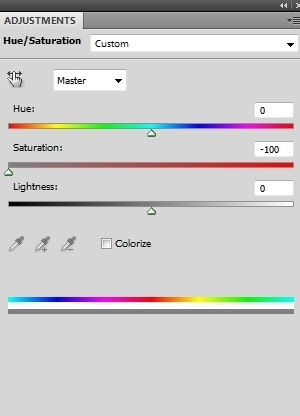
To reduce the saturation of the model, I used an adjustment layer with Clipping Mask. Go to Layer > New Adjustment Layer > Hue/Saturation:
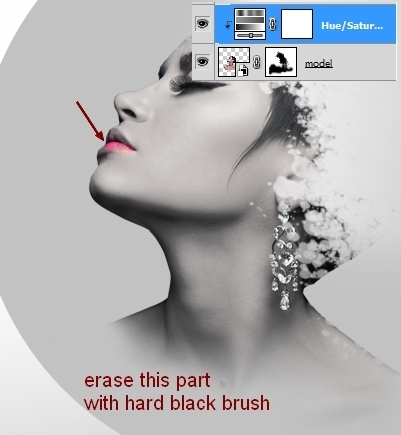
On this Hue/Saturation layer mask use a hard black brush to keep the lower lip red:
Step 6
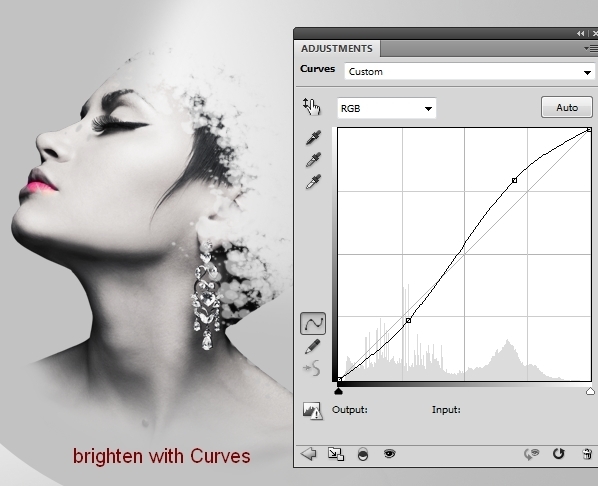
Make a Curves adjustment layer to brighten the model:
Step 7
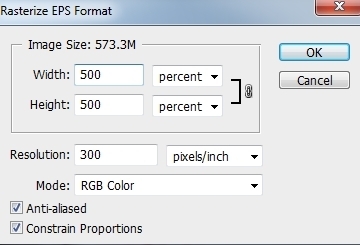
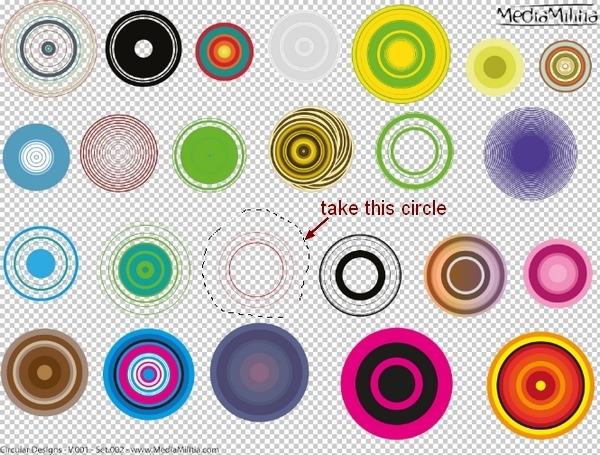
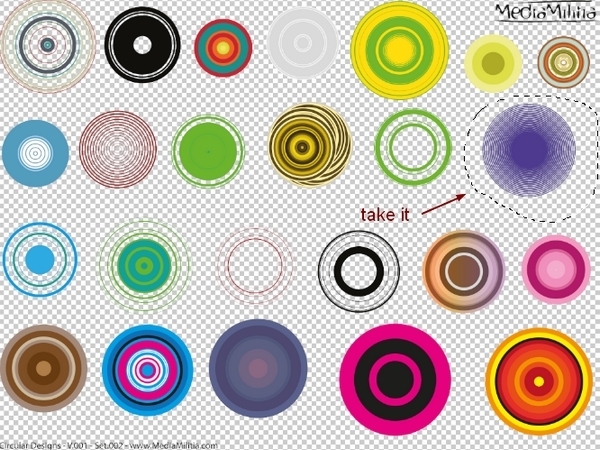
Open the circular design pack. I chose the set 002 to rasterize with the settings below:
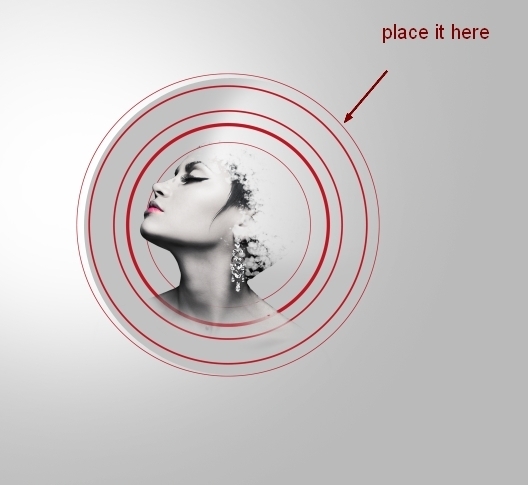
 Make a red circle with the Lasso Tool (L) and place it onto the shape drawn in step 2. Set this layer under the model layer.
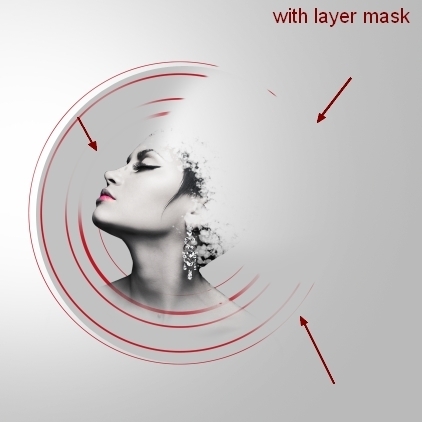
Use a layer mask to erase some parts of it as shown below:
Step 8
I used a Hue/Saturaton adjustment layer for this circle layer:
Step 9
Make a new layer (still under the model layer). Change the foreground to black and use the splatter brushes to draw around the model and the circle area ( I used the brush number 353):
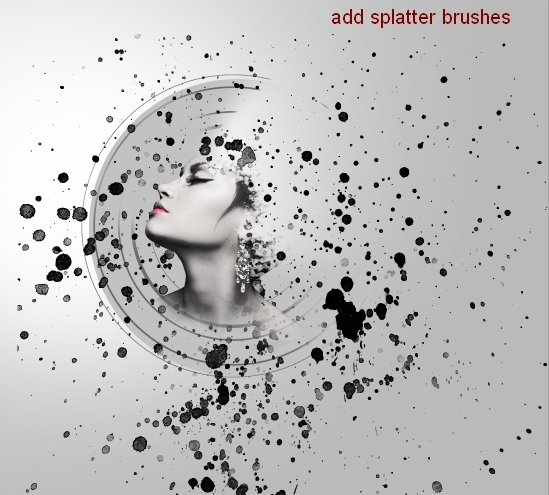
Use a layer mask to reduce this effect as the image below shows:
I named this layer “background splatter”.
Step 10
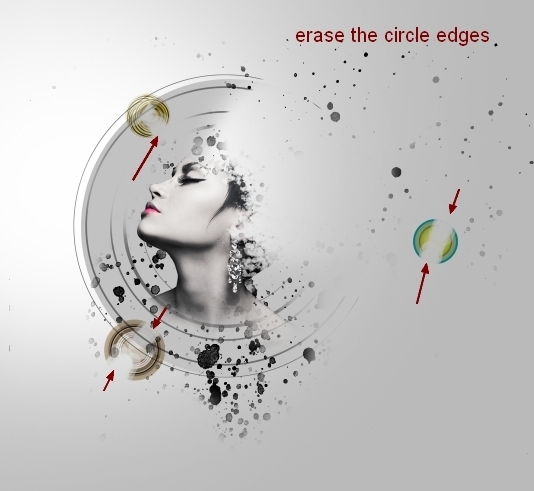
Rasterize all the circular design sets. I took three circles from these sets and placed them around the model (feel free to use the ones you like).

Remember to set all these layers above the model layer.
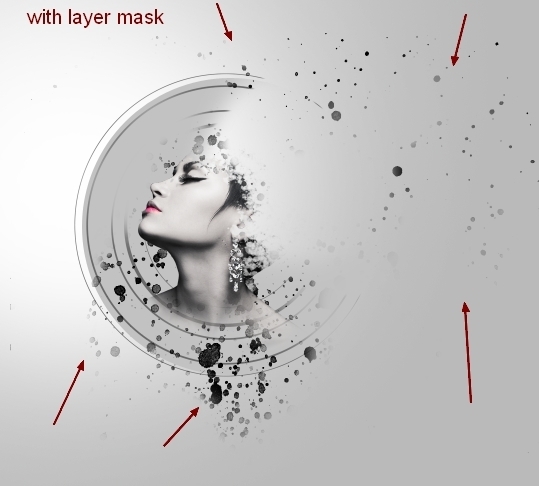
Step 11
Add a mask to all these circle layers and with a black brush, hide some of their edges:
Step 12
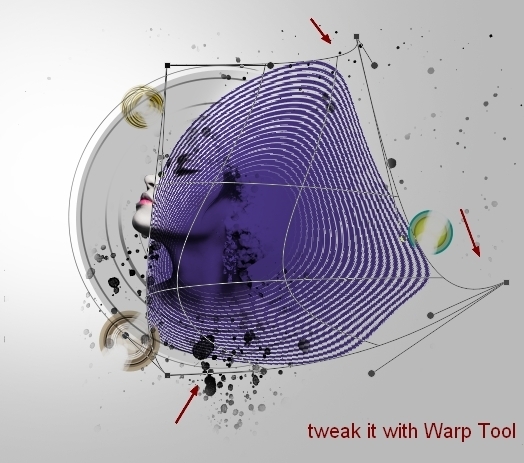
Take a purple circle from the set 002 and place it onto the right of the model’s head. I arranges this layer under the small circle layers arranged in the previous step. Use the Warp Tool to tweak it (Edit >Transform > Warp):
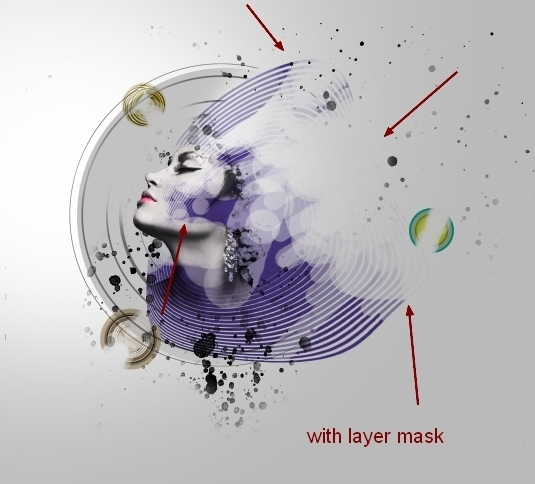
Use a layer mask and a hard black brush with opacity varying from 30-100% to apply on the circle. Here is my result after this erasing job:
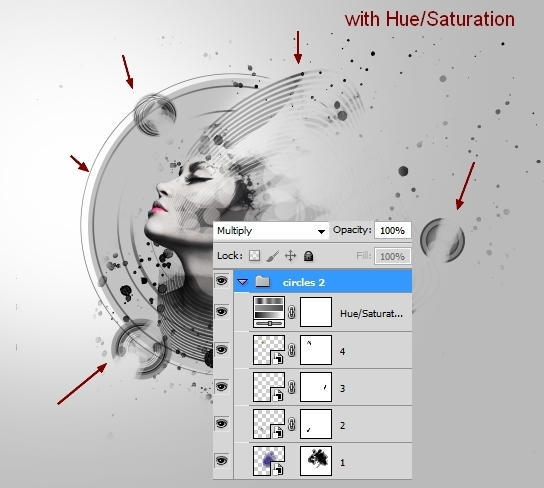
Step 13
Select all the circle layers created in steps 10 and 12 and hit Cmd/Ctrl+G to create a group for them. Change the mode of this group from Pass Through (default group mode) to Multiply 100%. I named them from 1 to 4. On layer 4, go to Layer > New Adjustment Layer > Hue/Saturation:
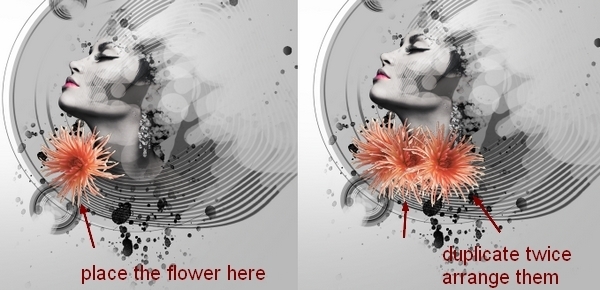
Step 14
Open the flower image. Place it at the model’s neck and then duplicate it twice. I arranged them as shown below:

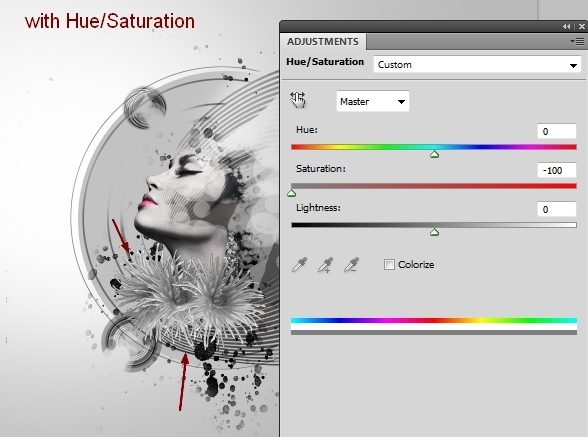
Step 15
Make a group for the flowers as you did with the circles but with Normal mode 100%. Use a Hue/Saturation adjustment layer to change their color to black and white:
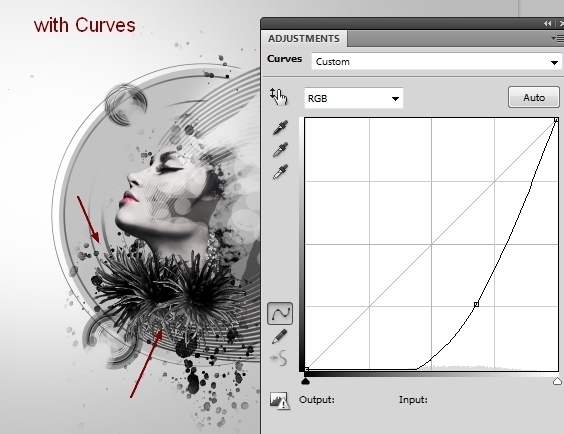
Step 16
I used a Curves adjustment layer to increase the dark contrast of these flowers:
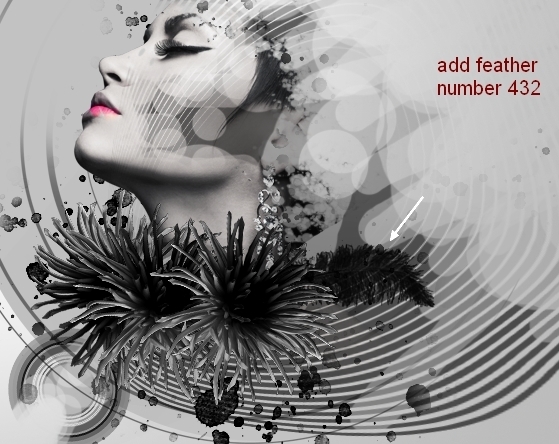
Step 17
Make a new layer under the flowers group. Change the foreground to black and use feather brush, number 432 to paint a feather beside the flowers:
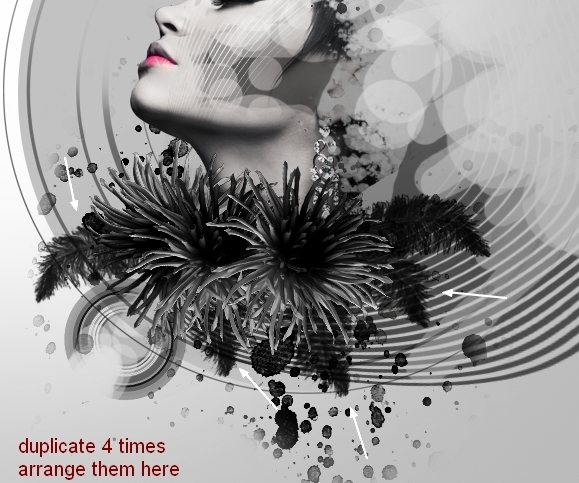
 Duplicate this layer four times and arrange them around the neck and under the flowers. You can rotate, transform, warp if needed:
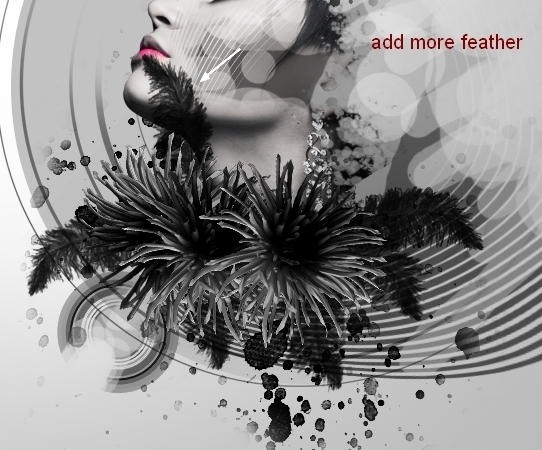
Step 18
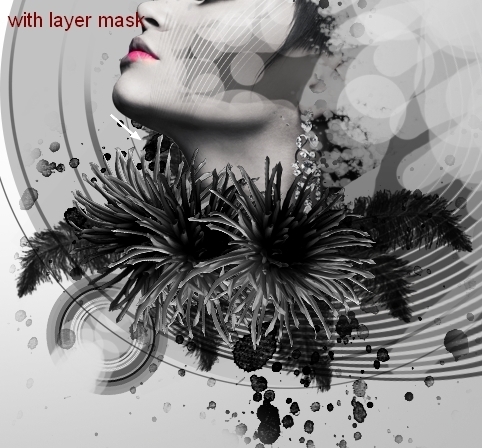
Add a feather above the flowers. Use a layer mask to remove the part on the model and make it appear behind her:
Step 19
Make a new layer on the top. Change the brush to the splatter ones. I used number 682 to paint on the model’s head:
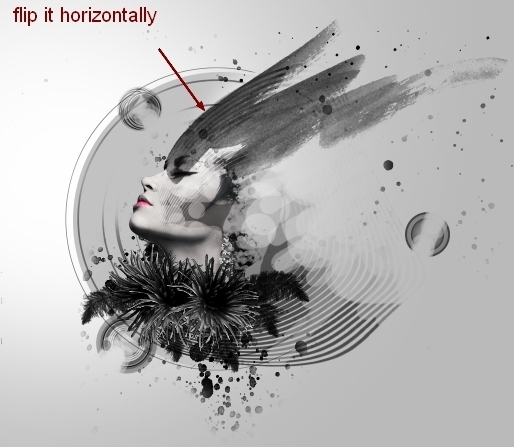
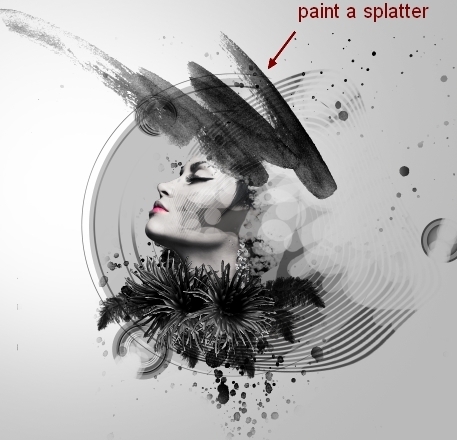 Flip it horizontally (Edit > Transform > Flip Horizontal):
Step 20
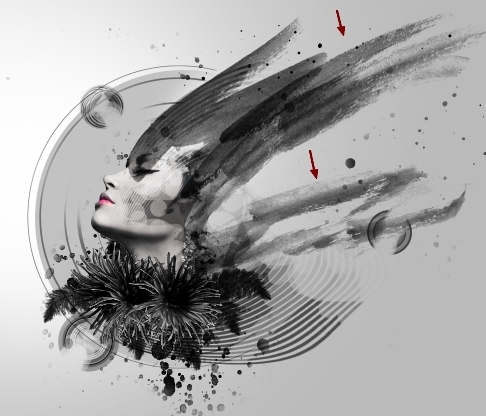
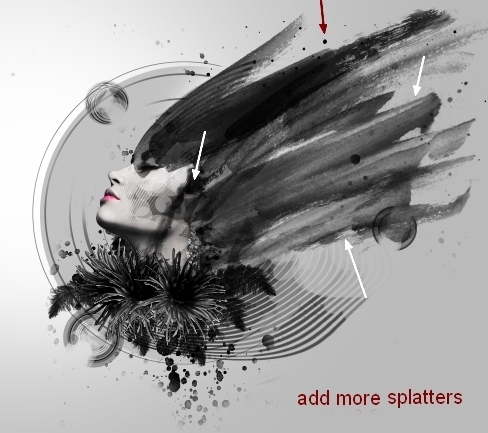
Add some other splatters using different brushes to the right of the model:
Step 21
Drag the branch into our main canvas and put it behind the model’s head. Place this layer under the background splatter layer (step 9).
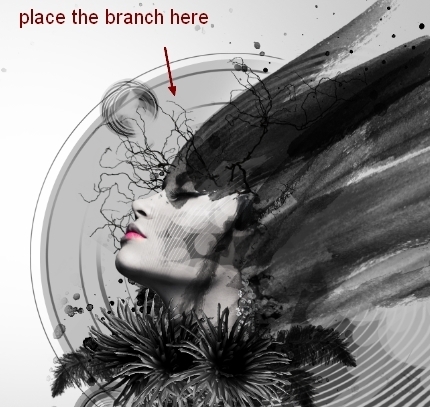
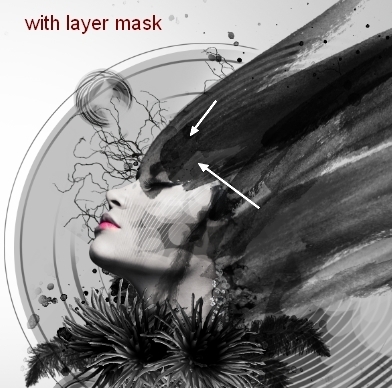
Use a layer mask to erase the part on the model :
Step 22
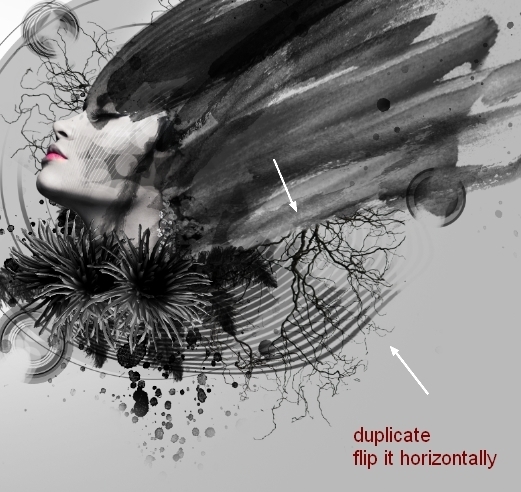
Duplicate this layer, flip it horizontally, and use a layer mask to get the result below:
Step 23
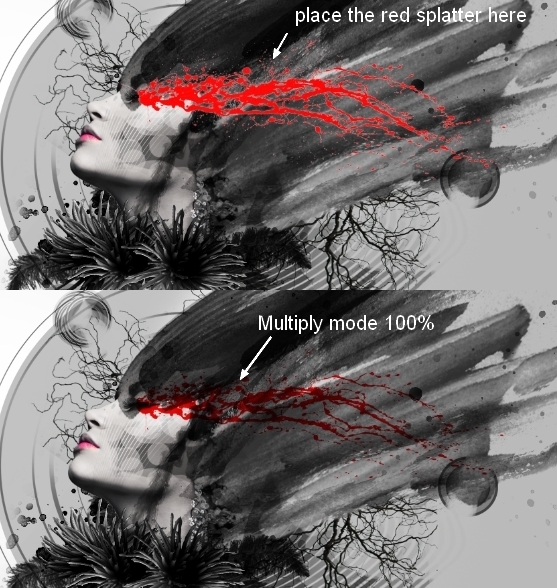
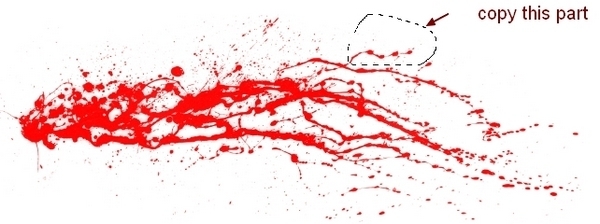
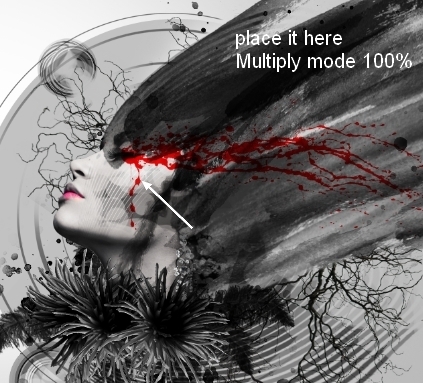
Open the red splatter image. Isolate it from the background and put it onto the right of the model (the eye). Change the mode to Multiply 100%:
Step 24
Copy a part from this splatter image and put it under the model’s eye (Multiply mode 100%):
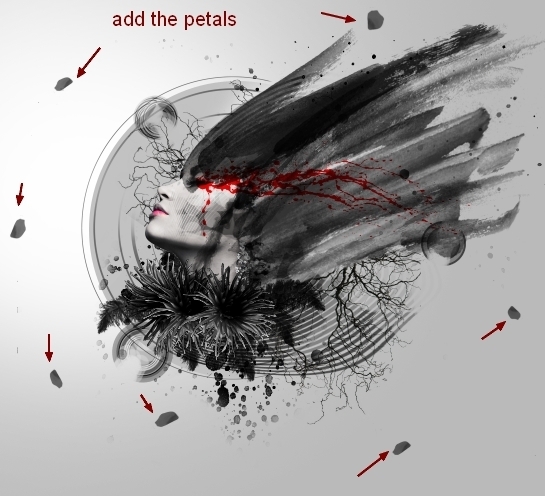
Step 25
Create a new layer on the top and alter the brush to the petal ones. I chose number 78 and used black for this brush. Hit F5 to change its settings:

Paint the petals around the center section as shown below:
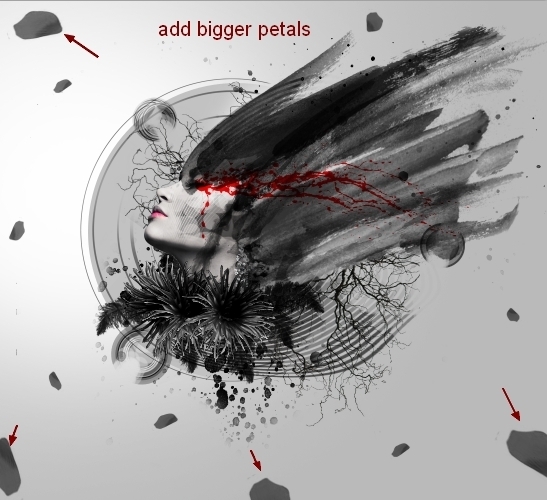
Step 26
On a new layer, use a bigger size for the petal brush to add to the edges of the image:
Step 27
Go to Filter > Blur > Gassian Blur and set the radius to 6px:
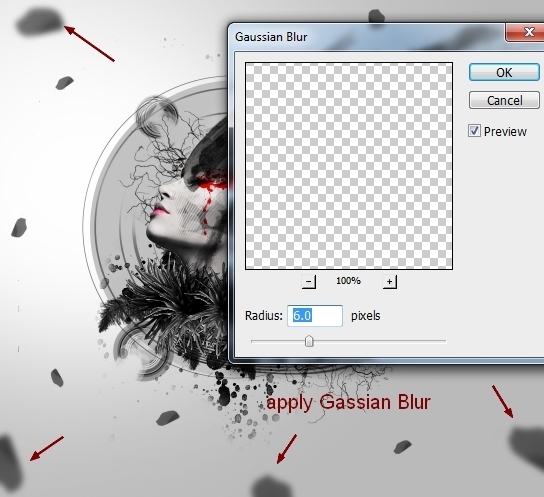
This step is to add depth to our picture.
Step 28
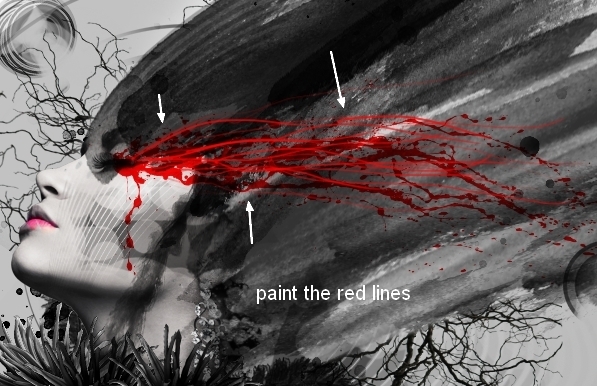
Create a new layer on the top of the layers. Use a basic brush, 4 px with red (#ff0000) and the settings below:
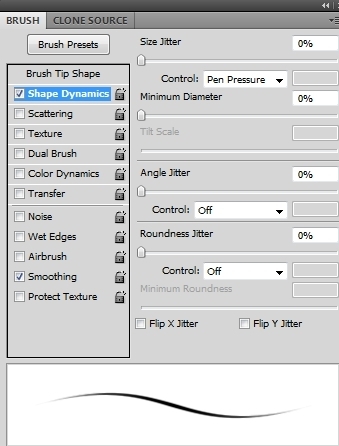
Paint red lines from the model’s eye to her right side:
Step 29
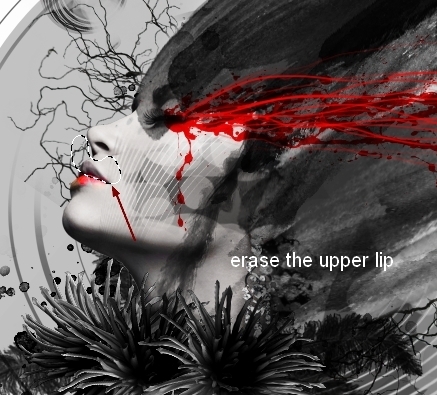
Make a Hue/Saturation adjustment layer on the top:
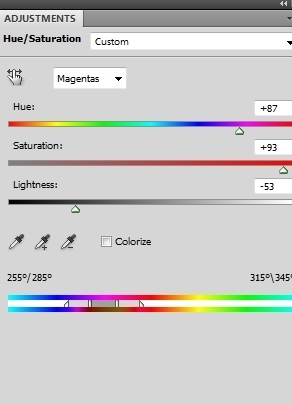
On this Hue/Saturation layer mask use a brush to erase the upper lip of the model:
Step 30
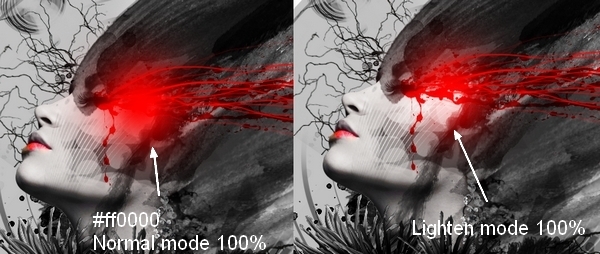
On a new layer I used the brush with color #ff0000 to paint on the eye part, then changed the mode to Lighten 100%:
Step 31
Final step: Add a Curves adjustment layer to the top:
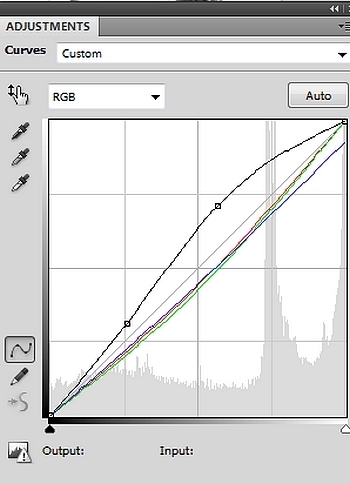
And We’re Done!
I hope that you enjoyed the tutorial.