In this tutorial I will show you how to create a Zippo lighter in Adobe Photoshop.
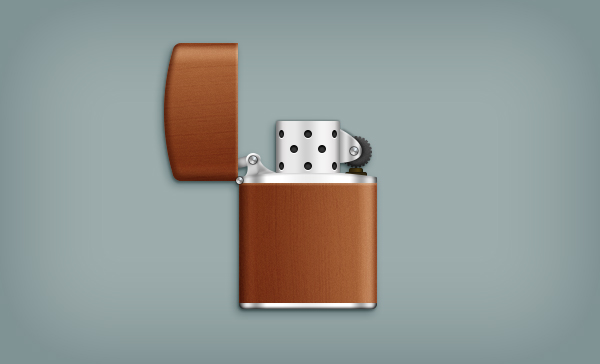
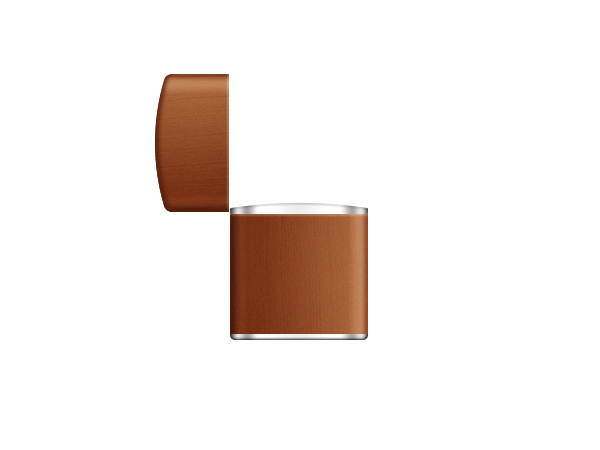
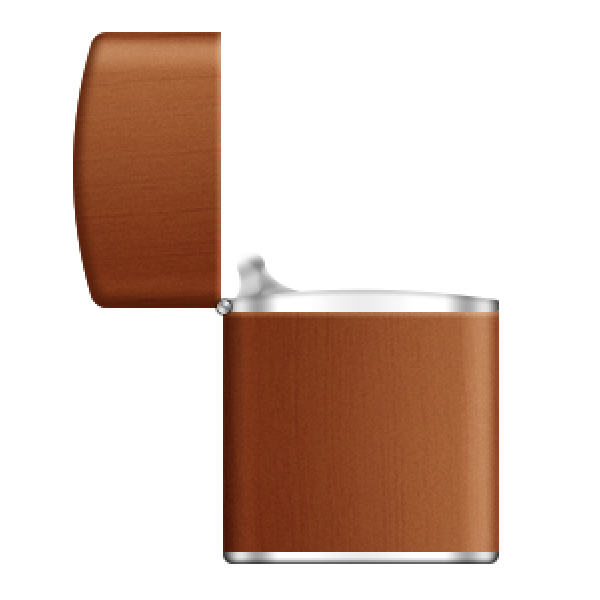
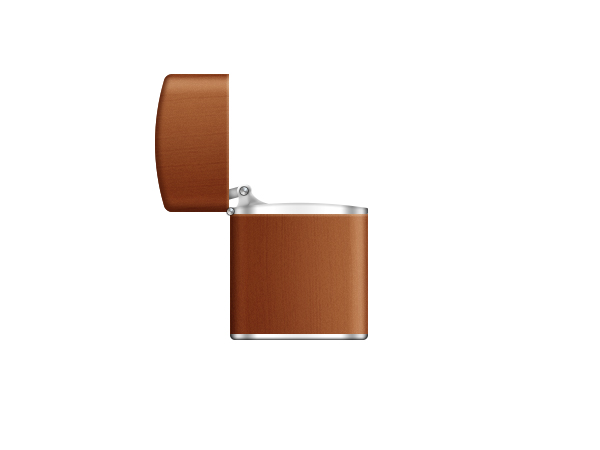
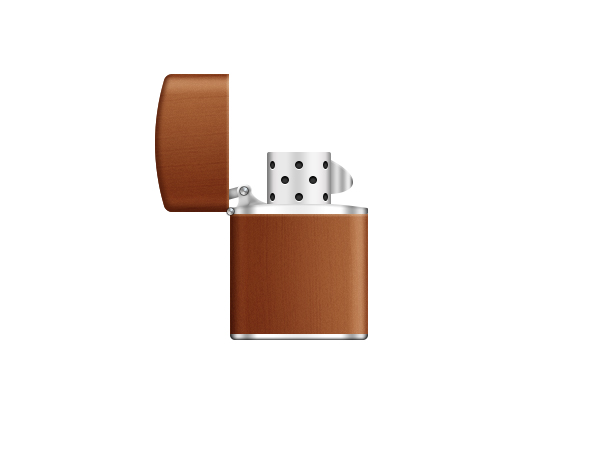
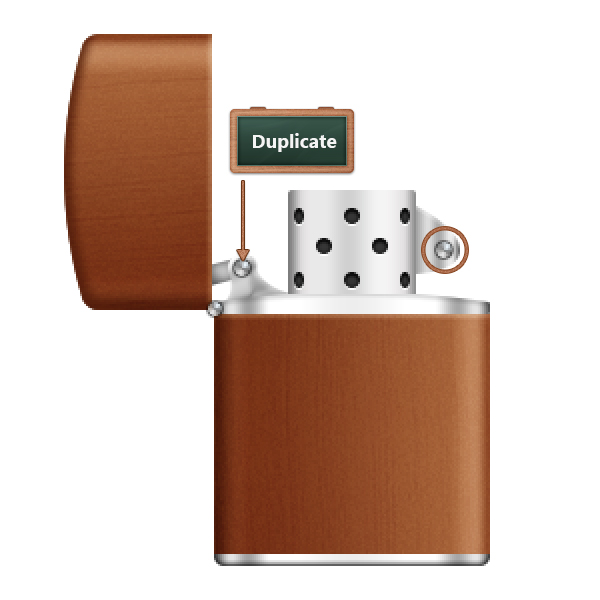
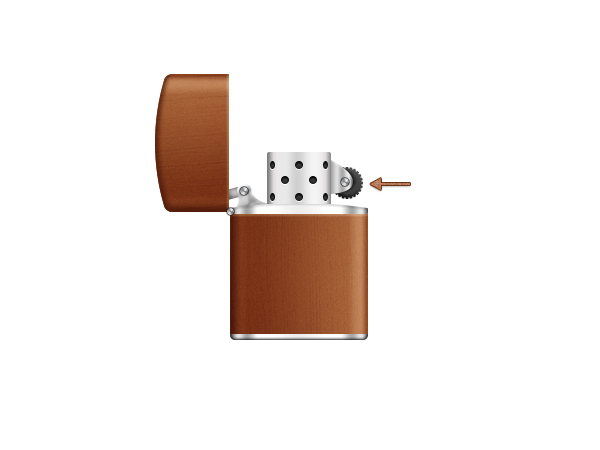
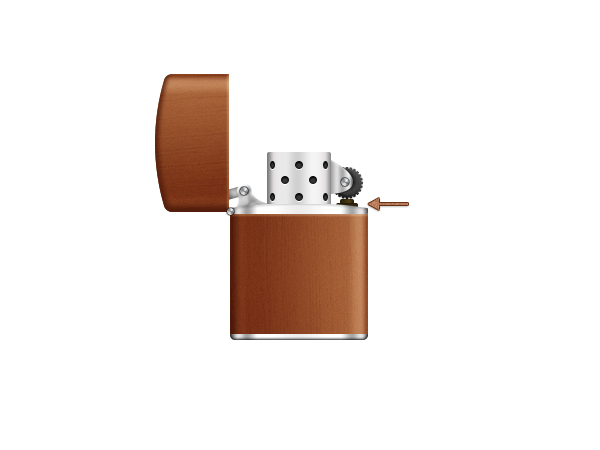
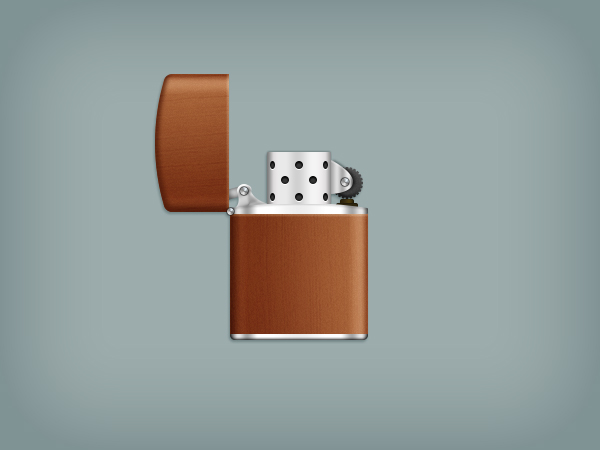
Final Image
As always, this is the final image that we’ll be creating:

Tutorial Details
- Program: Adobe Photoshop CC
- Estimated Completion Time: 50 minutes
- Difficulty: Beginner-Intermediate
Resources
- 45 Wood Textures – by Jammurch
Step 1
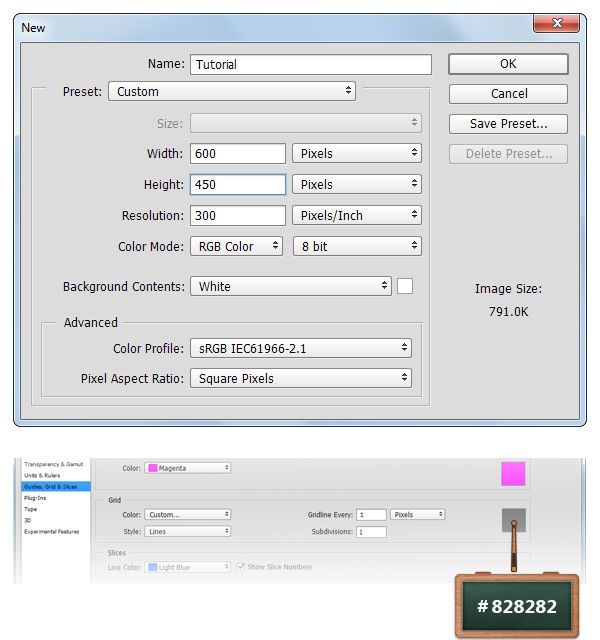
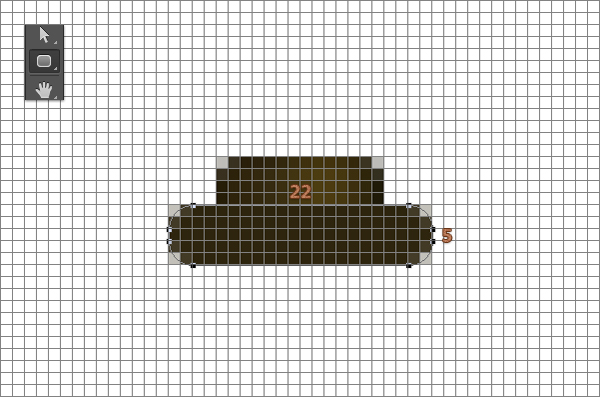
Create a 600 x 450px document, go to View > Show > Grid to enable the Grid and then go to View > Snap To > Grid to enable the Snap to Grid. Hit Control + K to open the Preferences window, go to Guides, Grid & Slices and enter the settings mentioned in the next image. Along the tutorial I turn off the grid (Control + ‘) for you to have a better view. The grid will make it easier for you to create the shapes.
Step 2
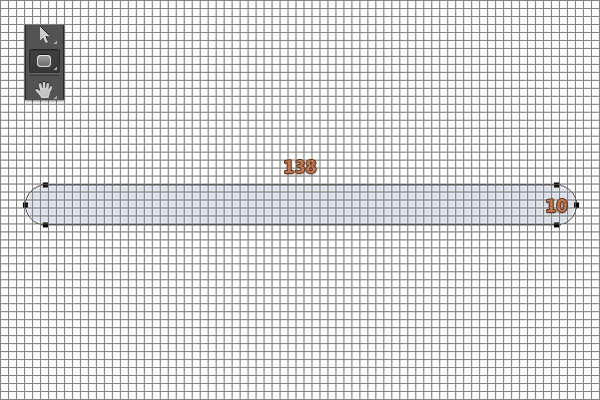
Concentrate on your Toolbar and set the foreground color to #DCE0E8.
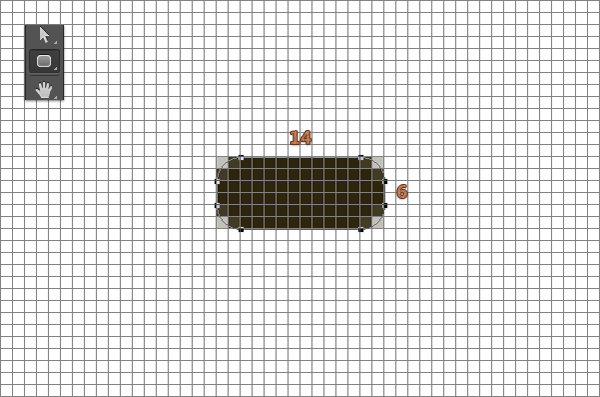
Select the Rounded Rectangle Tool, focus on the top bar and set the Radius to 5px. Move to your canvas and create a 138 x 10px vector shape.
Step 3
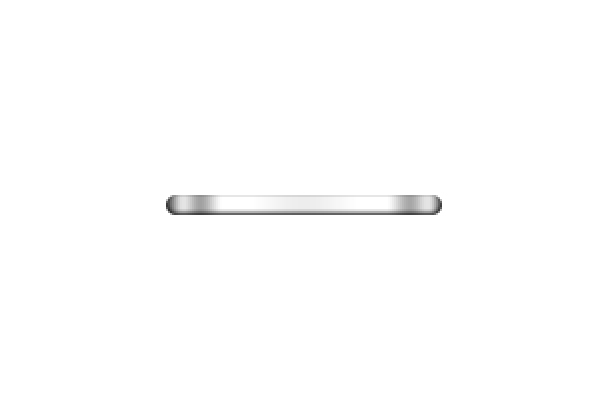
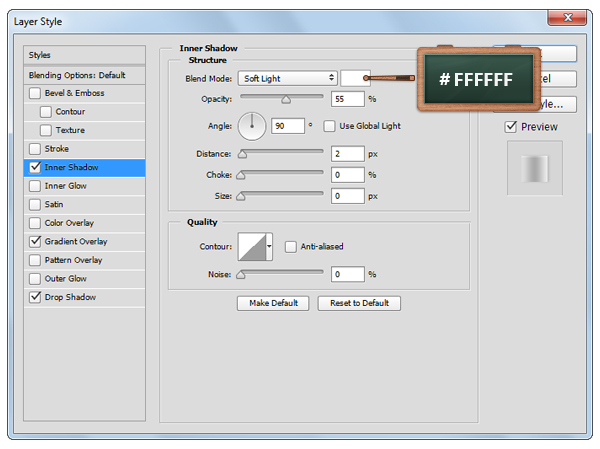
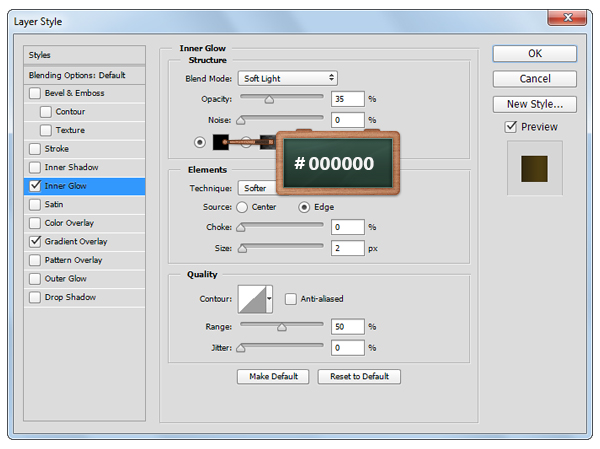
Open the Layer Style window for the vector shape made in the previous step and enter the settings shown below.
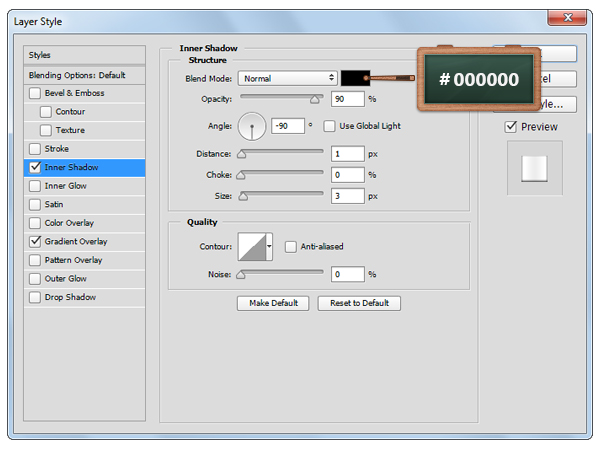
Step 4
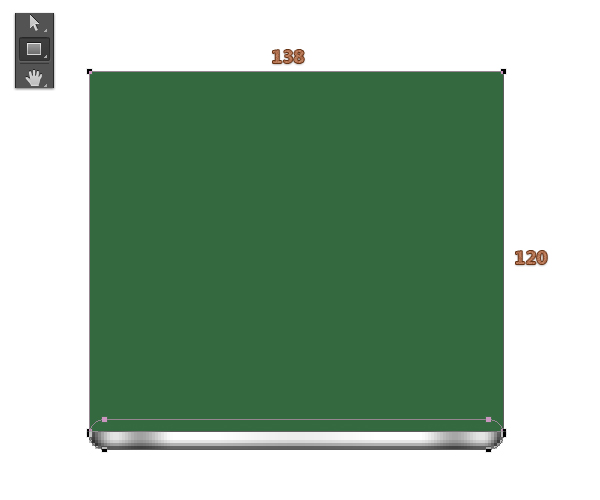
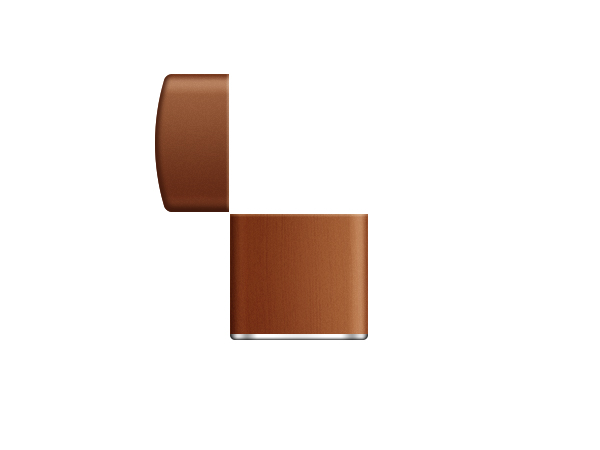
Set the foreground color to #34693F and pick the Rectangle Tool.
Move to your canvas, create a 138 x 120px vector shape and place it as you can see below.
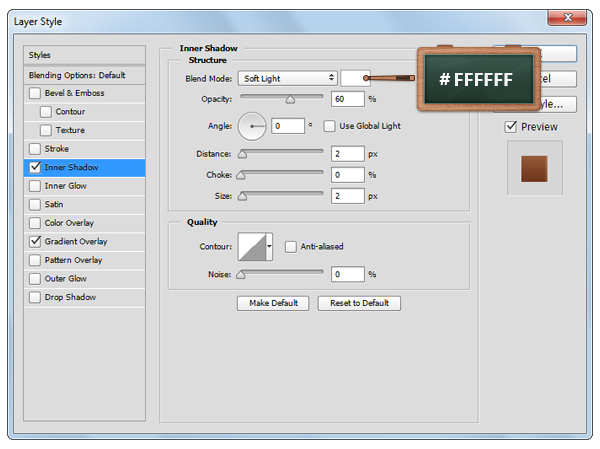
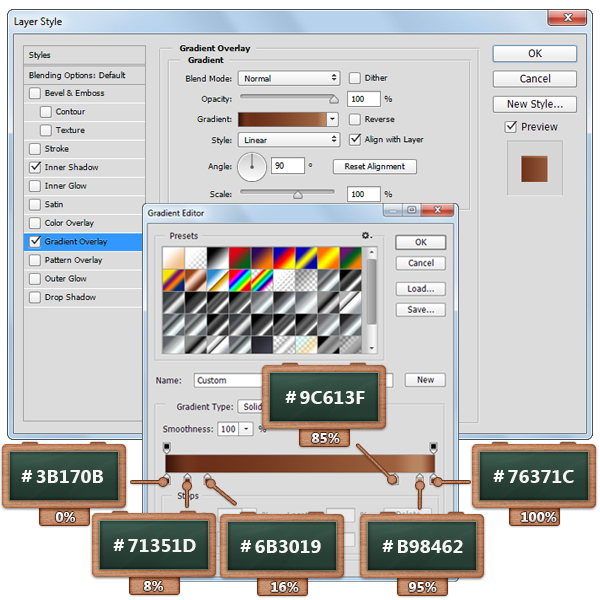
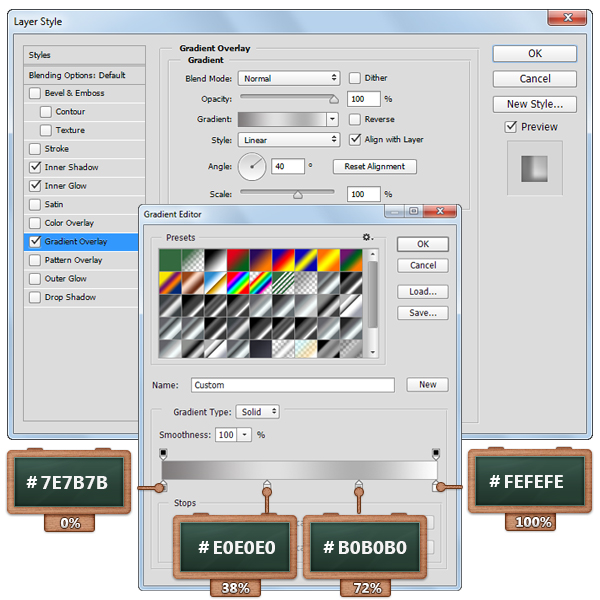
Step 5
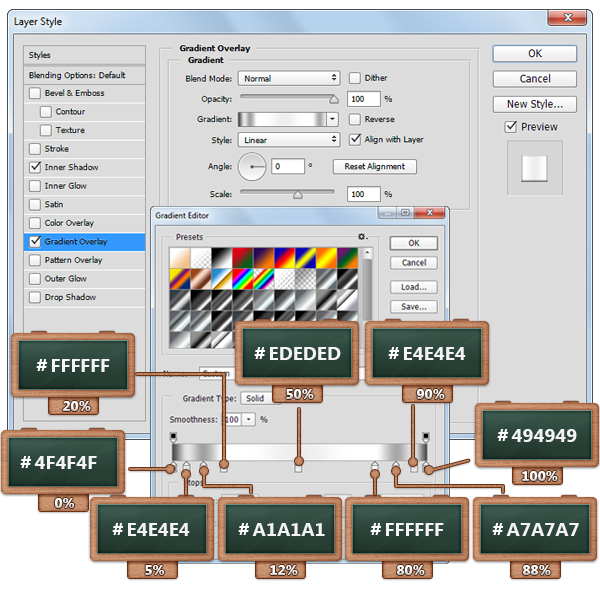
Open the Layer Style window for the vector shape made in the previous step and enter the settings shown below.


Step 6
Focus on the Layers panel, select the rectangle vector shape and hit the Control + J keyboard shortcut to duplicate it.
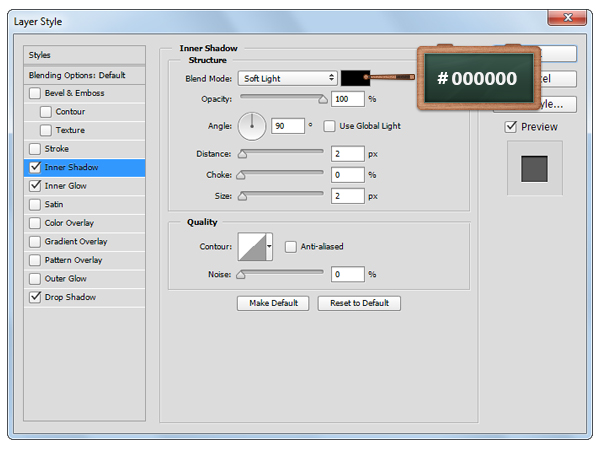
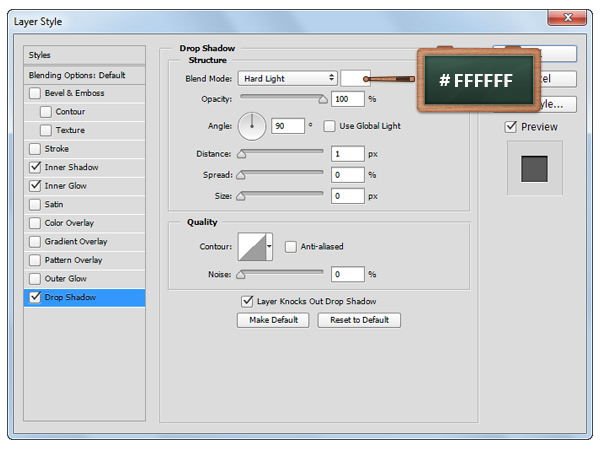
Right click on this fresh copy, go to Clear Layer Style and lower the Fill to 0%.
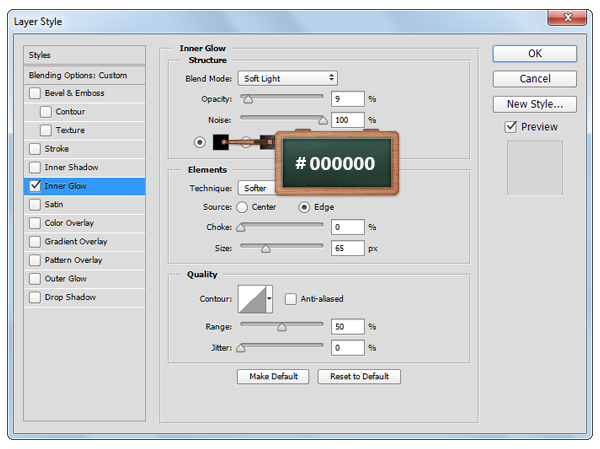
Open the Layer Style window for this copy and enter the settings shown below.
Step 7
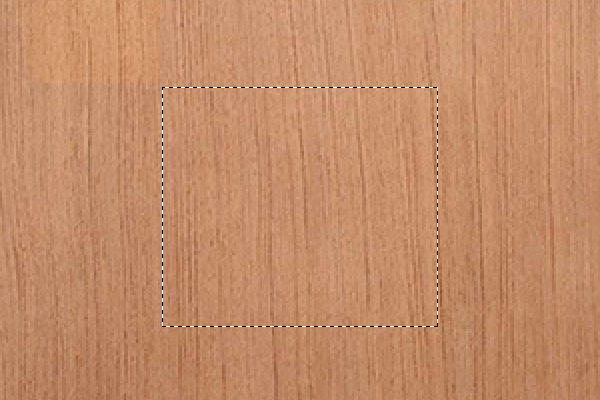
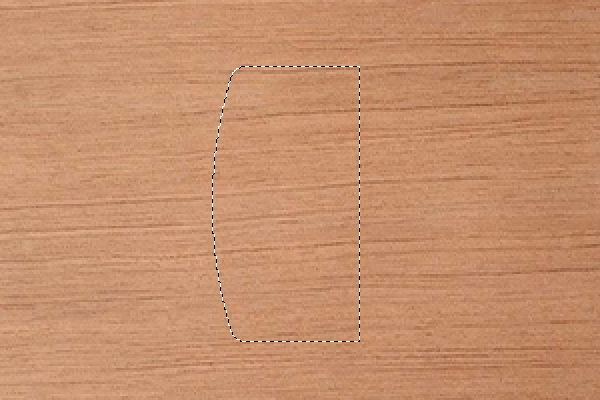
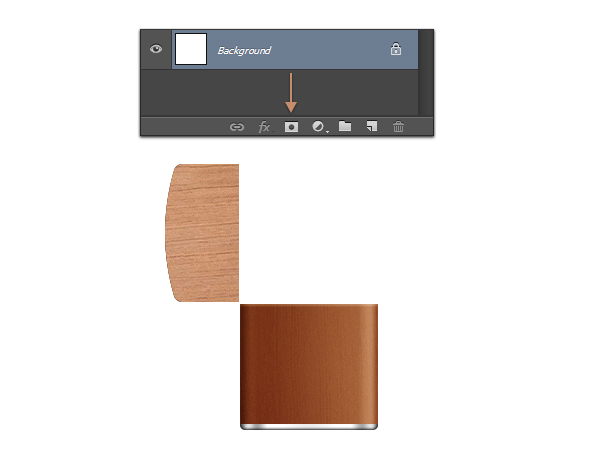
Import the “BUBINGA” texture from this wood textures pack and place it over the vector shapes.
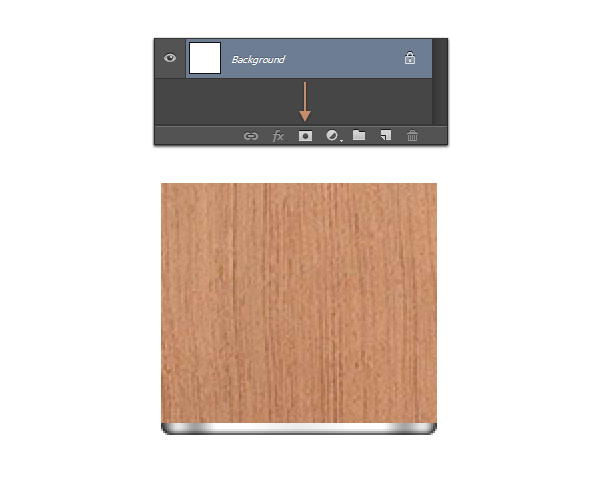
Focus on your Layers panel, hold the Control button on your keyboard and then click on the thumbnail icon of the rectangle vector shape layer to load a simple selection around it.
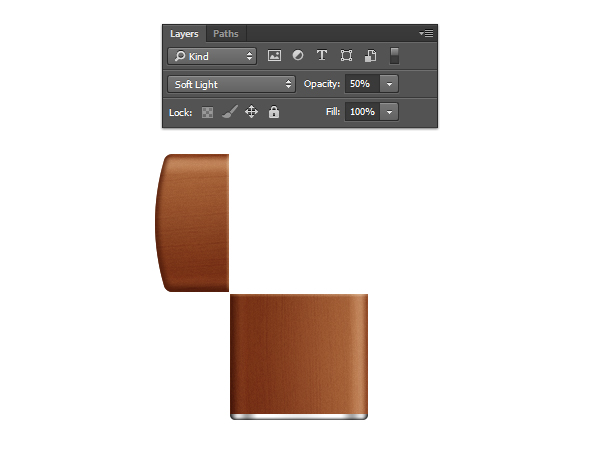
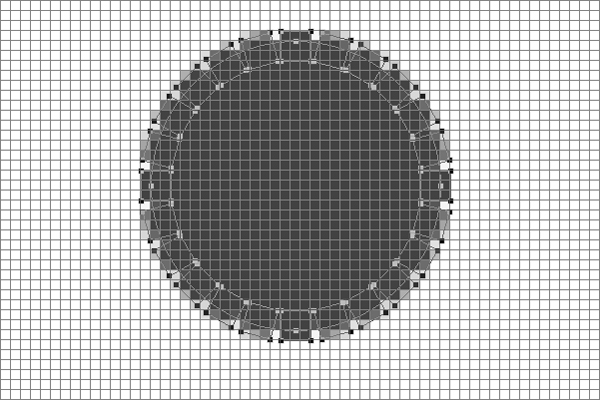
Now, make sure that your texture is selected, click on the Add Layer Mask button and then change the Blend Mode to Soft Light and lower the Opacity to 50%.

Step 8
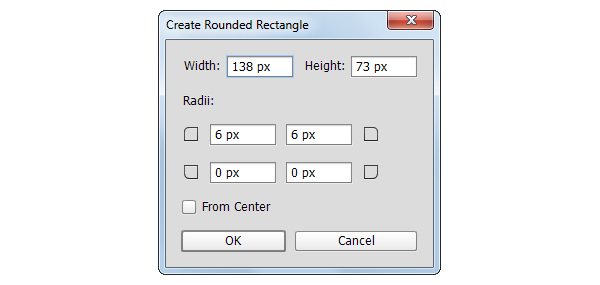
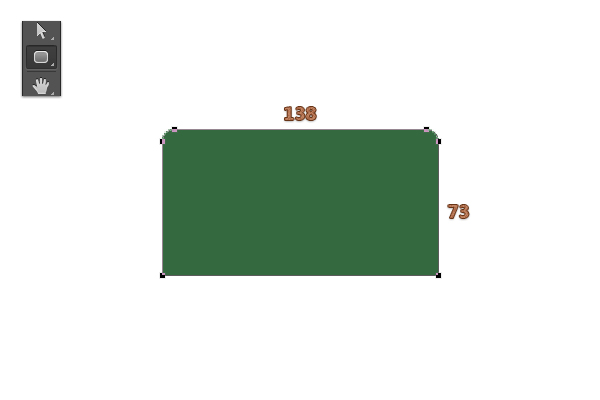
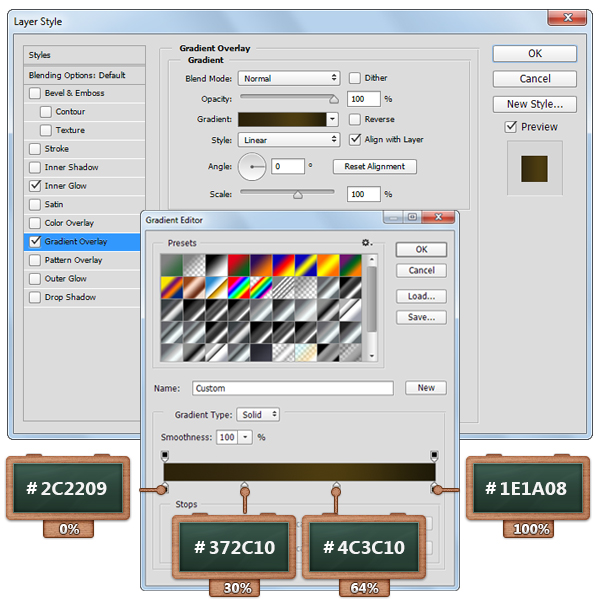
Select the Rounded Rectangle Tool and click on your canvas to open the “Create Rounded Rectangle” window.
Enter the settings shown in next image and then click the Ok button.
Step 9
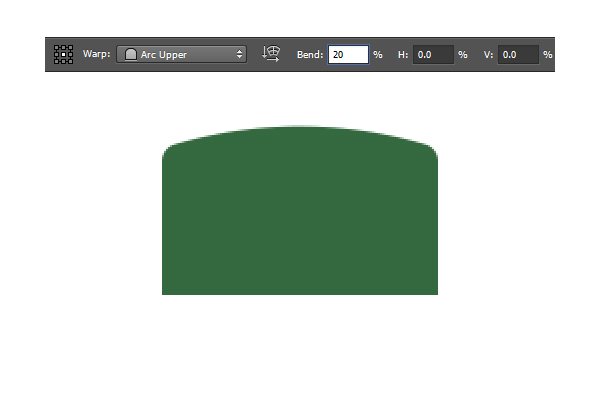
Make sure that the vector shape made in the previous step is still selected, go to Edit > Transform > Warp, select Arc Upper, set the Bend to 20 and then hit Enter.
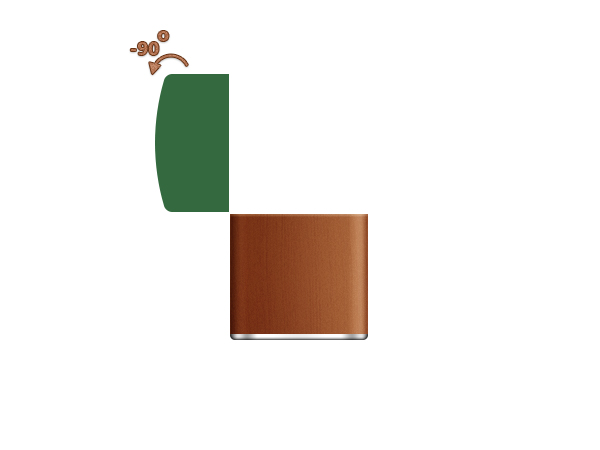
Hit Control + T and simply rotate this vector shape to -90 degrees, as you can see in the second image.
Step 10
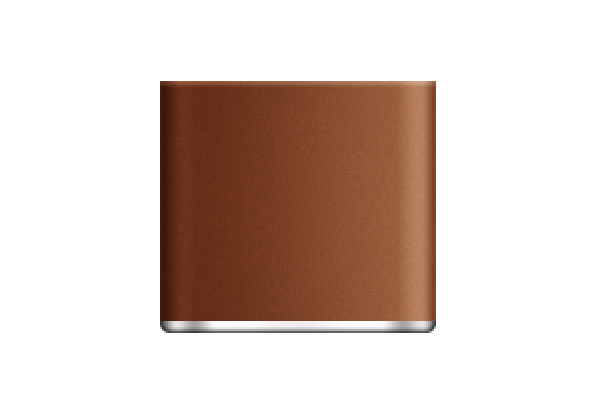
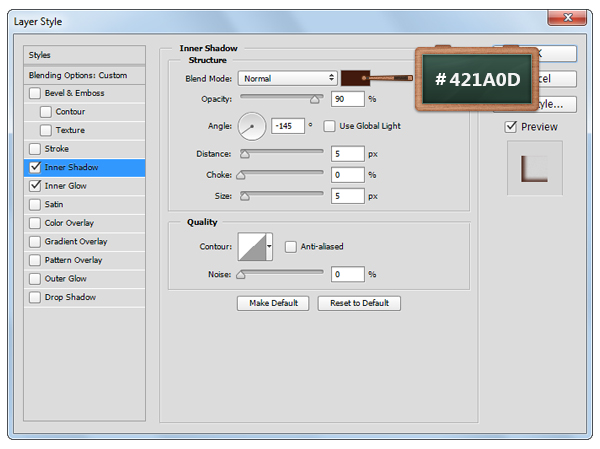
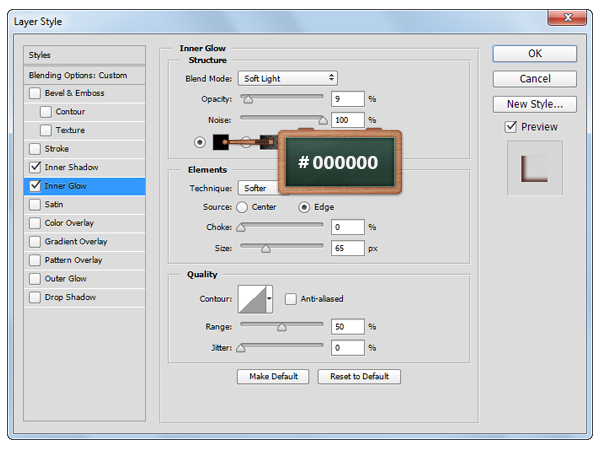
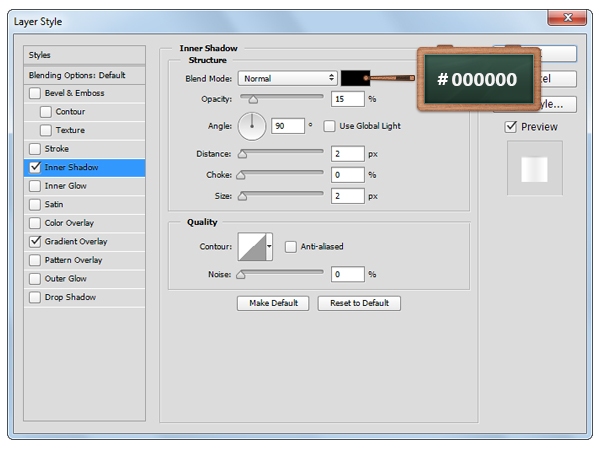
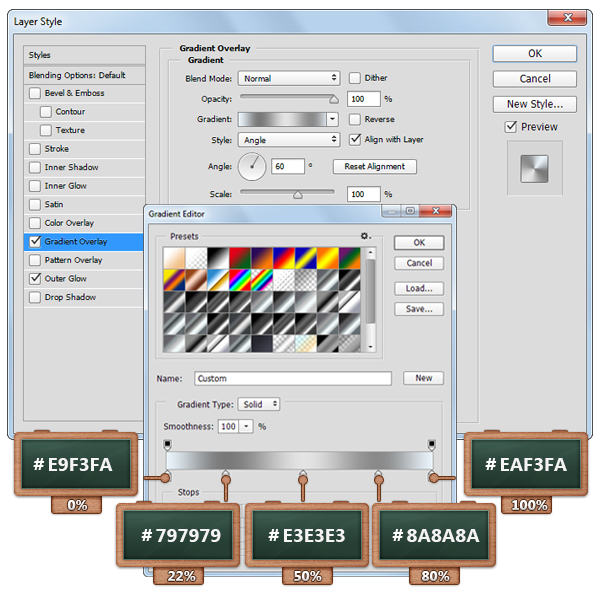
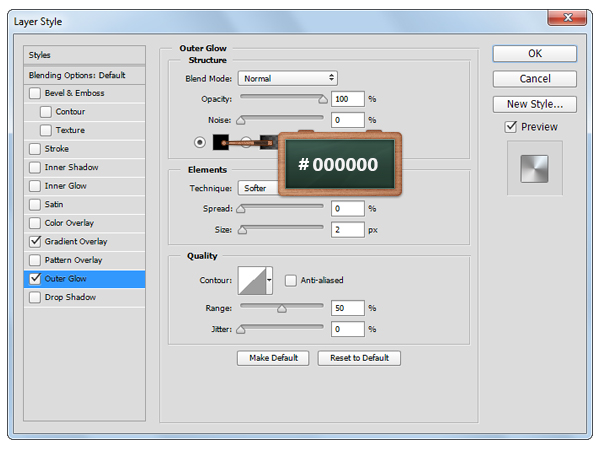
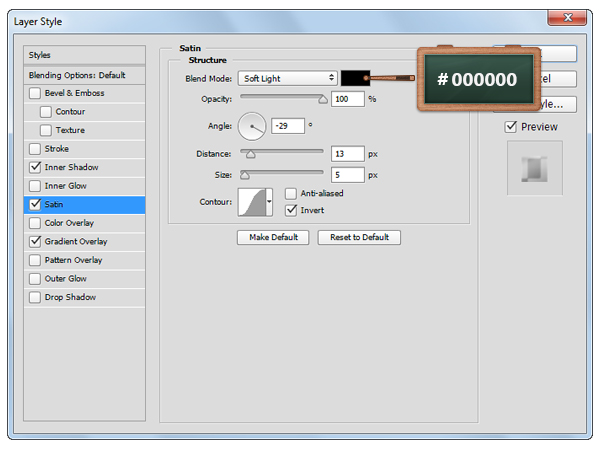
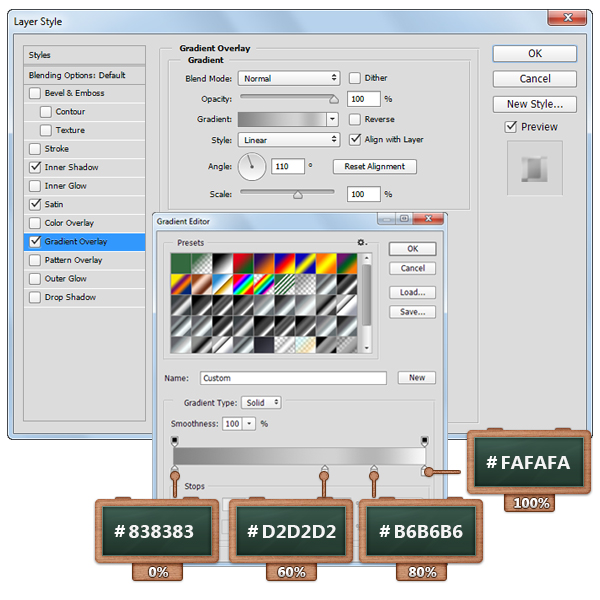
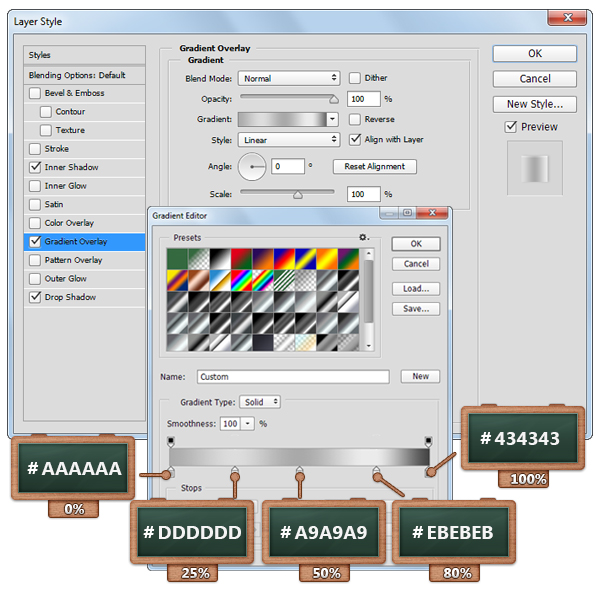
Open the Layer Style window for the green vector shape and enter the settings shown in the next images.

Step 11
Focus on the Layers panel, make sure that the vector shape edited in the previous step is still selected and duplicate it ( Control + J ).
Select the copy, lower the Fill to 0% and then open the Layer Style window and enter the settings shown below.
Step 12
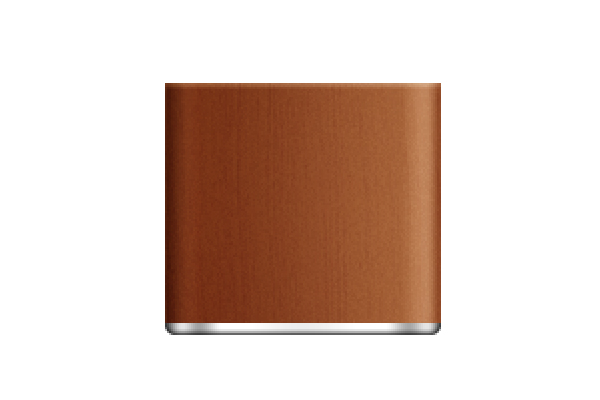
Import again that same wood texture, hit Control + T and rotate it to -90 degrees.
Load a selection around the shape that makes your lighter’s cap, select the texture added in this step and click again that same Add Layer Mask button.
Keep focusing on the Layers panel and change the Blend Mode to Soft Light and lower the Opacity to 50%.
Step 13
Select the Rectangle Tool, create a 138 x 6px vector shape and place it as you can see in the first image.
Make sure that the vector shape created in this step is selected, go to Edit > Transform > Warp, select Arc Upper, set the Bend to 10 and then hit Enter.


Step 14
Open the Layer Style window for the vector shape made in the previous step and enter the settings shown in the next images.

Step 15
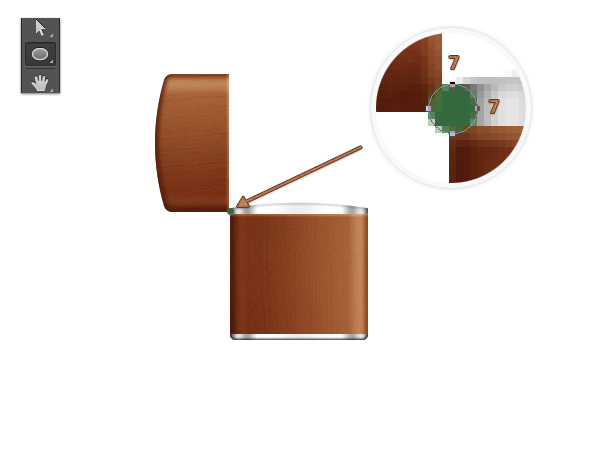
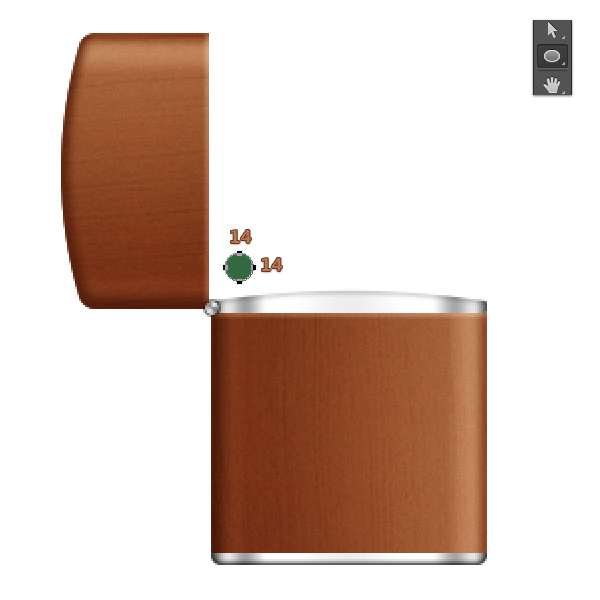
Pick the Ellipse Tool, create a 7 x 7px vector shape and place it as you can see in the first image.
Open the Layer Style window for this vector shape and enter the settings shown below.
Step 16
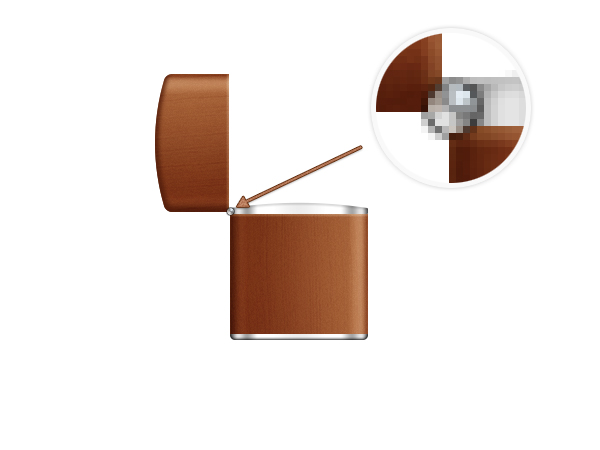
With the same tool, create a 14 x 14px vector shape and place it as you can see in the first image.
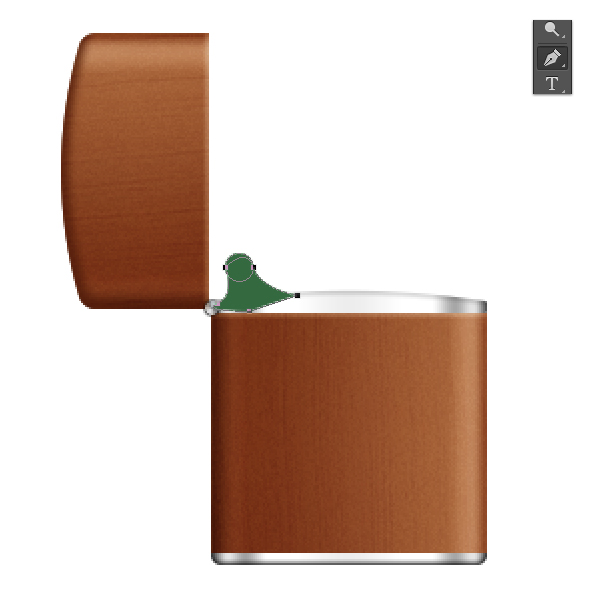
Pick the Pen Tool and create a vector shape roughly as you can see in the second image.
Focus on the Layers panel, select the vector shapes made in this step, right click on one of them and go to Merge Shapes.
Select this fresh vector shape and hit Shift + Control + [ once, to move it behind the rest of the shapes.

Step 17
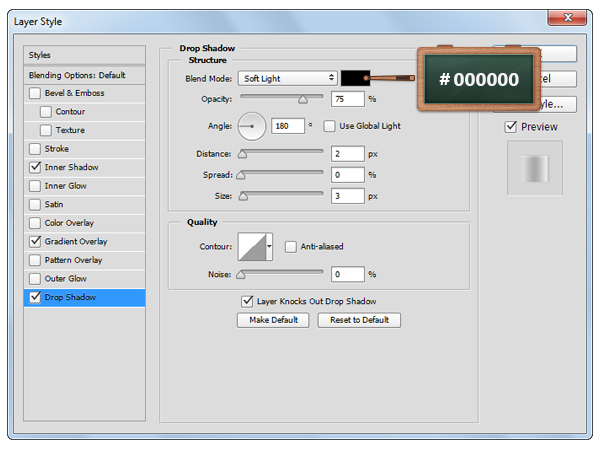
Open the Layer Style window for the vector shape made in the previous step and enter the settings shown in the next images.

Step 18
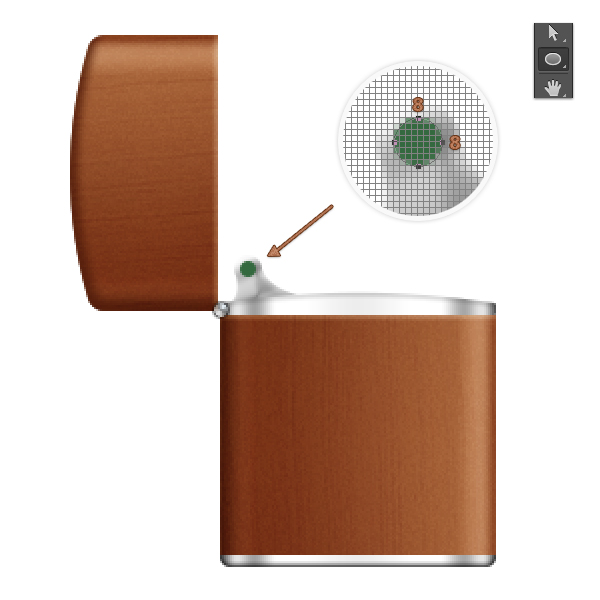
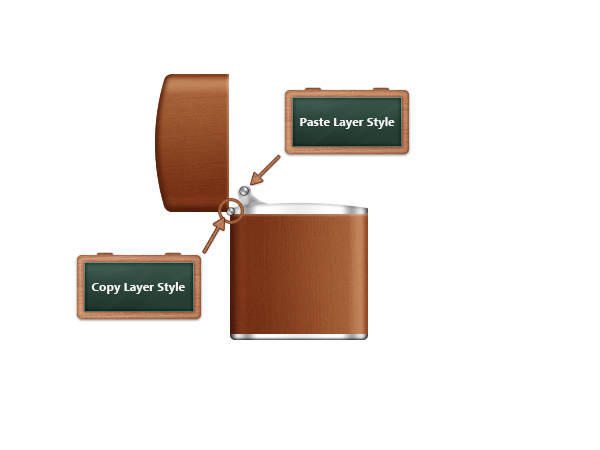
Grab the Ellipse Tool, create a 8 x 8px vector shape and place it as you can see in the first image.
Focus on the Layer panel, select the vector shape highlighted in the second image, right click on it and go to Copy Layer Style.
Select the vector shape made in this step, right click and simply go to Paste Layer Style.
Step 19
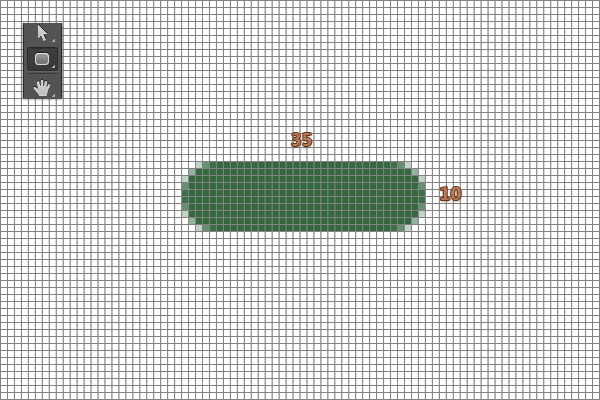
Select the Rounded Rectangle Tool, set the Radius to 5px from the top bar and create a 35 x 10px vector shape.
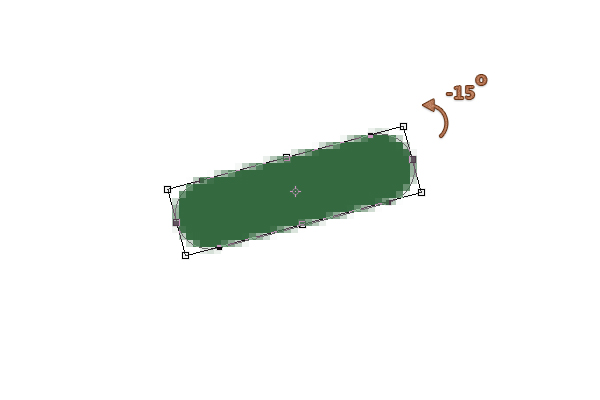
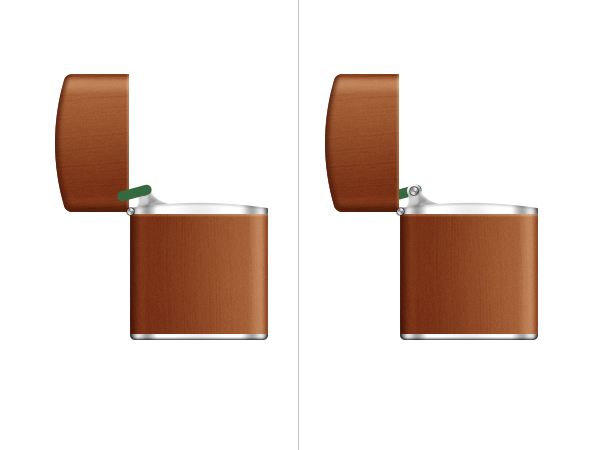
Hit Control + T, rotate it to -15 degrees and then place it as you can see in the third image.
Remember that you can easily send it to back using the Shift + Control + [ keyboard shortcut.
Step 20
Open the Layer Style window for the vector shape made in the previous step and enter the settings shown in the next images.


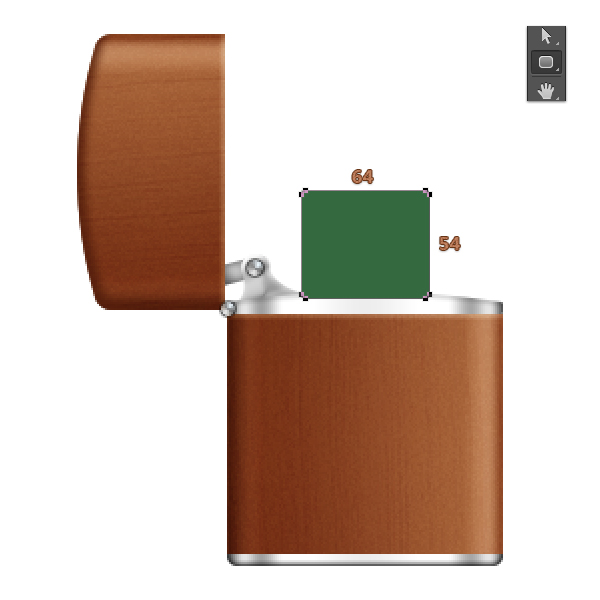
Step 21
Select the Rounded Rectangle Tool and set the Radius to 2px from the top bar.
Move to your canvas, create a 64 x 54px vector shape and place it as you can see below.
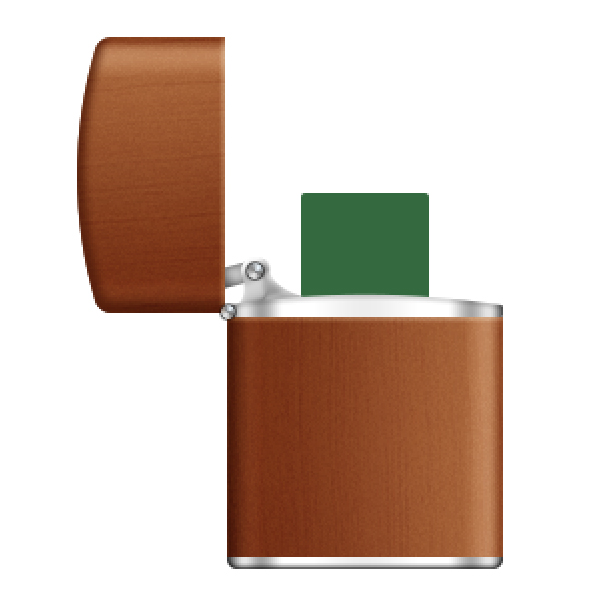
Step 22
Open the Layer Style window for the vector shape made in the previous step and enter the settings shown in the next images.

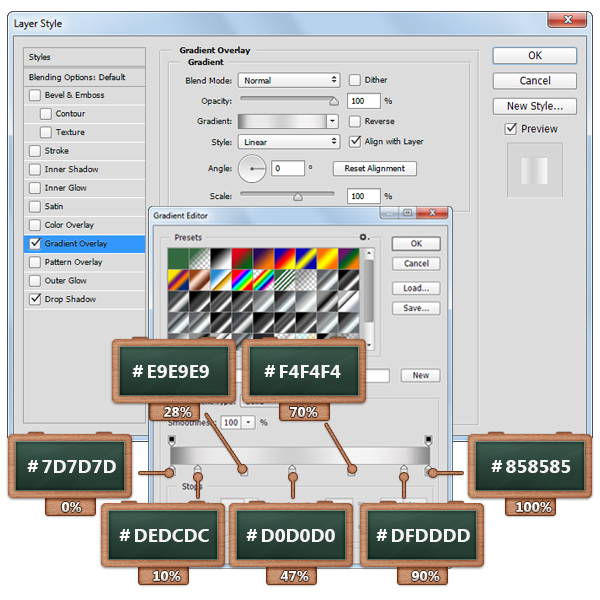
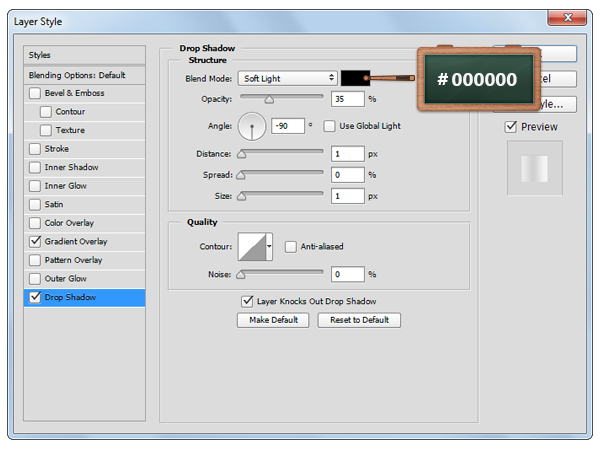
Step 23
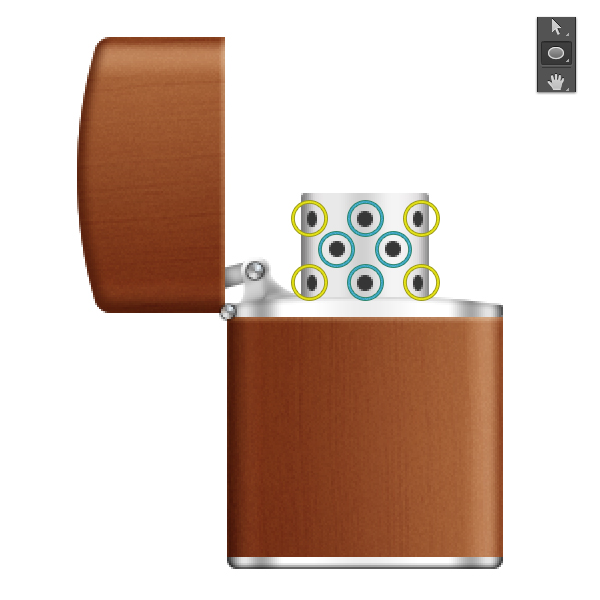
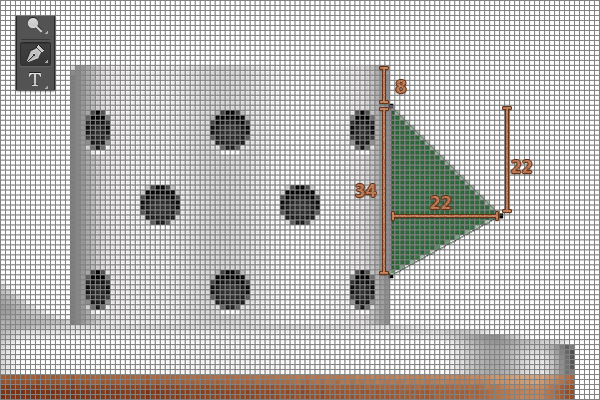
Set the foreground color to #363636 and pick the Ellipse Tool and create the eight shapes shown in the following image.
Keep in mind that the shapes highlighted by the yellow circles should be 5px wide and 8 px tall while the shapes highlighted by the blue circles should be 8 px circles.
Step 24
Open the Layer Style window for the vector shapes made in the previous step and enter the settings shown in the next images.

Step 25
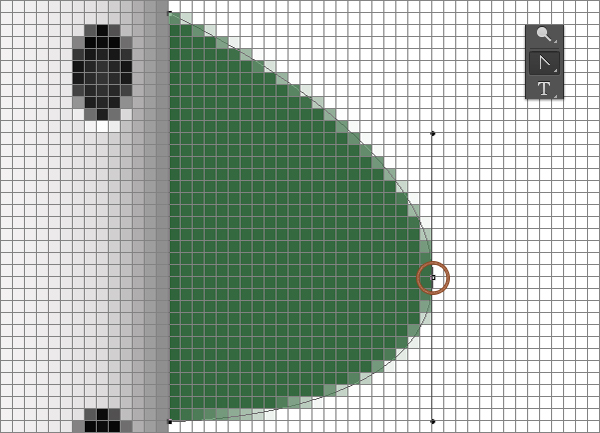
Pick the Pen Tool and create a triangle vector shape as you can see in the first image.
Grab the Convert Point Tool and then click and drag the highlighted handles as you can see in the second image.
Step 26
Open the Layer Style window for the vector shape made in the previous step and enter the settings shown in the next images.
Step 27
Focus on the Layers panel, select and duplicate the pointed vector shape.
Select this fresh copy and place it in the highlighted point.
Step 28
Set the foreground color to #424242, pick the Ellipse Tool and create a 29 x 29px vector shape.
Grab the Rectangle Tool, create two, 3 x 3px vector shapes and then place them as you can see in the second image.
Focus on the Layers panel, select the rectangles made in this step, right click on one of these shapes and go to Merge Shapes.
Select this new vector shape, duplicate it , select the copy and rotate it 15 degrees.
Make sure that the copy is still selected and duplicate it. Select the newly copy and rotate it 15 degrees.
Now, repeat this technique until you get the result shown in the third image.
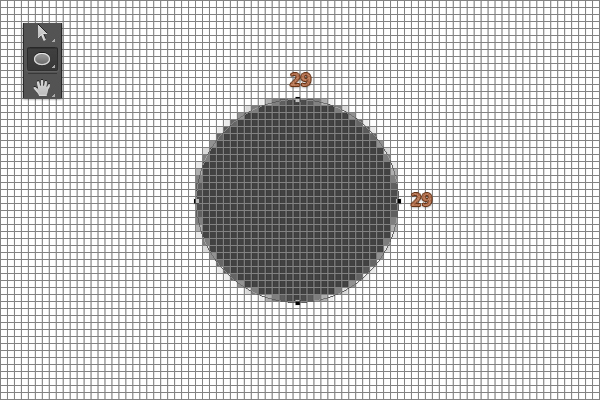

Step 29
Select all the vector shapes made in the previous step, click on one of them and go to Merge Shapes and then place it as you can see in the first image.
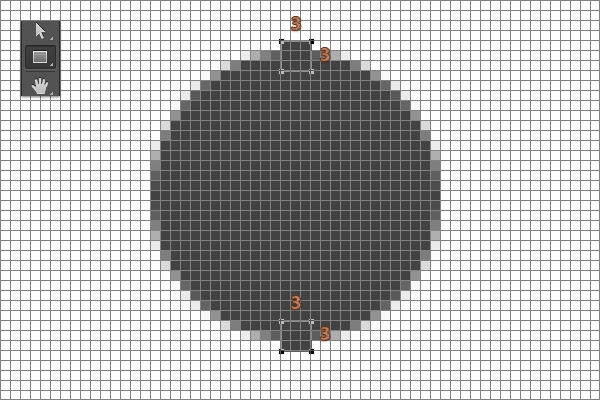
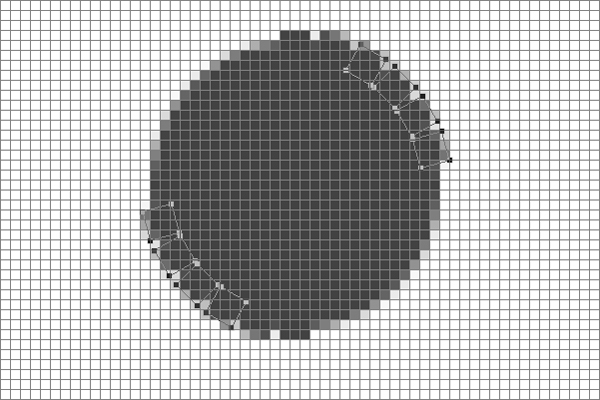
Open the Layer Style window for the vector shape made in this step and enter the settings shown in the next images.


Step 30
Set the foreground color to #2E250E, select the Rounded Rectangle Tool and set the Radius to 2px from the top bar.
Move to your canvas and create a 14 x 6px vector shape.
Open the Layer Style window for the vector shape made in this step and enter the settings shown in the next images.

Step 31
With the same tool, create a 22 x 5px vector shape and place it as you can see in the first image.
Open the Layer Style window for this vector shape and enter the settings shown below.
Select the vector shape created in this step along with the vector shape made in the previous step and place them as you can see in the last image.

Step 32
Focus on the Layers panel, select the Background layer and click on the padlock icon to unlock the layer.
Set the foreground color to #9CACAD, grab the Paint Bucket Tool and fill the canvas with your new color.
Open the Layers Style window for the layer unlocked in this step and enter the settings shown in the next images.


Step 33
Focus on the Layer panel, select the vector shapes that make up the Zippo lighter and hit Control + G to group them.
Open the Layer Style window for this group and enter the settings shown below.

Step 34
Keep focusing on the Layers panel and duplicate the group made in the previous step.
Select the group copy, lower the Fill to 0% , open the Layer Style window for this group, go to the Drop Shadow section and replace the existing settings with the ones shown below.


And We’re Done!
Here is how your final result should look.