
In the following tutorial you will learn how to create a simple web badge using Photoshop.
Final Image
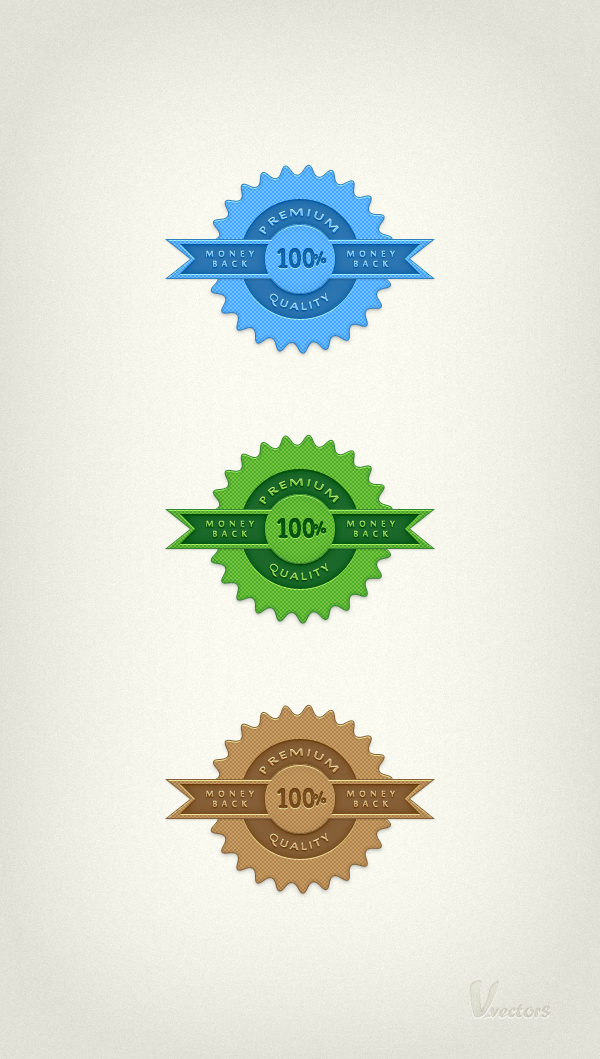
As always, this is the final image that we’ll be creating:
Resources
Step 1
Open Photoshop and hit Control + N to create a new document. Enter all the data shown in the following image and click OK.
Enable the Grid (View > Show > Grid) and the Snap to Grid (View > Snap To > Grid).
For the moment you need a grid every 5px. Go to Edit > Preferences > Guides, Grid & Slices and focus on the Grid section. Enter 5 in the Gridline Every box and 1 in the Subdivision box. Also, set the color of the grid to #a7a7a7.
Once you set all these properties click OK. Don’t get discouraged by all that grid. It will ease your work later.
You should also open the Info panel (Window > Info) for a live preview with the size and position of your shapes.

Step 2
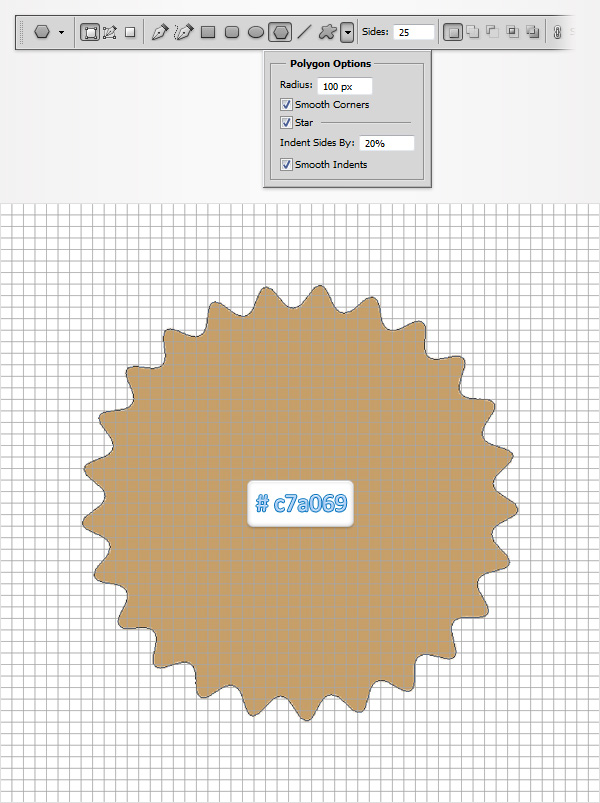
Pick the Polygon Tool and focus on the top bar. Enter 25 in the Sides box then click on the little black arrow to open the Polygon Options menu.
Check all three boxes then enter a 100px radius and a 20% indent.
Set the foreground color to #c7a069 and create your shape as shown in the following image.
Step 3
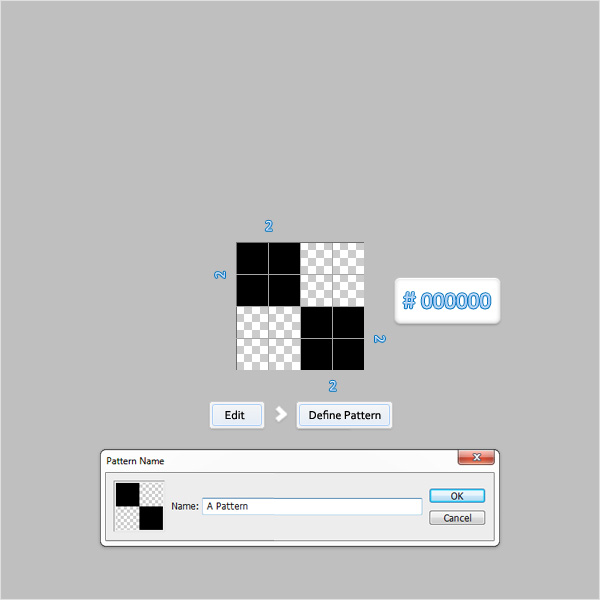
Next, you need to create a simple pattern. First, hit Control + N to create a new document. Enter 4 in the width and height boxes and click OK.
The Grid and the Snap to Grid should be already enabled. For this new document you need a grid every 1px. Simply go to Edit > Preferences > Guides, Grid & Slices and enter 1 in the Gridline Every box.
Move to the Layers panel and delete the “Background” layer. Set the foreground color to black and grab the Rectangle Tool. Create two, 2 by 2px vector paths and place them as shown in the following image.
Now, simply go to Edit > Define Pattern. Pick a name for your pattern, click OK and you got your pattern.
Close this document and return to the first one.
Step 4
Return to “gridline every 5px”. So, go to Edit > Preferences > Guides, Grid & Slices and enter 5 in the Gridline Every box.
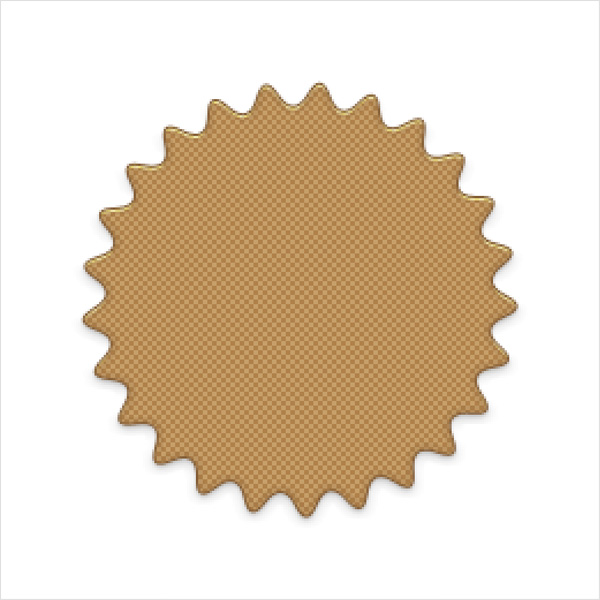
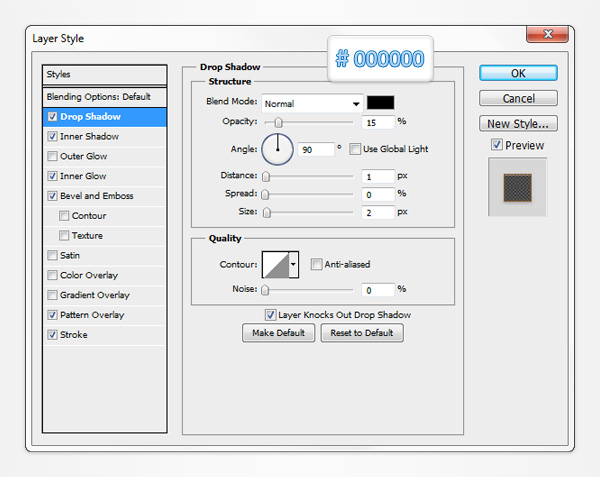
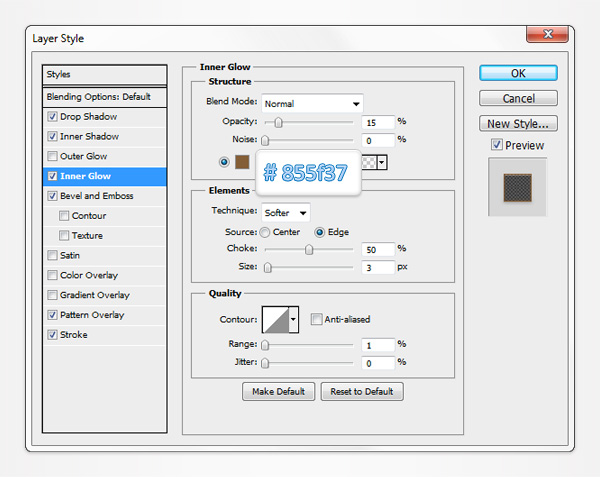
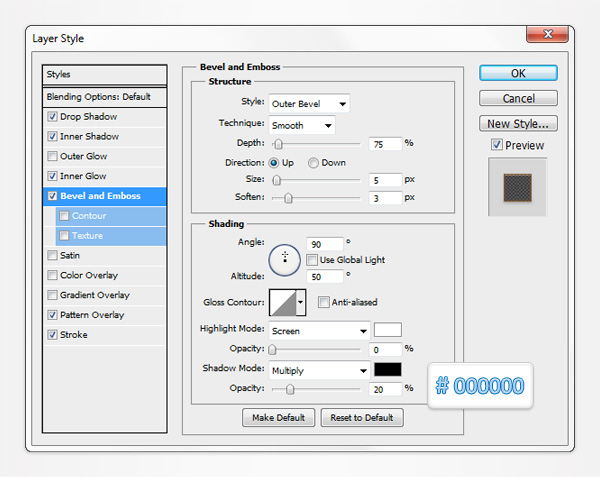
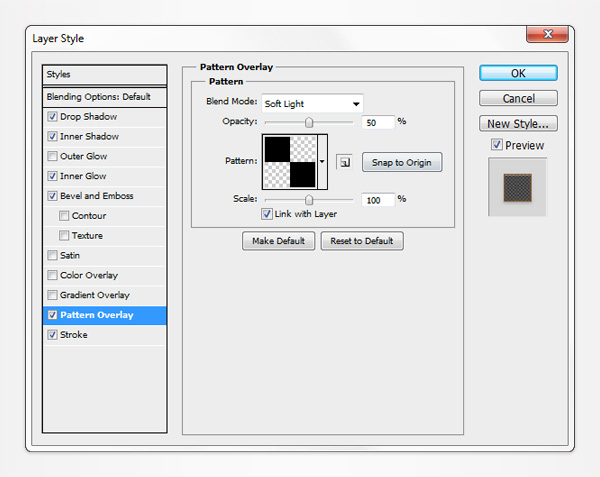
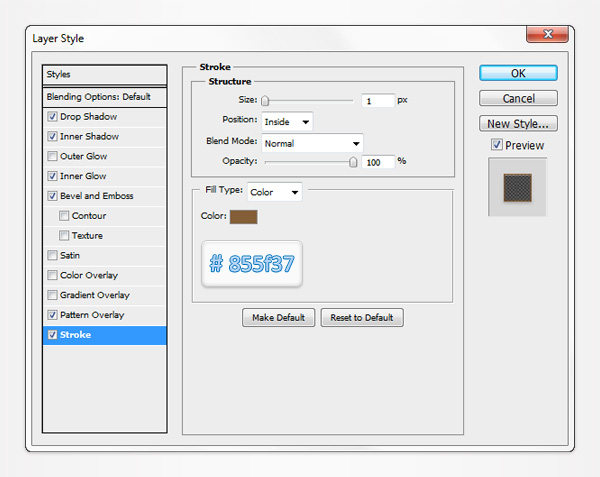
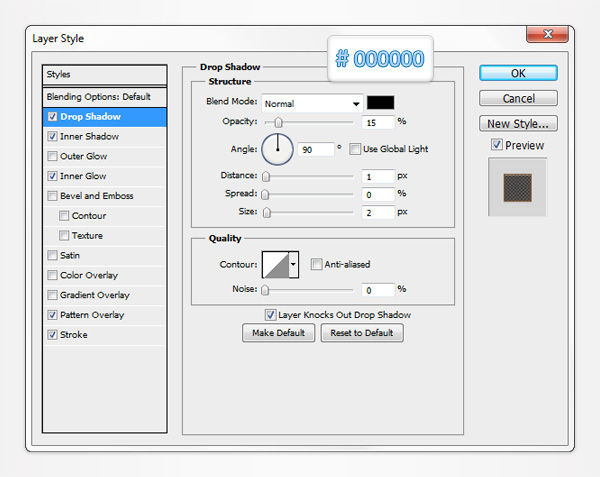
Focus on the Layers panel and double click on the vector shape made in the second step to open the Layer Style window.
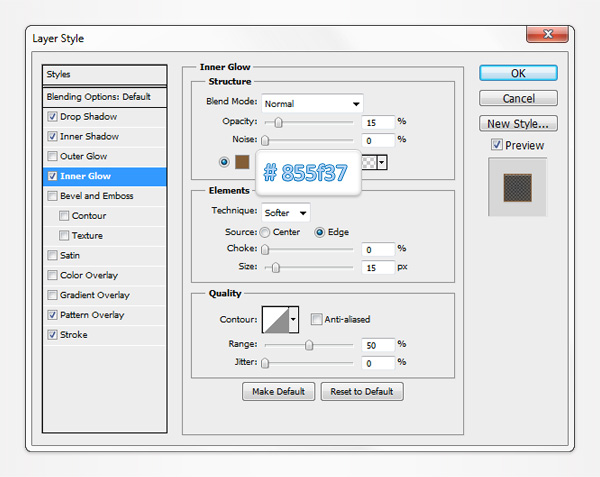
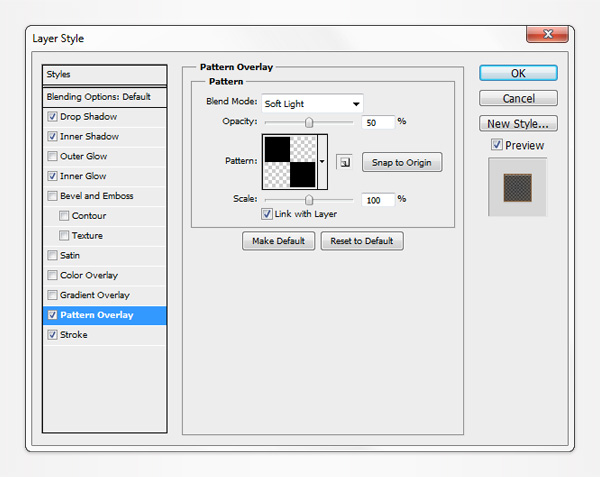
Enter the properties shown in the following images and click OK. For the Pattern Overlay section you need to use the pattern made in the previous step.

Step 5
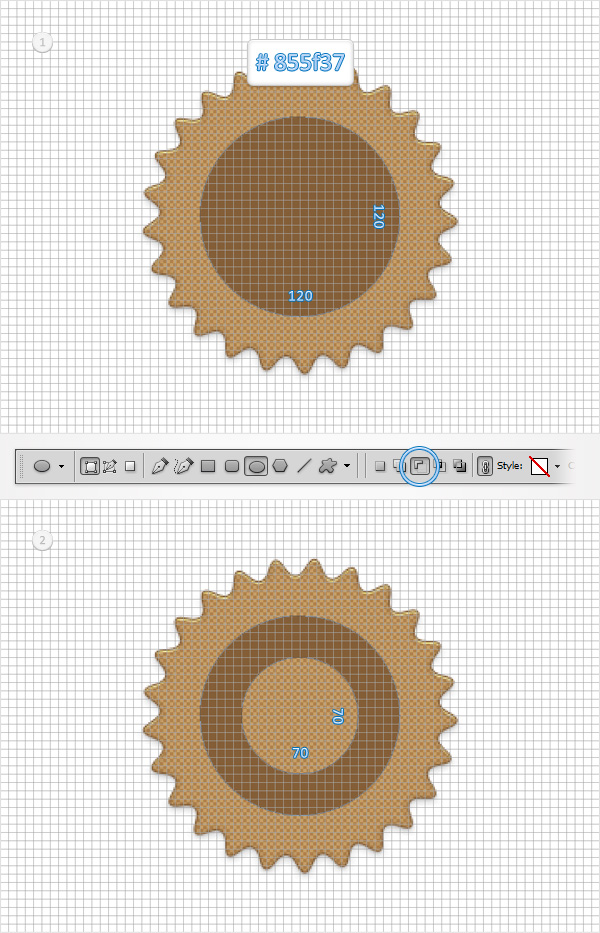
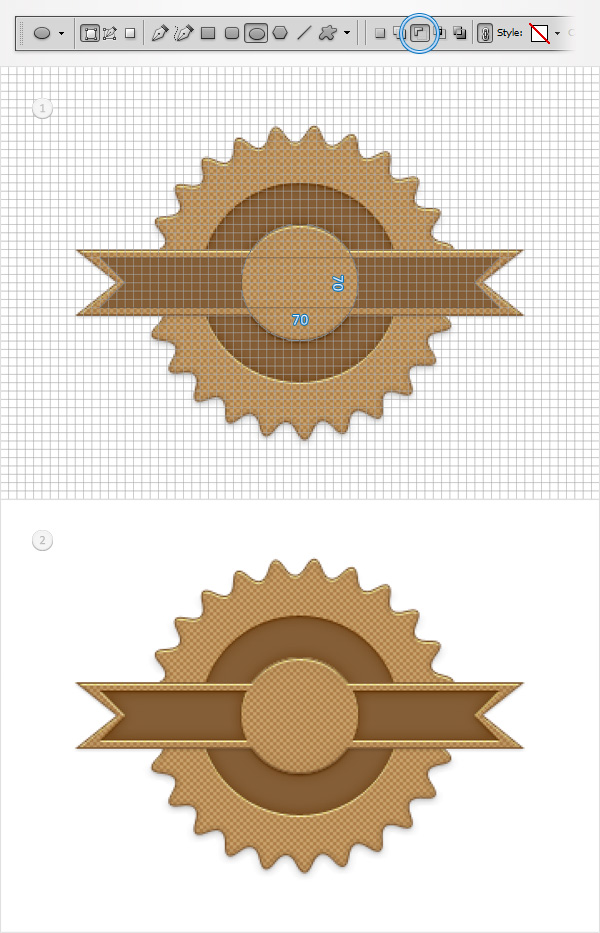
Set the foreground color to #855f37, pick the Ellipse Tool, create a 120px circle and place it as shown in the first image. Make sure that this new vector shape stays selected, continue with the Ellipse Tool, check the Subtract button from the top bar and create a 70px circle as shown in the second image.
Step 6
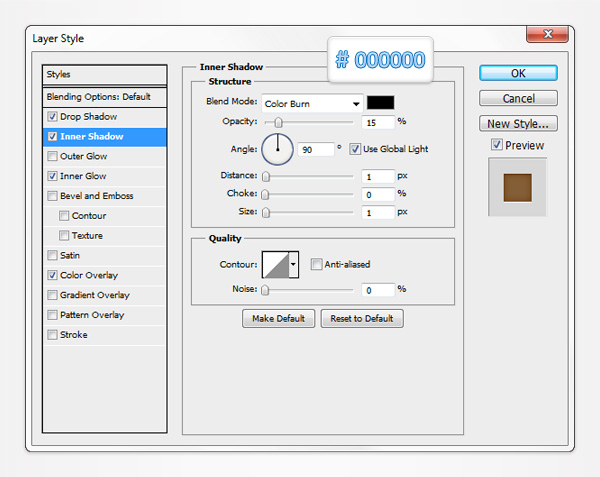
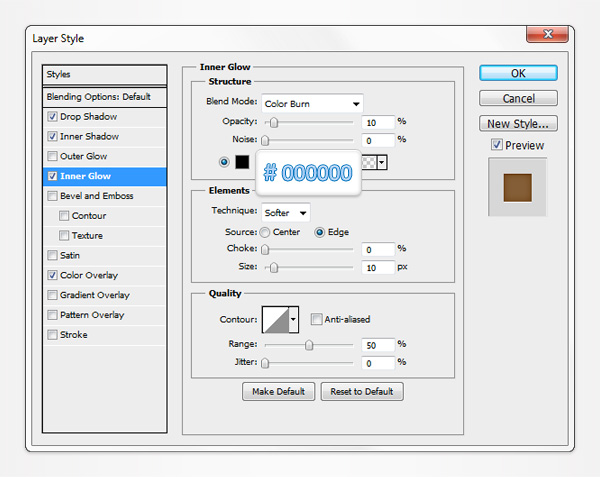
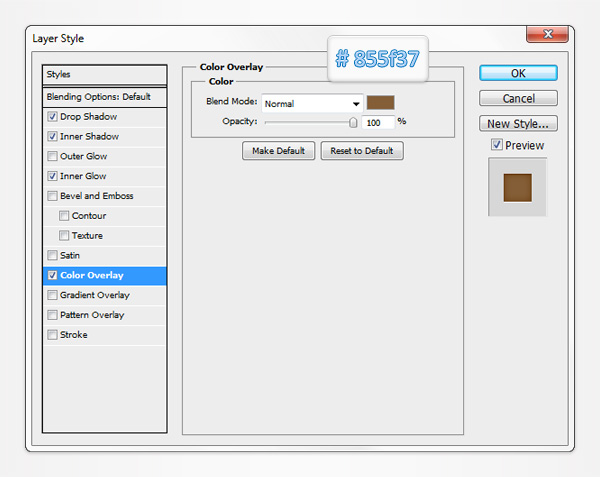
Open the Layer Style window for the vector shape made in the previous step and enter the properties shown in the following images.


Step 7
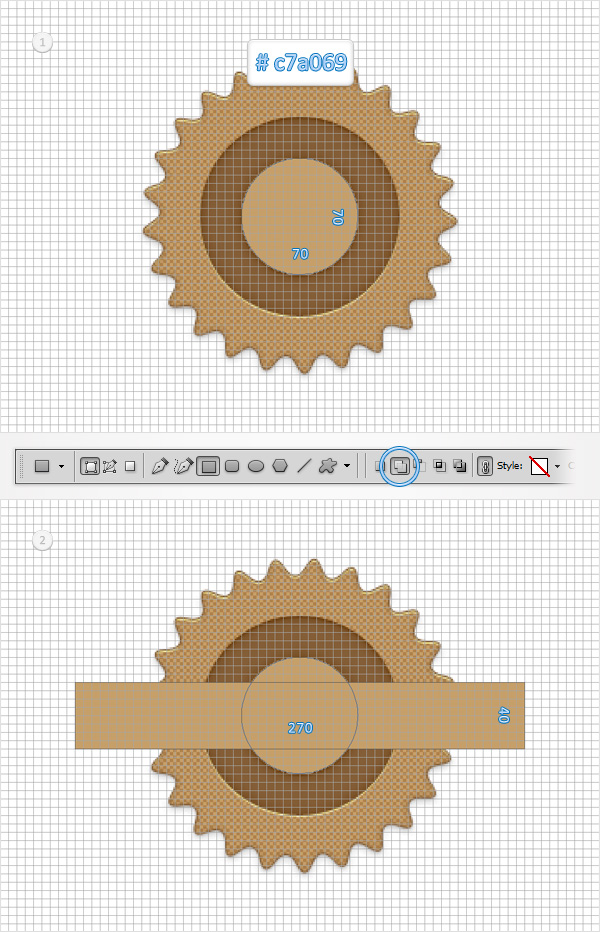
Set the foreground color to #c7a069, pick the Ellipse Tool, create a 70px circle and place it as shown in the first image. Make sure that this new vector shape stays selected and switch to the Rectangle Tool.
Check the Add button from the top bar and create a 270 by 40px rectangle as shown in the second image.
Step 8
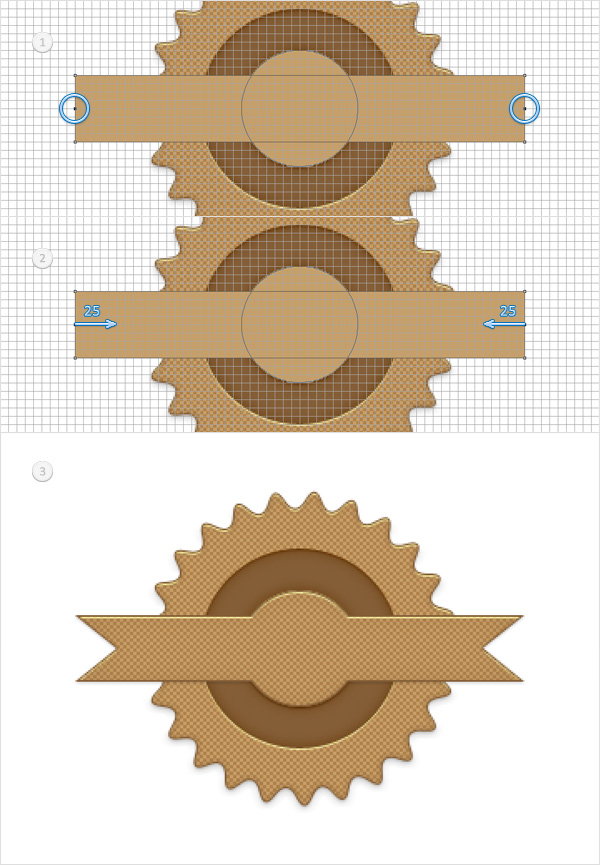
Make sure that the vector shape made in the previous step is still selected. Grab the Add Anchor Point Tool and add two new anchor points as shown in the first image.
Switch to the Convert Point Tool and click on both anchor points. Next, you need to move these new anchor points.
Pick the Direct Selection Tool, select the left anchor point and move it 25px to the right then select the right anchor point and move it 25px to the left. In the end your vector shape should look like in the third image.
Open the Layer Style window for this vector path and enter the properties shown in the following images.


Step 9
Set the foreground color to #855f37, pick the Rectangle Tool, create a 240 by 30px vector shape and place it as shown in the first image. Grab the Add Anchor Point Tool and add two new anchor points as shown in the first image.
Switch to the Convert Point Tool and click on both anchor points.
Pick the Direct Selection Tool, select the left anchor point and move it 15px to the right then select the right anchor point and move it 15px to the left. In the end your vector shape should look like in the third image.

Step 10
Make sure that the vector shape made in the previous step is still selected. Pick the Ellipse Tool, check the Subtract button from the top bar and create a 70 by 70px circle as shown in the first image.
Open the Layer Style window for this vector path and enter the properties shown in the following images.
Step 11
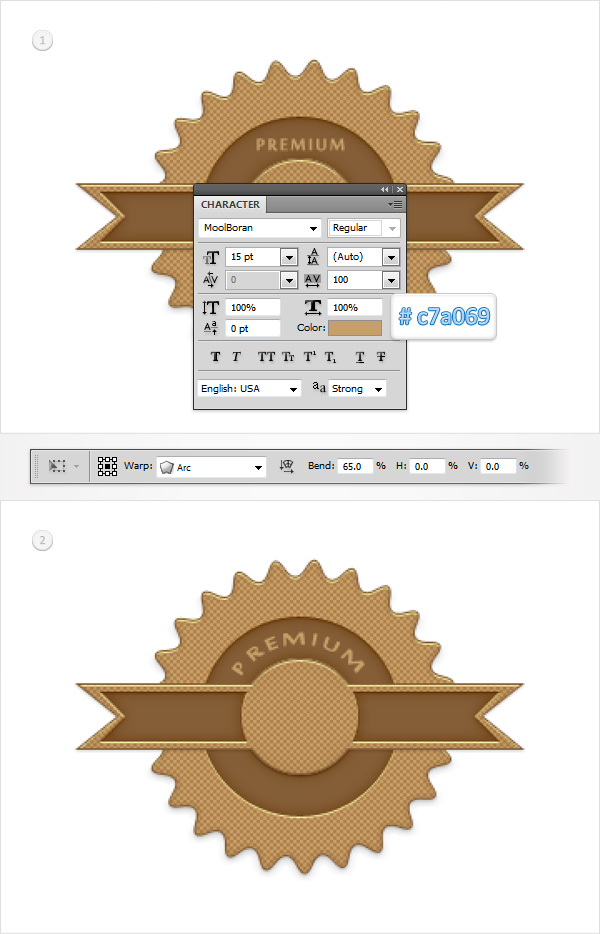
Set the foreground color to #c7a069, pick the Type Tool and add “PREMIUM” as shown in the first image.
Use the MoolBoran font with the size set at 15pt. Select this piece of text and go to Edit > Transform > Warp.
Select Arc from the Warp drop-down menu, enter 65 in the Bend box and hit Enter.
Step 12
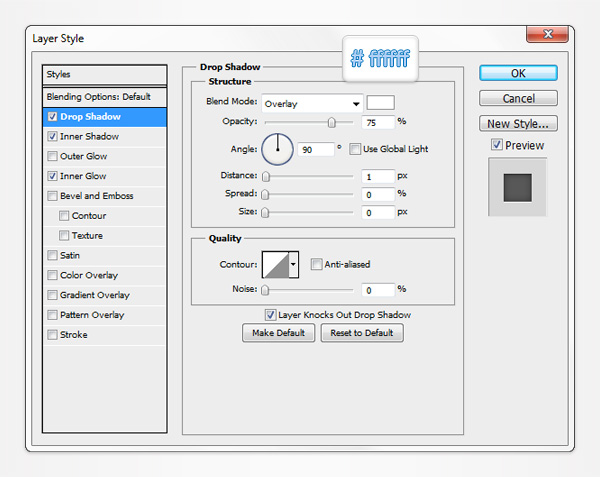
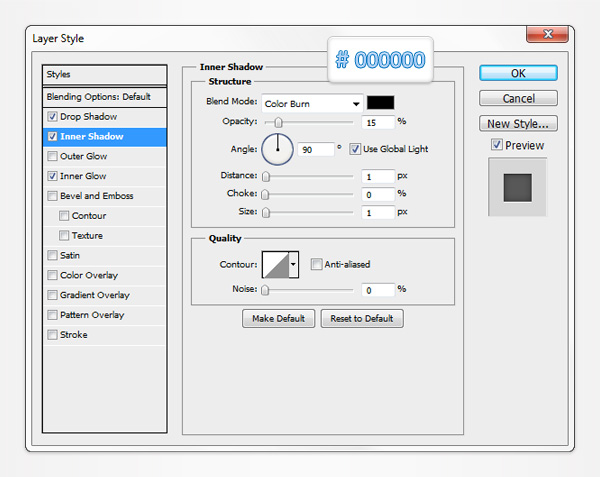
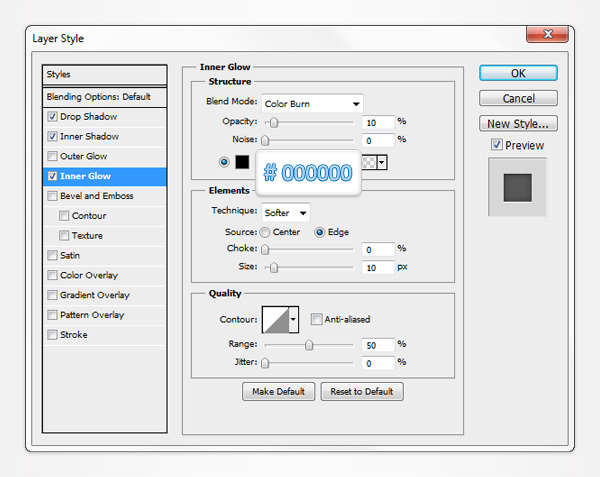
Open the Layer Style window for the text added in the previous step and enter the properties shown in the following image.
Move to the Layers panel, right click on this piece of text and click on Copy Layer Style.

Step 13
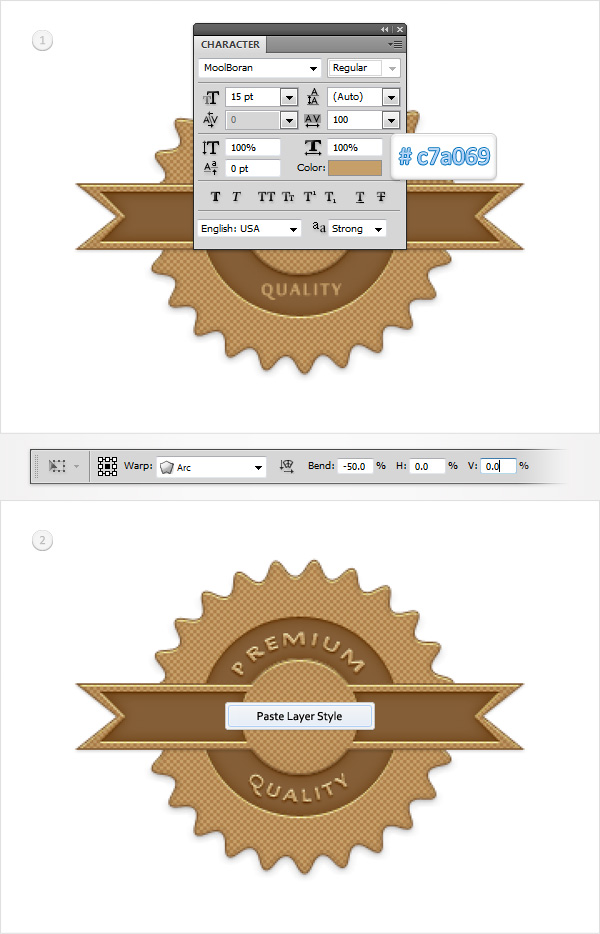
Pick the Type Tool and add “QUALITY” as shown in the following image. Again, use the MoolBoran font with the size set at 15pt.
Select this piece of text and go to Edit > Transform > Warp.
Select Arc from the Warp drop-down menu, enter -50 in the Bend box and hit Enter.
Move to the Layers panel, right click on this piece of text and click on Paste Layer Style.
Step 14
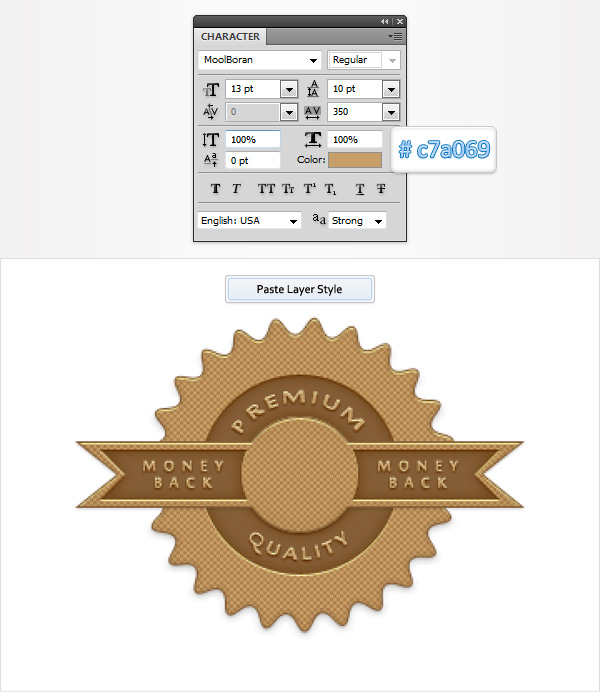
Pick the Type Tool and add “MONEY BACK” twice as shown in the following image.
Use the MoolBoran font with the size set at 13pt. Also, set the leading at 10pt and the tracking at 350.
Right click on these pieces of text and click on Paste Layer Style.
Step 15
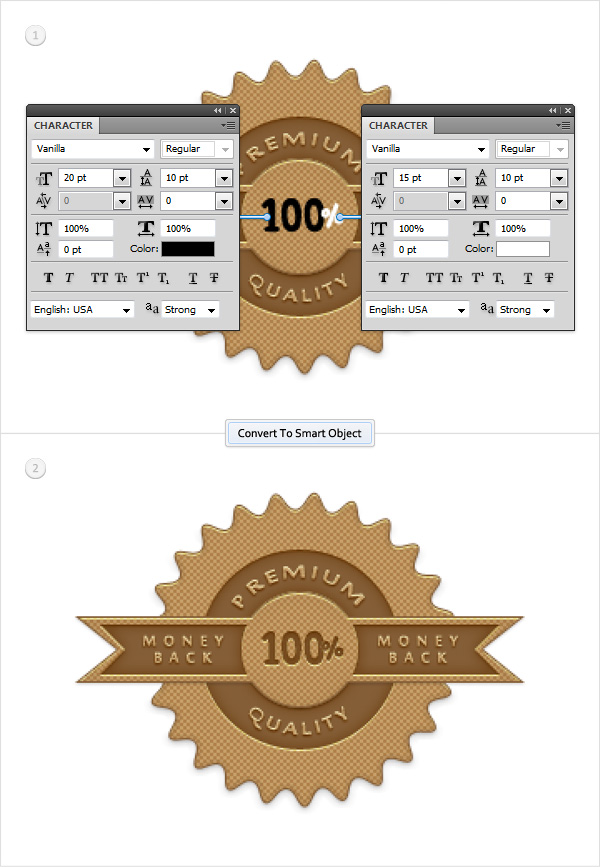
Pick the Type Tool, add the “100” and the percent symbol and use the properties shown in the first image.
Select both pieces of text and convert them to a smart object.
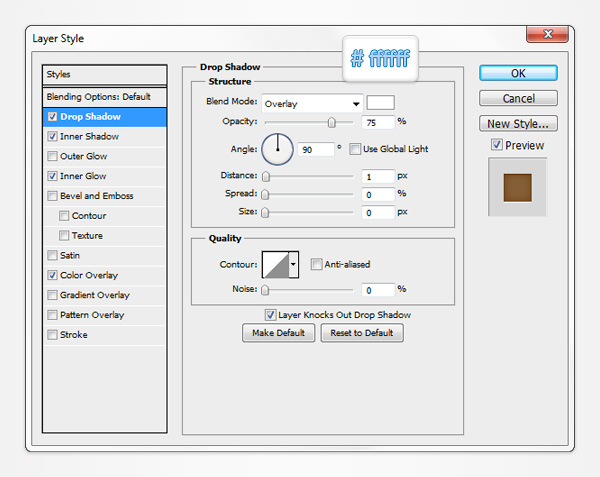
Open the Layer Style window for this smart object and enter the properties shown in the following images.
Final Image
Here is how your final result should look.