In this Photoshop tutorial, you’ll learn the most common selection tools and methods to become a powerful Photoshop user.
View Other Articles in This Series
- How to set up Photoshop
- Photoshop Interface Explained (Part 1)
- Photoshop Interface Explained (Part 2)
- Introduction to the Photoshop Toolbar (Part 1)
- Introduction to the Photoshop Toolbar (Part 2)
- Introduction to the Photoshop Toolbar (Part 3)
- Photoshop Channels and Color
- Photoshop Selections
- Photoshop Layers
Resources
Photoshop Selection Tools Inner Workings
Sure, you may use the software just to color correct your images with the various Adjustment layers, or maybe you just like playing with the Liquify Tool or maybe all you do in Photoshop is paint. This may be fine if you’re using Photoshop for personal use only, after all, your friends and family aren’t the greatest Photoshop experts and you can impress them with what you know already.
But if you are working for a client or maybe you want to go to the next level in Photoshop expertise then you really should master (at least the basics) Photoshop selections. Before you even touch a selection tool you should know the inner workings of the process.
Photoshop doesn’t know a thing about colors. It doesn’t see the orange, blue or red colors. Strange, huh? One of the best raster (and implicit color) image manipulation tools, it’s completely unaware of the colors it works with. But how does it do adjustments, selections and so on if it is color blind?
Well, it may be color blind, but it is not Luminance blind. It works only with shades of black and white. Or grayscale. If you don’t know about channels check this tutorial, but as a quick resume know that Photoshop sees each channel as a grayscale image with 255 shades of black and white. So when it makes a selection it does so based on the difference between these 255 shades of black and white.
But wait, this is just one channel, and when I make selections all three channels are involved and that’s more than 255 shades of black and white, right? Wrong. Well, in a way! You see, concerning selections, what Photoshop does is that it calculates the overall “grayscale image” by preserving the lightest pixel.
Let me put it in another way. Let’ say a pixel is 100 levels red, 20 levels green and 240 levels blue. In the final grayscale composite that Photoshop uses for selections, the pixels will be 240 levels luminance. The lightest channel wins. If you want to emulate this behavior simply press Ctrl + Shift + U to desaturate the image and make your selections using the Quick Selection Tool or the Magic Wand tool. The results will be the same as if you were using a colored image.
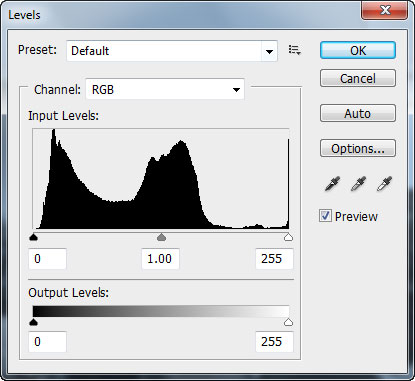
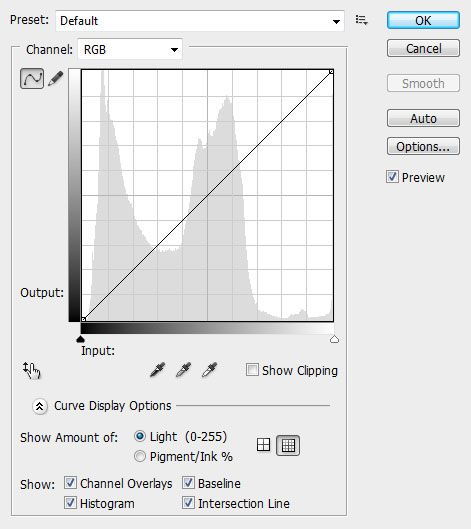
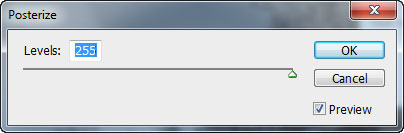
Ok, so let’s recap. Regarding selections Photoshop only sees 255 shades of black and white. Some selection tools use this model to select different parts of the image based on the difference between adjacent pixels (more on this later). You will also meet this number in many Adjustment tools (Levels, Posterize, Curves) and now you know why. These tools work with 255 shades of black and white as mentioned above.
Now it’s time for you to meet the selection tools.
Marquee Selection Tools
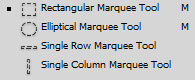
To make rectangular selections we use the Rectangular Marquee Tool and to make elliptical selections we use the Elliptical marquee tool. Pretty obvious, huh? The Single Row Marquee Tool and the Single Column Marquee Tool are pretty useless and I seldom use them. They select a single pixel row or column.
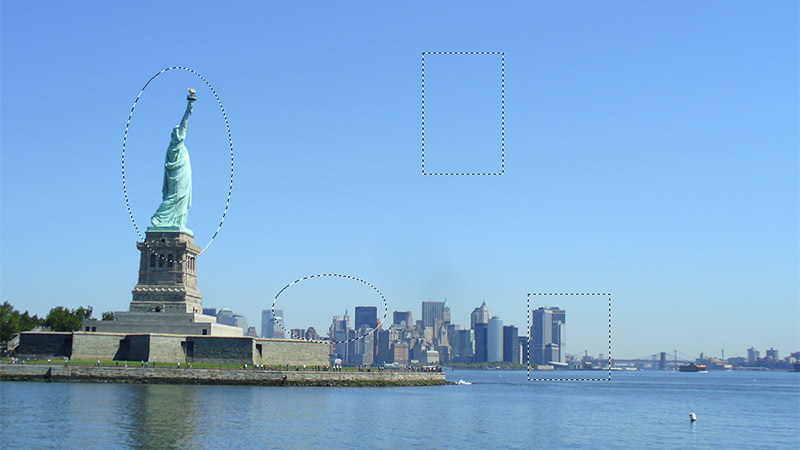
Let’s go back to the Rectangular and Elliptical Marquee tools. You can see in the image below some selections I made using these tools. They may not seem of great use, but trust me, with the little tricks I am going to show you they are.
To use the above-mentioned tools simply left-click and drag. When you are happy with the selection release the mouse button.
How to Use Shift and Alt Keys
Let’s say you made a square selection but you want to modify this selection by adding another selection to it. If you simply drag again, the previous selection disappears. To add to a current selection hold Shift and then make your selection. This way the previous selection is still in place and we just added another selection to it.
The Alt key works like the Shift key except it allows us to extract from the selection instead of adding to it. So if I have a rectangular selection and I want to subtract an area from this selection I simply hold the Alt key and drag with the selection tool of choice to subtract from the selection.
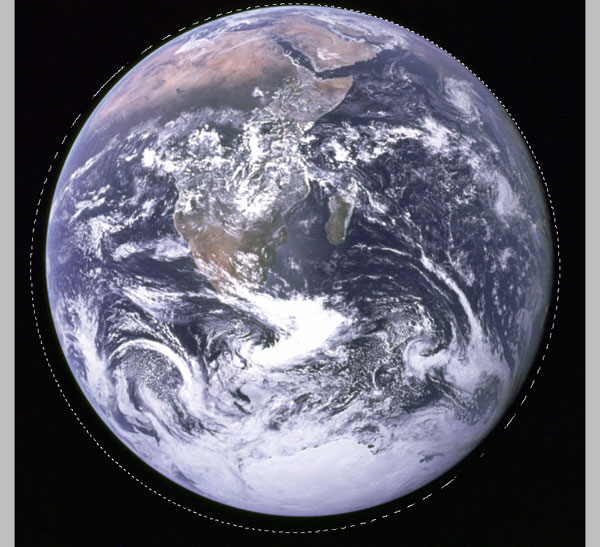
Note that this technique works with all selection tools. Let’s say you have to select a perfect circle, like a planet (below) or a perfect square. Then you would hold the Shift key while dragging with the Rectangular or Elliptical Marquee tool for a perfect circle or square.
Note that in the image below I didn’t center my selection because the selection would’ve been more difficult to see and because I want to introduce you to the second (little known) valuable trick.
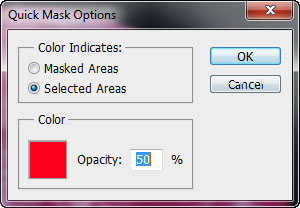
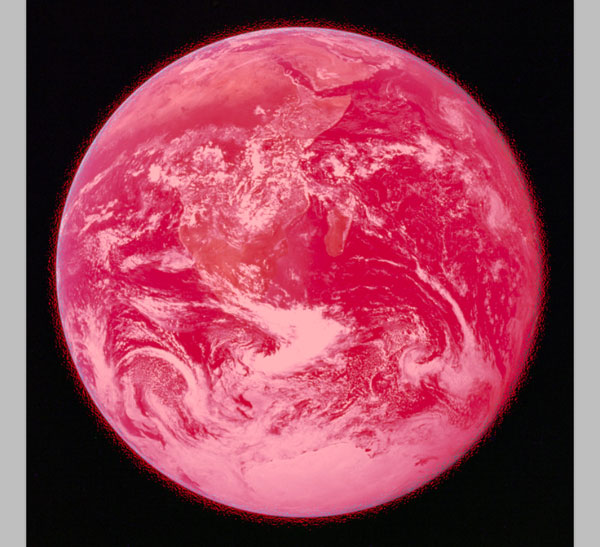
Some of you may be familiar with the Quick Mask Mode but nevertheless, a quick description is required. Basically, when you enter the Quick Mask Mode (Q) your selected areas (or unselected areas) are shown with a red overlay. Like below (Note: If the red overlay in your image looks different than in the image below continue reading, I provide a solution in the following lines).
Now if you select a brush and paint with white you will erase the red overlay and paint with black adds to the red overlay. Painting with a 50% brush will partially erase or add to the red overlay. When you exit the Quick Mask Mode (press Q again) the area with a previous red overlay will be selected. The partial red overlay (like when you paint with a 50% Opacity brush) will be partially selected. This behavior may be different on your machine so the red overlay may be representing the unselected areas. In order for the following trick to work double-click the Quick Mask button and choose Selected Areas.

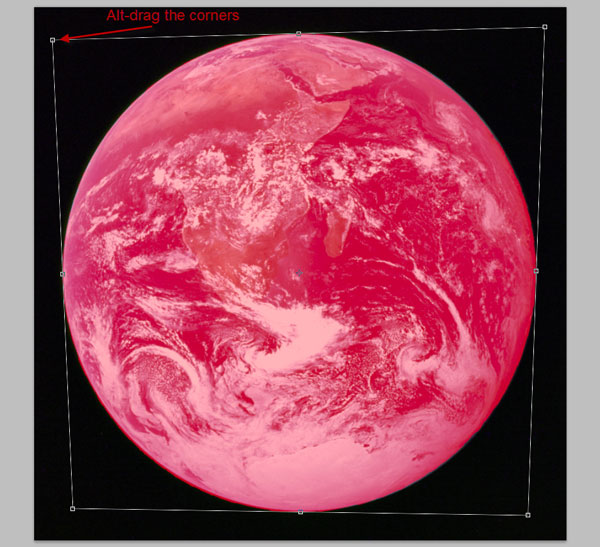
Time to show you this little trick I have been talking about. Ok, so you’re in the Quick Mask mode, you have a selection (like the planet image above). How do you center and tweak the circle so it fits the planet? You can’t do that with the Elliptical Marquee tool (at most you can make a flatter ellipse, but that’s all) so what is to be done?
While in Quick Mask Mode with a selection press Ctrl + T to enter Free Transform mode and voila, you can tweak your selection to your heart’s desire. In the case of the planet, I would simply Alt-drag the corners to make it fit perfectly and because I selected previously Selected Areas I transform the selected area and not the unselected area (that will be weird). After you’re done press Enter to apply the transformation and the press Q to exit Quick Mask Mode and voila, you have free transformed the selection.
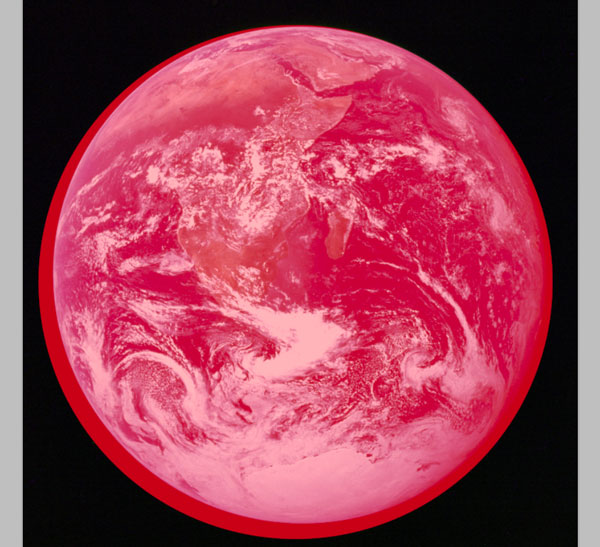
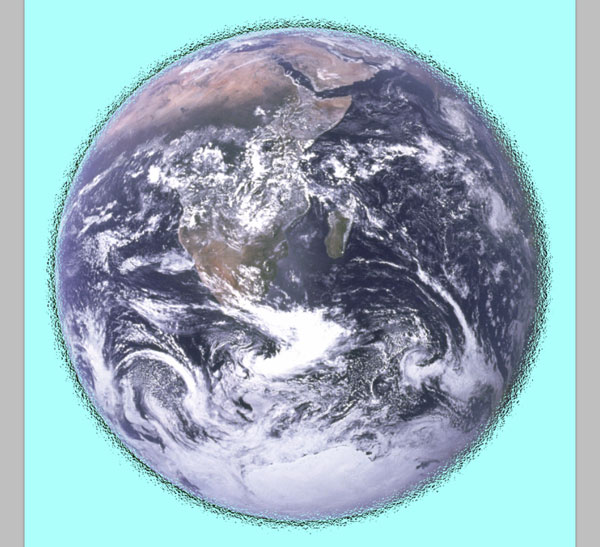
This kind of selections would be very hard to make without this technique. Of course, when you are in the Quick Mask Mode you can Warp the selections or apply Filters. This is very powerful and it struck me first when I found out this was possible. You can apply a huge variety of filters to your selections for creative effects. In the example below, after I applied my transformation I applied Filter > Distort > Ocean Ripple to my selection.
Then I exited the Quick Mask Mode (Q) and I made a new layer from selection by pressing Ctrl + J. Then I added a layer below and filled it with a light blue for the purpose of the demonstration. Crazy, right?
Lasso Selection Tools
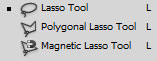
To make a selection with the Lasso Tool simply draw your selection (or “lasso it”) and release the mouse button. Personally, I don’t use this tool very often because it lacks precision. Next, we have the Polygonal Lasso Tool. This tool helps us draw polygonal selections and may be useful in certain situations. To use it simply click and move your mouse multiple times. This is easier done than said so go ahead, select it and use it on an image. A quick tip: you can temporarily access the Polygonal Lasso Tool while using the Lasso Tool by holding the Alt key.
And we still have the Magnetic Lasso Tool. To use this tool simple click once somewhere on the image and then drag across the margins of the object you want to select. You will notice some lines and points that snap to the edges of the object you want to select but not always. It works by analyzing the contrast between the adjacent pixels and draws lines according to the settings shown below.
When you’re done simply double-click to transform these lines into a selection. I will not be covering this tool mainly because I consider it bulky and imprecise. And I know much better ways to make selections. And mostly it is a noob’s choice (and we want to do it the professional way, right?). Of course, if you feel lazy you can use this tool for quick results but for advanced selections, it will simply not be enough.
![]()
Quick Selection and Magic Wand Tools
Let’s talk Quick Selection first. Think of it as a brush not for painting but for selecting. You can change the brush size to select more or lower the brush size to select less.
![]()
You can see in the image below how the Quick Selection icon even resembles a brush. The brush with the + sign is used to add to the selection and the brush with the – sign is used to subtract from the selection.
If you check Sample All Layers then it will make selections based not only on the actual layer but in conformity with all the layers. Auto-Enhance will make your selection edges better and Refine Edge will open the Refine Edge window.
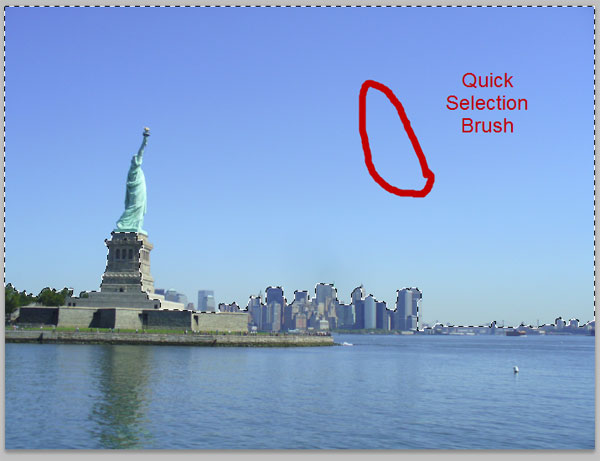
How it works? If you brush over an area then Photoshop uses an algorithm to determine where the closest edges are and snap to them. You can see in the image below by the red how I quickly selected the sky by dragging (or painting) with the Quick Selection tool in the red encircled area. Notice how the selection automatically snapped to edges and that the selection didn’t snap around the edges of the Statue of Liberty. That’s because the color of the statue is close to the color of the sky (blue-cyan) but it snapped around the buildings below the statue because they are a different color and have a pronounced edge.
This tool is good for quick and dirty working when you are in a hurry. I find myself using this tool when I composite scenes from different images and I just want to see how an object from an image would fit into my composite scene without the time required to make a refined, precise selection.
Experiment with it on different images and get the “feel” of how this tool works. One quick tip worth mentioning it is that you can press the Alt key and drag with the brush to subtract from the current selection.
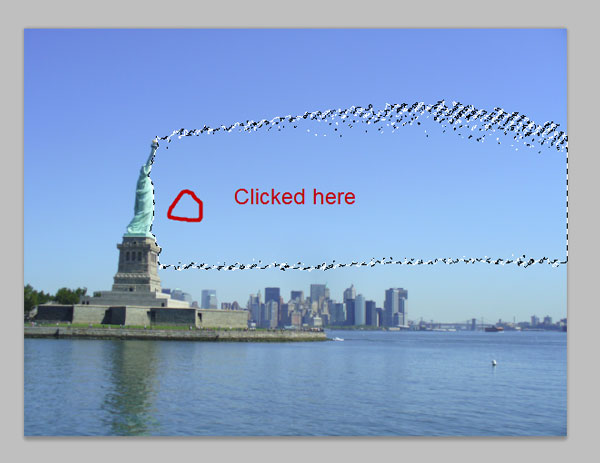
Next is the Magic Wand tool. The Magic Wand tool works like this: you click somewhere in the image and an area is selected based on the settings of the Magic Wand, the area you clicked on and the closest edges. You can see in the image the red encircled area is where I clicked once with the Magic Wand tool.
Notice how it selected an area and it snapped around the edges of the Statue of Liberty.
Let’s take a look at the settings available for the Magic Wand tool.
![]()
The 4 icons with squares at the left are in order from left to right: New selection, Add to selection, Subtract from selection and Intersect with selection. When one of these icons is activated (like the New selection icon is activated in the image) your further clicks with the Magic Wand tool act differently on the current selection. With Subtract from selection activated then you will be subtracting from the selection, with Add to selection you will be adding to the current selection and with the Intersect with selection you will have an intersection between the current selection and the area you just selected with the Magic Wand tool. You can also use shortcut keys to replicate the above behaviors. While clicking with the Magic Wand tool hold Alt to subtract, Shift to add and Alt + Shift to intersect.
The Magic Wand tool works like this: when you click somewhere on the image it will select a contiguous area of pixels based on the Tolerance setting. The Tolerance values range from 0 to 255. These values are familiar, aren’t they? These numbers represent the luminosity values a pixel can have. Let’s say that you have a Tolerance of 10 and you click on a pixel with a luminosity value of 88. The Magic Wand tool will select all adjacent pixels with values that are between 98 (88 + 10) and 78 (88 – 10). If Contiguous is unchecked, then it will select all the pixels in the image with values between 98 and 78. The Anti-alias checkbox makes your selection edges smoother. Sample All Layers and Refine Edge work the same way as with Quick Selection.
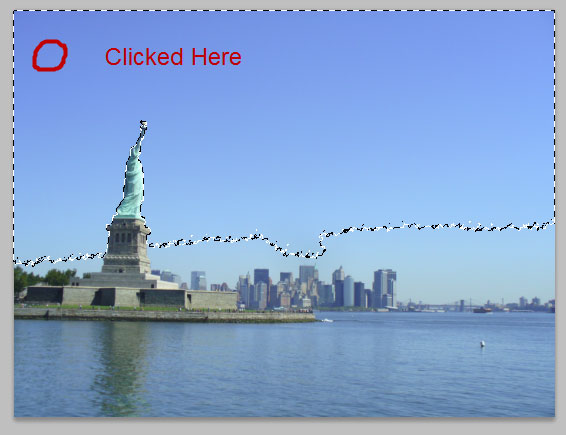
Let’s take a look at a practical example. I clicked in the red encircled area with the Magic Wand tool. The Tolerance setting was 50. Notice how the selection snapped around the edges of the Statue of Liberty. That’s because the luminosity level of the sky is about 170 and the luminosity level of the Statue is 70. Because I clicked a pixel with a luminosity level of 170 it selected all the contiguous pixels within 220 (170 + 50) and 120 (170 -50) because the Statue of Liberty has a luminosity level of 70 it was not selected.
Color Range
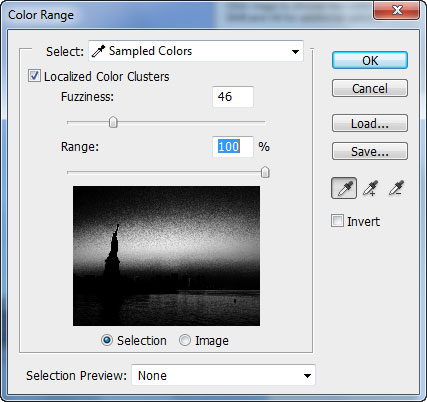
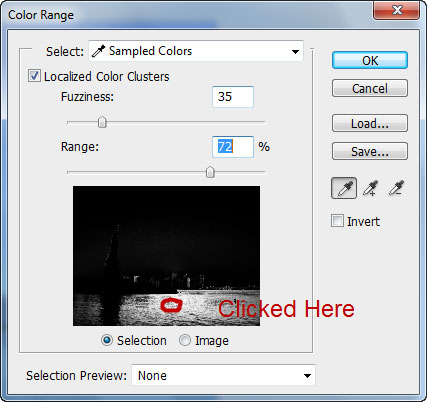
Let’s move on to yet another selection tool Photoshop provides, namely the Color Range. You can access the Color Range Dialog box by choosing Select > Color Range.
It selects an area based on the clicked area luminosity value. It also has a preview black and white version of the image showing the selected areas. White shows the selected areas, black the unselected areas and gray the partially selected areas.
You can click on the small black and white preview image or you can click on the actual image. Localized Color Clusters is similar to the Contiguous checkbox for the Magic Wand tool. Fuzziness and Range expand or contract the selected areas and the little pen icons with the + and – sign stand for Add to selection and Subtract from selection (you can also hold Alt for Subtract and Shift for Add).
You can get familiar with this window by giving it a try. Play with the Fuzziness and Range sliders, click on different parts of the image and notice how the selection changes. Remember, in the small black and white preview image white stands for selected areas, black for unselected areas and gray for partially selected areas.
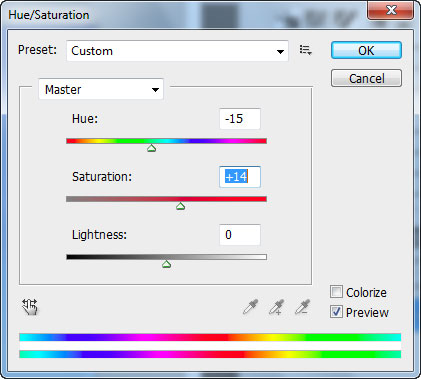
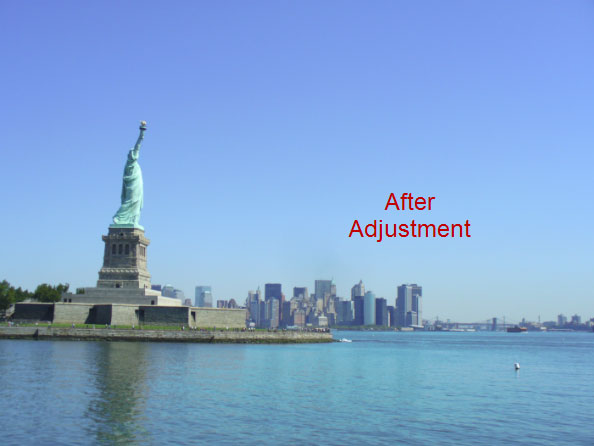
I use this tool for applying Image Adjustments to different parts of the image. Let’s say I want to change the color of the sea. I can make an approximate selection with the Color Range (look below) and then I can apply an Image Adjustment of my choice (Curves, Hue/Saturation, etc…).
In this case I used a Hue/Saturation adjustment to change the hue of the selected area (Image > Adjustments > Hue/Saturation).
As I said before, just reading about this stuff isn’t going to teach you a great deal. Practice and experiment to learn how to use these tools.
Learn How to Select
Now it’s time to show the pro selection method. It is a bit more complex and it involves the use of the Pen tool but the results are worth the effort.
What is the Pen Tool? The Pen Tool creates vector shapes using Bezier Curves. Vectors are pixel independent and are rendered using mathematical formulas. I will not get into explaining vectors and Bezier Curves but I will give you a quick and dirty guide for using the Pen Tool to create amazing selections. The process of creating selections with the Pen Tool has 2 major stages:
1. Use the Pen Tool to create vector outlines.
2. Convert vector outlines to a selection.
First select the Pen Tool by pressing P. Make sure option Paths is selected. You can start creating straight vector outlines by simply clicking in different places. The last click should overlap the first starting point to obtain an outlined vector shape.
If you don’t want to enclose the outline simply Ctrl-click anywhere at any stage of drawing with the Pen Tool to finish drawing the vector path.
The term “path” and “vector outline” are roughly equivalent and I use them interchangeably. “Vector outline” suggests an enclosed area while “path” is more of a freeform line. The little squares in the image below are called Anchor Points. When you click with the Pen tool you create an Anchor Point. If you click again in a different position you create a new Anchor Point and a path that connects the two Anchor Points.
That’s the bread and butter of paths: Anchor Points connected by paths.
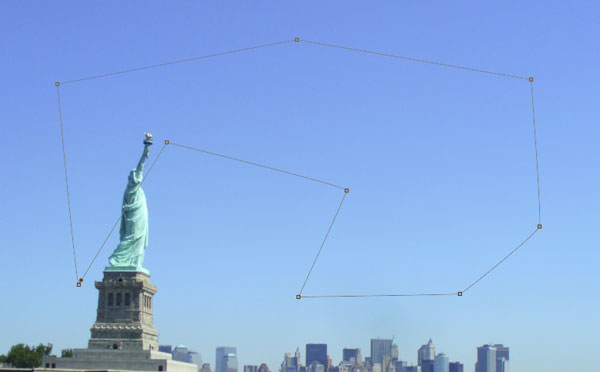
To create curved paths click once anywhere on the image and then click and drag to some other point. When you do that notice that the straight lines become a curve and its curvature is in the opposite direction to the dragging. The more you drag the more pronounced the curve. Notice the new elements: Handles. You can drag the handles after you have created the path to modify the curvature of the path.
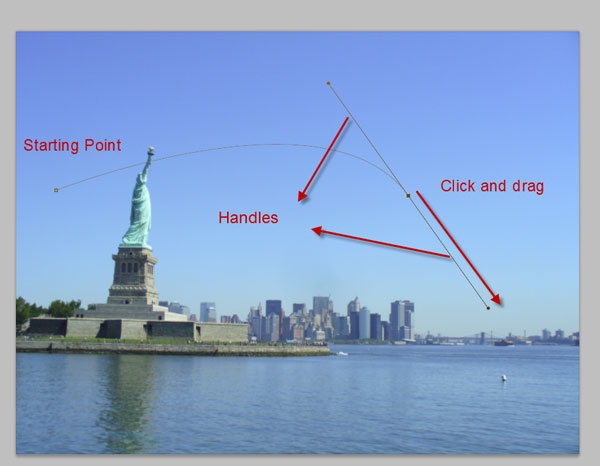
In the image below I clicked and dragged again to continue my path.
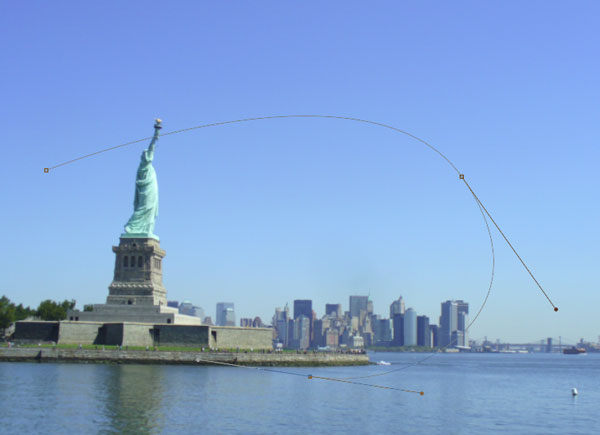
And finally I clicked on the starting point to enclose the path.
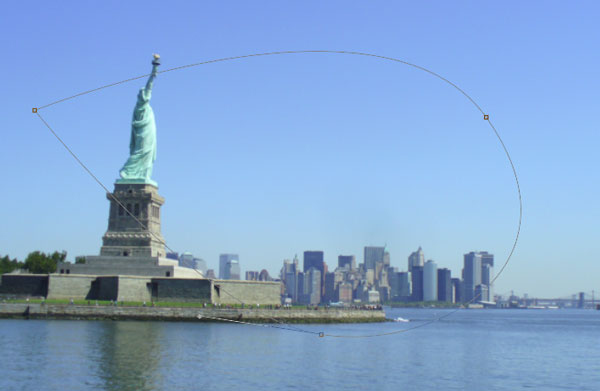
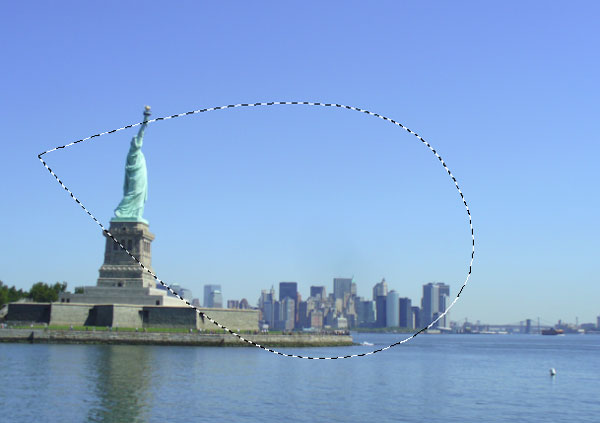
To transform this path into a selection simply press Ctrl + Enter. This may seem like a lot of overkill for a simple selection. Believe me, it is not. This is a very simple and limited example of the Pen Tool and is for demonstration purposes only. You can create precise and intricate paths and convert those paths into selections.
This comes in handy when you are dealing with objects that have a color close to the background color, making the use of the common selection tools (Magic Wand, Quick Selection) impractical. Heck, even this simple example below is hard to replicate using the simple selection tools. I dare you to create the perfect teardrop form shown below with the Lasso Tool. You will find out that it is not an easy task.
Conclusion
This Photoshop tutorial is just an introduction to the wonderful world of selections and it barely scratches the surface of the more advanced capabilities of Photoshop regarding selections (Channels and Layer Masks) but I hoped it served its purpose and made basic selections easier for you.