Creating Your own Grunge Brushes

I’ll show you a fairly simple yet very effective method of making good grunge brushes in this tutorial. Enjoy.

Photoshop Grunge Brushes

1. New Document

First of all, as usual, create a new document in Photoshop. This is up to you, do you want a very large brush that you can size down every time you want to use it? Or do you want a brush around 200 pixels in size so that it’s ready for use whenever you want to use it in a small document. It’s probably best to use a very large document size for this tutorial, but I’ll just use a small size for the sake of learning.

2. Initial Brushing

Get out one of the standard soft brushes that come with Photoshop. Size it up to whatever size you would like it, then brush a few blobs onto the background.

These are the settings I’ve got:

brush settings

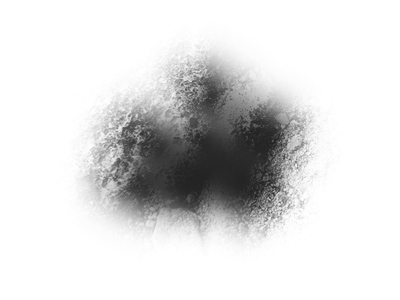
This is what my random brushing looks like:

brushing

Now merge all of your layers together, so that you only have one layer.

3. Apply Texture

The next thing we need to do is apply some sort of texture to the brush. Start by finding a good texture on the internet. For this tutorial I’ve used this dirt texture that I took a few months ago.

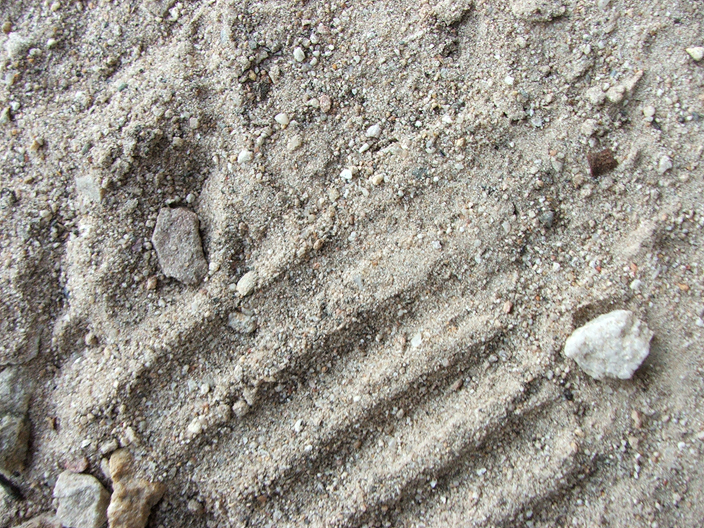
Open up your texture and save it as a PSD file onto your desktop.

Now back to your brushing document. Be sure your layers are merged together, then go to Filter > Distort > Displace, using the settings shown below, or similar.

displace settings

After you press OK (shown in the top right of the above screenshot) you’ll be asked to choose a PSD file, this is used to displace the current document. Choose the PSD that you earlier saved to your desktop.

after displace filter

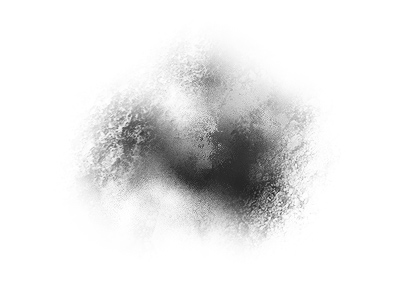
Looks pretty decent in my opinion, but be sure you mess around with different settings and textures.

4. Finishing Off

To finish this off, get another grunge brush either you made or someone else, and brush a little bit over the edges with white as your foreground color.

grunge brushing

You may also want to apply Filter > Sharpen > Sharpen to your brush layer, to give it a little more detail. Remember to get creative, remember to try different textures, filters, layer modes, etc.

After you’re finished with making the brush, select the canvas (ctrl+a) then in your Photoshop menus, go to Edit > Define Brush, then it will show up in your brushes. This is a grungy image I came up with using the brushes that I made using this tutorial:

Photoshop Grunge Brushes

Thank you all for reading this Photoshop tutorial, I hope you learned something!

Return home. Published Nov 4th, 2006 under Photoshop Basics.
Previous Random
Digg Delicious Reddit Float Stumble

You must be logged in to post a comment.

22 responses

Wolfsong said:October 13th, 2007

This is all well and great .. so far. How do I save as a brush?? I’m pretty new to PS and have no clue.

Thanks,
W.

K said:December 7th, 2007

To save as a brush, go to: Edit > Define Brush Preset… It’ll make it into a brush and you just give it a name.

Chris said:December 17th, 2007

Uh yeah how do you save it as a legit PSD file eerytime I try to displace one it says I can’t because it’s not a real photoshop image. Can anyone help?

Thanks,
Chris

B said:January 23rd, 2008

This doesn’t work for me. Despite merging layers, the filter options are all greyed out? I’m using CS3.

april said:January 28th, 2008

B,
Make sure the file is RGB. It won’t let you apply filters otherwise.

Debra said:March 10th, 2008

Good tutorial and very easy to follow. Thanks too to the person who asked how you set it as a brush; as much as I use the program and even though it pays my bills, I had no idea either… lol.

Joe said:March 13th, 2008

I have Photoshop 5.0, and the Edit > Define Brush Preset isn’t there… is there another way to make a brush?

Laurence said:March 17th, 2008

How do you save the texture as a PSD? All i can save it as is a JPEG..

Laurence said:March 17th, 2008

Worked it out now so it’s fine

henry h said:March 23rd, 2008

answer to wolfsong’s question

go to edit>define brush preset

matt said:April 4th, 2008

how do you make those lines, that looks like rays of light or sun rays… and what are they called.. ?

SarumanX said:April 13th, 2008

To save the texture as brush, u have to copy the layer, and save as PSD,
cuz the first layer without copy, it is LOCKED, this is the problem.

VeenaSri said:June 4th, 2008

This tutorial is useful to us.

Thanks for send it.

We need more like this!

bang said:June 20th, 2008

thank you !

Thea said:June 25th, 2008

Nice tutorial! Didn’t occur to me that it could be so easy to make grunge brushes. Thanx :-)

sudhir said:September 22nd, 2009

great & thanx a lot !!!!!!!!!!!

Trackbacks

  1. Pixelco Blog » Blog Archive » Las utilidades del día
  2. Tutorial - Creating Your own Grunge Brushes « Flash Enabled Blog
  3. tutorialboss.com » Blog Archive » Creating your own Grunge Brushes » Free Photoshop Tutorials and
  4. 23 tutoriales para Photoshop Imperdibles | Solo un Blog
  5. 23 Most Incredible Photoshop Tutorials
  6. 17 Tutoriels exceptionnels pour Photoshop | Blog sur L'actualité Multimédia du Web2.0