Before you start using Photoshop you should set it up properly. Don’t worry if you don’t understand what all the options mean, just follow the guidelines below for starters. With time and extensive use the meaning of all those fancy and (apparently) complex options will fall into place and you will know exactly what you want. You have to start somewhere, right?
View Other Articles in This Series
- How to set up Photoshop
- Photoshop Interface Explained (Part 1)
- Photoshop Interface Explained (Part 2)
- Introduction to the Photoshop Toolbar (Part 1)
- Introduction to the Photoshop Toolbar (Part 2)
- Introduction to the Photoshop Toolbar (Part 3)
- Photoshop Channels and Color
- Photoshop Selections (Part 1)
- Photoshop Selections (Part 2)
- Photoshop Layers
General Preferences
Let’s start by going to Edit > Preferences > General (Ctrl+K).
General
Uncheck “export clipboard” and leave the rest as default.

Interface
Here you can also leave as default but you may want to temporarily check “show channels in color” to see them in color and maybe better understand the way RGB channels work. But you will want to uncheck this option eventually because it will make channel evaluation difficult.

File Handling
I usually uncheck “Ask before saving layered TIFF files” because it is annoying to have the warning pop up every time stating that using layers increases file size. I also choose “Never” from “Maximize PSD and PSB file compatibility” popup menu. But if you are using your files across multiple versions of Photoshop or other Adobe Suite products you may want to leave this to “Always” or “Ask”.

Performance
- Memory usage
This depends on your available RAM but I usually let Photoshop use 70% of total available memory. This is enough for my system to do multitasking and not choke if I have other apps open simultaneously. - History & Cache
The only thing you should change is “History States”. This option is very important because it determines how many history states you have available when editing a file (that is how many ctrl+Z or steps back you can go). 500 is a fairly right amount but be careful of maxing it out (1000) because it will require more RAM and it will increase your scratch file size (we will get to that next). - Scratch disks
Scratch disks are disks where your scratch files are stored. But what is a scratch file? Well, a scratch file is usually a file on your hard-disk where Photoshop stores history states (remember them from above?), cache levels and other information about your working documents. As you continue to edit your images the scratch file size increases. So you should select as primary scratch disk a fast, large hard-drive (other than the one the operating system is installed). A Solid State Drive would be great, but a defragmented hard-disk with 20+ Gigabytes will be enough for most of your tasks. - GPU Settings
You should definitely check “Enable OpenGL Drawing” if your graphic card allows it. That is, if the option is grayed out you probably don’t have a good enough graphic card or your drivers are missing or they are old in which case you should update your GPU drivers. This is not essential for working with Photoshop but it sure makes navigation and editing smoother and more eye-candy.

Cursors
- Painting cursors
Go with the “Full size brush tip option” and check “Show crosshair in Brush Tip” as this increases your precision when painting. - Other cursors
Leave it to “Standard”. You can press Caps Lock to bring up the precise cursor.

Transparency & Gamut
Here you can leave the default settings.

Units & Rulers
Because I mainly use Photoshop for the Web I set “Rulers” to “pixels”. But if you are working with files for print or other medium you can change the “Rulers” to the other measuring units available. Be aware of the “New Document Preset Resolution” option. You should leave “Print Resolution” at 300 pixel/inch but you can change the “Screen Resolution” to 80 pixels/inch if you are working with images for Web display and raise it up to 250 pixels/inch if you are working with images that will have multiple future destinations ( print, web, video editing etc.).

Guides, Grid & Slices
Here you can leave the default settings.

Plug-ins
The only notable change you can make here is to check “Additional Plug-Ins Folder” and select your plug-ins folder. How is this going to help you? If you use lots of plug-ins you can install them in different folders ( other than the default plugins folder ) and select only the folder with plug-ins you need that day or that week. The thing is that the fewer the plug-ins, the faster the start-up.

Type
Here you can leave the default settings.

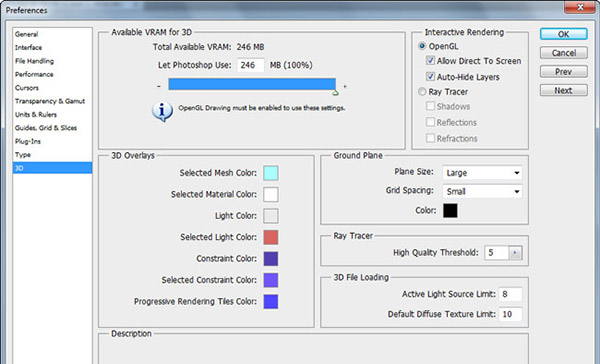
3D
I don’t use 3D on a regular basis so I can’t give you proper advice about how to set up this effectively, but on the rare occasions that I work with 3D the default setting work just fine.

Color Settings
Color settings is a very important thing to set up right because your entire workflow is affected by it. These settings establish the way Photoshop treats your images so you should be careful and set it up properly. Go to Edit > Color Settings (Ctrl+Shift+K).
The first thing you should do is click the “More options” button which reveals some advanced settings.
- Working Spaces
Here you can choose in what color space you will be working. I suggest you leave “Gray” and “Spot” as they are and also leave CMYK at “US Web Coated SWOP v2” unless you have specifications from your printing service. The RGB is set to default at “sRGB IEC61966-2.1” and it should work fine if you edit images only for the web. However, if your images will have multiple future destinations ( video editing, print, etc. ) you should choose either ”Adobe RGB(1998)” or “Pro Photo RGB” color space. What is a color space? Well, when you work in a color space, your image will be displayed using all the colors available in that color space. sRGB is a smaller color space than others, so your image will look less smooth and poorer in color variation than it would look if you have displayed your image on Adobe RGB or Pro Photo RGB because the last two are larger color spaces and thus contain more color nuances. If you are interested in the subject you can check this Wikipedia article. Follow this general rule: If your images are for the Web only than choose sRGB. Otherwise go with AdobeRGB or Pro Photo RGB. - Color Management Policies
Here you set up the way Photoshop treat the profile mismatches and images with missing profiles. My advice is to leave “CMYK” and “Gray” to “Preserve Embedded Profiles” and “RGB” to “Convert to Working RGB”. This setting will convert an image with and existing or missing profile to your working profile ( your working profile will be the color space you selected from the dialog above this one ). Also you should check “Profile Mismatches” “Ask when Opening” and leave the other two options unchecked. This is useful when you are working in a smaller color space and the image you open has a larger color space Because the conversion will discard some color information you should be aware of it when it will happens. As a rule of thumb convert to working RGB only when your working RBG is Adobe RGB or Pro Photo RGB and the image you’re converting has an sRGB or an unknown color profile. - Conversion Options
Leave the “Engine” to “Adobe(ACE)” but if you are working mainly with photos then I recommend that you change the “Intent” to “Perceptual”. This will preserve the color relations in a photo when converting it to another color space and that is important for photography. If you are working only with charts or logos this is not something you want for your pictures.
After you’re done changing the options you should save your settings for future use and for in-between applications color management compatibility. By saving your settings you ensure that the same color settings are applied throughout other Adobe apps (Bridge, Dreamweaver etc).

Those are the basic settings you should set before starting to use Photoshop. You could tweak the keyboard shortcuts and menus (Edit> Keyboard Shortcuts) but if you are a newbie to Photoshop I suggest you leave those unchanged until you are more comfortable with the program and you have developed certain workflows and habits. Try experimenting for yourself and observe how various settings affect your images but always return to the safe options which you know for sure work for you unless you know precisely that you want something else.